Showing posts with label Cache. Show all posts

Sunday, April 16, 2017

Gun Blog Variety Podcast #139 - Beth, What Is Best In Life?

By Crom, what a podcast!
  • The USCCA Concealed Carry Expo is worth several shows. This week, Beth tells us what some of the women in the firearms industry have to say.
  • It's a complicated storyline in this week's Felons Behaving Badly, but the characters are much the same as they always are. Sean gives you their backstories.
  • Barron is on assignment this week.
  • Are you a snob? Miguel has a few words for you.
  • In the Main Topic, Sean and Erin explore why no one is talking about that school shooting in San Bernardino last week.
  • Are you a parent? Do you have responsibility for others? Tiffany brings us an interview with Melody Lauer who, along with John Johnston, teaches the Contextual Handgun: The Armed Parent course.
  • Erin wants you to bury your stuff. Safely. For reasons.
  • From the "You can't make this stuff up" files, Weer'd brings you an interview with Moxie Cotton, a drag queen who will be helping school kids film a "gun violence documentary. Seriously.
  • And our plug of the week is "Concealed Carry is Herd Immunity Against Crime" shirts by our very own Erin!

Thank you for downloading, listening, and subscribing. You are subscribed, right? We are available on iTunes, Stitcher Radio, and Google Play Music!

Listen to the podcast here.
Read the show notes here.

Thanks to LuckyGunner and Remington for their sponsorship, and a special thanks to Firearms Policy Coalition for their support.

Blue Collar Prepping Transcript:
Cold, Hard Cache
Last week, I mentioned that best way to safeguard preps that you cannot control is to bury them. This is known as caching supplies, and has been used by militaries around the world for centuries, if not longer. What’s important to note is that the word cache - see ay see aitch ee - is from the French word “cashy” which means “one who hides”. A cache, then, is a hidden supply of something - probably something valuable, since someone has gone to the effort of hiding it. The website How to Bury Your Stuff has a phrase, No one can take what they cannot find, and I recommend that every prepper read it.

Now when it comes to caching supplies, there are three qualities to keep in mind: Accessibility, Portability, and Capacity.
Accessibility. This is the most important consideration, because a buried cache you cannot get to might as well not exist at all for what good it does you. The ideal solution is to cache on land that you own, as this gives you the best amount of control over it, but many preppers have caches concealed along the route to a bug-out location. If you do this, it is critical that you can get to these supplies at all times of the day and night, and in all seasons.

Access doesn’t always mean “can I reach the place where I buried my cache”, either; it can also mean how difficult it is to unearth it. If the ground freezes where you live, then you need to have a way to break through frozen ground in order to reach your supplies. Will there be flooding? A foot of standing water can make it nearly impossible to get to your cache. And if the land is public, there’s always the chance that the earth could be disturbed for a variety of reasons - erosion, development, animal activity - and reveal your cache to other people.

Portability. Once you reach your cache, do you need to take everything, including the case, with you? Or can you just open it, take what you need, and close it back up?

A completely portable cache needs to be small. Not only will a larger container be heavier, but it will also take more time and effort to dig up than if you only need to remove the lid. However, if you are in a hurry you may not have time to properly re-bury or otherwise conceal a non-portable cache, meaning that anything you cannot take will be lost, whereas with a portable container you can just leave behind an empty hole.

Capacity. There are differing schools of thought on this subject. On the one hand, it’s a lot of work to dig a hole, fill a container with supplies, seal it up, bury it, and conceal the evidence of the burial, so there’s a lot to be said for doing the “one and done” approach, especially on land that you own.

On the other hand, “one and done” means that if your cache is compromised, you have lost ALL of those preps. However, if you spend the time and effort to hide multiple caches, you stand a greater success of not losing all of them.
So with these in mind, I present to you various options for making your cache.

  • A wide-mouth Nalgene bottle is a great way to store a lot of small preps, or to have a portable cache, and they only cost around 10 dollars. If the bottle is opaque, or if you put have a sleeve to put it in, no one will see that it’s full of supplies instead of water, and these days no one looks twice at a water bottle unless they’re thirsty. I specified Nalgene instead of metal because plastic won’t rust the way metal will, and unless you are burying a cache in the desert or other dry climate, you need to worry about groundwater.
  • If you want to store a little more and are willing to pay more, an MTM Survivor Ammo Can costs $20 and holds up to 500 rounds of 5.56 ammunition, or 16 30-round magazines, or anything else that fits into a 7x12 inch space, like a pistol or money or food.
  • For a great combination of capacity and portability, kick it old-school with an Army surplus ammo can, which costs between $25 and $30 depending on if you choose 30 or 50 caliber. While these are made of metal, they are incredibly tough; there’s a picture on How to Bury Your Stuff that shows a can that was buried for 4 years, and the pistol and ammunition stored inside it worked perfectly. The can showed signs of rust and pitting, but could have probably stayed in the ground another 4 years without issue. Giving the bottom of the can extra coats of Rust-Oleum paint and wrapping it in a plastic tarp will also expand its functional lifespan.
  • To get more capacity at the loss of portability, get some food-grade buckets like I mentioned waaaay back in episode 5 and pair them with some gamma-seal lids for $12 each. They provide an airtight seal on the bucket and they’re very easy to open if you have opposable thumbs -- much less so if you’re an animal. We store pet food in ours and leave them on our back porch, and while animals have tried to get inside by gnawing the plastic, not even raccoons have been able to open the lid.
  • Finally, if you want a big container for a “one and done” solution, get a Military Grade 58-Gallon Waterproof Molded Barrel. They’re big - almost 2 feet across and nearly 4 feet high - and they’re heavy, weighing 18 pounds - but boy do they hold a LOT of stuff. I’m not sure how you’d get everything out of if without having to crawl inside, but you can fit anything short of a fully-assembled Mosin-Nagant inside. They’re also quite expensive - around $60 before shipping - but I can’t think of anything larger I’d want to bury.
And remember: If they can’t find it, they can’t take it!

Wednesday, October 19, 2016

Prudent Prepping: Cache and Carry

The dust has settled and the First 72 Hours have passed. Follow along as I build a long term plan via Prudent Prepping.

Our Esteemed Editrix Erin Palette foolishly posted several pun-inspired potential titles for future Blue Collar Prepping articles. Several of us have said,  "Challenge accepted!" and here is my contribution to The Cause.

Cache And Carry
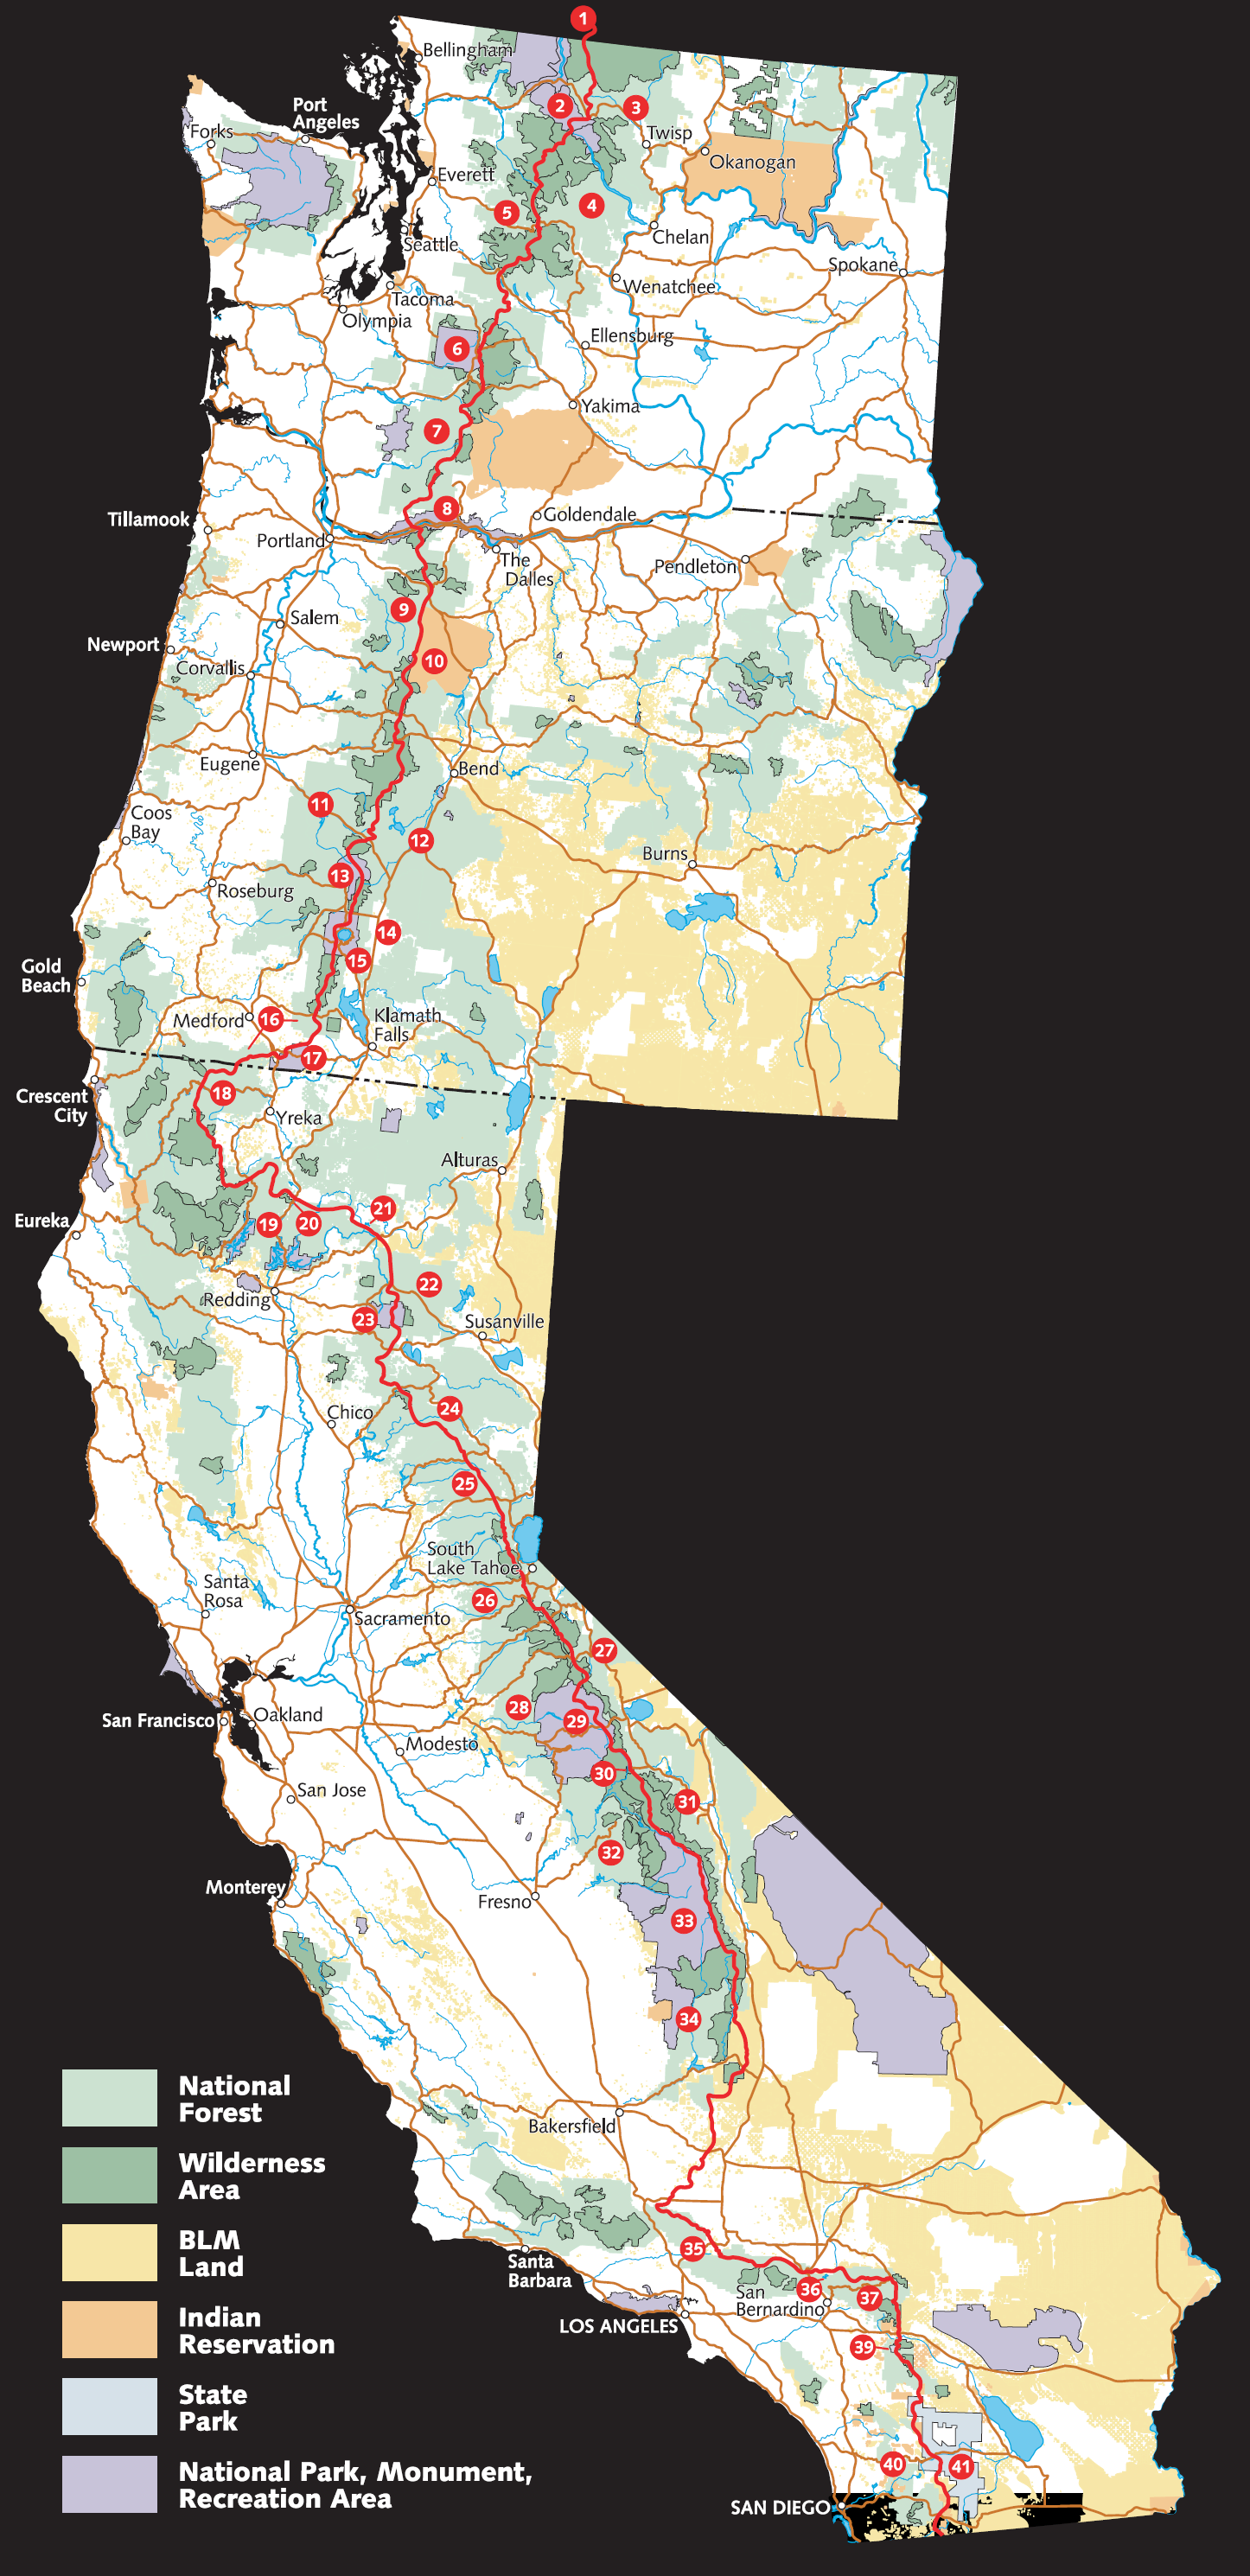
It has been several years since I have actively hiked or backpacked long distances. Marriage to a woman with a minor disability, home ownership, and having a child slowed down my participation in activities that were easily done as a single man. When I was able to hike the Sierra Nevadas, the group of guys I hiked with started at Lake Tahoe and went all the way to Yosemite National Park. We never made it all the way to Yosemite in one trip; weather knocked us back twice, and illness the third time we tried it.

We did make the trip in pieces over the years, though. To do a hike that long (almost 190 miles), lightweight food was required. Unfortunately for us, our wallets were lacking the money to buy freeze-dried meals, so we made do the best we could with a mixture of canned goods and what few lightweight meals we could afford. To make it easy on ourselves, we decided to carry in supplies by putting our food into pails, lashing them to the frames of our backpacks, and caching them at the halfway point. This was relatively easy, since the Forest Service and the State of California maintain fire roads into and around the areas the Pacific Crest Trail runs. We still had to do some serious hiking, mostly uphill and through some very rough terrain, to get to the PCT.

This is similar to the pack frames we used, only our frames didn't have a shelf to make keeping a cylindrical object stable.

http://tinyurl.com/ze9gvjg
The idea was to hike in to the "Go, No Go" point, bury the pails in a place that would be easily found, mark it and hike out. Since metal pails were too expensive, 5 gallon plastic pails were what we used.

To keep varmints out of our food, we adapted an old frontier trick used by early settlers to keep graves from being dug up by animals. They would spread gunpowder around the area, whereas we mixed motor oil into the dirt used to backfill the holes. This is totally unacceptable to me now, in our environmentally conscious times, but back then no one thought about the potential damage. I will state that 10w-40 protected our food very well, since it once took us a year to get back to the cache.

Finding an area with enough soil to allow us to dig a hole over two feet deep was our second hardest problem. These holes were NOT dug below the frost line, but the pails were never intended to be stored long term anyway.

This method of food storage, and the idea of being able to grab supplies quickly and easily, was in the back of my mind when the idea of The Bucket of Holding hit me. Adapting an internal frame pack to take a 5 gallon pail might be a problem if the pack is completely full; if only partially filled with gear, lashing a pail to the outside should be relatively easy, using existing D-rings and anchor points

http://tinyurl.com/hlxtn3u
I see similar pictures from every disaster in the First or Second World: people no different than those I might see at the grocery store, carrying bags, suitcases or even cardboard boxes filled with their belongings and walking down the road. I don't intend to be like these people if I have to Bug Out, or even if I am going across town in a disaster. I will be carrying my gear safely and securely, on my back.


Just a reminder: if you plan on buying anything through Amazon this Holiday season, please consider using our referral link. When you do, a portion of the sale comes back here to help keep this site running!


If you have comments, suggestions or corrections, please post them so we all can learn. And remember, Some Is Always Better Than None!

NOTE: All items tested were purchased by me. No products have been loaned in exchange for a favorable review. Any items sent to me for T&E will be listed as such. Suck it Feds.

Thursday, October 13, 2016

Cache Register

Since our illustrious editrix decided to play word games with my last post about caches, a few of the writers here have decided “challenge accepted”. You want prepper puns? We'll deliver them.

If you're going to hide some things far away from your normal Area of Operations (AO), you'll need to have a way to find them when you need them. A map with a large red X on it will work, but it will also mark the spot for anyone else that may see or find your map. I mentioned encrypting the location information in my last post, so here are a few methods that will work toward that end.

Methods of Identifying a Location
First, you need to figure out what kind of information you're trying to hide. The location of a cache (buried, submerged, or otherwise hidden from view) can be expressed as a series of numbers and/or letters using one of many methods. Those letters/numbers can then be encrypted to make it more difficult to find your cache.

Latitude and Longitude
The most common method of designating a specific place on the planet, lat/long has been in use for centuries. Starting from the arbitrary “zero” of the Prime Meridian that passes through Greenwich, England and moving around the earth east and west, we divide the world into 360 one-degree slices. The north-south division begins at the Equator and is also a total of 360°. Each degree is divided into 60 “minutes” (symbol ' ) and each minute is divided into 60 “seconds” (symbol “). A complete lat/long would look like 21 18' 32 ' -157 51' 3” or 21.308787 -157.850811 in decimal form. The negative sign designates areas south of the Equator and/or west of the Prime Meridian. Geo-caching and modern GPS units have made lat long a common system.

Military Grid System
Instead of working with pure numbers, the US military decided to separate the Earth into 60 east-west zones (numbered 1 through 60) and 20 north-south zones (letters C through X, excluding I and O which are easily confused with 1 and 0). Each block designated by a number and a letter is roughly 6° by 8° and covers about 800 km by 1100 km. An example zone would be called “4Q”.

Each block is further split up using 24 east-west and 24 north-south lines, to create squares. These squares are identified using the same letters of the alphabet as the grids. An example would be “FJ”.

Locations within the squares are pinpointed by measuring, in meters, from the south-west corner. You measure the distance east, then the distance north to get a string of numbers. The more precise the location, the more numbers. An example would be “19056562”, which means 1905 meters east and 6562 meters north of the starting point.

Using this system (which takes some practice) and military maps, a chunk of land 10 meters on a side would have a designation something like “4QFJ19056562”, which happens to be somewhere in Honolulu, HI.

Polar Coordinates
Instead of measuring in squares, another method uses vector and distance from a known point. If you have a standard starting point, say a large boulder or a bridge, you take out your compass and note the direction to your cache (the vector). You then measure the distance in paces, meters, feet, etc. and combine the two. An example would be 143275, for a point 275 meters (or feet, whatever you want to use) from your starting point at a bearing of 143°.

Encryption
Now that you have your data, you need to pick a way to hide or encrypt it. I don't have the time or space to get into all of the possible ways you can encrypt numbers, but I can give you a few basics.

Substitution Codes
These are the most common form of encryption. Replacing a letter or a number with another digit, chosen through a system that only you know, is the root of a substitution code. They are as basic as replacing the numbers 0 through 9 with letters of the alphabet starting with the first letter of your middle name (FGHJKLMNPQ for me) and get as complicated as the 128-bit security algorithms used for banking. Pick one that you're likely to remember or that you can pass on to someone else if you're unlikely to be able to use your cache. Replacing letters with numbers is similar. I suggest you look into one-time pads if you're serious about encrypting data.

Steganography 
Another method of hiding or encrypting your data, the quick definition is "placing your numbers and/or letters in an existing document in such a way that they are not noticed" (follow the link for a thorough explanation). Writing your debit card PIN number down as the last four digits of a phone number is a (not very smart) example - anybody that sees it will think it is just a phone number. Writing a lat/long designation in decimal form down in the back of a math book, maybe as part of an equation, would be another example.

Split Control 
This option breaks your data into two parts and gives each part to a different person. John has the longitude or vector, but Mary has the latitude or distance.


Being able to find what you have intentionally “lost” is important. I hope I have given you some things to think about, and maybe a new idea or two. As always, comments here or on our Facebook page are always welcome.

Tuesday, October 11, 2016

Cache Flow

Sometimes, you need to stash things. Sometimes, the place you want to stash your stuff is wet, either part time or full time. With a little work, these locations can prove ideal.

Wet locations have quite a few things going for them, in regards to hiding a cache:
  1. Their usually cool nature can extend shelf lives on some items. 
  2. They're usually less accessible than dry areas, discouraging thieves and scavengers, who may not even think to check for a watery cache. 
  3. Sealing your cache to keep it dry also keeps smells from getting out, which will prevent animals from locating and destroying your supplies.
Wet caches do have some drawbacks, though:
  1. That inaccessibility that keeps them safe also can impede your access. For example, getting to a watery cache in December might be trivial for Erin, but ice and snow might make it almost impossible for me. 
  2. Also, water getting to your supplies can damage or destroy them, rendering the cache worthless.
If you are going to sink a cache, the two big problems are keeping it dry and keeping it down. Using a length of PVC pipe to contain your cache puts you on the road to solving both of these problems. Other cache containers will work, but will require some testing before you trust them with anything critical.

Making a Watertight Cache
  1. Consider the largest items you plan to cache when sizing your pipe. Make sure you have sufficient pipe length and diameter to hold these items and anything else you're planning on stashing. 
    • Vacuum sealing items in your cache and including desiccant packets are also good ideas.
  2. Use PVC cement to seal one end of your pipe with an appropriately sized pipe cap and allow it to dry. Do all of your gluing in a well-ventilated area, as PVC cement smells terrible and is generally nasty
  3. On the other end of your cache pipe, glue on a female threaded adapter. This, combined with a threaded plug, allows access to your supplies. 
  4. A bit of thread sealant whenever you remove and replace the plug should keep the contents dry.
As a side note, everything linked to in this article is 4" material, because that is a convenient size for general storage use. Larger and smaller sizes are available at your local store, for larger and smaller prices.


Dive! Dive!
Now that our things are dry, we need to make them sink. How easy or difficult this is hinges upon how heavy your supplies are. A heavy cache won't need much help staying down, but a light cache will need all the help it can get.
  1. Adding weight to a light cache is a good way to get it down; a handful of steel hardware (nuts, washers, screws, etc.) will always be handy in supplies, in addition to adding weight. 
  2. Caches also need to be anchored in place, so epoxy or otherwise attach a length of cord (paracord works great) to the side or end of your cache, then tie or otherwise secure it wherever you'd like your cache to stay. Shorter lines are less subject to fouling, and keep your cache in one spot, but use whatever length fits your needs. 
  3. Mark or otherwise note your cache location, and you're good to go, knowing your stuff is safe and in a very inconspicuous location.

Lokidude

Thursday, October 6, 2016

Cache Thoughts

When most people think of a cache, they picture a piece of plastic sewer pipe, capped on each end, that has been buried in the ground. This option may work for some folks, in some locations, but is not the only way to set up a cache.

Remember, the word “cache” comes from the French verb “cacher”, which means “to hide”. Obviously a cache must be hidden, but what other things will you need to consider when thinking about hiding supplies?

Location
Is the place you want to hide your supplies accessible year-round? Will snow or flooding cut off the routes to your cache? Weather is one of the reasons we prepare, so you'll need to take it into consideration when planning a cache. Mountain roads are hazardous in the winter even when maintained by government road crews, how do you think they'll be after TSHTF? Bridges are another possible problem, since a good portion of the bridges in the USA are old and in poor condition. Route planning is a separate issue, but something that needs to be looked at when planning a cache.

Location
Who else has access to the location of your cache? Burying anything on public land leaves it vulnerable to discovery by anyone passing through the area. While using land that is not linked to you may have OPSEC (Operational Security) value, it lowers the chances of your being able to recover your cache intact.

Hollywood seems to like the idea of using a public storage unit for caching supplies- the theme pops up in several movies. While having a 10 x 15 space packed with emergency supplies sounds like a wonderful idea (if you can afford to fill it), it gets expensive to pay the monthly rent and you would have no control over the security of it. Most of the storage units that I have seen or helped empty were full of household items and didn't contain much of value, to the looting of public storage wouldn't be likely until well after TSHTF.

Caching things at a friend's place will provide some security and ease of recovery, but everyone in the friend's household as well as any guests will potentially have access to your supplies. Fire, theft, divorce, and other calamities could also destroy your supplies.

Location
Can you retrieve or monitor your cache easily?

The first step in retrieving a cache is finding it. Do you remember exactly where you buried it? Did you draw a map (if you do, use a code or other way to encrypt the data) of its location? Landmarks change rapidly- buildings are torn down, trees are cut, fences are removed, bridges replaced or moved, etc. so you need to have several ways of locating your cache. Geo-caching as a hobby is a good way to practice locating a hidden cache, but you'll need encrypt your GPS coordinates in some manner to prevent others from finding it. GPS is satellite-based, and is subject to government shut-down in times of emergency, so learn how to read a topo map and get the maps that cover your areas.

I live in the upper Midwest, so I have to take climate into consideration any time I think about burying something. Around here the frost line goes down about three feet during an average winter. That means that the ground freezes solid for the first three feet of digging. A wet summer followed by a colder than normal winter can drive the frost four feet deep. Without the use of industrial excavating equipment, anything buried below the frost line is going to be a chore to recover. Anything buried in the frost zone will likely “float” to the surface as the frost comes and goes over a few years or get damaged from the pressure created by the freezing water. Frost heave is capable of lifting roads and cracking concrete, so a PVC pipe isn't going to withstand it.

Contents
What you put in your cache will have some bearing on where you hide it. Anything with a shelf-life will need to be rotated out so plan on retrieving and re-hiding your cache at scheduled times. In general, the more you mess with a cache the more likely it is to be discovered by someone else. Digging leaves disturbed soil that is easy for a trained/experienced person to spot. Visitors to remote areas are noticed by locals, whether the visitors know it or not. Frequent trips to a cache site will stir the curiosity of observers and may lead to the uncovering of your cache. The best bet would be to avoid anything with a shelf-life and never visit a cache site until you need the contents, but that would mean never being certain if it was intact until you needed it.

Size
A piece of PVC pipe will hold a few day's worth of food, basic shelter, some fire-starting tools, and maybe some clothing. Common sizes of PVC are from 8-14 inches in diameter, with the smaller ones being easier to transport to your hiding spot and much easier to dig a hole for. They are also harder to find when you try to retrieve your cache. One method of hiding PVC caches is to use the same size and color as your existing house plumbing to add on “extra” drains in your home. If you have access to your plumbing (not all hidden in walls or before the walls are finished) you could place a few “spare” drain lines that would pass a quick inspection. Not many burglars are going to be cracking open sewer lines looking for valuables, but government representatives might.

Plastic 55-gallon drums will hold a lot more than a piece of sewer pipe, but are harder to transport discretely and take considerable effort to hide successfully. Most plastic drums weigh about 25 pounds empty, so carrying one on your back as you trek into the forest to your cache site is going to be the first workout. Digging the hole will be the second, and carrying all of the contents will be the third. Something this size is a candidate for storage in a friend's basement or garage rather than burial.


These are the things that go through my head when considering a possible cache, and may or may not fit your local variables. Learning how to hide things is like learning any other art, it takes practice and planning. For OPSEC reasons, I will not ask for details about anyone elses cache sites or plans. This is a prepper site and I know there are unfriendly people who scan these sites looking for targets of opportunity (mostly wannabe warlords and couch commandos) so I won't feed them intel. If you have general ideas or suggestions that fit your location, feel free to leave a comment here or on our Facebook page.

Thursday, September 29, 2016

Got Cache?

I'm not sure if we've covered caching in detail before, it is getting a bit hard to recall every single post over the last two and a half years. If we have and I'm repeating things, you have my apology in advance.

Caching supplies is a bit of a touchy subject. On the one hand you have people who believe that everyone must have a cache buried somewhere with at least a 72 hour kit in it, and on the other hand you have folks who will say that any supplies not under your direct control are as good as lost. Both sides have good points and bad, neither is right or wrong. The ones who are selling something generally make the strongest arguments for having a large cache. Caching is a personal choice that should be decided after careful thought and some study.

What is a cache?
The word cache comes from the French word cacher, which means “to hide”. A cache is a hidden supply of something.

Why would you cache?
If your BOL is more than a day's walk away from your normal area, having a resupply point along the way would minimize the load you'd have to start out with. Having a back-up supply of the bare necessities stored away from your main BOL for emergency use might be nice insurance. If your BOL is damaged or destroyed, you'd still have something to start over with. You may also want to be able to give the location to a friend who wasn't able to stockpile (or lost) what they need to get through a few days. Hiding things from people who wish to take them away from you is a valid reason to cache, with a few exceptions.

What would you cache?
This is one of the really tough ones to answer. There is no “one size fits all” answer because each of us are going to have different needs, resources, and reasons. Look around the internet and you'll find all kinds of lists of what the “experts” think you should have in a cache. None of them are going to be a perfect fit for every situation. Water purification, fire starting, shelter, food, and clothes are understandable things to cache- redundancy in these areas are never a mistake. Fuel, firearms, ammo, and medicine are a bit more controversial. Fuel needs to be rotated to keep it fresh. Firearms and ammo are expensive and may be traced back to an owner. Medicine has both issues- it needs to be rotated to keep it fresh and any prescription information on the bottle would be easy to trace.

How would you cache?
This is another tricky ones to answer. The standard answer is a sealed piece of PVC pipe buried in the ground. Good luck retrieving that in February anywhere the ground freezes. Underwater locations have been discussed in various forums, as have suspension in trees and structures. I'll cover concealment in an separate post. Basically any water-tight container placed in a hidden location is a cache, so use your imagination and think about how to hide a suitable container.

Where would you cache?
The common answer is burial on land not associated with you. The choice to use land not legally associated with you is to provide deniability for anything that may be (or become) illegal if the cache is found by overzealous authorities. The downside to this is that you don't have control of the land and what is done to it. Your cache could easily be discovered or made impossible to recover with a few minute's work of a bulldozer as it reconfigures the landscaping.

My personal favorite is to leave a sealed container at a friend's place with the understanding that if I don't show up within 5 days of an emergency, the contents are his. Obviously this would limit what I could place in the container, since I have no desire to put my friends in legal peril.


Next week I'll try to explain my system for considering a cache. There are many variables to consider and having a system helps prevent any from being missed or skipped.

My posts will be lighter than normal for the next few months, since my job has moved me to 12 hour shifts 6 or 7 days a week for a while. Life gets in the way of blogging, sometimes.

The Fine Print


This work is licensed under a Creative Commons Attribution- Noncommercial- No Derivative Works 3.0 License.

Creative Commons License


Erin Palette is a participant in the Amazon Services LLC Associates Program, an affiliate advertising program designed to provide a means for sites to earn advertising fees by advertising and linking to amazon.com.