Tuesday, May 30, 2023

Data Recovery

Not actually Erin.
& is used with permission.

Dear readers, if you can't recall the last time you backed up your computer, do it now. (Ask me how I know this.)

If you've never backed up your computer before, or don't have the hardware to do it, I suggest you go to Walmart and get the PNY Complete SSD Upgrade Kit in either 500 Gb or 1 Tb, depending on the size of your computer's main hard drive, and clone your drive. The bundled Acronis True Image software is almost criminally easy to use:
  1. Download and install the software, using the registration number included in the kit. 
  2. Plug the cable into the SSD and then into your computer's USB port. 
  3. Run the software. 

https://www.walmart.com/ip/PNY-500GB-2-5-SATA-III-SSD-Upgrade-Kit-with-Transfer-Cable-and-Software/172976564

It is that easy. The software handles everything else for you, including the incredibly annoying disk partitioning (and if you've never had to do that, consider yourself lucky), and when it's done you have a bootable solid state drive that contains a perfect copy of your original drive in about 2-3 hours. Once you get it started you can let it do its business as you go on about yours (just so long as your computer doesn't go into hibernation while you're away). 

SSD vs. HDD: What are they?
Put simply, a Hard Disk Drive (HDD) is mechanical, with a motor that spins the hard disk to read and write data. A Solid State Drive (SSD) is purely electronic in operation, much like a thumb drive. Because it has no moving parts it is faster, more forgiving of movement while operating, and hopefully lasts longer than an HDD. 

Unfortunately, I hadn't backed up the HDD of my computer since I bought it in November 2020. Now in my defense, I had frequently backed up the data I had by copying that data to other drives, but I neglected to back up Windows itself. This oversight came back to bite me last weekend when my computer slowed to a crawl and then refused to boot. 

One new computer later (it cost about as much as a new pistol... sigh), I plugged the old HDD into to new computer and while Windows saw the old drive, it wouldn't let me access it due to, and I quote, "The disk structure is corrupted and unreadable."

The good news in all this is that Windows was able to see the drive, which meant it could be accessed with the proper program. In this case that program is the EaseUS Data Recovery Wizard Pro, which can be downloaded for free to see if the program works. It did, so I shelled out the $70 year-long license (ouch) and set about recovering my data. 

The process was long, because it scanned my drive three times using different recovery methods to maximize the chance of recovery. This triples the amount of data I have to sift through, and since I had nearly 1Tb of data on that drive, that means I have nearly 3Tb of data to sort through. Fortunately there were things which I could ignore, such as the entire OS and all the data I knew I'd backed up (such as my folder of mp3 music). This still left me with a lot to sift through, and not a lot of free time for that sort of thing. 

At this point I've reinstalled all the programs I had (except for maybe a couple of games), and the only data which I haven't been able to recover is copied onto a thumb drive I have around here... somewhere... and hopefully I'll find that before I need it. I've copied the pictures and documents from the old drive to my new one (which I now keep backed up with my PNY) and will sort through those whenever I have a spare moment. The misbehaving HDD will be kept for a while, just in case I remember something I needed which I didn't copy over, and hopefully it will still work at that time. My thinking here is that if I can't remember something I had on the old drive within the next month or so, I probably didn't need it, and so when the drive finally dies I will either have gotten everything from it that I wanted or decided that whatever is left isn't worth the effort to recover. 

By the way, if you don't own something like this SATA IDE to USB 3.0 Adapter, you should get it. I've found it incredibly useful lately; not only does it run the old HDD for recovery operations, but I also use it to power my formerly-internal-but-now-external DVD drive because this new computer didn't have space to mount said DVD drive. 

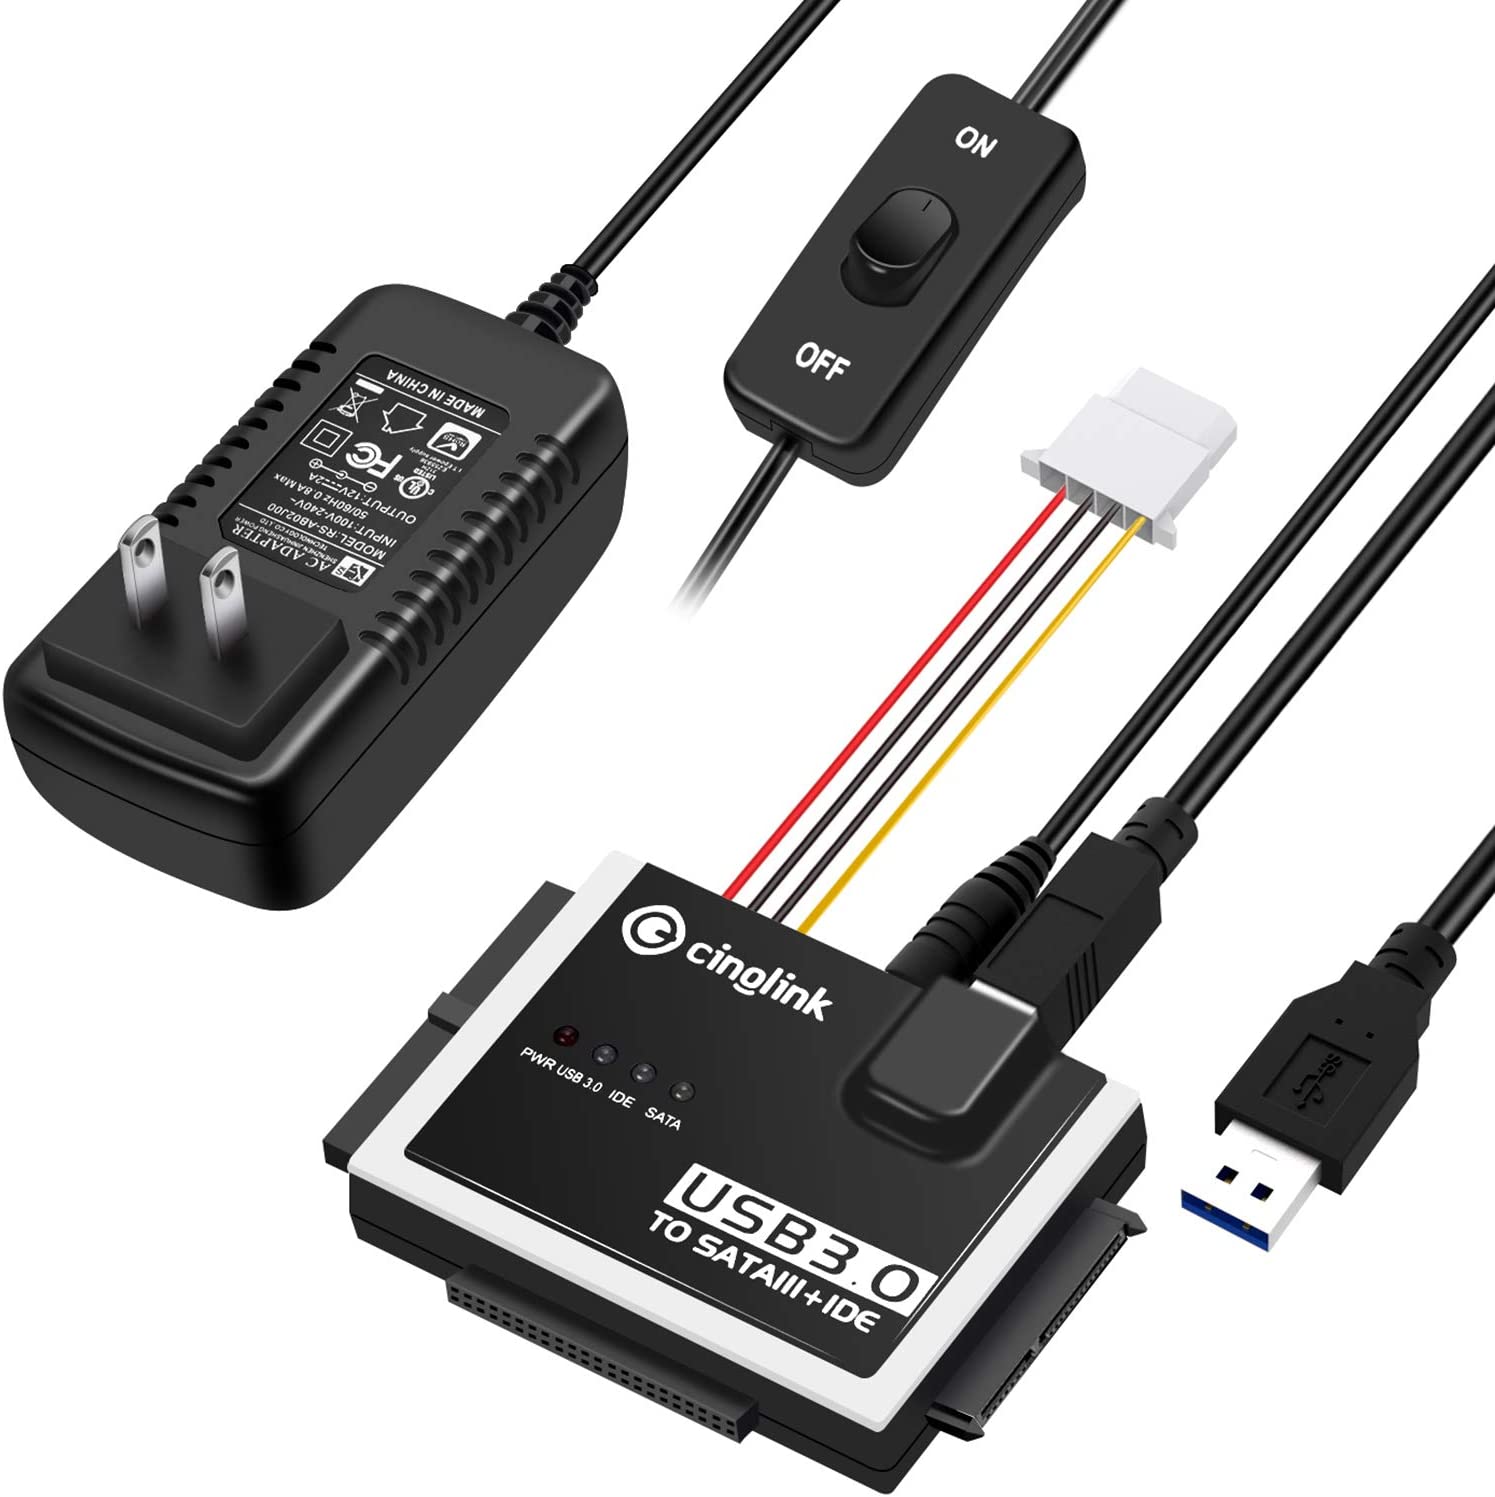
https://amzn.to/42dLjwy

Please, don't be foolish like I was. Let my pain be a lesson to you all, and back up your OS. It's far better to pay tens of dollars now to clone your drive than to lose that drive and spend hundreds of dollars getting a new computer*.


* I couldn't just reinstall the OS with a new drive because my old computer did not come with a copy of Windows on CD-ROM. Furthermore, the old computer ran Windows 10, which I couldn't find in stores, and lacked the ability to run Windows 11. So my choices were "Spend money to get up and running now, so that I can do my job" or "Try to find what I need online, wait for them to arrive, and hope like heck I can get it to work". I may have made a foolish decision, but I'm not convinced I made the wrong one; the true foolishness was in not backing up my OS. 

Besides, this new computer is very nice and I'm quite happy with it. Which is good, considering what it cost. 

Friday, May 26, 2023

Prepping the Grill

Now that spring has fully sprung in most of the US, people are looking forward to more outdoor activities, one of which is grilling. It's always a good idea to have an alternate method of cooking food, and a small grill is an excellent option. Whether it uses charcoalpropane or gas, a grill is a combination cooktop and oven. While it isn't as easy to regulate temperature with a grill as it is with regular appliances, it can work quite well with some practice.

Ideally, we all prepared our grills for winter storage, by which I mean making sure as much food waste and drippings were cleaned off the grill as possible, the exterior was wiped or washed down, and the cover was securely fastened.

Note: Never put a cover on a hot grill. 
Let it cool completely first.

Unfortunately, due to unexpected circumstances I only did the last one of these for our grill, a small Weber Spirit. This meant I had a bit more work to do this spring.

Author's grill, covered and uncovered

After removing the cover, I gave the exterior and underside of the grill a thorough going-over with the garden hose to remove loose debris before going to work on the interior. My first step was to make sure the grill hadn't become the home of one or more critters; thankfully, all was good there. That's where the good news ended, because the drip tray was frankly disgusting; to get an idea, visualize an unintentional suet feeder. Lots of hot water, dish soap, and elbow grease got it clean. 

I then removed the cook surfaces and heat diverters. Since I'm in the habit of cleaning the cooking grates both before and after each use, they were in relatively good shape. The heat diverters -- upside down V shapes of metal under the cooking grates -- were slightly rusty, but that's actually fairly normal with regular use. Heat diverters will rust and, eventually, will need to be replaced.

Interior with one cooking grate removed, revealing the heat diverters.

The last part of the cleanup was taking a look at the burners themselves. Our grill has two, one across the front and the other at the back. These are simply metal pipes with a row of small holes for the gas, and over time, these apertures will get clogged. The easiest way to clean them is with round toothpicks dipped in vegetable oil. One. Hole. At. A. Time.

Finally it was time for a function test. I turned on the gas and ignited the grill. Fortunately, I had no issues there either.

Note: Propane tank valves twist open in reverse compared to other items, and should be kept closed when not in use.

Our grill has a piezoelectric ignitor. This is a crystal-based system that generates a spark when struck, igniting the propane. Other grills have battery-powered ignitors, and their batteries should be removed at the end of the grilling season and replaced at the start of the new one to reduce the chance of corrosion. Some gas, and all charcoal, grills don't have an ignitor and need to be lit with a fireplace match or grill lighter. Once the grill was lit, I closed the lid and let it run up to temperature. Ours will exceed 500 degrees if I let it go long enough.

I mentioned cleaning the cooking grates before and after each use. Once the grill is hot, I take a piece of scrap cotton or a washcloth, roll it up, and dip it in vegetable oil. I use this to wipe down the grate. Once I'm done cooking, I turn the heat back up, use a grill brush to scrub off any loose particles, then repeat with a fresh piece of cloth and oil. This keeps the grate clean and ready to use, and also seasons the metal slightly to reduces sticking and rust.

Prepped, clean, and ready to grill

Grillers of the world, ignite! You have nothing to lose but your hunger!

Thursday, May 18, 2023

Prepper's Pantry: Ginger

Unlike many discovered plants, ginger seems to have been intentionally cultivated around 5,000 years ago. In this case, it wasn't selectively bred to improve certain natural characteristics like garlic was; instead, the hybrid resulted in a serendipitous combination of features from intentionally crossbreeding plants that didn't display those characteristics. Basically, everything that makes ginger, ginger seems to be a result of luck, not design.

While many people are familiar with the use of ginger in cooking, primarily Indian and Asian cuisine, fewer seem to be aware of its potential health benefits, though most of these have not been either proven or accepted by Western medicine. Ginger has been used in Chinese folk medicine for at least 2,500 years, and writings by Confucius and his followers claim that the philosopher ate ginger with every meal. Ginger is reported to aid in digestion, relieve nausea and upset stomach, help reduce intestinal gas, reduce pain and inflammation, lower cholesterol, and more.

In addition to being available fresh at most grocery stores, ginger is also available powdered for cooking, in supplements, pickled, chunked and dried, as well as candied for snacking.


One of the easier ginger-based items to make is a simple syrup for use as-is, in cocktails, or to combine with seltzer for a home-made ginger beer.

Ginger Simple Syrup

  • Ginger (dried or fresh)
  • Sugar
  • Water

  1. If using fresh ginger, peel, slice, and put in a pot with an equal amount of water.
  2. If using dried ginger, dice and allow it to soak in an equal amount of water for several hours.
  3. Add an equal amount of sugar to the water (or more, if a sweeter result is preferred) and bring to a boil, stirring until all the sugar has dissolved.
  4. Reduce heat and simmer for 15-20 minutes.
  5. Allow to cool and pour into a sealable container, such as a canning jar.
  6. Steep for as little as 1 hour or as long as several days for a stronger ginger flavor.
  7. Strain out the ginger solids and pour the liquid into a sterilized sealable container.
  8. Refrigerate and enjoy.


That's merely one of the many, many uses for ginger.. and I'm not even talking about redheads.

Thursday, May 11, 2023

Trekking Poles

Not actually Erin.
& is used with permission.

I recently bought a pair of trekking poles for my nightly mile walks around the neighborhood. The arthritis in my lower back has been a limiting factor when it comes to the amount of distance I can comfortably walk, and while researching solutions to this I discovered the concept of Nordic walking -- essentially, cross-country skiing without the skis. Between the increased cardiovascular benefits of Nordic walking and subsequent discovery that trekking poles help with load distribution while walking with a rucksack, I decided to investigate the benefits for myself. 

Since  didn't know if they would work for me, I bought a set of aluminum trekking poles from Cascade Mountain Tech ($21.50 on Amazon) because they had a high rating and because if I ended up not liking them I wouldn't be out a lot of money.

https://amzn.to/3HZvFxf

 Here's what I discovered:

1) No one can seem to agree if cork or foam grips are better. 
Both sides have their supporters, and the only thing they can agree upon is that cork grips are slightly ($10-$20) more expensive than EVA foam. After that, here's what I've been able to make out to the best of my ability:
  • Cork is less durable than foam, but is more comfortable because it wicks away your sweat and conforms to your grip. 
  • Foam is more durable, but this also means it will chafe more. It also absorbs moisture so sweat and/or rain will reduce your grip. 
  • Both foam and cork offer the same amount of cushion/shock absorption, so it's a matter of long-term comfort vs long-term durability. 
I went with foam mainly because I wasn't sure I would like the poles to begin with. At this time I haven't found myself wishing my EVA foam grips were more comfortable or less sweaty, but that may be because my walks only last between 30 and 60 minutes and I'm walking on level asphalt roads. 

2) It takes time to learn how to walk with trekking poles. 
When I first started, I thought I knew how to use them, but within the first few feet I knew something was wrong because I felt no additional stability or speed. I was taking two steps for every use of the pole, and that didn't feel right, but I wasn't sure what I was doing wrong. Even YouTube videos didn't tell me what to do; while they may exist, I couldn't find a "This is how you walk with trekking poles, you dummy" video. 

What I eventually realized was that I needed to search for "How to Nordic Walk" videos instead, and that was tremendously helpful to me. These videos showed me where my pole tips should be striking the ground -- roughly where my heel would be if I were standing still -- and not in front of me at all. This has helped a great deal. 


I'm still getting the hang of it, but I think I'll soon have a natural stride. 

3) My left hand goes numb about halfway through the walk.
To be clear, I'm not blaming this on the poles. My left hand gets pins and needles basically any time I need to hold it at a a 90° angle or higher for more than a few minutes or when I need to grip something tightly for longer than a minute. I lack health insurance so I haven't had this diagnosed by a doctor; the last time I had it looked at (2019) I believe I was told it was tendonitis and not a big deal, although I'm not ruling out carpal tunnel syndrome. 

Either way, this numbness is quite uncomfortable and it's hard for me to concentrate on anything when it happens, especially the position of my trekking poles. The only way to fix this is to shake my hand, or otherwise let it hang down, which is difficult to do when carrying a pole and makes using a pole pretty much impossible. 

Perhaps I'm gripping the pole too tightly, or my pole technique is otherwise improper, and correct form would prevent hand numbness. I will continue to refine my technique and let you know how that goes. 

Do I recommend trekking poles?
Right now I have to say that my results are inconclusive because I feel like I haven't yet gotten the hang of Nordic walking. If I can't seem to get the hang of it after a suitable amount of time, or if I do and see no benefit, then I would say no. 

However, I can see the appeal and the benefits seem logical, and the multitude of Nordic walking enthusiasts can't all be wrong. Perhaps tonight everything will fall into place and I will become a zealous Nordic convert. 

Only time and experience will tell, and I will keep you all posted. 

Friday, May 5, 2023

"May" Rhymes with "Buffet"

Not actually Erin.
& is used with permission.

Cripes, it's been another month between blog posts. I'm really sorry about that; right now I'm in the unenviable position of "not a lot to talk about prepping-wise" and "my house is still in turmoil due to the mold problem." The bedroom - bathroom - walk-in closet suite is still down to bare foundation as we work things out between the plumber, the carpet/tile people, the drywall people, and the insurance company. At this point I have no idea if the renovation is even going to start this month or if it will be the summer (or later) before it begins. 

Because of this chaos I don't have any new topics to discuss, so if there's something you'd like me to address, please leave a comment or send me an email. I can, however, give you some updates on things -- a "Buffet Post", as David Blackard likes to call them -- so that this post isn't a total loss. 

My nightly walks are going well, and I can pretty easily do the 1.1 miles of the loop. Progress past that point is slow, however, because while walking (even without a backpack) my lower back -- where I think I have arthritis -- begins to ache and the muscles start to cramp and tighten, so how far I go after that depends upon my back. I do feel that the constant exercise is slowly helping my back, because over the past few months the tightness after a loop is slowly subsiding. Every so often I can make two loops, but most days I can only do 1.5 or 1.25. 


https://amzn.to/3perZ4c

Speaking of walking, last year I needed to replace my combat boots which I used for inclement weather. I ended up getting a pair of Wolverine DuraShock boots with a 6" ankle, and they're... okay, I guess? It's not that they're bad boots or anything. They are heavy and stiff, though, which means it's taking me a long time to break them in and so I don't have a strong opinion or a solid review on them yet. I will likely get more use out of them during hurricane season. 


https://amzn.to/3VyN45G

It's been a pretty rainy spring here, so I've ended up wearing my Poncho Villa by Hazard 4 a lot during these walks. It's the black version, which is pretty low visibility, especially in a semi-rural neighborhood at night in the rain. In order to keep from getting run over I bought a set of reflective patches and mounted them to the velcro fabric on the front, back, and sides of the Poncho Villa. I haven't been hit yet, so they seem to be working. 

https://amzn.to/42moHed


My waxed boonie hat is still plenty waterproof 2.5 years after waxing, although I haven't used it on a daily basis. I am still quite impressed with its durability and performance, though. 


This last part isn't really prepping-related, but I've found it enormously convenient in my daily life. Like most of us I use my smart phone as a GPS to help me get to locations and avoid traffic, and on longer trips that can drain the battery significantly. The obvious solution is to keep the phone plugged in to the car's AC outlet for charging, but if I am frequently getting out and back in (such as when running errands) then making sure the tiny USB charger fits into the tiny USB port can be an annoyance. 

https://amzn.to/41bg190

That annoyance can be wholly mitigated by using magnetic USB tips and cables. I use this version from Digital Ant, because each cable (there are three) comes with three different tips: Micro USB, USB-C and whatever Apple is calling its interface these days. This has given me enormous flexibility when it comes to recharging my various devices, such as the head lamps I reviewed last month

L to R: 1000 Lumen LED HeadlampEverBrite 350 Lumen Red/Green Headlamp, Tozo Bluetooh Earbuds


Pair these cords with a smart technology three-port charger that determines how much current a device needs based on its draw and you have an easy, convenient way to charge most portable electronic devices. 

https://amzn.to/3LYQfjI


So, that's been my month. Hopefully I'll have another post for you before June. 

Tuesday, May 2, 2023

Prepper's Armory: Reflector Sight

The ancestor of the modern red dot sight family is the reflex sight, originally called a reflector sight. It's been around for considerably longer than most people realize: the reflector sight was originally patented in 1900 by Sir Howard Grubb, a noted optical designer and telescope maker in Ireland. He titled his patent "A Gun Sight for large and small Ordnance" and described it as "a better alternative to the difficult to use iron sight while avoiding the telescopic sight's limited field of view, greater apparent target speed, parallax errors, and the danger of keeping the eye against an eye stop."

On March 20th 1901, at a meeting of the Royal Dublin Society, Sir Howard began the explanation of his new invention as follows:

When it is necessary to point any instrument at an object, whether it be a rifle, or a gun, or a telescope, it is usual to do so by glancing at the object along the axis of the instrument, or some member or part which is parallel to the axis, bringing this part as nearly as possible into line the of sight between the eye and the object aimed at. This is done instinctively, without any education or instruction, and it is curious to note that in this, the twentieth century, the most primitive and unscientific method still endures, and is used in all but exceptional cases for sighting purposes in our most modern weapons.

He continued by describing a theoretical sight we may also recognize:

It would be possible to conceive an arrangement by which a fine beam of light like that from a search light would be projected from a gun in the direction of its axis and so adjusted as to correspond with the line of fire so that wherever the beam of light impinged upon an object the shot would hit. This arrangement would be of course equally impracticable for obvious reasons but it is instanced to show that a beam of light has the necessary qualifications for our purposes.

Now the sight which forms the subject of this Paper attains a similar result not by projecting an actual spot of light or an image on the object but by projecting what is called in optical language a virtual image upon it.

Impossible then, but he quite clearly described a laser sight of the type most Americans became familiar with in the mid-1980s.

He went on to detail what most shooters of today would instantly recognize as a reflex sight, and listed a number of features we expect from the modern iterations of his invention.

These points included:

  1. The aiming mark being sharply defined simultaneously with the object being aimed at, meaning that the shooter could keep both the aiming mark and the target in focus simultaneously.
  2. Little to no parallax. As long as the aiming mark and the target were both visible, the bullet would impact where they coincided.
  3. The ability to be used with or without magnification.
  4. Any form of aiming mark, whether cross, circle, or other, could be used, even those impossible in traditional magnified optics of the time.
  5. His design was self-contained and easily detachable from the weapon.
  6. The sight itself has no adjustments, so it is not possible to be put out of order or adjustment unless actually broken.
  7. The field of view is practically unlimited and the view of the horizon is not obstructed.
  8. The aiming mark can be conveniently illuminated and the sight used as effectively at night as in the day.
Sir Howard's invention was slow to catch on at first, but soon went on to take the world by storm. It was first adopted into military service on German fighter planes late in World War One, followed by use on nearly every other military aircraft of the 1920s and 30s. By the Second World War, the reflector sight was being used not just in aircraft gunsights but on a wide variety of military equipment, including land, vehicle mounted, and naval artillery. 

Its simplicity and quick target acquisition let to the adoption of the name "reflex sight" that we still use to this day.

The Fine Print


This work is licensed under a Creative Commons Attribution- Noncommercial- No Derivative Works 3.0 License.

Creative Commons License


Erin Palette is a participant in the Amazon Services LLC Associates Program, an affiliate advertising program designed to provide a means for sites to earn advertising fees by advertising and linking to amazon.com.