Friday, November 30, 2018

Portyanki

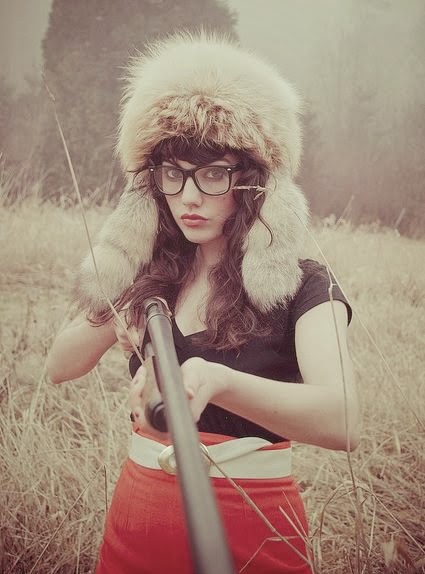
Not actually Erin.
& is used with permission.
Despite what it sounds like, a portyanki isn't a monster from Dungeons & Dragons. It's actually the Russian name for "foot wrappings", and they were commonly used by the armies of many nations through the 20th century in lieu of socks.* In fact, the Russian army wore portyanki up until 2013!

A portyanka (that's the singular term) is simply a piece of cloth -- ideally rectangular and roughly 3 feet long by 1.3 feet wide, but square and triangular cloths will also work -- that is wrapped around a foot like a bandage and tied into place. It acts like a sock to cushion and insulate the foot, wicking away sweat and protecting against blisters.

https://en.wikipedia.org/wiki/Footwraps#/media/File:FootClothFromFinnishDefenceForces.JPG

Benefits
At this point, you're probably wondering why I suggest you learn to tie cloths around your feet when you have perfectly good socks. While socks are clearly the superior technology, there are several good reasons for knowing how to wrap your feet:

Portyanki are Easy to Make 
You might find yourself barefoot during a disaster, or your socks might become damaged or lost in a long-term SHTF scenario. Socks can be difficult to replace or repair in that situation, but portyanki can be scrounged from fabric like sheets, pillowcases, t-shirts, and the like, and they will fit any size foot. 

Portyanki can be Re-wrapped 
Socks with holes in them aren't very good, but since portyanki are wrapped, a hole isn't that big of a deal; just turn the cloth over and re-wrap it to cover the hole. 

Wet socks aren't pleasant, either. If you're wearing long enough portyanki (this is why I said the rectangular ones are better), you can take them off and re-wrap them so that the part which was wrapped around your shin (and are hopefully dry) can go around your foot, and the wet portion is now on the outside and higher on your leg where it can dry. 

Portyanki are Easy to Clean
Speaking of drying, because they are single pieces of cloth which lie flat, portyanki dry quickly in the air. Since the cloth is thinner than most socks, they are also easier to clean -- in fact, the standard Russian manner of cleaning portyanki was to boil them!

Portyanki are Disposable
Easy come, easy go. You didn't put a lot of effort into making them, so when they're worn and threadbare, you can throw them away without regret.

Drawbacks
Despite all these advantages, there are areas in which portyanki fall short.

Portyanki are Slow to Put On
Socks are easily and quickly pulled on, but portyanki must be tied in a specific manner. It is possible to put them on quickly -- Russian soldiers were held to a standard of getting dressed in 45 seconds -- but that requires practice.

Portyanki Must be Tied Properly
Improperly tied portyanki will result in painful blisters! Make sure that all folds and wrinkles are smoothed out as part of the tying process.

Summer vs Winter
Summer portyanki can be made out of cotton (and if you're scrounging them, that's probably the material you'll use). Winter portanki were traditionally made out of flannel, although wool would be best.

Tying Your Socks
So how do you properly tie your portyanki? I'll provide you with a step-by-step procedure, but the easiest way to teach you is for you to see the process yourself. I've provided several videos of the process from different angles, in case a certain step isn't clear. If you only watch one of them, watch the first one.


  1. Place your foot on the portyanki such that most of the material is on the same side as your big toe. (We will call this the inside.)
  2. Leave approximately one foot-width of material on the same side as your little toe. (We will call this the outside.)
  3. Some people like to have their feet parallel to the sides; others place theirs at an angle, with their heel near the corner. Experiment to find which style works best for you. 
  4. Take the outside edge corner and wrap it over your toes, tucking it under the ball of your foot. Smooth out any wrinkles. 
  5. Take the inside edge and wrap it over your entire foot and ankle, smoothing out any wrinkles. Make sure that the cloth stays taut around your heel and ankle.
  6. Continue the wrapping motion and go under your foot, stepping down again once the material is smoothly wrapped. 
  7. Grasp both corners of the inside wrap and cross it, so that the front corner is in the back and the back corner is in the front. 
  8. Wrap this portion around the upper ankle and shin. You will have one corner pointing up your leg and another behind your leg. 
  9. Take the corner behind your leg and wrap it around to the front, tucking the loose end into the wrap you've made. 
  10. Tuck the final corner down into the wrap. 
Congratulations, you've tied your first portyanka! Now you get to do it again for your other foot!

https://outdoors.stackexchange.com/questions/8125/how-to-put-on-footwraps-correctly


*  Prior to the 20th century, socks were considered luxury items that were only given to officers.

Thursday, November 29, 2018

Dealing with Pain in Others

A lot of prepper articles are written about first aid because injuries tend to happen with any situation that rises to the level of an emergency. First aid generally means treating injuries when professional medical help is not available to stop further damage and prevent loss of life, with the goal being to get the patient to better care as soon and as safely as possible. The patient is going to experience pain both before and after seeing a physician, and the field of treating pain is complicated and controversial, but there are secondary issues that we should all be ready to address.

I'm learning to deal with chronic (long-term, unending) pain in someone I know. The day-to-day stress of having pain that won't go away has emotional and mental effects that drugs don't treat. Acute pain (short-term, may go away eventually) is normally the result of injuries and tends to be more unsettling to the patient because it is out of their normal experience. Both types of pain cause changes in the person suffering them that will affect how they deal with the world and people around them. Don't expect a person dealing with pain to act or react normally; you may have known them for years, but they can turn into a completely different person once they're in pain.

Physical Effects of Pain
  • Loss of appetite and weight. Plan your meals accordingly and do what you can to make sure they get the calories and nutrients that their bodies need, especially if they're healing.
  • Fatigue and sleeplessness. Pain will interrupt their normal sleep cycles, which will prevent deep, restful sleep. This will eventually cause fatigue and the other effects of sleep deprivation.
  • Decreased movement. The risks of pneumonia and blood clots rise with the lack of mobility caused by injury and pain. Internal movements will also be slowed down, so watch for constipation and fluid retention if they aren't eliminating wastes as they should. Diuretics and laxatives are a subject for a separate article.
  • Weakened immune system. Dealing with the source of the pain will focus the body's attention away from general immune response, so watch for infections in areas that weren't injured.

Mental/Emotional Effects of Pain
  • Stress. Pain causes a lot of different stresses on the body and mind, so expect anyone who is not a hard-core stoic to show signs of stress. Dealing with stress varies from person to person, so investigate the patient normally deals with stress and find ways for them to do it.
  • Depression/anxiety/panic/fear. Chronic or acute, pain tends to kick us out of our comfort zones. From what I've experienced, the severity of the pain is less of a factor than the personality of the patient. Drugs can help with these effects, but they tend to cause problems of their own that you then have to deal with. A calm environment and slow, quiet movements may help reduce these effects by eliminating any new emotional stresses.
  • Anger/resentment. This one I know well. Pain, especially chronic pain, tends to cause outbursts of anger and resentment over little things, and big things lead to full tirades and melt-downs. Patience, prayer, and a thick skin are your only defenses. Being able to take a break and letting someone else handle the person in pain will help with your mental state.
  • Disconnection from other people. Pain centers the mind on itself, leading to a loss of concern for others and difficulty relating to them. This means more conflict and less enjoyment for everyone around. This can be really hard on a marriage or other long-term relationship.

Pain is Part of Life
Humans have been dealing with pain longer than we've been able to talk, so it shouldn't be something arcane or mysterious. Our society has tried to ignore or sometimes punish those in pain for several centuries, which is so fundamentally wrong to my mind that I have a hard time grasping the concept. Most of the natural drugs we have stumbled across, even the discovery and development of things like alcohol and narcotics, have been in search of at least a temporary respite from the pains of life. The addictive properties of some of these drugs get blown out of proportion by those who think they know how to live our lives for us, and I'm sure some of that is based on their desire to control as much of the world as they can.

Those of you who are young and healthy should enjoy life as much as you can and give thanks to whichever deity you prefer. As we age, we collect injuries and ailments that cause pain and this impacts our lives and the lives of those around us. Be aware of those impacts and take them into consideration when dealing with others.

Wednesday, November 28, 2018

Prudent Prepping: More First Aid

The dust has settled and the First 72 Hours have passed. Follow along as I build a long term plan via Prudent Prepping. 

I always look for ways to add to and improve my preps, and while food is most important, right after are my first aid supplies.

Every Day Carry
I have in my lunch box a very small first aid kit that has various band aids, triple antibiotic, and Tylenol. In a separate zip lock bag is Advil, aspirin, gauze pads and QuickClot. After an employee cut himself on some metal strapping this week, I decided it was time to look for a better way to carry more and better gear. I'm exploring several different options for keeping gear close to me (which means future blog posts on this subject), but this is my first step to improving things.

Adventure Medical Kits Trauma Pak


https://amzn.to/2m2JPU5


This kit was mentioned by both Erin and myself in the $30 First Aid Kit Challenge prompted by this post from Chaplin Tim.

I really like the fact that it is sealed in a very sturdy plastic(?) bag and also has a zip lock seal to close it up after you open it the first time. Erin and I both really like what is included.

Since I really like this kit, it made sense to me to look at what else might be available from Adventure Medical Kits.

This is what I found:


Adventure Medical Kits Professional Series Trauma Pak Pro
https://amzn.to/2E6ps3o

The Pro is similar to the regular pack; however, it includes a SWAT-T tourniquet and loses some of the gauze pads. I'm good with trading some gauze for being able to stop serious bleeding.

From the Amazon listing for the Trauma Pak Pro:
  • Stops Bleeding: The Advanced Clotting Sponge uses zeolite, a common mineral, to help blood clot up to three times faster than blood on its own.
  • Critical First Aid Information: Instruction sheet with information on managing life-threatening and traumatic injuries.
  • Made for Tactical First Response: Designed for fast deployment in critical situations; fits in BDU pocket.
  • Personal Protection: Nitrile examination gloves plus biohazard disposal bag.
  • A Tourniquet Anyone Can Safely Use!: The SWAT-T is easy for anyone to use without advanced training. Instructions are printed directly on the SWAT-T.

Luckily, the injury to the employee didn't require the use of a tourniquet, but I don't know when I may need one.

The slight downside to the Trauma Pak Pro is everything isn't in a sealed package but in a woven pouch. All of the critical gear appears to be contained in waterproof and sterile packaging, so those items won't be ruined by water, but the pouch itself could get knocked around some in my lunch box. If worst comes to worst, I'll put it into a zip lock bag like I've done to my existing gear that could be ruined by water.

The Takeaway
  • Improvements to my gear come in tiny steps as I am able to afford it.
  • If bleeding can be controlled, the chances of survival until expert medical care arrives is increased.

The Recap

Just a reminder: if you plan on buying anything through Amazon, please consider using our referral link. When you do, a portion of the sale comes back here to help keep this site running!

If you have comments, suggestions or corrections, please post them so we all can learn. And remember, Some Is Always Better Than None!

NOTE: All items tested were purchased by me. No products have been loaned in exchange for a favorable review. Any items sent to me for T&E will be listed as such. Suck it Feds.

Tuesday, November 27, 2018

Monday, November 26, 2018

Apocalypse Builds: #10 Can Stove


It's after the apocalypse, and you've reached your bug out location and you're sitting around, waiting for the zombies to eat you. Your pork and beans deluxe (now without long pig!) is ready to eat straight out of the can.

You get out your handy dandy P38 can opener and you open the can. Using your tactical spork, you dig in.. and realize that it would really taste better hot. You need a way to heat it up, so you quickly empty a can of freeze dried beef chunks into a gallon ziploc bag, and you make a stove using your handy dandy pocket knife.

Wait, what?
A #10 can stove (sometimes called a hobo stove) is a super easy to make emergency stove. All it requires is a #10 can (think coffee can) and a pocket knife. You can make it with all sorts of fancy features and tools, but at its core, all you need is a pocket knife and a can.

If you want to make it easy on yourself and you have onet on hand, you can use a “church key” style can opener. Tin snips and  a pair of pliers are useful, but not actually needed. 

Note: This is not a number 10 rocket stove. That is a different thing.


Building a #10 Can Stove
  1. The can should have one open end (this will be the bottom) and one closed end (the top and cooking area). 
  2. Place the open end on the ground.
  3. Use the can opener or pocket knife to cut holes below the closed top, evenly spaced along the sides. I prefer eight holes of about a half inch diameter each.
    • If in doubt, cut fewer holes, since you can make more fairly easily.
    • Don’t cut away the metal! If you need to, you can adjust the air flow by bending the metal back in. 
  4. Using the pocket knife, score a spot on the can about one quarter of the way up from the open end (aka the bottom).
  5. Cut down from that spot to the open end.
  6. Repeat steps 4 and 5 at a distance of about 1/4 the height of the can between cuts.  
  7. Fold the "flap" of metal out of the way.  
  8. Place fuel into the stove using that hole. 
  9. Light it.
Done.

But why not just build a fire?
In my experience a #10 can stove works just as well as an open fire, and it also keeps the fuel relatively dry and hot. The can forms both a cooktop and a chimney, and allows you to burn a variety of fuels. I especially like it for burning things like fuel tabs with random brush piled on top when it is wet (or the brush is damp). It dries things off quickly, and keeps the fire manageable.

In a pinch, you can even make these out of soup cans; they just have less capacity, and don’t get as hot. 

If you have made a couple of these, you can experiment with the chimney design so that it still flows well, but smokes less.

I made one with nothing but a leatherman multitool, and it worked great. I had cooked eggs in about 10 minutes from a dead start with a cast-iron pan.


As always, don’t forget to practice.

Thursday, November 22, 2018

Happy Thanksgiving!

Chaplain Tim has the day off to spend time with his family like the rest of us. Regular posting resumes tomorrow.

In the meantime, please enjoy these two holiday favorites written by the
Chaplain:
Whatever you do, have a great day filled with fun, good, fellowship and family.

The Fine Print


This work is licensed under a Creative Commons Attribution- Noncommercial- No Derivative Works 3.0 License.

Creative Commons License


Erin Palette is a participant in the Amazon Services LLC Associates Program, an affiliate advertising program designed to provide a means for sites to earn advertising fees by advertising and linking to amazon.com.