I saw these tasty treats mentioned online, but when I tried
to go back, I couldn't find the source. I decided to try my hand at making
them myself, based on what I remembered of the description.
While I made mine from fresh ingredients, nearly every component
of this recipe can be found in a well-stocked prepper's pantry.
Harder cheeses, if prepared properly, can last without
refrigeration for quite a while.
Canned cheeses are also available, and they
have shelf lives measured in years.
The same is true for butter.
Jarred crushed
garlic, if unopened and stored in a cool dark place, can last quite a while,
and powdered garlic lasts even longer.
Home-made biscuit dough can be used, though the article I
read called for the pre-made kind found in the refrigerated section of the
grocery store.
I've made these biscuits twice now, once with each type of dough. A
lesson I learned was not rolling the home-made kind too thin.
Once the dough is prepared, assembly can begin.
Garlic Cheese Biscuits
Ingredients
Biscuit dough
Cheese, cubed or shredded
Garlic, crushed
Butter
Recipe
Roll the biscuit dough no less than ½" thick and cut into 3" rounds.
Place approximately ½ teaspoon of butter in the middle of
the dough.
Add preferred cheese, enough to cover the butter. (I used
mozzarella.)
Add ½ teaspoon or so of crushed garlic.
Carefully fold the dough over the contents and pinch closed.
Bake at 350°
for 14-16 minutes, or until lightly browned on top. Don't be concerned if some
of the biscuits open during baking.
If desired, drizzle with melted butter, and serve while still
warm.
Biscuit rounds cut and rolled out with filling added
Folded over and ready for the oven
Out of the oven and ready to serve
These biscuit can be reheated... if there are any left over, that is.
As I've mentioned in some of my other food related articles (spices, canning [1 and 2], and pickling), home-preserved foods are generally nutritious and filling but can eventually get monotonous. There are many different additives available to add variety to meals, the simplest and most common being salt to enhance flavor and pepper to add some zing. Another option, and one with great variety, is hot sauce.
My Wife and I grow some form of hot pepper in our garden most years. In addition to using them throughout the growing season, we also preserve them in different ways: sliced and frozen; in salsa, which is also frozen; dried and crushed; bottled in vinegar; and, of course, in hot sauce. We make a number of different hot sauces of different levels of heat and flavor, depending on the harvest and our mood. Neither of us likes heat for the sake of heat, preferring flavor with some spice. With that in mind, we also make some hotter sauces that are intended for use in soups or stews, where a tablespoon of hot sauce will go a long way.
Speaking of heat, peppers are measured on the Scoville Scale, starting with the sweet bell pepper and going up through the truly insane.
At their most simple, hot sauces are an acid (such as cider vinegar) and a flavoring (such as hot pepper paste). Frequently, salt will be added for its preservative and flavor-enhancing properties. In the following recipes, carrots are used as a
thickener and to moderate the heat level. Habaneros are obviously not the
only peppers that can be used; feel free to substitute different
peppers and experiment.
WARNING!
When making hot sauce at home, the most important precaution is to avoid transferring any of the spice molecules to your mucous membranes, such as your eyes, nose, mouth, or genitals. Gloves and goggles or lab glasses can help with this, as can rigorous washing-up.
Habanero Hot Sauce
1 ½ cups
chopped carrots
1 onion,
chopped
1 ½ cups lime
juice
3 cloves
garlic, minced (minimum)
2 tsp salt
1 cup chopped
habaneros, about 12 chilis (minimum)
Combine all the
ingredients, except the habaneros, in a saucepan and bring to a boil. Boil for
10 minutes or until the carrots are soft.
Add the
habaneros and simmer until at the desired flavor and heat. Adjust the heat by
adding more habaneros or by increasing the carrots, but this can alter the
flavor.
Place all the
ingredients in a blender or food processor and puree until smooth. Strain for a
smoother sauce.
If you've spent any amount of time baking bread, you have likely read or heard about sourdough bread and the substance known as a "starter". So what is a sourdough starter?
Put simply, it's a colony of wild yeast and bacteria raised in a medium of flour and water, and any bread product leavened with this mixture (as opposed to commercial yeast) can be considered a sourdough bread.
Why is this relevant for preppers?
The biggest reason is that bread is a staple in most cultures around the world, and yeast is a requirement for a majority of these breads. As we saw in the 2020 COVID-19 Pandemic, disruptions to the labor force and supply chain, plus a massive interest in hobby baking, meant that commercial yeast vanished from store shelves. There's no reason why this might not happen again.
As you'll see in this article, making sourdough is very easy. Even if you decide that keeping a starter in your kitchen isn't for you, after you've learned the techniques I'm going to teach there's nothing stopping you from doing it in the future if you ever change your mind.
One component of the starter culture is yeast, but the other is the bacteria Lactobacilluswhich consumes the starches in your flour and produces carbon dioxide (which is our leavening gas) and lactic acid. The acidity of this starter is the "sour" in sourdough, but this acidity also has anti-fungal properties. This means that products leavened with sourdough starter will be less likely to grow mold than products made with commercial yeast.
A standard loaf of bread has just four ingredients: flour, water, salt, and yeast. Of all those ingredients, yeast has the shortest shelf-life, and even frozen commercial yeast will expire and die.
Eating bread baked at home is going to be better for your health than eating store-bought bread, because there will be no need for the additives and preservatives that keep bread soft and fresh.
Hopefully I have your interest. Now let's get to work making a starter.
For reference, I relied heavily on this video and this website.
Growing a Sourdough Starter
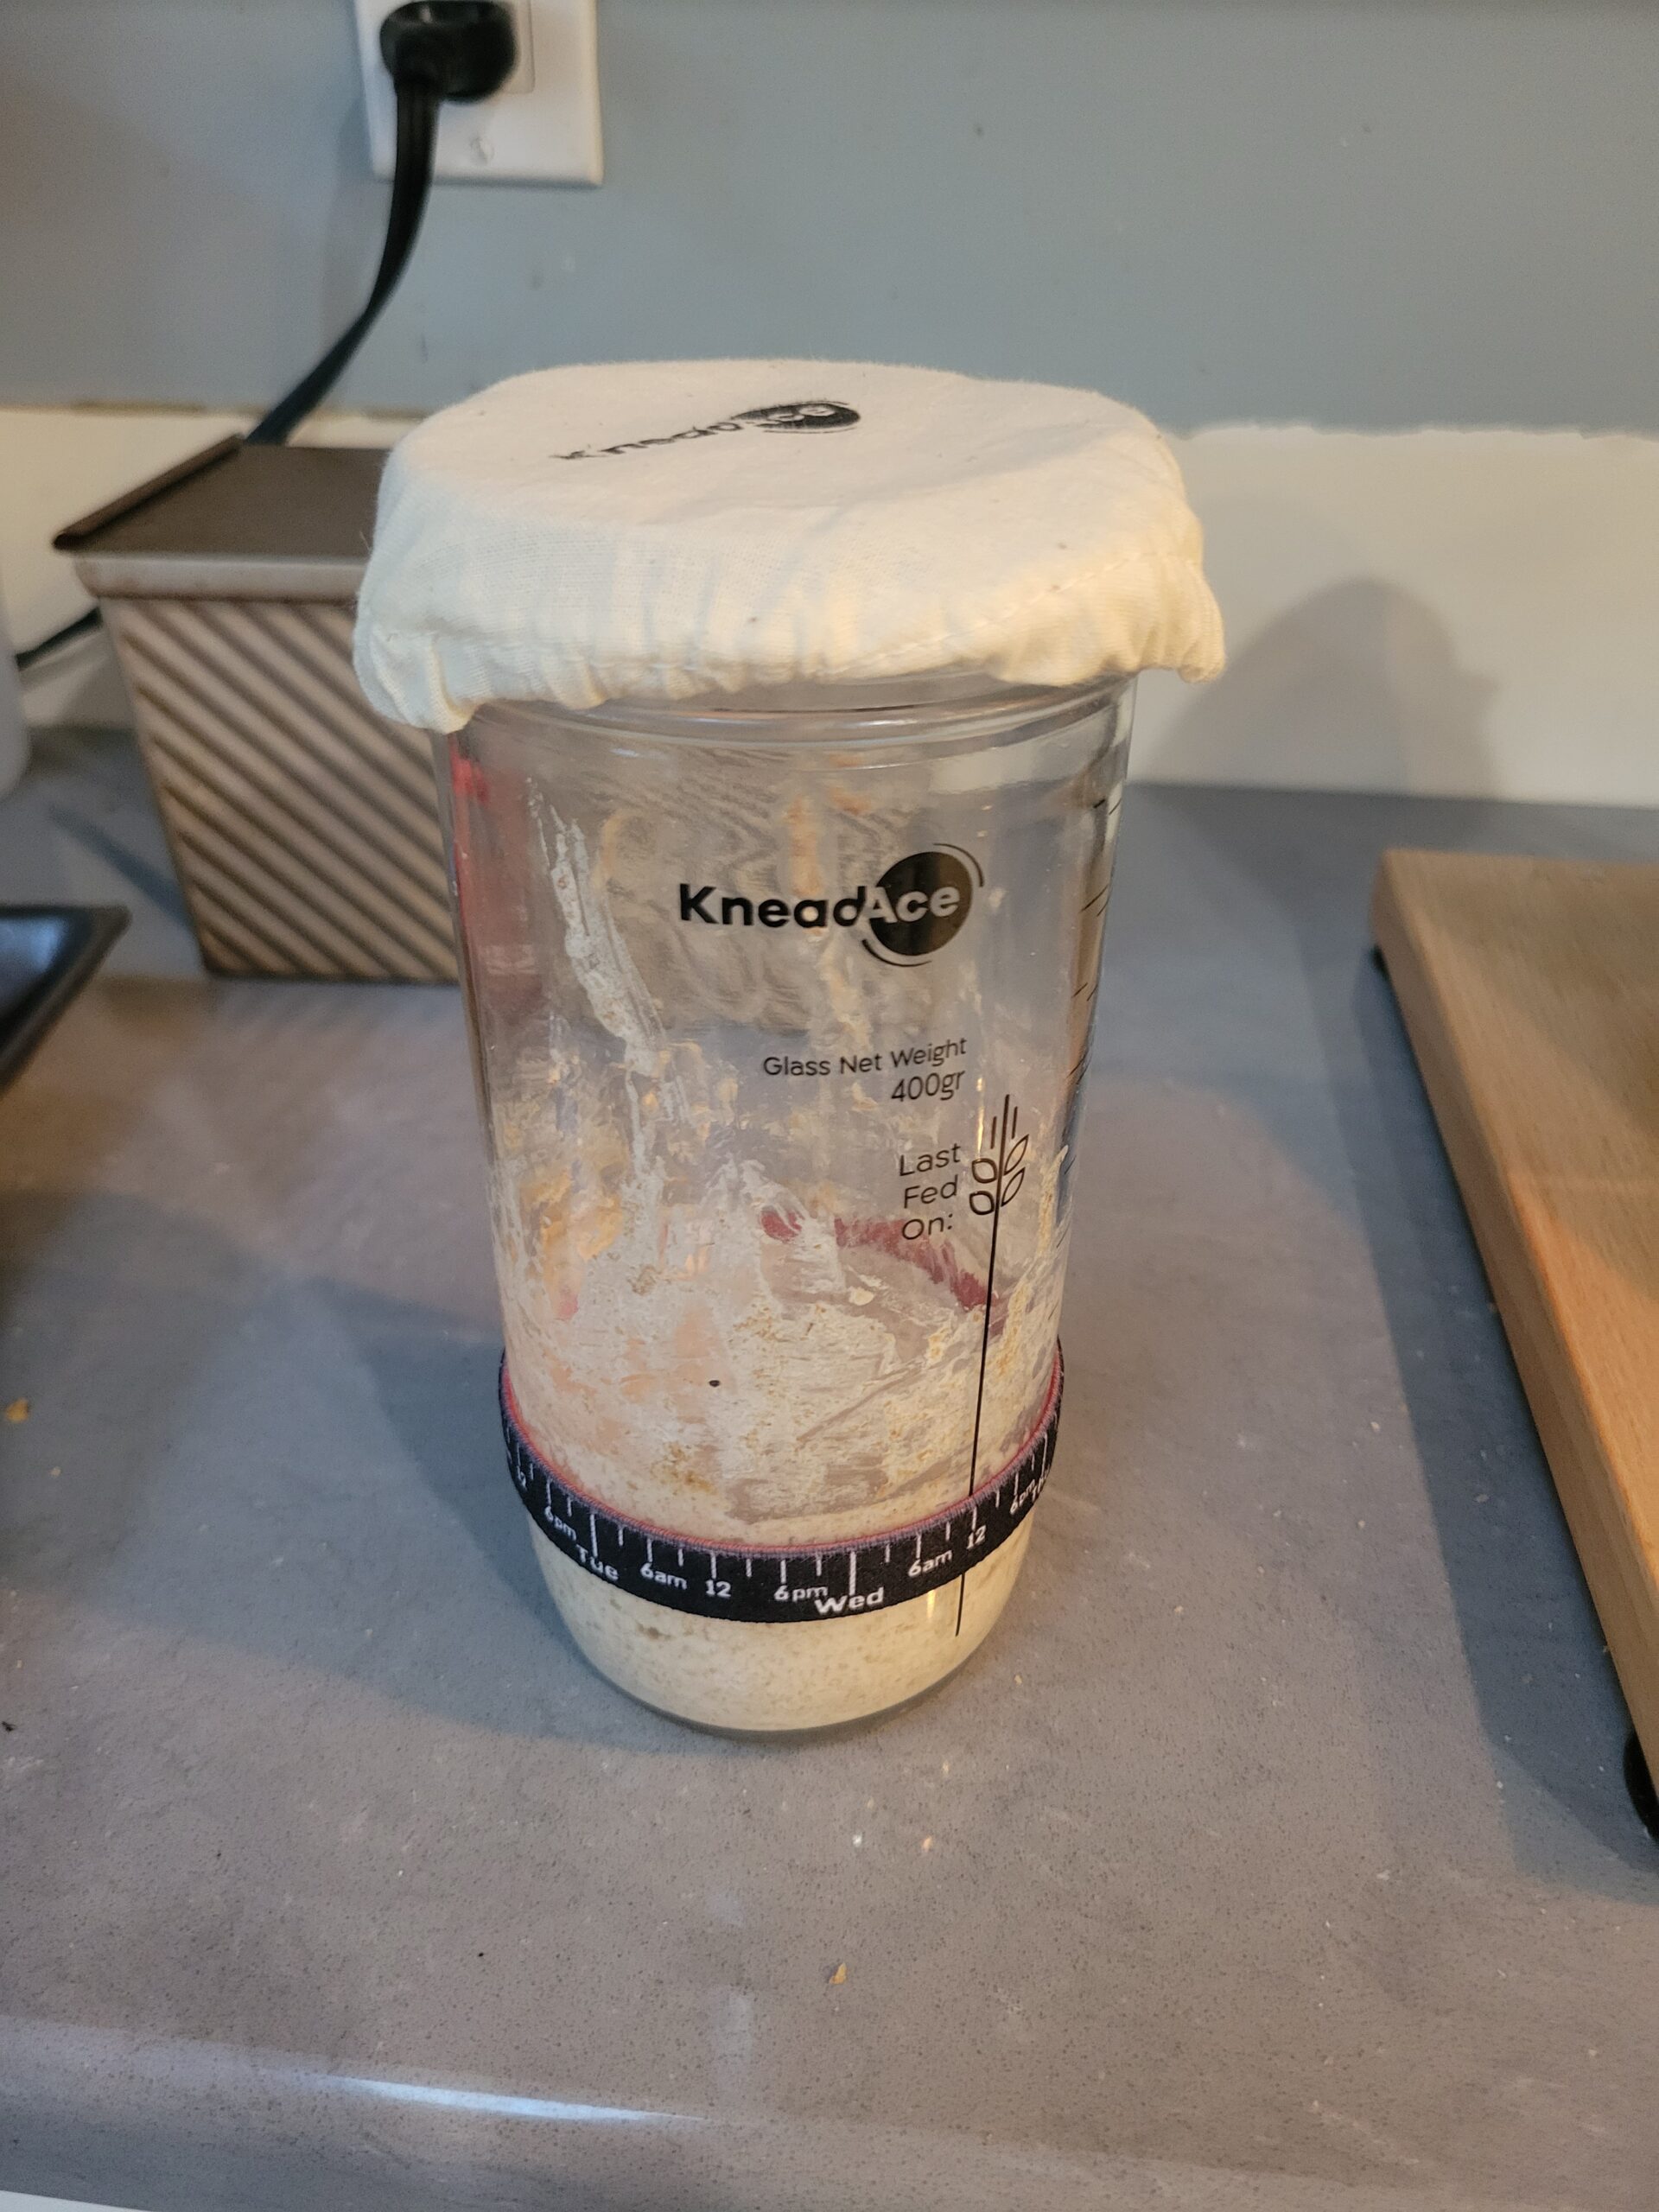
First, you'll need a container. I panic-bought a bunch of commercial yeast during the pandemic and I was worried it would die, so I ended up spending a lot of time talking about sourdough before I actually started making it.
Because of that, my wife bought me this kit, which is nice but honestly not necessary. You'll be fine with any glass container that has a wide mouth and relatively straight sides, so a drinking glass, a pickle or tomato sauce jar, a canning jar, etc. and a paper towel, a piece of cloth or a clean rag secured with a rubber band or twine is just fine. (Also, remember to save the cap if you re-purpose a jar. I'll explain why later.)
After you thoroughly clean and rinse your container, add about two tablespoons of flour and two tablespoons of water to the bottom of the jar and mix them well. For this initial phase I suggest that you use water that's been de-chlorinated (well water, bottled water, or water that has been boiled but then allowed to cool to room temperature) and whole wheat flour. This will likely work with tap water and AP flour, but whole wheat and chlorine-free water will give the wild microbes a bit of an advantage to start out.
Keep the jar someplace warm but sheltered from sunlight. If you have a place where you keep your fresh fruits or vegetables on the counter, that would be ideal. Fruits and vegetables will also have wild yeast growing on them, so in theory the air around these will have more spores and will foster growth.
After 24 hours, give it a good mix and scoop out about half the material (about 1 tablespoon) and replace it with an additional tablespoon of fresh flour and water. Give it another good mix and scrape down the sides as best you can. The fresh flour and water will give the microbes fresh nutrients to grow, and by removing half the material you're giving better odds that the microbes you end up growing will be the right kind. The scraping isn't necessary for the starter's survival, but once flour and water dry they turns into library paste and will make a mess and make it harder to see the progress, so this is more of a quality of life kind of thing.
Every day for a week you'll want to do the same thing: mix, discard, add, mix, scrape. By about day three or four you'll start seeing bubbles and activity. At this point you should start smelling the mixture before you discard half.
You see, we co-evolved with these microbes, and the waste products of these critters (lactic acid for the Lactobacillus and ethanol for the yeast) are not only chemicals that are safe for humans to consume, they are also lethal to many bacteria and fungi that might make us sick. Because of this you will likely start noticing a pleasant smell coming from the mixture, and what it smells like will vary from house to house and may change over time.
When my starter first started, the smell reminded me of stale beer. This summer, it took on a scent more like overripe fruit. Now that the weather has gone cold, the smell reminds me more of a really nice aged cheddar. My buddy who lives in the next town has a starter that smells more like an aged Parmesan cheese.
My point is that the smells coming from this should be invoking scents that remind you of foods or drinks, not of unpleasant objects like a wet dog, dirty feet, or dirty laundry. In the event that your mixture starts smelling foul, don't give up yet. Keep dividing and feeding it for another week and see if things improve, as there's a good chance the yeast and lactobacilli will crowd out whatever nasty critters have taken up residence.
After your first week you should start seeing noticeable activity in your jar, and you can start feeding it twice a day. Once a starter has been sitting for a few hours, it starts developing a foamy top layer with a layer of liquid over the less active bottom layer.
I like to think of that line as a "fuel gauge". When a starter is freshly fed that line of liquid will be evenly distributed, but after a while a well-fed starter will be mostly foam with a small line of liquid near the bottom. When you see this line, stir it up so that the top doesn't dry out and form a crust and see where the next line forms.
If a head doesn't form and the liquid rises to the top, then the bulk of the starches have been consumed and the starter is ready to be fed again.
After about 10-14 days your starter should be very active when fed and have a pleasant smell. Once this happens you can start maintaining it, and a well-maintained starter should rarely need to be discarded.
Maintaining Established Starters Now you can start gaining volume if you need it; just remember to feed at least roughly half the volume in the jar of flour and water. You can also switch to tap water and AP flour if you desire (I use tap water, but I still use whole wheat starter because I feel it's better for the microbes and a small amount of whole wheat flour makes for a better bread).
Always remember to leave plenty of space at the top of the jar, because it will expand as the microbes consume the starches!
If you have a good volume of starter and you think it'll be a few days before you need it, you can cover it with the solid lid and put it in the fridge for up to a week.
Using Your Starter The easiest answer is to look up sourdough bread recipes and follow those, but you can also convert existing recipes to sourdough by adding a volume of starter instead of the yeast, and then subtracting that volume of flour and water equivalent to that volume of starter. The standard rule of thumb is "1 cup of starter is equal to one packet of yeast (which is a little more than 2 teaspoons of active dry yeast) then subtract one cup of flour, and one cup of water."
This conversion will require longer rise times because wild yeast isn't a race horse bred for speed like commercial yeast is. Because of this, I prefer using less yeast and taking a longer time.
Mix well to combine, then give the dough at least 8 hours to rise.
Once risen, pour into a greased loaf pan and allow to proof until it's close to the top of your pan (note that the rise time won't be too different between starter and conventional yeast, but the proof time will be at doubled at the very least, depending on the air temperature).
Place proofed dough in 450 degree oven for 30 mins. Then take loaf out of the pan and allow it to cool on a rack before cutting.
Sourdough Crackers
Since these crackers use no oil, and the sourdough starter has lowered the PH of the cracker they will keep for a very long time in an airtight container.
1/4 cup sourdough starter
2 cups AP flour
1 tsp salt
2/3 cup cold water
Combine all ingredients in a bowl. Dough should be soft but not sticky. Let rise at least 8 hours.
Give dough a quick knead until smooth, then turn out onto a floured surface (divide dough into manageable pieces) and roll out into a rectangle approximately 1/8".
Salt the surface and roll the salt in, adding other seeds or spices if desired.
Take a fork and prick the surface evenly. If you skip this step the crackers will puff up like oyster crackers, which isn't a bad thing.
Cut to size using a pizza cutter or a sharp knife.
Place pieces on a baking sheet, making sure they have a little space between each cracker, and put into a 400 degree oven for about 10-15 mins. Watch closely because once the crackers start to lightly toast they are done, but they will go from toasted to burnt very quickly.
You can double this recipe just by doubling the flour, water, and salt, and keeping the same amount of starter.
Tips for Managing Sourdough
If you happen to use up all your starter while baking, simply add more flour and water to the dirty container. There are enough microbes remaining to completely revive the starter.
Once your starter is established, I recommend freezing at least a cup's worth. In the freezer, a starter will last at least one year with no maintenance. To use simply thaw it, feed it as soon as it becomes liquid, and it's ready to use as soon as it's frothy and active again.
To make a large batch of starter you can just put a small amount of starter in a bowl and simply put equal parts flour and water in and give it a good stir. It'll be all starter by the next day.
I hope you found this guide useful and can see the advantages of knowing how to make and use sourdough starter as a prepper resource!
This is an extremely simple bread with a prep time measured
in minutes. Including baking, the entire process took me less than an hour from
start to finish. It's perfect for those days where bread is desired, but time is
limited.
Yogurt Bread
Ingredients
3 Cups self-rising flour or all-purpose flour
5 tsp Baking powder
¾ - 1 tsp salt
1 ¾ Cups lowfat vanilla yogurt
(if using Greek yogurt,
increase to 2 Cups)
Recipe
Combine flour and yogurt in a large bowl. Mix with a spatula
until no lumps of flour remain. Hand mixing may be required. When done, the
dough should be moist and slightly sticky. Add small amounts of flour or yogurt
to get the desired texture.
Dough mixed and ready
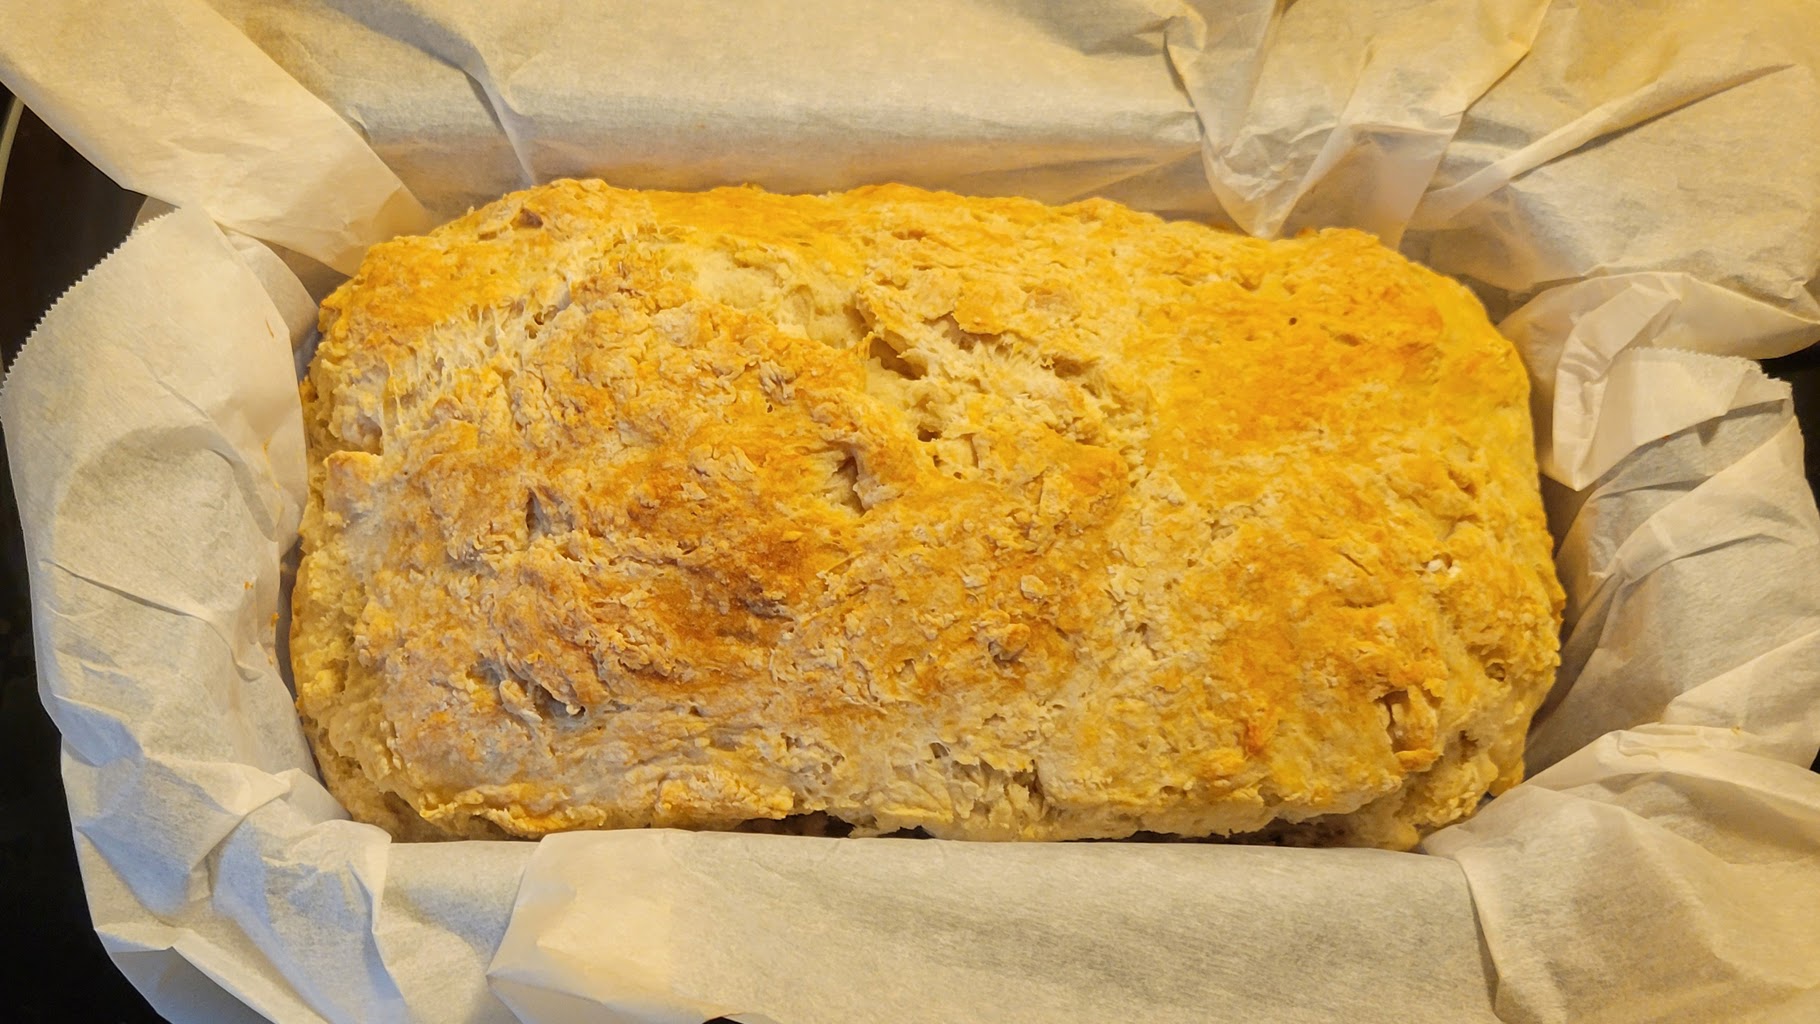
Grease or line a loaf pan with parchment paper and add the
dough. Use the spatula to smooth and level the surface if desired.
In the parchment paper-lined loaf pan
Bake in a preheated 375° F oven for 35-40 minutes, or until
the surface is lightly browned.
Fresh out of the oven
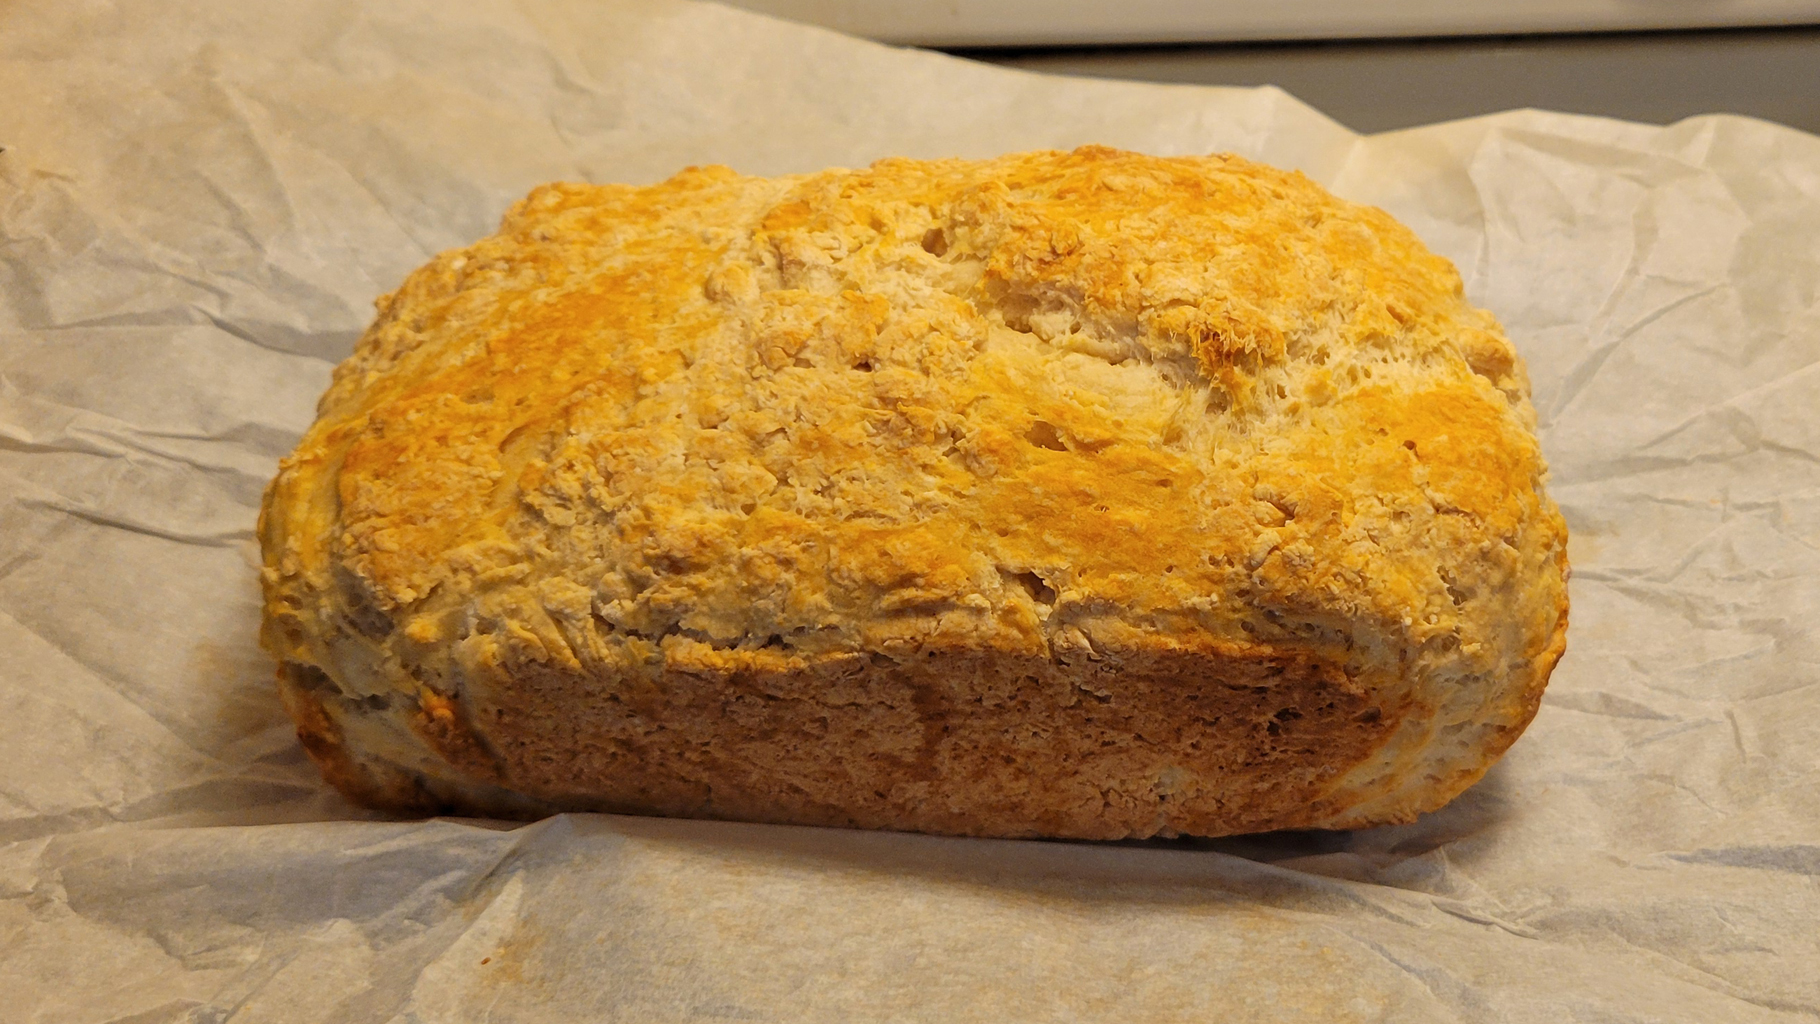
Cool on a baking rack before slicing.
Transferring to the cooling rack
This bread has a slightly heavy texture and a rich flavor. It can be eaten as-is, but works wonderfully with a fruit spread or honey for breakfast, or any other time. There's also an alternate version that uses sour cream in place of the yogurt I intend to try as well.
In the past I've done posts on various types of baking, such as yeast breads and quick breads, and one thing all these recipes have in
common is a relatively short shelf life. This is due primarily to the
inclusion of fats such as butter and oil. While these serve to help retain
moisture and keep baked goods soft for longer, they (along with sugar) are also more
likely to result in mold if not eaten quickly enough, especially in a humid
environment.
Back in the age of sail, various methods were devised for
preserving food. One of the more difficult items to make last for long was
bread, which was referred to as "soft tack" to differentiate it from "hard tack", a tooth-breakingly tough addition to issued rations.
Hard Tack
A simple combination of flour, water, and salt, hard tack
got its long shelf life from being baked twice to drive as much of
the water as possible out of the dough.
Hard Tack
Ingredients
2 Cups All Purpose Flour
3/4 Cup Water
1 1/2 Teaspoons Salt
Recipe
Preheat oven to 375 ° F.
Combine the flour, water and salt and mix well.
After mixing, the dough should be slightly dry and not sticky.
If it is too sticky, add small amounts of flour until the dough holds together,
but is still dryer than traditional dough.
On a floured work surface, roll out the dough to a thickness
of approximately 1/2 inch.
Cut the dough into 3" squares.
Poke holes in the dough with a fork. Make sure the holes go
all the way through. This helps prevents the biscuits from puffing up while
baking.
Place the hardtack biscuits on a parchment paper lined baking
sheet.
Bake for 30 minutes.
Remove the biscuits from the oven, allow to cool for a few
minutes, then flip and bake for another 30 minutes.
When done, place the hardtack biscuits on a cooling rack.
Once they are completely cooled, store in an airtight container.
Biscotti
Another twice-baked item that is much more palatable, biscotti is less likely to go bad than other baked desserts. This is partially
due to the two trips through the oven, and partially due to this delicious treat being eaten quickly.
Form dough into two logs on a greased or parchment paper
lined cookie sheet. 1" high by 1 ½" wide. For a better finish, wet
your hands and pat the top and sides of the dough.
Brush the logs with egg wash and bake for 20-22 minutes.
Remove from the oven and let the logs cool for two minutes.
Cut the logs diagonally into slices 1" thick.
Lay the slices on their sides, and re-bake at the same
temperature for 15 minutes.
This is a basic biscotti recipe; there are many optional
ingredients, such as dried fruits, nuts, and spices, like cinnamon or ginger. Biscotti are also frequently dipped or coated in chocolate.
I meant to get this post out last week, but life intervened. However, while it's too late for Hanukkah this year, hopefully our readers can take part in the tradition of eating fried foods at this time next year.
One of the main elements of Hanukkah is the miracle of the oil: only one day's supply was available, yet it burned for eight days. In recognition of this, foods fried in oil are common in Jewish homes during the holiday.
Potato Latkes Diverging from that tradition in the interests of health, these latkes are baked in the oven instead of fried in oil. We've found it best to use a smooth cooking sheet, not grooved, as the additional surface contact seems to help the latkes hold together.
Ingredients
4 large potatoes (about 10 oz each)
1/2 small chopped onion
1 egg or 1/4 Cup egg substitute
1/4 Cup matzo meal
Minced garlic to taste (optional)
1 tsp salt
1/4 tsp black pepper
Cooking spray
Directions
In a large bowl, combine egg (or egg substitute), matzo meal, onion, garlic (optional), salt and pepper.
Grate the potatoes. Squeeze out any excess moisture. Combine with the egg mixture. (Note: Do not grate potatoes ahead of time.)
Pre-heat oven to 400°F. Coat baking sheet with cooking spray. Place twelve 1/4 cups of latke mixture on sheet and flatten; coat with cooking spray. Bake until pancakes are crisp, 30 minutes, turning over after 15 minutes.
Serve with sour cream, apple sauce, or try some with each.
Sufganyot
These little jelly doughnuts take some effort, but they are totally worth it and make for a special treat. Don't sprinkle the powdered sugar on them until just before serving, though, or it will be absorbed by the doughnut and disappear.
Ingredients
2 cups all-purpose flour, plus more for dusting the baking sheet and rolling out the dough
1/4 cup granulated sugar
1 (1/4-ounce) packet active dry yeast (2 1/4 teaspoons)
1/2 teaspoon fine salt
2 large egg yolks
3/4 cup warm whole milk (105°F to 115°F)
2 tablespoons unsalted butter (1/4 stick), at room temperature
6 cups (1 1/2 quarts) vegetable or canola oil, for frying, plus more for coating the bowl
2/3 cup smooth jam or jelly
Powdered sugar, for dusting
Special Equipment
2-inch round cutter
If none are available, a drinking glass of the same size can be used
a candy/fat thermometer
a 12- to 18-inch pastry bag fitted with a 1/4-inch round tip to fill the donuts.
Instructions
Place the flour, sugar, yeast, and salt in the bowl of a stand mixer and whisk to combine. Add the yolks and milk and mix, using the hook attachment, on low speed until a shaggy dough forms (about 1 minute). Add the butter, increase the speed to medium, and mix until the dough is smooth, shiny, and elastic, about 5 minutes.
Coat a large bowl with oil. Form the dough into a ball, place in the bowl, and turn to coat in the oil. Cover with plastic wrap or a damp towel and let rise in a warm place until doubled in size (about 1 to 1 1/2 hours).
Lightly flour a baking sheet; set aside. Punch down the dough, transfer to a lightly floured work surface, and roll until about 1/4 inch thick. Using a 2-inch round cutter, stamp out as many dough rounds as possible and place on the prepared baking sheet about 1/2 inch apart. Gather the dough scraps into a ball and roll out again, stamping rounds until you have 30 total on the baking sheet. Cover loosely with plastic wrap or a damp towel. Let rise in a warm place until puffy and about 1/2 inch thick, about 30 minutes.
Place the vegetable or canola oil in a Dutch oven or a large, heavy-bottomed pot and set over medium heat until the temperature reaches 350°F on a candy/fat thermometer. Meanwhile, line a second baking sheet with paper towels and place a wire rack over the paper towels; set aside. Place the jam or jelly in a piping bag fitted with a 1/4-inch round tip; set aside.
Using a flat spatula carefully transfer the dough rounds, one at a time, into the oil. Fry about 6 at a time, leaving at least 1 inch of space in between and keeping the oil temperature at 350°F. Adjust the stove’s heat as necessary to maintain a constant temperature. Fry until the bottoms are golden brown (about 1 1/2 minutes). Carefully flip with a fork and fry until the second side is golden brown (about 1 1/2 minutes more.) If air bubbles appear in the donuts, pierce with the tip of a paring knife. Remove with a slotted spoon to the wire rack. Repeat with the remaining dough rounds.
When the donuts are cool enough to handle, use a paring knife to puncture the side of each to form a pocket in the center. Place the tip of the piping bag into the pocket and pipe about 1 teaspoon of jam or jelly inside. Dust with powdered sugar before serving.
These treats aren't restricted just to Hanukkah; they can be made any time of year to add a little brightness when needed.
For our American readers, this Thursday is Thanksgiving and I hope that we all have much for which to be thankful. At our house, among the usual blessings of
power, clean water, and plenty of food, the nearby wildfire has been
extinguished... again. Yes, after it was put out the first time, it reignited. With
that worry gone for now, we can focus on Thanksgiving Dinner Prep.
A major part of the Thanksgiving tradition is lots of
food. While many families have their own favorite items, there are certain
standards that are more common. The following is a by no means exhaustive list of some of
the items that can be found on the Thanksgiving dinner table.
Main Dishes
Turkey is the traditional cornerstone dish for Thanksgiving.
When choosing size, a good estimation is approximately half a pound per person
as a minimum, depending on how much you like leftovers. Butterball has a nifty
turkey and stuffing calculator on their website.
Since turkey is generally sold frozen, it's recommended to start thawing the turkey a day or more ahead of time. While the USDA suggests three ways (refrigerator, cold water, and microwave), other sources only list the first two. The amount of time required for thawing will depend on the method used and the size of the turkey.
When cooking a turkey, a good rule of thumb is 13 minutes per pound at 350° F for unstuffed (about 3 hours for a 12 to 14 pound turkey), or 15 minutes per pound for a stuffed turkey. We layer bacon across the top of ours, because bacon makes everything better.
Turkey ready to go into the oven
Ham is another traditional Thanksgiving food and can be
prepared many ways. Pre-cooked spiral cut hams seem to be the most common these
days, and they need only to be heated before serving.
Beef Brisket is a perennial favorite at any time, and has
become more popular at Thanksgiving in recent years. There are a near infinite
number of ways to prepare this dish.
Sides
As regular readers know, I like to bake. For Thanksgiving, I
usually make one of my favorites, potato rolls are one of my favorites. This is the recipe I
use.
Potato Rolls
Ingredients
1 cup lukewarm potato water*
1 large egg
2 teaspoons instant yeast
3 to 3 1/4 cups all-purpose Flour
1 1/4 teaspoons salt
3 tablespoons sugar
1/4 cup (4 tablespoons) unsalted butter, very soft
1/4 cup nonfat dry milk
*Water in which you've boiled potatoes. If you don't have
potato water, use a scant cup water plus 1/4 cup dried potato flakes.
Directions
Whisk together the yeast, egg and potato water.
Whisk together the remaining dry ingredients, stirring
everything together as best you can. Add the soft butter.
Mix and knead everything together until you've made a smooth
dough. If you're kneading in a stand mixer, it should take 5 to 7 minutes at
second speed, and the dough should barely clean the sides of the bowl, perhaps
sticking a bit at the bottom.
Place the dough in a lightly greased bowl. Cover the bowl,
and allow the dough to rise, at room temperature, until it's nearly doubled in
bulk. This is usually about an hour, but the rise of yeast bread is always an estimation. It may take longer, so be sure to give it enough time to become quite
puffy.
While the dough is rising, lightly grease a 9" x
13" pan.
Gently deflate the dough, and transfer it to a lightly
greased work surface. Divide it into 16 pieces.
Shape each piece into a rough ball by pulling the dough into
a very small knot at the bottom, then rolling it under the palm of your hand
into a smooth ball.
Place rolls in the 9" x 13" pan, spacing them
evenly; don't worry if they touch one another.
Cover the pan with lightly greased plastic wrap, and allow
the rolls to rise till they're very puffy, and have reached out and touched one
another, about 1 hour. While the rolls are rising, preheat the oven to 350°F.
Bake the rolls until they're a deep golden brown on top, and
lighter on the sides, 20 to 25 minutes.
Remove the rolls from the oven, and after 2 or 3 minutes,
carefully transfer them to a rack. They'll be hot and delicate, so be careful.
Potato Rolls
Mashed Potatoes are another staple. While they can be made with potato flakes or another shelf stable option, fresh is better. My Wife makes ours with sour cream instead of milk. We also occasionally add roasted garlic.
Glazed Carrots were a holiday tradition in my family,
and I still make them every year. Boil the carrots until they just start to get
soft, drain the water and add butter and brown sugar to the still warm pot.
Stir until the butter melts and the carrots are evenly coated.
Stuffing and Dressing can cause serious arguments. In
general, stuffing is cooked inside the bird, while dressing is cooked on the stovetop
or in a casserole. This is another dish with a near-infinite variety.
Dessert
Pumpkin Cheesecake
My Wife made this for the first time shortly after we
started dating, and it has been mandatory ever since. This needs to chill overnight, so plan accordingly.
Ingredients
Crust
9 whole graham crackers (about 4 ounces), broken
1/4 cup sugar
1 teaspoon ground cinnamon
1/4 cup (1/2 stick) butter, melted
Filling
4 8-ounce packages cream cheese, room temperature
1 1/2 cups sugar
3 large eggs
1 15-ounce can pure pumpkin
1 cup whipping cream
2 teaspoons vanilla extract
2 teaspoons ground cinnamon
1 teaspoon ground ginger
1/2 teaspoon ground nutmeg
1/2 teaspoon ground allspice
1/4 teaspoon ground cloves
Recipe
For crust:
Position rack in center of oven and preheat to 350° F.
Wrap a double layer of heavy-duty foil around outside of
10-inch diameter springform pan.
Combine graham crackers, sugar, and cinnamon in processor.
Blend until graham crackers are very finely ground. Drizzle butter over. Using
on/off turns, blend until crumbs begin to stick together. Press crumbs onto
bottom (not sides) of springform pan.
Bake until crust is slightly golden, about 10 minutes.
Transfer to rack and cool while preparing filling. Maintain
oven temperature.
For filling:
Using electric mixer, beat cream cheese and sugar in large
bowl until smooth and fluffy.
Beat in eggs 1 at a time.
Add pumpkin and remaining ingredients.
Beat just until blended.
Pour filling into prepared crust.
Place springform pan in large roasting pan.
Add enough water to come halfway up sides of springform pan.
Bake cheesecake until slightly puffed and softly set and top
is golden, about 1.5 hours. Transfer springform pan to rack and cool. Cover
and refrigerate cake overnight.
Using knife, cut around sides of pan to loosen cake. Release
pan sides. Cut cheesecake into wedges and serve.
There are many other foods that may be found on the Thanksgiving
dinner table, such as cranberry sauce, either home-made or canned, creamed
onions, and sweet potatoes. Feel free to comment with some of your favorites.
To all our readers, have a safe and happy Thanksgiving.
This recipe is a staple from my childhood. I generally make this soup for my family on Sunday afternoons, as it’s quick to put together and makes a filling meal. It also makes a pretty decent “refrigerator magnet” for any other leftover proteins you may have; just chop them up and add to the soup (although I’ve never tried leftover fish, the beef, pork, and chicken have all been successes).
Ingredients
One 14 oz or larger smoked sausage (Kielbasa works fine)
One can stewed tomatoes
One can each: pinto beans, black beans, kidney beans, great northern beans, black-eyed peas (technically a bean, despite the name), and whatever else you have on hand
One quart of savory fluid (stock, broth, etc)
Seasonings (to taste)
Directions
Slice up the sausage into bite-size rounds and add to pot.
Dump stewed tomatoes into pot.
Rinse the beans before putting into the pot. This will remove a large amount of the specific carbohydrate that ferments in your gut to give you gas.
Cover the bean/sausage/tomato mix with the savory fluid, and heat until it boils.
The notes are after the recipe, because we have manners
This recipe is much like “The Pirate Code” in that it’s “more like guidelines, really.”
My wife and I have made this recipe with beans we pressure canned ourselves. Even with Aldi generic canned beans coming in at under a dollar per can, it’s hard to beat the economy of canning your own legumes.
What do you do if you can’t get sausage? This is where tinned meats, or pressure canned meats, come into play. The majority of the flavor from the sausage is a “smoky” note, but that’s not important from a nutrition standpoint. You can add back in a lot of “umami” flavor with soy sauce (which is shelf stable almost indefinitely) or even pressure can sausage ahead of time.
If you keep Kosher or Halal, then obviously your meat options are more limited, but tinned chicken seems to work fine. If you are vegetarian, then there are all sorts of shelf stable “textured vegetable protein” soy options to mix in.
The best part about this recipe is that it is cheap, quick, and filling, but whether or not it ends up “delicious” really depends on how you season it. I like a few slices of hot pepper (or a few dabs of pepper sauce) to liven it up, along with a few bay leaves, basil, and black pepper for more depth. Sometimes I’ll use “Italian stewed tomatoes” with the basil and oregano already mixed in. One time I used miso soup as the savory liquid, and it worked well enough that my younger son asked for that variation specifically.
There is one trick I’ve learned for rinsing the beans, and that is to use a cheap set of kitchen strainers. I bought mine from Ikea, but any set will do. If you don’t want to waste the water rinsing beans, justdump the contents of each can into the pot; your gut flora will eventually adapt to the non-digestible carbohydrates and the flatulence will diminish quite a bit.
So if you are ever in a survival situation where water is at a premium you can, as Benjamin Franklin once opined, “Fart proudly.”
In previous posts I've talked about Crock Pots (aka Slow
Cookers), Instant Pots, soups and stews, chili, lasagna, shepherd's pie, and
other dishes that can be made using a single container, maybe two at most. One-pot meals used to be a staple of world cuisine, and in
many places for many people they still are, even though the popularity of separate
recipe categories for main dishes and sides have taken over most cookbooks.
Many years ago, when I still went camping, the only cooking
pot I brought along was a steel wok. In that I could make nearly anything over
the campfire, from hamburgers to stew to biscuits, though generally not all
at the same time. It was extremely versatile and allowed me to travel lighter while
still eating well. On trail drives, the cast iron Dutch oven served (and still serves) a similar purpose, allowing simple and hearty meals to be made with
little need to carry a variety of cookware in the limited space of a chuck
wagon. With some thought and preparation, a frying pan or skillet can serve
the same purpose in the prepper's kitchen.
One dish I used to make in my bachelor days was also both simple and hearty, and only required the aforementioned frying pan. I've dredged the recipe up from ancient, long-term memory, so quantities are not exact.
Shredded pork and onions in a cast iron frying pan
Bachelor Chicken
Ingredients
Two boneless skinless chicken breasts
Half a bag (6-8oz) Stuffing mix (I prefer cornbread)
Half a bag (6-8oz) Frozen vegetables
1 can Cream of chicken soup (or 1 ¼ cup homemade broth &
¼ cup milk)
2 Tbsp Olive Oil
Salt & pepper (to taste)
Crushed garlic (to taste)
Recipe
In a frying pan, over medium heat, add olive oil and brown
the chicken breasts on both sides (do not cook completely).
Reduce heat and add vegetables around the chicken breast.
Add salt, pepper, and garlic on top.
Use stuffing to make a layer over everything.
Pour the soup over the stuffing.
Cover and cook on low heat until the chicken is completely
done, about 20 minutes.
Serve hot and enjoy in front of the TV. Put the leftovers
away for the next night, or share with a friend.
For something with a more Mediterranean flavor, this dish is
one My Wife has perfected over the years.
Chicken With Onions
Ingredients
1 cup olive oil
2-3 medium onions (sliced)
3-4 lbs chicken (we generally use bone in thighs)
¼ cup white vinegar
10 whole peppercorns (½ tsp pepper)
10 whole allspice (½ tsp ground allspice)
2-3 bay leaves
½ cup sliced black olives
Crushed garlic, to taste
Salt and pepper to taste
Recipe
In a large skillet, heat ¼ cup of olive oil over medium heat
and add the onions.
Sautee until soft.
Add the chicken and cook until browned.
Mix the remaining olive oil and vinegar, add to the skillet
with the remaining ingredients.
Add just enough water to cover, and cook until chicken is
done. Approximately 30 minutes.
Serve as is or over rice, with noodles, biscuits, etc.
For our readers who are more accomplished cooks, it doesn't
require too much creativity to come up with some interesting and tasty
combinations that can be prepared in a similar manner. There are many sources of one-pot meal recipes both online
and in print.
With the weather starting to get colder in much of the
United States, the desire for comfort food grows. In previous Prepper's posts I've talked about soups and stews,chili, and most recently lasagna.
All these dishes are distinct, yet they also all have in
common a tendency to be hearty, possibly even heavy; are generally served hot; and can provide us with plentiful leftovers. The recipe for this post is no exception.
Shepherd's Pie is one
of my favorite fall and winter comfort food, although since my version uses beef
instead of lamb, it's really more of a Stockman's or Cottage Pie. Any meat or meat substitute can be used, however.
As this is a family recipe, I don't really have precise
quantities. I tend to make it to fit the baking dish, which is usually either a glass
8x8 casserole dish, or the same deep 9 x 13 metal dish I use for lasagna.
Shepherd's Pie
Filling Ingredients
Ground beef (3-5 lbs)
2-3 6-oz cans Tomato paste
1-2 lbs Frozen or otherwise preserved vegetables (peas,
carrots, corn, green beans, etc)
Topping Ingredients
3-5 Potatoes
4-8 oz Butter
1-2 cups Milk and/or sour cream (measurement is total)
Salt & pepper to taste
Recipe
Brown and drain the ground beef.
Mix in the tomato paste and frozen vegetables.
Spray an oven safe baking dish with non-stick spray and pour
in the filling.
Boil the potatoes until soft then drain.
Mash and add butter, milk (and/or sour cream), and salt and
pepper to taste.
Cover the top of the filling with an even layer of potatoes.
Bake at 350° F for 45 minutes, or until the potatoes are
nicely browned, and the filling is bubbling up around the edges.
Erin Palette is a participant in the Amazon Services LLC Associates Program, an affiliate advertising program designed to provide a means for sites to earn advertising fees by advertising and linking to amazon.com.