Last month, we received a request for an article about prepping long-term food for people with Avoidant/Restrictive Food Intake Disorder (ARFID). While I don't have any experience with ARFID, I'm neurodivergent and have neurodivergent children, so that means I have some experience with pickier than normal eaters. This article will cover a few options for dealing with the possibility of going through a survival situation or disaster response with a child who is a picky eater and may be neurodivergent. These recommendations will change based on the age of the person.
Children Under Five
At this age, children really do have a less developed digestive tract and weaker stomach acid, so I recommend avoiding raw vegetables (they're great for fiber in adults, but they can really irritate a young child’s digestive tract). Preserved fruits are generally an easy source of calories and vitamins, and fatty tinned meats like “Vienna Sausages” are enough to meet their protein requirements. It isn’t a healthy diet in the long term, but in a survival situation the goal is to last long enough to get back to normal. Sweet snacks like chewy granola bars are generally a good option here as well, and the “mac & cheese” from a box is often well tolerated.
Tips for this age range: Add nutrition to foods that are easily digested, such as a half cup of dehydrated milk to mashed potatoes to add protein and calcium, or a scoop of unflavored collagen protein powder to the boxed mac & cheese. This doesn’t change the taste much, and helps round out the nutrition intake.
Children Five to Eight
At this age, texture is more of an issue than flavor, and this is “green vegetables” more than anything else. Chop the vegetables finely and mix them in with a starch (potatoes or rice in my house, but a pasta based casserole works too). Your goal is to get them to have enough calories and nutrients to survive.
Tips for young children: Have plenty of a sauce on hand that they like. At this age, a lot of children really use food as a delivery method for ketchup.
Children Nine to Twelve
This age group has food aversions based mainly on taste or texture. If all Billy or Suzy will eat from what you’ve cooked is mashed potatoes or white rice, that's enough to get them through a few weeks without adverse effects. The impact of malnutrition from a month of potatoes (which you can fortify with powdered milk or protein) is negligible, and you should have multi-vitamins in your preps anyways. Children at this age can be willful, so letting them skip a meal until they are hungry enough to eat is just fine.
Tips for pre-teens: Involve them in food prep with appropriate tasks such as peeling vegetables, opening cans or jars, building a cooking fire. Involving them in the prep makes it easier to involve them in eating together.
Teenagers
Let them choose whether or not they eat what's available. Acknowledge their sovereignty over their body, but limited choices are limited choices, so let them choose. When they're hungry enough to eat, whatever's available is their choice.
Note: If it does get to the point where they are literally dying (which takes weeks if they were nominally healthy before the disaster), then the survival situation has gone on long enough where force feeding options are on the table. How to force feed a person of normal intelligence who is choosing to starve themselves to death is a very low probability, so I won't go into details here.
Tips for teenagers, even neuro-divergent teens:
They're much more likely to eat food they prepared (or helped prepare) from start to finish. It’s the same food you make, but because they had a hand in making it they are more willing to try it.
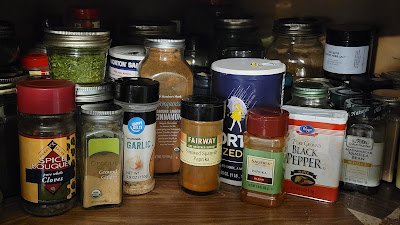
Herbs and spices are cheap. Letting your teens have access to them to change the flavor profile of food is generally a good thing.
In Summary
Involve your picky eaters in food preparation at every age level. This will build them into competent people who know how to cook when they leave home and start their adult life.
Have dietary supplements, multivitamins and unflavored protein powder on hand for rounding out nutrition requirements.
It's okay to let your picky eater skip a meal or two, as hunger is the best spice.
If you've spent any amount of time baking bread, you have likely read or heard about sourdough bread and the substance known as a "starter". So what is a sourdough starter?
Put simply, it's a colony of wild yeast and bacteria raised in a medium of flour and water, and any bread product leavened with this mixture (as opposed to commercial yeast) can be considered a sourdough bread.
Why is this relevant for preppers?
The biggest reason is that bread is a staple in most cultures around the world, and yeast is a requirement for a majority of these breads. As we saw in the 2020 COVID-19 Pandemic, disruptions to the labor force and supply chain, plus a massive interest in hobby baking, meant that commercial yeast vanished from store shelves. There's no reason why this might not happen again.
As you'll see in this article, making sourdough is very easy. Even if you decide that keeping a starter in your kitchen isn't for you, after you've learned the techniques I'm going to teach there's nothing stopping you from doing it in the future if you ever change your mind.
One component of the starter culture is yeast, but the other is the bacteria Lactobacilluswhich consumes the starches in your flour and produces carbon dioxide (which is our leavening gas) and lactic acid. The acidity of this starter is the "sour" in sourdough, but this acidity also has anti-fungal properties. This means that products leavened with sourdough starter will be less likely to grow mold than products made with commercial yeast.
A standard loaf of bread has just four ingredients: flour, water, salt, and yeast. Of all those ingredients, yeast has the shortest shelf-life, and even frozen commercial yeast will expire and die.
Eating bread baked at home is going to be better for your health than eating store-bought bread, because there will be no need for the additives and preservatives that keep bread soft and fresh.
Hopefully I have your interest. Now let's get to work making a starter.
For reference, I relied heavily on this video and this website.
Growing a Sourdough Starter
First, you'll need a container. I panic-bought a bunch of commercial yeast during the pandemic and I was worried it would die, so I ended up spending a lot of time talking about sourdough before I actually started making it.
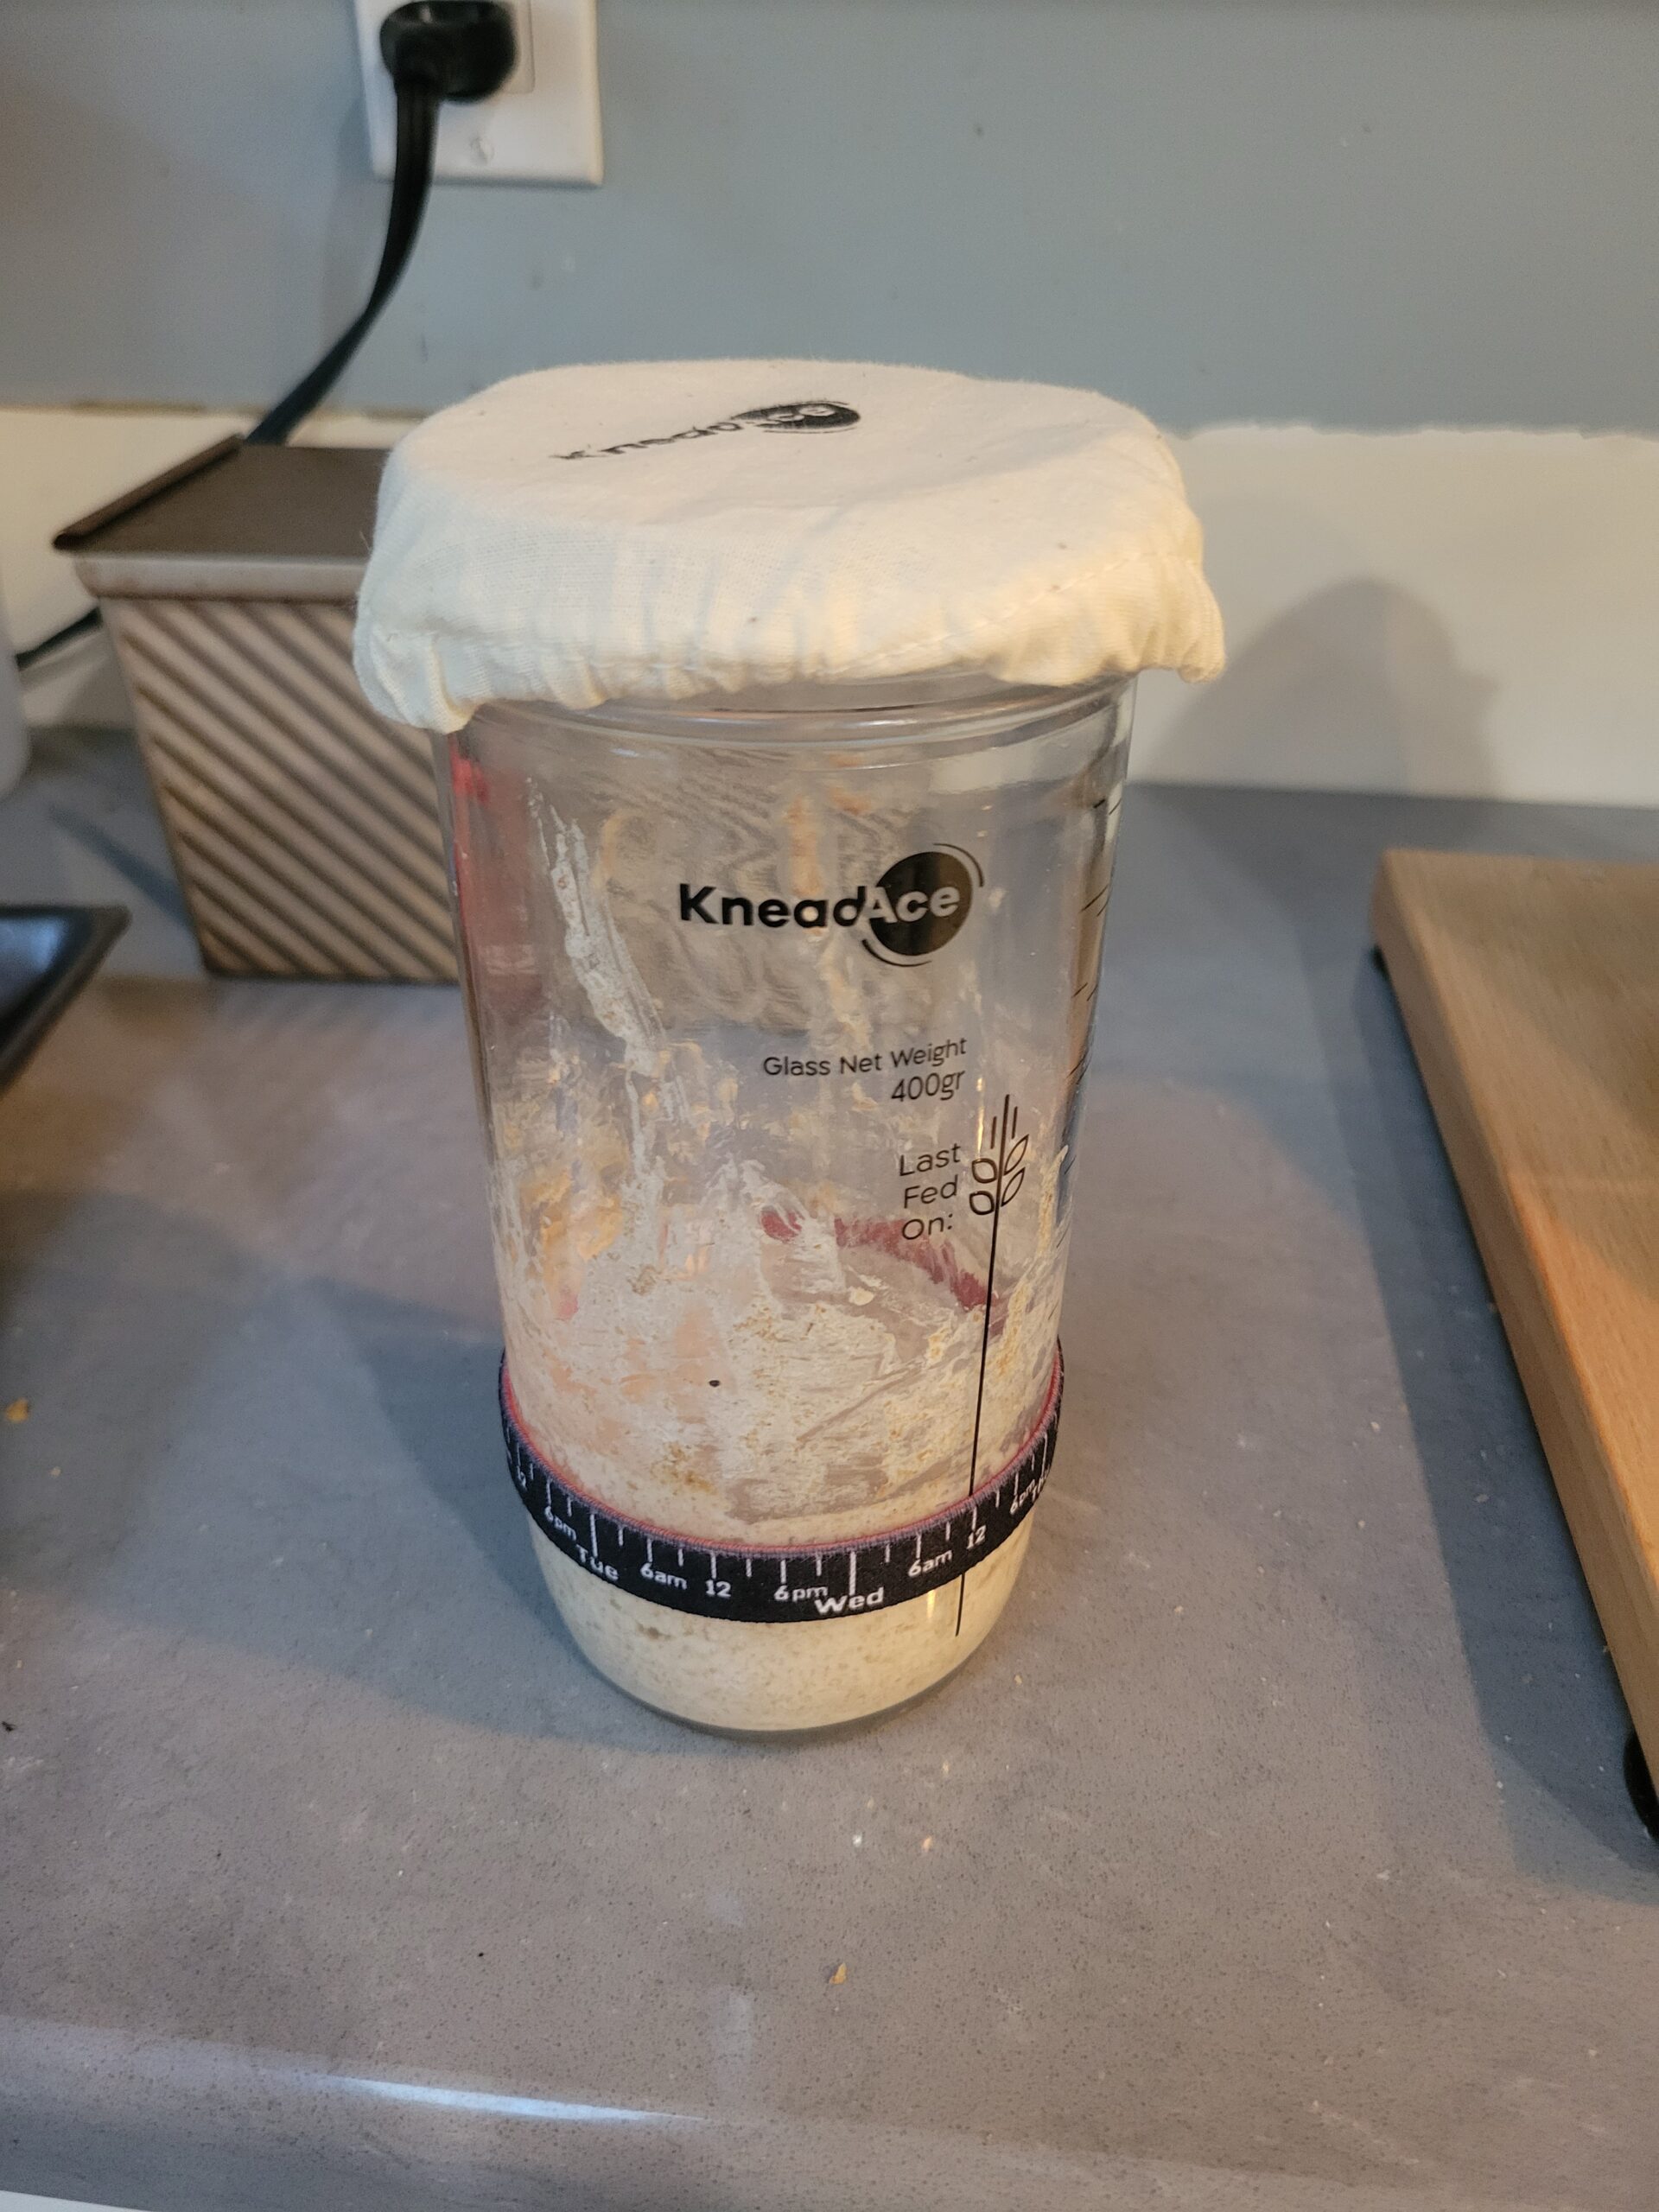
Because of that, my wife bought me this kit, which is nice but honestly not necessary. You'll be fine with any glass container that has a wide mouth and relatively straight sides, so a drinking glass, a pickle or tomato sauce jar, a canning jar, etc. and a paper towel, a piece of cloth or a clean rag secured with a rubber band or twine is just fine. (Also, remember to save the cap if you re-purpose a jar. I'll explain why later.)
After you thoroughly clean and rinse your container, add about two tablespoons of flour and two tablespoons of water to the bottom of the jar and mix them well. For this initial phase I suggest that you use water that's been de-chlorinated (well water, bottled water, or water that has been boiled but then allowed to cool to room temperature) and whole wheat flour. This will likely work with tap water and AP flour, but whole wheat and chlorine-free water will give the wild microbes a bit of an advantage to start out.
Keep the jar someplace warm but sheltered from sunlight. If you have a place where you keep your fresh fruits or vegetables on the counter, that would be ideal. Fruits and vegetables will also have wild yeast growing on them, so in theory the air around these will have more spores and will foster growth.
After 24 hours, give it a good mix and scoop out about half the material (about 1 tablespoon) and replace it with an additional tablespoon of fresh flour and water. Give it another good mix and scrape down the sides as best you can. The fresh flour and water will give the microbes fresh nutrients to grow, and by removing half the material you're giving better odds that the microbes you end up growing will be the right kind. The scraping isn't necessary for the starter's survival, but once flour and water dry they turns into library paste and will make a mess and make it harder to see the progress, so this is more of a quality of life kind of thing.
Every day for a week you'll want to do the same thing: mix, discard, add, mix, scrape. By about day three or four you'll start seeing bubbles and activity. At this point you should start smelling the mixture before you discard half.
You see, we co-evolved with these microbes, and the waste products of these critters (lactic acid for the Lactobacillus and ethanol for the yeast) are not only chemicals that are safe for humans to consume, they are also lethal to many bacteria and fungi that might make us sick. Because of this you will likely start noticing a pleasant smell coming from the mixture, and what it smells like will vary from house to house and may change over time.
When my starter first started, the smell reminded me of stale beer. This summer, it took on a scent more like overripe fruit. Now that the weather has gone cold, the smell reminds me more of a really nice aged cheddar. My buddy who lives in the next town has a starter that smells more like an aged Parmesan cheese.
My point is that the smells coming from this should be invoking scents that remind you of foods or drinks, not of unpleasant objects like a wet dog, dirty feet, or dirty laundry. In the event that your mixture starts smelling foul, don't give up yet. Keep dividing and feeding it for another week and see if things improve, as there's a good chance the yeast and lactobacilli will crowd out whatever nasty critters have taken up residence.
After your first week you should start seeing noticeable activity in your jar, and you can start feeding it twice a day. Once a starter has been sitting for a few hours, it starts developing a foamy top layer with a layer of liquid over the less active bottom layer.
I like to think of that line as a "fuel gauge". When a starter is freshly fed that line of liquid will be evenly distributed, but after a while a well-fed starter will be mostly foam with a small line of liquid near the bottom. When you see this line, stir it up so that the top doesn't dry out and form a crust and see where the next line forms.
If a head doesn't form and the liquid rises to the top, then the bulk of the starches have been consumed and the starter is ready to be fed again.
After about 10-14 days your starter should be very active when fed and have a pleasant smell. Once this happens you can start maintaining it, and a well-maintained starter should rarely need to be discarded.
Maintaining Established Starters Now you can start gaining volume if you need it; just remember to feed at least roughly half the volume in the jar of flour and water. You can also switch to tap water and AP flour if you desire (I use tap water, but I still use whole wheat starter because I feel it's better for the microbes and a small amount of whole wheat flour makes for a better bread).
Always remember to leave plenty of space at the top of the jar, because it will expand as the microbes consume the starches!
If you have a good volume of starter and you think it'll be a few days before you need it, you can cover it with the solid lid and put it in the fridge for up to a week.
Using Your Starter The easiest answer is to look up sourdough bread recipes and follow those, but you can also convert existing recipes to sourdough by adding a volume of starter instead of the yeast, and then subtracting that volume of flour and water equivalent to that volume of starter. The standard rule of thumb is "1 cup of starter is equal to one packet of yeast (which is a little more than 2 teaspoons of active dry yeast) then subtract one cup of flour, and one cup of water."
This conversion will require longer rise times because wild yeast isn't a race horse bred for speed like commercial yeast is. Because of this, I prefer using less yeast and taking a longer time.
Mix well to combine, then give the dough at least 8 hours to rise.
Once risen, pour into a greased loaf pan and allow to proof until it's close to the top of your pan (note that the rise time won't be too different between starter and conventional yeast, but the proof time will be at doubled at the very least, depending on the air temperature).
Place proofed dough in 450 degree oven for 30 mins. Then take loaf out of the pan and allow it to cool on a rack before cutting.
Sourdough Crackers
Since these crackers use no oil, and the sourdough starter has lowered the PH of the cracker they will keep for a very long time in an airtight container.
1/4 cup sourdough starter
2 cups AP flour
1 tsp salt
2/3 cup cold water
Combine all ingredients in a bowl. Dough should be soft but not sticky. Let rise at least 8 hours.
Give dough a quick knead until smooth, then turn out onto a floured surface (divide dough into manageable pieces) and roll out into a rectangle approximately 1/8".
Salt the surface and roll the salt in, adding other seeds or spices if desired.
Take a fork and prick the surface evenly. If you skip this step the crackers will puff up like oyster crackers, which isn't a bad thing.
Cut to size using a pizza cutter or a sharp knife.
Place pieces on a baking sheet, making sure they have a little space between each cracker, and put into a 400 degree oven for about 10-15 mins. Watch closely because once the crackers start to lightly toast they are done, but they will go from toasted to burnt very quickly.
You can double this recipe just by doubling the flour, water, and salt, and keeping the same amount of starter.
Tips for Managing Sourdough
If you happen to use up all your starter while baking, simply add more flour and water to the dirty container. There are enough microbes remaining to completely revive the starter.
Once your starter is established, I recommend freezing at least a cup's worth. In the freezer, a starter will last at least one year with no maintenance. To use simply thaw it, feed it as soon as it becomes liquid, and it's ready to use as soon as it's frothy and active again.
To make a large batch of starter you can just put a small amount of starter in a bowl and simply put equal parts flour and water in and give it a good stir. It'll be all starter by the next day.
I hope you found this guide useful and can see the advantages of knowing how to make and use sourdough starter as a prepper resource!
Let me preface this post by unequivocally stating that I love
cheese. Perhaps not every single type of cheese, but the vast majority of them. (Due to
a mold allergy I pay a price for enjoying some varieties, but sometimes it's worth it.)
One of the earliest methods of preserving dairy products was
through cheese making. In fact, cheese production predates recorded history; every region where people lived seems to have come up with their own version of
preserving milk, which brings us to the thousands of varieties of cheese
available today.
Harder cheeses have a longer shelf life than softer cheeses, though adding a wax or other protective coating (called a rind) can extend storage
time, potentially by years. Some cheeses even use an outer layer of mold as
their protective rind. Canned cheeses with extremely long shelf lives are also
available on the retail market, made both domestically and from
international sources.
Many cheeses are quite plain, but others contain nuts, dried
fruits, herbs, and spices. There are also cheeses that have mold layered
throughout for added flavor.
While cheese is readily available in the refrigerated
section of the local grocery store, this may not always be the case. With a
source of milk (whether cow, sheep, goat, or many other mammals) and a few
other ingredients, making a simple cheese at home doesn't have to be complicated.
Everyone knows about chocolate, one of the most popular edibles in the world. Most people like it, many love it, some can't eat it for health reasons, and a few simply don't enjoy the flavor. As a bonus, by the time this post is published Halloween will have just ended, which means all sorts of chocolate will be on sale.
History The origin of chocolate comes from the region known as Mesoamerica, an area that ranges from central Mexico down to northern Costa Rica, where the cacao tree is native. It was harvested and processed primarily for use as a beverage by native tribes, possibly fermented in some manner.
The first European to encounter cacao was most likely Christopher Columbus, though it didn't make much impact on his return. It wasn't until Spanish interaction with the Aztecs by Hernan Cortez that chocolate became more known in Europe, though at first only as a medical treatment of abdominal and digestive issues, most likely due to its extreme bitterness.
It took a few hundred years to develop industrial processes to make chocolate both palatable and inexpensive enough for mass marketing. Today, of course, chocolate is available in a bewildering array of flavors and mixes, usually at a fairly reasonable price. It has many types including baking, dark, milk, and modeling, with these types coming in both solid and powdered forms for different uses. (There's also white chocolate, but as that's just sugar lying about being chocolate, so we won't discuss it here.)
A selection of the author's chocolate stash
Chocolate can pack a lot of energy in a fairly small package, especially if mixed with nuts, seeds and dried fruits as in trail mix. This makes it an excellent choice for outdoor activities such as hiking. During World War II the United States Government, in cooperation with various American chocolate companies, developed the D-Ration, a moderately palatable 4oz bar designed for use in emergencies. These came in packages of three bars of roughly 600 calories each to make a soldier's, marine's, or airman's daily ration in extreme situations.
Storage
There are three major concerns when it comes to chocolate for emergency use: melting, going rancid, and eating it all before an emergency occurs. Proper packaging and storage can help with the first two, no power in the universe has been found to prevent the third.
Chocolate is best stored in a cool, dry, dark place, ideally between 65 and 70 degrees Fahrenheit, and should be kept in an airtight container or packaging, because chocolate can easily pick up the odors of surrounding foods. When stored in this manner, it can last quite a while: milk chocolate can stay fresh for over a year, dark chocolate for nearly two years, and filled chocolates (i.e. chocolates with a non-chocolate filling) for around three to four months. If stored in the freezer, this duration can be increased, perhaps even doubled. Of course, this assumes the chocolates don't get eaten before then.
There are two things to keep in mind as chocolate gets old: texture and bloom.
Texture: As chocolate ages, some of the more liquid volatiles will escape, causing the chocolate to have a more crumbly or grainy texture. This has little to no effect on the nutritive or energy value, just the mouthfeel.
Bloom is a white coating that may appear on the surface of chocolate following prolonged storage. This is due to either fat or sugar migrating to the surface as the chocolate ages.
Neither of these issues are anything to be concerned about, but should be considered as part of the storage and rotation of supplies.
Chocolate can be enjoyed in many ways: as an ingredient in baked goods, in beverages, confectionary of various types, as an element of trail mix, and, of course, as a simple chocolate bar for a treat... but I think we can all agree that the best chocolate is the type you get for free on Halloween and Valentine's Day, or on sale afterwards.
The dust has settled and the First 72 Hours have passed. Follow along as I build a long term plan viaPrudent Prepping.
Due to circumstances sometimes under my control and other times not, I've been absent from BCP. There are more posts in my notes and if work smooths out, I will be back to contributing regularly.
Insects as Alternative Foods
The news was recently full of reports on the World Economic Forum supporting the eating of various insect as a way to combat the supposed scarcity of food worldwide. This report is tough reading to get to the important parts, so I'm linking to an earlier article from the WEF on the topic.
(Full Disclosure: I have eaten cooked/roasted insects and found the taste... not good, but not terrible either. I've eaten things that were much worse. The grasshoppers were sort of nutty, and if you can ignore what they are, not bad. It helps to know the people who are serving, so everything is prepared properly. Beer is also recommended.)
There is an actual UN agency, the Food and Agriculture Organization, that promotes insect harvesting for food and as a cash crop. The selling of potentially crop-damaging pests as a benefit to the local people is something I never thought about.
While insects could maybe, possibly, sort-of supplement diets, I don't see how this will be normalized any time soon in the USA. Viewed globally, the eating of insects is seen as occurring in Third or Fourth World countries.
However, if a fair examination of different cuisines is made, things aren't that different in First World gourmet menus. For example...
This is the common Garden Snail, which is considered a pest here in the USA. It is an example of an invasive species brought here and allowed to ruin our environment. The snail pictured is the same type of snail native to the Mediterranean region, and is raised as a food source there.
For those interested, here is the recipe. Enjoy! Or not. You get to decide.
As you can see, there seems to be a "menu creep" where what once started out as peasant (i.e. subsistence) food made its way up the food chain and on to expensive plates. That may happen in the future with eating insects, but that will take a lot of time and a lot of work to happen here.
Recap and Takeaway
Besides the fact that multinational organizations and potentially our government want to change how we grow our food and what we eat, insects do have a place in feeding many people in the world.
As a normal part of a western diet, insects will not be added any time soon.
Knowing which insects can be eaten and those to avoid is important information to learn, especially in a wilderness survival situation.
* * *
Just a reminder: if you plan on buying anything through Amazon, please consider using our referral link. When you do, a portion of the sale comes back here to help keep this site running!
If you have comments, suggestions or corrections, please post them so we all can learn. And remember, Some Is Always Better Than None!
NOTE: All items tested were purchased by me. No products have been
loaned in exchange for a favorable review. Any items sent to me for
T&E will be listed as such. Suck it Feds.
Many of the
recipes I’ve shared in my posts involve some form of flour. At a basic level, flour is the ground product of
any of a number of grains, beans, nuts, roots, or seeds. Humans have
been grinding all sorts of plants to a fine powder for at least eight thousand
years, though there’s some evidence it may go back much earlier in our
development.
The biggest
issue with long-term storage of flour, as with so many things, is oxygen. If
the germ of the grain is left in during production of flour, the fatty acids present start
to oxidize immediately, leading to spoilage. This high
risk of spoilage led to the prevalence on the market of white wheat flour,
which is basically whole wheat flour with the germ and bran removed. In fact, most wheat
flour is processed as white flour, and then the germ is added back in after it’s
treated for preservation, producing whole wheat flour.
Currently in
the United States, the most common flour is made from wheat. Following that, corn is the next most popular
source, and even these basic categories have a number of varieties. However, almond,
various bean, buckwheat, chickpea, hazelnut, peanut, potato, rice, tapioca, and
many other flours can be found in the baking aisle of many grocery and specialty
stores.
It’s not
uncommon in the baking aisle to see packages of flour labelled all-purpose,
bread, biscuit, cake, enriched, pastry, self-rising, unbleached, and whole
wheat. These divisions are generally based on the fineness of the grind as well
as additives or supplements in the mix, though some labels are more for
advertising purposes.
A selection of flours and friends from
the author’s pantry.
The most
common uses of flour are for making things like bread, pasta, cookies, cakes,
and as additives in a wide variety of other foods. For example, when making a
roux to thicken gravy and sauces, some form of flour is essential to produce
the proper consistency. In non-food
use, when mixed with water and a little salt, flour is an essential ingredient
in papier-mâché or wallpaper paste. It can also be used to make a sort of clay
for children’s projects.
While it’s certainly possible to get un-milled grain and run it through a manual or electric mill, that’s a pretty significant investment in time and money. Most preppers are likely better off buying pre-milled flour in bulk and storing it in food-safe airtight containers with oxygen
absorbers. Larger quantities can be kept in buckets, and smaller amounts in Mylar
bags. In our house, we tend to store some flour in canning jars and zip lock bags because we have
them conveniently at hand.
While there
is some overlap between types and styles, it’s important to use the right flour
for the job. Coarseness, density, water retention and other factors will
determine how a particular flour affects a recipe. As they say, "Horses for courses."
While wandering a bunch of prepper sites I saw an ad for a book called The Lost Superfoods. The ad mentioned that it had a recipe for the emergency ration crackers used by the US government in the 1960s when they stocked the fallout shelters around the country. Since I have an interest in most things from the Cold War era, having served in the military back then, I spent the $27.00 and had a copy delivered.
This is a review, so don't expect me to copy the entire book; I'll give an overview and my opinions on the quality and quantity of information in it.
The first chapter covers the emergency rations that were stockpiled to feed people in fallout shelters in the event of a nuclear war with the USSR. This was a short-lived program, but thousands of shelters were stocked and ready. The rations were a thick cracker, sort of a hardtack crossed with a graham cracker, with hard candies to provide extra calories. Less than 1000 calories per person, per day, for two weeks was enough to keep people alive in a shelter where there was little chance of strenuous activity. All of the original rations were recalled in the 1970s, but I've seen a few examples that were not sent back and they were inedible by the 1990s; 30 years was just too long for a cracker to survive. The recipe and baking is pretty simple, because most survival foods are simple. If I get the time this fall I may test this one and see if my limited kitchen skills can pull it off.
Other chapters cover various ways to store meat and fish for long periods. Going back to the recipes used by sailors and explorers hundreds of years ago, long before refrigeration was available, the authors present each in a chapter with clear instructions and plenty of color pictures to help you get it right. (Spoiler: preserving meats uses a lot of salt.) Some of the items are a bit odd, but that makes them fit into the category of "forgotten" foods. Jerky, pemmican, biltong, home-made Spam, bully beef, potted meat, and bacalao (salted cod) are covered in sufficient detail to get you started on storing animal protein.
Canning several different things is covered fairly well, and I liked the chapter on canning butter. It's been a long time since I last used a pressure cooker, but I know several families that put up a lot of food in them every year. Fruits and vegetables are staples when canning food, and this book covers the basics. There are plenty of recipe books for canning fruits and vegetables and the information doesn't get old, so look in used book stores and garage sales for grandma's old cookbooks.
About a third of the book is general prepper knowledge, things like how to grow your own yeast, what to do with the food in your freezer if the power goes out, and how to use Mylar bags and oxygen absorbers to store food. Good general information, but only lightly related to "lost superfoods".
In my opinion, this is a good book to have on the shelf. The price isn't horrible for the amount of information presented, and the color photos and clear descriptions are rare in prepper books. You can buy the book at Amazon for $27.00 (shipping is extra).
One of the longest cultivated foods, beans have been grown and eaten
since before humans developed pottery. Beans were placed in the tombs of pharos
in ancient Egypt, and beans are still an important part of our diet today.
The name ‘bean’ (like nut) hasbeen extended from the original discoveries like broad beans, chickpeas, and
the like to cover a variety of edible pod-borne seeds. These encompass not only the
new world soybean and pea, but also some plants with only a scant resemblance
such as coffee, vanilla, and cocoa beans.
Today, a variety of beans can be purchased dry for long term
storage, but will need additional prep before eating; this can involve extended
soaking in water or cooking in a pressure cooker. Beans of different types are also available canned; while
plate-ready, store-bought beans preserved in this manner generally have a high
sodium content and frequently include additional chemicals as part of the
canning process.
A selection of beans from the author's pantry
If growing beans at home, an important detail to keep in mind
is many varieties of beans are vine-based plants and need something to climb
for optimal health and productivity. This can be as simple as a garden
stake next to the plant, or more involved items such as a trellis or fencing. This element was an integral part of the Three
Sisters method of planting which allowed the beans to use the corn stalks for
support.
As with rice and pasta, beans are a dietary staple in our home. When many types of beans are combined with rice, the result is a complete protein, which means the dish contains enough of each of the nine essential amino acids necessary as part of a healthy diet. There are a wide variety of beans on the market and even more recipes for how to prepare them: some good, some not so good, and some rather surprising.
Barbeque beans, courtesy of the author's wife
One of the dishes my wife makes in the warmer months is Barbeque Beans. It’s a very simple dish: three 12 oz cans of beans heated in a pot on the stove, then BBQ sauce added to taste and consistency. For variety, she usually uses a mix of beans; in this example, Red Kidney, Great Northern, and Black beans. On occasion, she’ll add browned ground beef to the mix and call the resulting dish “Red, White, and Moo.”
Available commercially canned, dry, or frozen, and in varieties
easily grown in a container
garden, beans are an important part of our diet and a good staple (along
with rice) in every prepper’s pantry.
A food item that’s good for long term storage, is
energy and nutrition dense, and can be eaten as-is or combined with other
ingredients, are nuts and their biological or culinary cousins.
From the perspective of science, nuts are considered fruits
with a hard shell which protects an edible inner kernel. Examples include acorns,
chestnuts, and hazelnuts (or filberts). While almonds, cashews, pecans,
pistachios, and walnuts are not botanically considered nuts, they have been
accepted into that culinary family. The all-encompassing term for both
groupings is tree nuts.
(Editrix's Note: I have an irresistible urge to say "How 'bout TREE nuts?!" That is all.)
Peanuts are considered nuts in a culinary sense, but actually are not nuts at all; they are properly members of the legume family alongside beans,
soybeans, peas, chickpeas, and lentils.
A selection of nuts from the author's pantry
One of my favorite uses of peanuts for cooking is in Asian
recipes. While this particular example is somewhat ingredient intensive, it makes
a delicious meal. I usually serve it with rice.
1 medium yellow onion, sliced longways into 1” strands
1 bunch scallions, sliced, separate the light green bottom
and the dark green top
1 green bell pepper, coarsely diced
1 red bell pepper, coarsely diced
3 tablespoons (6 cloves) crushed garlic
2-3 pounds chicken breasts, cut into 1″ cubed bite-sized
pieces
1 cup chicken broth
1/3 cup low-sodium soy sauce
2 tablespoons balsamic vinegar
2 tablespoons cooking sherry
1/4 cup hoisin sauce
1/4 cup oyster sauce (or half and half hoisin sauce and soy
sauce)
2 tablespoons smooth peanut butter
1 tablespoon chili garlic sauce
3 tablespoons cornstarch + 3 tablespoons water, mixed
together to form a slurry
1 cup roasted, salted or dry peanuts, as well as some for
garnish
Other vegetables such as carrots, mushrooms, water chestnuts
or baby corn can be added at Step 1 while sautéing the veggies.
Recipe
Add the sesame oil to the Instant Pot, set to “Sauté” on the
“More” or “High” setting.
Allow it to heat for three minutes and then add
onion, peppers and soft green portion of the scallions.
Sauté for 3 minutes and
then add garlic. Sauté for 1 more minute.
Add the chicken and sauté for another 3 minutes, stirring
constantly, until pinkish-white in color (it shouldn’t be fully cooked by now).
Add in the broth and deglaze the bottom of the bottom of the
pot so anything that may have stuck onto it comes up.
Follow up by adding in
the soy sauce, balsamic vinegar and cooking sherry. Give everything a good
stir.
Secure the lid, move the valve to sealing position, set to
“Pressure Cook” on High Pressure for 7 minutes. Quick release when done.
Set to “Sauté” on the “More” or “High” setting again. As it
comes to a bubble, add in the oyster sauce, hoisin sauce, peanut butter, and
chili garlic sauce. Stir well.
When bubbling stir in the cornstarch slurry,
allow to bubble for 1 minute and then turn the pot off.
Finally, stir in the peanuts and whiter, crunchier portion of
the scallions.
Nuts are commonly used in baking. They are added to everything
from cookies, to pastries, to yeast breads. This perennial favorite is a
variation of the recipe from my post on quick
breads and is an excellent companion to a nice hot cup of Assam-based tea.
Cranberry Almond Scones
Scones hot from the oven
Ingredients
2 cups all-purpose flour
1 cup whole wheat flour
1 tablespoon baking powder
½ teaspoon baking soda
½ to 1 teaspoon salt
1 cup dried cranberries, chopped
½ to 1 cup raw almonds, coarsely chopped
6 tablespoons butter at room temperature
4 tablespoons of sugar
1 to 1¼ cups buttermilk
Recipe
Preheat oven to 500 degrees Fahrenheit.
In a large bowl, blend the dry ingredients.
Cut in the butter until the mixture has the consistency of
coarse breadcrumbs.
Stir in the buttermilk, but for no more than 20 seconds.
Turn the dough out onto a well-floured board and knead
gently 8 to 10 times, adding more flour as needed.
Tear off chunks of dough or scoop out large spoonsful, and
arrange them on a well-greased cookie sheet.
Turn the oven down to 450 degrees Fahrenheit and bake for 15
to 20 minutes. Larger scones take a longer time. They should be just starting
to brown when you take them out.
Let rest on a cooling rack.
Whether as a snack or part of a recipe or travel food like
trail mix, nuts are an excellent source of nutrients in a compact package and, barring
allergies, should have a place in every prepper's pantry.
The dust has settled and the First 72 Hours have passed. Follow along as I build a long term plan viaPrudent Prepping.
While searching for an item through the Home Depot portal, I misspelled the word and found Augason Farms food pails! The assortment is good, but unfortunately Home Depot (like pretty much everywhere and everyone) is currently out of stock. I even did some checking and there is no restocking date. The only item in inventory seems to be a 100 count box of 125 mL Emergency Water pouches, and they aren't even an Augason brand.
From the Augason Farms website, here are the water barrel specs:
Water is the first product to sell out at grocery stores in the days leading up to and during an emergency. Be sure your family has plenty of water in an emergency with an easily-accessible supply of safe, potable water for drinking, cleaning, cooking, and sanitation. Don’t forget to pick up water treatment drops to ensure your water is free of bacteria, viruses, and cysts. Augason Farms 55-gallon Water Barrel is BPA-free and produced from food grade Polyethylene.
Barrel Specifications
55-gallon food grade water barrel
BPA-free
Stackable
22.95" diam. x 35.13"h· 18.2 lb.
It appears that this is also unfortunately out of stock, but you may be able to source all the parts to build something similar elsewhere.
Recap and Takeaway
The Home Depot is
probably the very last place I would look for emergency food, but here
it is! When the pails were available, the prices were very competitive.
I can see a water barrel being on the Home Depot site, since it joins water troughs and tanks as livestock-related items.
* * *
Just a reminder: if you plan on buying anything through Amazon, please consider using our referral link. When you do, a portion of the sale comes back here to help keep this site running!
If you have comments, suggestions or corrections, please post them so we all can learn. And remember, Some Is Always Better Than None!
NOTE:
All items tested were purchased by me. No products have been
loaned in exchange for a favorable review. Any items sent to
me for T&E will be listed as such. Suck it Feds.
I apologize for the absence; the past month has been really hard on me and I needed to pull away from most interaction to get my head and my soul in order. I'm going to ease back into blogging with a short, easy update post.
I mentioned previously that I'd bought two bricks of SOS Emergency Food Rations and that I was going to take a test hike with them, and that if I was able to carry them easily then I'd get two more because that would give me seven days of calories.
Well, the good news is that I was easily able to hike with the two bricks.
The bad news is that four bricks are just too heavy, and I aborted that hike a quarter mile into it.
However, all is not lost: I reconfigured the contents of my chest rig and was able to fit a ration brick in there, and I can hike with that configuration quite easily. This gives me (3600*3 = 10800/2000 = 5.4) nearly five and a half days of rations at 2,000 calories each, plus whatever supplemental calories I have in energy bars, soups, etc. I'm quite happy with this arrangement.
I know it looks like I might be able to fit another ration brick on top of the first, but it won't fit. The bricks are taller than they are wide by half an inch.
Next week ought to be the final post in my GHB series.
The main reason I do "bag dump" posts like these isn't to show you how to assemble a Bug Out or Get Home Bag, or even to show off all the cool stuff I have. No, it's because in the process of laying everything out, photographing it, and then explaining my reasoning behind it, I'm able to notice previously missed holes in my preps or flaws in my reasoning.
For example, by laying out the contents of my medical pouch, I realized that I didn't have any effective way to splint an injured arm or leg. Sure, I could probably craft one out of sticks, but the premise behind my GHB is that I may have to walk home for several days, and if I have a broken arm or a sprained ankle I'd rather have gear that is quality and, let's be frank, more comfortable that something improvised with sticks.
To that end, I bought some SAM Splints for my GHB so I wouldn't have to rob my BOB, and now I have both a 24" SAM and a 36" SAM in my medical supplies. I also added some titanium bandage shears, both to cut clothing, splints, etc for first aid and also just as a general cutting tool.
I also acquired a CRKT Eat'N Tool XL for my Snack Pouch because I also added a pouch of Bumble Bee Salmon. I love this stuff, but it's difficult to eat with my bare hands. I typically use a long-handled iced tea spoon when at home, but I thought the added utility of the XL would be welcome.
(Yes, I'm aware that pouched fish spoils easily, so if I plan to keep my GHB in my car during the warmer months I'll take the salmon out.)
Speaking of food, the reason I've been stalling on entries for this series is because during the course of the layout I realized that while I had snacks, soups and teas, what I was missing was bulk calories for energy. I had to try different kinds of survival foods in different pack configurations before I found something that worked. It required a drastic rearrangement of gear, but I made it work.
I wanted something that was compact, as light as possible, would last for a long time, and would provide a decent amount of calories. I ended up buying two of these SOS Emergency Food Rations.
Chaplain Tim reviewed these rations in 2017, and he gave them his top rating. I agree with his assessments and am largely happy to have these in my pack... although the weight (1.6 lbs each) is more than I'd like, it pales in comparison to the 6.6 lbs of water I'm also hauling.
I bought two for the simple reason that each brick has 3600 Calories, and the average person needs roughly 2000 Calories each day. Each brick is supposed to be a three-day supply, but that works out to 1200 per day; this is fine for sitting in a life raft waiting for rescue, but not enough to get home after a disaster. However, two bricks is 72000, which works out to 2400 Calories over three days. Between that, my snacks, and my supplemental foods, it ought to be enough either to get me home or get me to a place where I can restock.
I'm going to take some test walks with this setup once the temperature cools off a bit. If I can haul this without a problem, I'll see if I can fit two more bricks into my bag and carry it. If so, then I'll have seven days of meals, and that will make me a very happy prepper.
Finally, I decided to add a multivitamin to my rations. Bulk calories are important, but just as important is proper nutrition and vitamin supplements can help with that. I bought a bottle of Vitamin Shoppe-brand VThrive Bioactive Multivitamin that was appropriate for my age group and placed a week's worth in my GHB.
Next week ought to be the final post in this series, where I show you the miscellaneous stuff I have inside along with the configuration changes I've made.
Any prepper worth their salt* is going to have a good supply
of long term food storage. While many preserved foods may be good
at stability and nutritive value, they don’t always get high marks for flavor, and a week of eating bland but healthy meals can have a serious effect on morale
and general outlook. After all, there’s a reason military MREs come with those
little bottles of tabasco sauce.
* I see what you did there, David. -- The Editrix
Many herbs and spices, if kept in a cool dark place in well-sealed containers with oxygen absorbers, can be preserved long term and still maintain good flavor. This is because the two biggest causes of loss of flavor in spices are oxygen and light.
Tips for
preparing longer term spice storage:
Buy spices with expiration dates as far out as possible.
Keep the container sealed.
If the container is opened, use a dehydrator or the oven set
on low to force out as much moisture as possible.
Each container should have its own fresh oxygen absorber.
Store the spices in a cool dark place.
If working with fresh
herbs and spices:
Wash them carefully.
Pluck any wilted leaves.
Remove the stems.
Remove as much moisture as possible in a dehydrator or the
oven set on low.
Seal in containers no larger than necessary.
Each container should have its own fresh oxygen absorber.
Store the spices in a cool dark place.
With proper care, a vacuum sealer can be used to store
larger quantities of spices.
A glimpse into the author's spice cabinet
While the variety of spices is legion, certain seasonings
are more frequently encountered. As everyone has different preferences, the
spices chosen can vary significantly.
Salt
Probably the most common spice used throughout the world is
salt, to the point it’s part of common parlance. Look back at my first
sentence for one example; another is referring to something necessary but boring
as “Like rice without salt.” Roman legions even received part of their pay in
salt, from which the word salary is derived.
Modern table salt is not just simple NaCl, but has
anti-caking agents and iodine added for storage and health
purposes respectively. (The reason we often see a few grains of rice in a salt shaker is they
act as a basic moisture absorber.) Salt is fairly easy to store long term, and
is unlikely to lose any flavor.
Pepper
Black pepper is almost certainly the next most common spice. Ground pepper's flavor will deteriorate over time once unsealed: leaving peppers in kernel form increases storage life, but adds another
complication in the need for a grinder.
Other Spices
Depending on individual taste, both garlic powder and ginger
powder are two excellent choices as they add a good amount of flavor for their
volume. Though, is there ever such a thing as enough garlic?
Chili powder, paprika, and cinnamon (either stick or ground)
are other spices that offer a good bang for the buck and bulk. The first two
also come in a wide variety and can be tailored to appropriate foods and
cooking method.
When storing leafy spices, such as parsley, sage, rosemary,
or thyme, keep in mind that they will lose flavor more quickly, and possibly develop mold, if not
very thoroughly dehydrated. For home use, herbs and spices can be stored in the freezer
for quite a while without loss of flavor, though some will suffer in
appearance.
Remember, the plural of spice is spice, and also spices.
Erin Palette is a participant in the Amazon Services LLC Associates Program, an affiliate advertising program designed to provide a means for sites to earn advertising fees by advertising and linking to amazon.com.