A few years back I made the case for the .350 Legend cartridge, and this follow-up will address what I’ve learned in the field. This review should have been done two years ago, but life happened, and last year was my first hunting season not interrupted by my job.
Bottom line, all the advantages I listed back in 2019 are still true. It's a light, handy, low recoil cartridge and it kills deer cleanly. One interesting point that I didn’t bring up then, but I know now, is that there is almost a negligible difference in velocity between a 16” and 20” barrel for the .350 Legend.
As far as accuracy and reliability are concerned, the Bear Creek Arsenal upper I purchased has been completely acceptable, with only a few magazine-related failures to feed from the bench (something I’ve experienced many times with military issue M4s).
However, there are some disadvantages to my particular setup, a 16” AR pattern rifle, when used for hunting whitetail deer. The first is noise: an AR-15 bolt slamming home is a noisy thing, and to compensate I would load my rifle at my truck and move to the deer stand with the rifle on safe. A bolt action rifle like a Ruger American Ranch doesn’t have this problem.
The second disadvantage is cheek weld. I have a standard M4 style buttstock on that particular rifle, and so getting a good repeatable cheek weld requires consistent training. This is a skill I can transfer over from running an M4 for decades, but not everyone has that advantage so I feel it needs to be addressed.
The third disadvantage I encountered was with Herter’s brand .350 Legend ammunition, a 180 grain traditional cup and core bullet with advertised velocity of 2,100 fps (manufactured for Cabela’s by Winchester). Velocity was not 2,100 from my 16” barrel; it was instead a bit more than that. This additional velocity caused me to miss a shot, which prompted a trip back to the zero range and confirming that my rifle was in fact still sighted in at 50 yards, but was 6” high at 100. I watched a number of videos from other .350 Legend users who experienced the same “additional velocity” phenomena, and while there isn’t excess pressure or any safety concerns, it does mean you need to verify velocity rather than trust the box.
Things I’ve learned completely unrelated to the rifle and the ammo? Scopes matter, and while bigger isn’t necessarily better, I think the “compact tactical” size actually limited the hunting potential of my setup more than anything else. Last year I used a Bushnell Banner Dusk & Dawn 1.5-4.5x32 optic, but this year I used a Swift 4x32 compact scope. Next fall I’ll transition to something in the classic 3-9x40 variety for better light transmission at dawn and dusk, and I’m debating between a Sig Sauer and a Vortex.
Final Thoughts
The .350 Legend is great for southern whitetails.
It is the ballistic twin of the old .35 Remington, and that’s a good thing.
It has very low recoil out of lightweight rifles and should be no problem for anyone on the hunt.
It is not a long range hunting cartridge, so if you plan on taking shots beyond 150 yards, you’ll want to look to a cartridge like the 6.5 Creedmoor, .243 Winchester, or a .260 or 7-08 Remington if you are stuck with commercial ammunition purchases and need a moderate recoil option capable of accuracy at multiple football fields away.
However, if your hunting ranges are modest, and you are comfortable hunting with an AR platform rifle, you can keep a dedicated upper with two mags around for a very low cost-of-entry modern rifle during deer season.
Every disaster prep list usually includes the words “30 days’ (or more) worth of medication.” If you are on medication, this is really great advice, but there are also a bunch of things you can purchase without a prescription that will provide you with treatment options from a headache to a laceration, and those are good to have on hand for when stores aren’t open. This list isn’t all encompassing, and it’s meant to be generic so that you can decide, “Yeah, I need that, but not that” and customize it to your situation.
“For the Inside of You” List
Non-Steroidal Anti-Inflammatory Drugs (NSAIDs). These are the “fever reducing” and “general aches and pains” medications. I like generic acetaminophen and naproxen, but my wife finds that ibuprofen works very well for her. The generic bottles of 100 pills or more should be sufficient for a short term disaster, and I recommend one each acetaminophen, naproxen, aspirin, and ibuprofen.
Antihistamines. Due to the war on some drugs, the “good stuff” is still available without a prescription, but you’ll actually have to talk to a pharmacy tech and show your ID to make the purchase. The prices for even generics are pretty high, but pseudoephedrine is still the “king of clearing things up” (especially hives) for me when diphenhydramine doesn’t cut it. I would say that two 24 packs of pseudoephedrine pills is a good start for a household that doesn’t have environmental allergies, and one large bottle of diphenhydramine for mild “seasonal allergies”. People with chronic allergies will need a 30 day supply of their normal medication.
Laxatives. An interruption to your normal diet can cause a person to become constipated. There are multiple options, and if you don’t want to keep laxative pills on hand, you can make a “saline laxative” out of potable water and Epsom salts.
The “Anti-Laxative” Loperamide (aka generic Imodium) This helps avoid dehydration when illness causes diarrhea.
Vitamins. A generic multi-vitamin is cheap insurance; I use Walmart’s Equate brand. You’ll want one pill per person per day times the number of days you are prepping; for a 4 person family working on a month, that’s 124 pills. Generally a short term disaster doesn’t lead to any sort of vitamin or mineral deficiency, but it is pretty cheap insurance. If someone in your house has a specific supplement they need to take regularly (iron, magnesium, etc.) add that in as well.
Caffeine can really help with headaches/migraines, which is why caffeine is an ingredient in so many OTC headache pill and powder formulas. A bottle of generic “alertness pills” is cheap insurance in case someone needs caffeine to deal with a migraine, and for some reason don’t have caffeinated beverage handy.
Rehydration salts. These can be individual packets of sports drink mix, medical grade salt mixes, or a mix of salts in pill form. It doesn’t matter too much which you choose, but you will want some on hand to assist anyone who needs to rehydrate. This can get spendy if you buy individual packets of name brand sports drink, but electrolyte tablets seem to be fairly affordable right now on Amazon.
“For the Outside of You” List
Sterilizing Fluids. You’ll want 90% rubbing alcohol on hand, and a bottle of povidone iodine or prep pads is also a good idea.
Antibiotic Ointment. A generic “triple antibiotic ointment” is cheap insurance, so I recommend two tubes.
Super Glue. When you really, really need to hold skin together right now, this is good stuff to have on hand. It will harden in the container, so make sure you rotate in new stock every year. Of all the recommendations, super glue probably has the shortest useable shelf life.
Anti-fungal cream. A significant number of Americans have an active foot fungus infection at any given time. Generally this is not a problem, but you don’t want it to spread to others during a disaster.
Petroleum Jelly. Really useful for dry, cracking skin, and it also turns a cotton ball into a great fire starter.
Sports Tape. This is different than medical tape, as it is designed to support joints. I use the cheap three dollar generic stuff for taping my fingers for Brazilian Jiujutsu the same way rock climbers tap their fingers for that sport. This also serves as a good blister cover, and can wrap around bandages for added protection. It doesn’t last forever, but is pretty cheap to have on hand.
“Preventive Medicine” List
In the event that “normal services are disrupted” you want to be able to keep your area as clean as possible, preventing rodents and insects from invading your space.
Insect repellent for your skin. Being munched on by bugs is pretty miserable, and this helps prevent insect-borne illnesses from spreading. In addition to the sprays and lotions for your skin, you can get candles/torches and electronic devices that help you keep your area temporarily free from the bloodsucking insects.
Lice shampoo/treatment kit. Do not get an “organic/natural” kit here, get the kind that has dimethicone, which interrupts the lice water metabolism and kills them that way.
Permethrin. This is an insect killer/repellent for your living area. You can get it highly concentrated for agricultural purposes, or in spray cans to kill bed bugs. Understand that this is a pretty serious chemical, and it needs to be handled accordingly. It can be seriously nasty stuff if you let it touch your skin, but I’ve found nothing better for treating fabrics.
Sunscreen. Don’t make a bad situation worse by getting sunburned.
Storage and Stock Rotation
Like most perishable things, “store in a cool, dry place” is the best advice for your medicinal preparations, but even medicinal items stored properly still have a shelf life. If it is a dry item, like a pill or powder, that shelf life is much longer than the “use by” date on the packaging. If the product is “wet” in any way, such as a gel, adhesive tape, cream, or spray, you’ll see a much more noticeable degradation of the product the further beyond the “use by” date on the packaging. If the product is a liquid, such as hydrogen peroxide, you’ll want to replace it regularly for the same reason you rotate your stock of laundry bleach (it breaks down and loses its oxidative properties over time).
References
If you have access to the internet you can check for drug interactions here, and if you are preparing to survive offline the “Where There Is No Doctor” series comes highly rated, and the newest editions are updated with additional medicinal information.
While I don’t plan to start a village medical clinic, having a printed reference on hand is pretty cheap insurance for those things where I don’t have a clear idea on how to proceed.
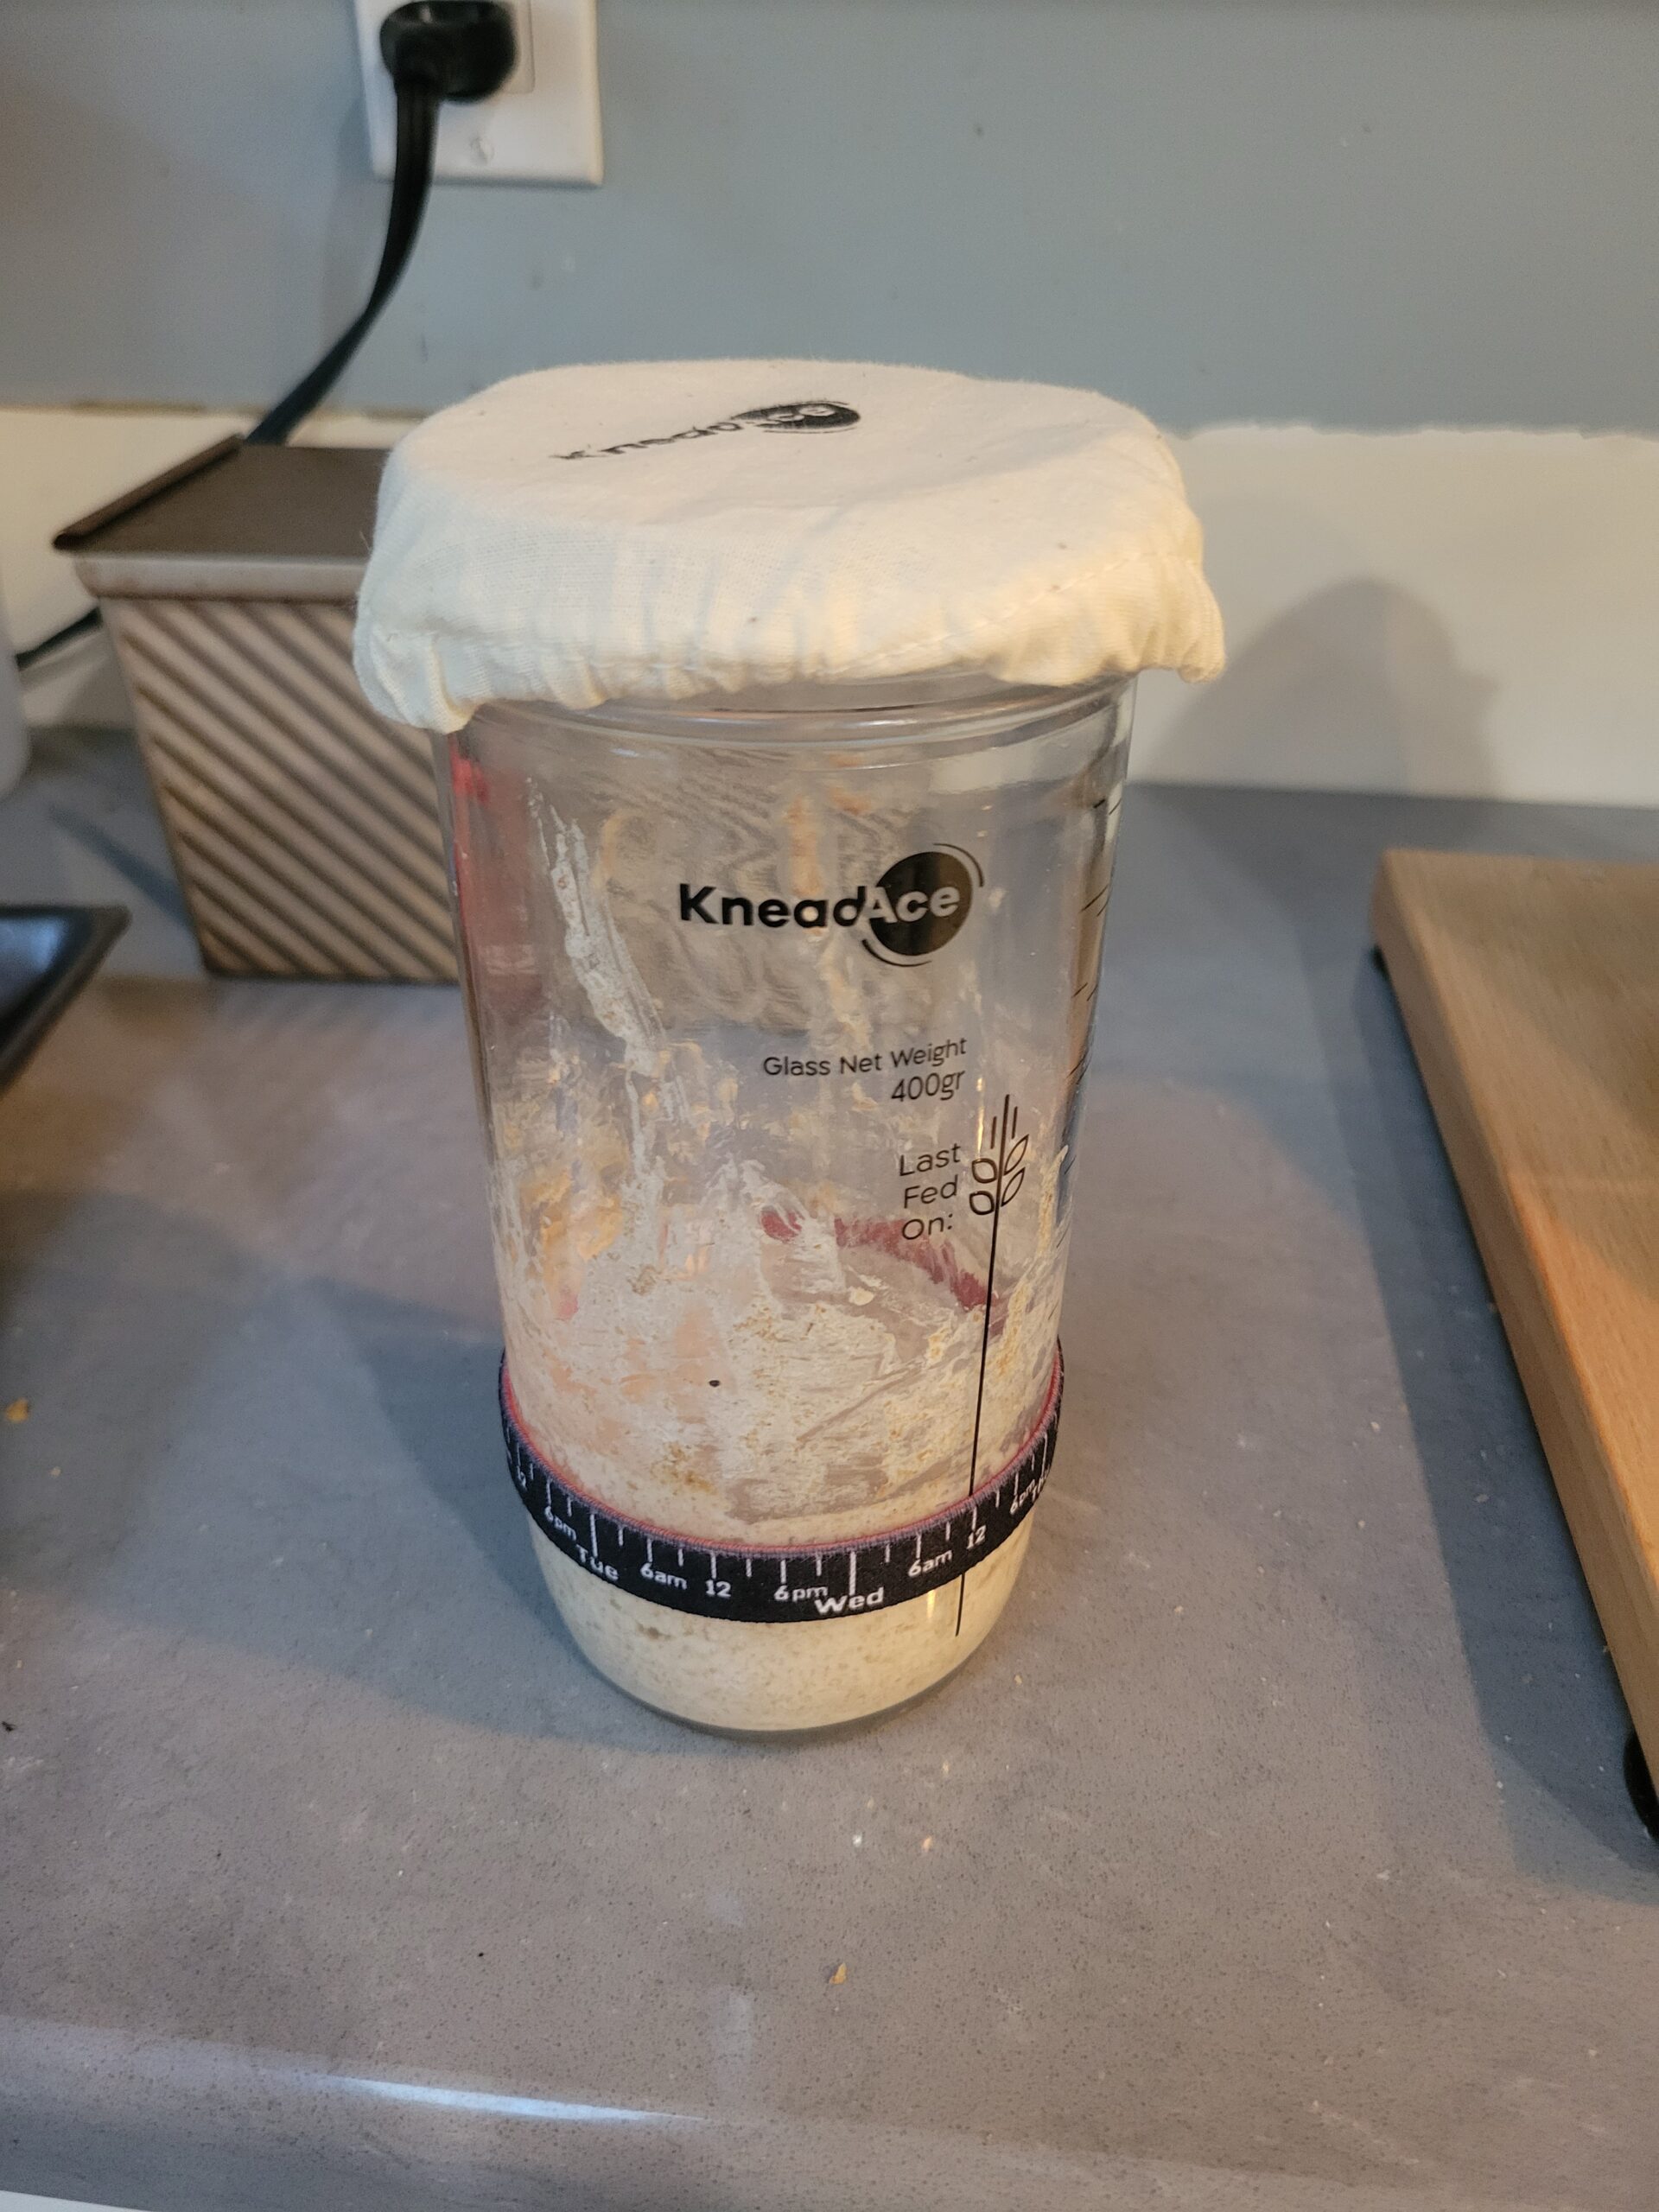
If you've spent any amount of time baking bread, you have likely read or heard about sourdough bread and the substance known as a "starter". So what is a sourdough starter?
Put simply, it's a colony of wild yeast and bacteria raised in a medium of flour and water, and any bread product leavened with this mixture (as opposed to commercial yeast) can be considered a sourdough bread.
Why is this relevant for preppers?
The biggest reason is that bread is a staple in most cultures around the world, and yeast is a requirement for a majority of these breads. As we saw in the 2020 COVID-19 Pandemic, disruptions to the labor force and supply chain, plus a massive interest in hobby baking, meant that commercial yeast vanished from store shelves. There's no reason why this might not happen again.
As you'll see in this article, making sourdough is very easy. Even if you decide that keeping a starter in your kitchen isn't for you, after you've learned the techniques I'm going to teach there's nothing stopping you from doing it in the future if you ever change your mind.
One component of the starter culture is yeast, but the other is the bacteria Lactobacilluswhich consumes the starches in your flour and produces carbon dioxide (which is our leavening gas) and lactic acid. The acidity of this starter is the "sour" in sourdough, but this acidity also has anti-fungal properties. This means that products leavened with sourdough starter will be less likely to grow mold than products made with commercial yeast.
A standard loaf of bread has just four ingredients: flour, water, salt, and yeast. Of all those ingredients, yeast has the shortest shelf-life, and even frozen commercial yeast will expire and die.
Eating bread baked at home is going to be better for your health than eating store-bought bread, because there will be no need for the additives and preservatives that keep bread soft and fresh.
Hopefully I have your interest. Now let's get to work making a starter.
For reference, I relied heavily on this video and this website.
Growing a Sourdough Starter
First, you'll need a container. I panic-bought a bunch of commercial yeast during the pandemic and I was worried it would die, so I ended up spending a lot of time talking about sourdough before I actually started making it.
Because of that, my wife bought me this kit, which is nice but honestly not necessary. You'll be fine with any glass container that has a wide mouth and relatively straight sides, so a drinking glass, a pickle or tomato sauce jar, a canning jar, etc. and a paper towel, a piece of cloth or a clean rag secured with a rubber band or twine is just fine. (Also, remember to save the cap if you re-purpose a jar. I'll explain why later.)
After you thoroughly clean and rinse your container, add about two tablespoons of flour and two tablespoons of water to the bottom of the jar and mix them well. For this initial phase I suggest that you use water that's been de-chlorinated (well water, bottled water, or water that has been boiled but then allowed to cool to room temperature) and whole wheat flour. This will likely work with tap water and AP flour, but whole wheat and chlorine-free water will give the wild microbes a bit of an advantage to start out.
Keep the jar someplace warm but sheltered from sunlight. If you have a place where you keep your fresh fruits or vegetables on the counter, that would be ideal. Fruits and vegetables will also have wild yeast growing on them, so in theory the air around these will have more spores and will foster growth.
After 24 hours, give it a good mix and scoop out about half the material (about 1 tablespoon) and replace it with an additional tablespoon of fresh flour and water. Give it another good mix and scrape down the sides as best you can. The fresh flour and water will give the microbes fresh nutrients to grow, and by removing half the material you're giving better odds that the microbes you end up growing will be the right kind. The scraping isn't necessary for the starter's survival, but once flour and water dry they turns into library paste and will make a mess and make it harder to see the progress, so this is more of a quality of life kind of thing.
Every day for a week you'll want to do the same thing: mix, discard, add, mix, scrape. By about day three or four you'll start seeing bubbles and activity. At this point you should start smelling the mixture before you discard half.
You see, we co-evolved with these microbes, and the waste products of these critters (lactic acid for the Lactobacillus and ethanol for the yeast) are not only chemicals that are safe for humans to consume, they are also lethal to many bacteria and fungi that might make us sick. Because of this you will likely start noticing a pleasant smell coming from the mixture, and what it smells like will vary from house to house and may change over time.
When my starter first started, the smell reminded me of stale beer. This summer, it took on a scent more like overripe fruit. Now that the weather has gone cold, the smell reminds me more of a really nice aged cheddar. My buddy who lives in the next town has a starter that smells more like an aged Parmesan cheese.
My point is that the smells coming from this should be invoking scents that remind you of foods or drinks, not of unpleasant objects like a wet dog, dirty feet, or dirty laundry. In the event that your mixture starts smelling foul, don't give up yet. Keep dividing and feeding it for another week and see if things improve, as there's a good chance the yeast and lactobacilli will crowd out whatever nasty critters have taken up residence.
After your first week you should start seeing noticeable activity in your jar, and you can start feeding it twice a day. Once a starter has been sitting for a few hours, it starts developing a foamy top layer with a layer of liquid over the less active bottom layer.
I like to think of that line as a "fuel gauge". When a starter is freshly fed that line of liquid will be evenly distributed, but after a while a well-fed starter will be mostly foam with a small line of liquid near the bottom. When you see this line, stir it up so that the top doesn't dry out and form a crust and see where the next line forms.
If a head doesn't form and the liquid rises to the top, then the bulk of the starches have been consumed and the starter is ready to be fed again.
After about 10-14 days your starter should be very active when fed and have a pleasant smell. Once this happens you can start maintaining it, and a well-maintained starter should rarely need to be discarded.
Maintaining Established Starters Now you can start gaining volume if you need it; just remember to feed at least roughly half the volume in the jar of flour and water. You can also switch to tap water and AP flour if you desire (I use tap water, but I still use whole wheat starter because I feel it's better for the microbes and a small amount of whole wheat flour makes for a better bread).
Always remember to leave plenty of space at the top of the jar, because it will expand as the microbes consume the starches!
If you have a good volume of starter and you think it'll be a few days before you need it, you can cover it with the solid lid and put it in the fridge for up to a week.
Using Your Starter The easiest answer is to look up sourdough bread recipes and follow those, but you can also convert existing recipes to sourdough by adding a volume of starter instead of the yeast, and then subtracting that volume of flour and water equivalent to that volume of starter. The standard rule of thumb is "1 cup of starter is equal to one packet of yeast (which is a little more than 2 teaspoons of active dry yeast) then subtract one cup of flour, and one cup of water."
This conversion will require longer rise times because wild yeast isn't a race horse bred for speed like commercial yeast is. Because of this, I prefer using less yeast and taking a longer time.
Mix well to combine, then give the dough at least 8 hours to rise.
Once risen, pour into a greased loaf pan and allow to proof until it's close to the top of your pan (note that the rise time won't be too different between starter and conventional yeast, but the proof time will be at doubled at the very least, depending on the air temperature).
Place proofed dough in 450 degree oven for 30 mins. Then take loaf out of the pan and allow it to cool on a rack before cutting.
Sourdough Crackers
Since these crackers use no oil, and the sourdough starter has lowered the PH of the cracker they will keep for a very long time in an airtight container.
1/4 cup sourdough starter
2 cups AP flour
1 tsp salt
2/3 cup cold water
Combine all ingredients in a bowl. Dough should be soft but not sticky. Let rise at least 8 hours.
Give dough a quick knead until smooth, then turn out onto a floured surface (divide dough into manageable pieces) and roll out into a rectangle approximately 1/8".
Salt the surface and roll the salt in, adding other seeds or spices if desired.
Take a fork and prick the surface evenly. If you skip this step the crackers will puff up like oyster crackers, which isn't a bad thing.
Cut to size using a pizza cutter or a sharp knife.
Place pieces on a baking sheet, making sure they have a little space between each cracker, and put into a 400 degree oven for about 10-15 mins. Watch closely because once the crackers start to lightly toast they are done, but they will go from toasted to burnt very quickly.
You can double this recipe just by doubling the flour, water, and salt, and keeping the same amount of starter.
Tips for Managing Sourdough
If you happen to use up all your starter while baking, simply add more flour and water to the dirty container. There are enough microbes remaining to completely revive the starter.
Once your starter is established, I recommend freezing at least a cup's worth. In the freezer, a starter will last at least one year with no maintenance. To use simply thaw it, feed it as soon as it becomes liquid, and it's ready to use as soon as it's frothy and active again.
To make a large batch of starter you can just put a small amount of starter in a bowl and simply put equal parts flour and water in and give it a good stir. It'll be all starter by the next day.
I hope you found this guide useful and can see the advantages of knowing how to make and use sourdough starter as a prepper resource!
Years ago, the tornado warning siren went off in our neighborhood. We took the kids to the basement and brought along a laptop so they could watch some cartoons while we waited for the storm to pass. We’ve since moved away from that area, and now live in a home without a basement, so our tornado room is an internal bathroom where we keep some basic survival kit under the sink. But if we lose power for days (such as after a hurricane) I still want to keep the boys and myself entertained, and that means having battery-powered devices or options that don’t require batteries.
Streaming services such as Netflix, Spotify, YouTube, Hulu, Crunchyroll, Amazon, Disney+, etc. all offer complete libraries of drama, romance, adventure, comedy, and horror at the convenience of nearly any screen capable of accessing the internet. This is an incredible bargain for a lot of people who don’t have the means to purchase physical media of every movie, TV show, or program that they find entertaining. However, it also means that entertainment is connected to steady broadband internet access that’s not always available during or after an emergency. In fact, once you get through an emergency there can be a lot of time spent just waiting for normal to return.
In the spirit of You Always Have Other Options (YAHOO), here are the options as I see them:
Physical books. The great thing about the dead tree format is that it doesn’t need to be recharged. However books can be bulky, and it can get expensive to keep expanding on your private library just in case a disaster happens. My wife and I love shopping in thrift stores for used books, and often they have a good selection of DVDs.
Physical disks. DVD or Blu-ray disks are “old tech” at this point, but they last indefinitely if they are not all scratched up. These can be used with DVD or Blu-ray players and a screen, or they can be played on a computer, such as a laptop. Not every laptop comes with a built-in DVD drive these days, so we’ll look at that in a bit. We have a habit of shopping for bargains in the $5 bin at Walmart for DVDs or Blu-ray disks.
Digital copies of books. A Kindle or e-reader can store lots of ebooks and last quite a bit of time on battery power. These are much more compact than the dead tree format, but are also a single point of failure if the device breaks. Erin wrote an article about her “Survival e-Reader” years ago.
Digital copies of visual media. You just store these as files on your local disk, or on your network attached storage device. If you set up a media server, like Jellyfin or Plex, you can even have the server handle transcoding duties to save battery life on your display device for movies and TV shows. If you don’t want to set up a home server you can use a USB drive of sufficient size to store the digital copies, and plug that external drive into a playback device.
Digital music. I know there are audiophiles that would rather listen to the end of the world on vinyl than any other format, but for the rest of us it's very easy to rip our music to digital format and use an old smartphone as a playback device with cheap earbuds kept on hand.
BCP isn't a tech support blog, so the hardware and software needed to build and deploy a home server that serves as network attached storage and media server is beyond the scope of this article, but a quick search on any search engine will show you many step-by-step guides to doing that particular chore. However, even as a tech guy I don’t recommend putting all your eggs in the digital basket. I realized quite quickly that a home server is a “nice to have”, not a necessity for keeping kids entertained.
Getting Started
My recommendation is to get started with physical disks, physical books, a low power draw/long battery life laptop such as an Ultrabook, and a USB disk player if you need one. This will cover the vast majority of entertainment needs for children of all ages, and most disruptions are measured in hours instead of days.
The next upgrade from there is the external USB storage device, but you’ll want a big one. A normal DVD contains about 4.7 gigabytes of data, so I don’t recommend drives less than 4 terabytes for spinning hard drives, or 2 terabytes for solid state drives (SSD). You will also need some method of recharging batteries, which can be as simple as a 12V plug into a vehicle accessory outlet, or as complex as an off-grid generation system.
To “rip” media from disk to digital format you’ll want a more powerful computer than a low power draw laptop, but you’ll not need something bleeding edge tech either. You will need some ripping software like HandBrake or MakeMKV, and of the two I prefer MakeMKV (they release a free serial number every month for people using their beta version). Any 4th gen or newer Intel chip (Haswell or newer) with 4 cores should be sufficient for the task. You could get away with older CPUs, but it’ll just take longer per disk.
Chromebooks
A word of caution about Chromebooks: while they have a very low power draw and generally a very long battery life, they will often be unable play DVDs through a USB attached disk drive. The version of Linux that ChromeOS is based on doesn't have the proprietary software enabled, which is why I recommend a good Windows or Apple laptop with long battery life for most people. If you are experienced with Linux, you don't need my advice on how to modify them.
However, if you decide to go the home media server route, Chromebooks access those digital files through a web browser and work well as a cheap terminal for kids. If you have a machine that can rip those disks to an external disk drive using HandBrake or MakeMKV, then the Chromebook should be just fine as a playback device even through USB. A second word of caution about Chromebooks: if you buy them used you run the risk of getting an “end of life” product without any security update support.
What I Do
In my house we use all of these options:
If the internet goes down, but not power, we have a home media server.
If internet and power go down, we have laptops, disks, books, and the ability to use external drives.
If we need to recharge, and our vehicles are functional, I have a 1500 watt inverter to recharge devices.
My “to be read” pile of sci-fi novels keeps growing....
My wife has collapsed the disk collection we have down to boxes and books, minimizing the size/volume footprint for storing disks (It also means we dispose of the DVD jackets that take up a lot of space). After I rip them to digital format and put them on the Jellyfin server she has access to them as long as the house has power (or the UPS hasn’t died), but we still keep all the disks because it eliminates the server as a single point of failure.
As Erin as said, “Morale is an important part of survival, and anything that makes your life better and takes your mind off boredom or miserable conditions is worthwhile.” This is especially true if you have children who are too little to be helpful, as keeping them happily entertained can keep you sane.
For those who aren’t in the know, Microsoft will end support for Windows 10 on October 15, 2025. This is not something to be afraid of; operating systems and other software generally have a limited shelf life, and Windows 10 will join Windows 8, 7, XP, 2000, Millennium Edition, 98, various NTs, 95, and 3.1 and earlier as unsupported.
But first, let me ask the rhetorical question Why do we need a modern operating system that's as secure as possible? Answer: Because the internet is a horrible place. For all the good that a great global network of constantly-on communications devices and computers has done for economic uplift, it has also created new risks to people’s livelihoods, life savings, and mental health.
The good news in all this is that Microsoft isn’t requiring too much in the way of expensive hardware to get a machine certified to run Windows 11. Basically, any Intel Core series with an 8000 or higher number, or an AMD Ryzen with a 2000 or higher number will do. However, if you're using a computer older than 2nd Gen Ryzen or 8th Gen Intel, you should know that while there are plenty of people out there who have managed to load Windows 11 on hardware well into the “Core 2Duo” era, they have really only done so to see if they could. If you're absolutely married to your current hardware and you have the tech chops to be your own IT department, this is an option, albeit one that I don’t recommend.
A better option is purchasing newer hardware on the Microsoft approved list. If you aren't a tech person, there are companies that purchase “off warranty” corporate IT gear and refurbish it for the market. My normal place to purchase a refurbished computer is Newegg.com, and so what follows is current as of the time of this article's publication:
Desktops
An Intel Core i5-8500T refurbished business desktop already loaded with Win 11 Pro can be had for under $200 US at Newegg. If that’s your budget and you're fine with a basic web browsing and productivity software suite box, that’s probably the best option for people who are not very tech oriented.
Laptops
Unfortunately for mobile users, Windows 11 laptops that are affordable (under the $200 mark) are on the underpowered side, using Celeron and Pentium processors with a small amount of RAM. These budget laptops will work for basic email, web browsing, and streaming media, but they lack significant onboard storage.
TPM 2.0
Another option is if you're running hardware on the approved list, but somehow your system fails the Microsoft Windows 11 upgrade health check. Generally this is due to a lack of a TPM 2.0, or Trusted Platform Module, on the motherboard. Depending on your motherboard you may be able to purchase a TPM 2.0 module and plug it in, but buyer beware! Some manufacturers use a 12 pin, some 14, and some 20 pin modules, so be sure of what you need before you purchase. Once the TPM is installed, Windows 11 can make use of that hardware to perform whole drive encryption to help secure your system and data.
Linux
The desktop-oriented Linux distributions of today are much easier to use than they were when I first started playing around with Slackware Linux in the late 1990s. If you know nothing about Linux, an easy choice is Linux Mint, which is a derivative of Ubuntu which is downstream from Debian. Debian is a free operating system that is community-supported, whereas Ubuntu is a “corporate Linux distribution” supported by Canonical. This means Mint benefits from both crowdsourced bug fixes and improvements from Debian, as well as corporate security updates and “polish” from Canonical.
While Linux is much more user-friendly than it used to be, it’s still rather picky about who it's friends with. If you have a basic computer with integrated graphics from AMD or Intel, there should be no issues with graphics drivers, but if you have an Nvidia graphics card then Linux can be dicey right now. If all you need is a machine to surf the web, send/receive email, maybe play a few retro-games on an emulator, Linux is great.
Notice I didn’t mention “streaming” there, as most streaming platforms aren't Linux friendly due to proprietary Digital Rights Management (DRM) software. If nothing else, you can load Linux on a legacy PC and set it up as a Network Attached Storage (NAS) file server to make your own network-attached storage appliance.
My Plan
I plan to go Windows 11 for my wife and two sons' desktops if I can get TPM modules that work for their motherboards, and also purchase my wife a Windows 11 laptop. My wife’s old desktop and laptop will have their files backed up to our NAS and migrated to the new machine. My “beater laptops” (refurbished government computers with built-in CAC smart card readers) will likely end up running Ubuntu since that is the desktop distribution most common where I work.
Erin had to ask me to clarify a lot of this, so if you need things explained please leave a comment and I'll help as best I can.
I’ve written before that military issue rucksacks generally suck for actually hauling lots of stuff long ways. The Infantryman on patrol needs a rucksack that doesn’t increase his overall profile from the front, so military rucks get bigger away from the body rather than packing gear higher and closer. This leads to “rucksack lean,” where you put your shoulders forward to get the weight closer to where your natural center of gravity normally is. Civilian backpacks don’t have that design consideration, so they are generally more “up” than “out” when packing in your kit, which leaves the weight closer to your center, and minimizes the “rucksack lean” quite a bit.
I mentioned in a previous post that for the past few years I've participated in the Mammoth Sniper Challenge, a three-day event in January where there’s a lot of ruck marching, no resupply of anything except water, and you sleep outside. I needed a rucksack that would hold a winter level sleep system, all my food, ammo, shelter, and clothing for three full days. I’ve lived out of a large ALICE pack for long enough to know that it can be done, but it’s not exactly comfortable, so I went looking for an affordable, large capacity, civilian hunting pack.
A “merely good” external frame rucksack/backpack can cost several hundred dollars, and all of the more affordable options are made overseas, mostly in China. While I ultimately ended up choosing an American-made (and more expensive) ALPS OutdoorZ Commander freighter frame and pack bag, the Tidewe 5500cu (90L) hunting backpack may be a decent option for you given the volume that it can carry and the features that it has.
Two main compartments, two zippered side “sustainment pouches”, and two small convenience pouches on the waist belt.
A built-in pack cover for rain, a convenient top flap cover for items you may need to grab quickly, and a center flap pocket (ideal for storing magazines).
A rifle buttstock pocket to strap a full-size rifle to the side of the rucksack.
Cinch straps across the body so you can pull the load tight against the frame, or use the straps to attach items externally.
The Bad
The nylon straps are a bit “floppy” and not milspec stiff, which means you will likely need to adjust them more often as they slip, or you’ll need to modify the straps to stay in place.
If you are handy with needle and thread, then modification isn’t a bad thing.
If you are fine with tightening down attachment points when you do a rest stop, there's no need to modify them.
If you aren't fine with either, then this isn't the pack for you.
Testing My initial test with the pack was about a 30 pound load: two tarps, 100 rounds of 9x19, 100 rounds of 7.62x51, a complete Army modular sleep system, a sleeping pad, two days of MREs, a one pound cylinder of propane and burner, wool hat, neck gaiter, a few rifle magazines, and a half gallon of water. I took it on a one hour hike (about 4 miles) and at that weight level it is much more comfortable than either an ALICE or MOLLE military rucksack.
I started off with a light weight because I was in the “condition my feet” level of ruck marching, and needed to get a good set of callouses built up between now and January. Over a span of weeks I increased pack weight and distance until I was able to knock out a 12 miler.
I used this pack for Mammoth Challenge 2023, but for this year I replaced it with the Alps.
Final Verdict
The Tidewe 5500cu is a decent hunting pack, but not a great rucking/hiking pack. I recommend it for hunters, or for a short “into the woods” weekend camping trip. If used for long hauls, you'll have to keep tightening the straps that connect the pack to the frame or the whole thing will shift and/or rock on your back and suck the energy out of you.
I do however recommend the Tidewe over a large green ALICE pack, because you can pack the weight closer and higher than the ALICE, making things much less painful on your back and shoulders.
The Tidewe pack can be removed from the frame so the frame can be used purely as a cargo carrier, for deer/elk or even firewood, that's pretty useful. (My Alps pack has the same feature.) If you just need an external frame backpack for hauling things around short distances, a used one off of eBay or secondhand store is probably going to be more affordable.
All in all, if you don't have a good hunting pack or hauling frame pack, the Tidewe 5500cu isn't bad for what it is, but honestly I would look for a used Alps or Eberlestock, or another better brand on the used market, over a new Tidewe 5500.
In January of 2023 I participated in the Mammoth Sniper Challenge, a three day endurance event where you have to pack everything except water and live out of your pack. This year I used an ALPS OutdoorZ Commander freighter frame and pack bag, stowing an AR-15 in the rifle retention system on the pack and carrying 150 rounds of 5.56x45 and 100 rounds of 9x19 on the opposite side pouch to balance the load. Magazines went in the outer utility pockets. My food, clothes, cooking kit, and pistol went in the upper compartment, my sleeping system went in the bottom compartment, and my sleeping pad was rolled up and strapped to the bottom.
All told, my pack weighed in at 59 lbs at the beginning. I had 2.2 lbs of food per day, with around 3,000-3,500 calories per day. At the end, with most ammunition expended and two days of food gone, my pack was around 45 lbs.
Cooking
I’ve served in the US Army for 25 years, and I have plenty of experience long distance rucking, but I always had the opportunity to make a small cooking fire or to re-supply with MREs at logistics points. Since fires aren't allowed during Mammoth by Fort Eisenhower Range Control, I had to purchase a packable cooking solution. I went to Walmart and picked up this Coleman Peak One butane-propane stove for my cooking needs.
The good: It works, it’s small, and it is easy to use. It was available at my local Walmart for about $14 when I bought it in 2022.
The bad: It’s 6.7 ounces, or nearly 200 grams. 6.7 ounces feels light in the hand, but I learned the hard way, again, that ounces make pounds, and pounds make pain.
For Mammoth 2024, I used a titanium stove that weighs only 26 grams:
The good: It works, it’s small and it's light. At $24, its price is competitive with the Peak One whose 2024 price has risen to $22 at Amazon.
The bad: It’s slightly less efficient at turning fuel into heat than the Coleman, adding about 20 seconds of time to boil one liter of water. My partner for Mammoth picked up the same stove, and neither of us had any issues actually using it throughout the event.
Fuel
Another thing I learned is that I should pack the absolute smallest isobutane canister possible. Since Mammoth only lasts three days, I only really need to cook about seven meals, and even the smallest fuel container can cover boiling water to re-hydrate nine freeze dried camping meals.
In 2023 I bought the “econo-size”450g canister at Walmart, and I’m still using it multiple campouts later. While it was good value for my money, it was also weight that I didn’t need to carry for three days. This time I bought the absolute smallest canister I could, and it lasted the entire event just fine, and because the location hardly ever drops below 25° F, I chose a pure isobutane fuel instead of an isobutane/propane mix. If you live in an area where it does get colder than the boiling temperature of isobutane, you’ll want an alternate cooking method.
Mess Kit
The second upgrade to my kit was going from two stainless steel cups to a titanium cup and a titanium pot. The 450 ml cup was 20 dollars and comes with a lid...
As you’ll see later, the real upgrade is going to vessels with lids, which makes it easier to cook over a fire without cinders or ash falling back into your food.
Weight Savings
Between the burner and the two vessels, I’m shaving six ounces off my load.
Old Stainless Kit: 14.9 ounces (no lids). This “heavy” loadout cost me about $23 because I got the burner on sale and one of the stainless cups from the Goodwill thrift shop for 99 cents.
Stainless Steel
Pure Titanium Kit: 8.9 ounces, including lids. This new loadout cost about twice as much, for just over half the weight. My partner at Mammoth 2024 used a stainless steel Stanley cup with a plastic nesting cup, and he’s already decided to replicate my Titanium loadout if he competes in Mammoth 2025.
I also have two teenagers, one of whom needs his own backpacking setup, so he can get the “heavy” option until something better comes his way.
Pure Titanium
If you're curious, my old stainless kit with a new titanium lightweight burner weighs in at 9.2 ounces, but don't get any lids for the cups, and I have no idea where you can get my bigger cup that I got from Goodwill.
For me, the weight savings are worth the cost. For those of you who might need a “get home bag” that isn’t carrying a long gun with 150 rounds of ammunition and a pistol with 75 rounds of ammunition, your weight budget might easily handle a stainless steel cup or pot, or even a 1.7 lb Kelly Kettle. If you plan on “bugging in”, then having a stainless Kelly Kettle at your location is very good at rapidly boiling water.
If your “get home bag” doesn’t need to include food prep items, this entire article doesn’t apply.
I am a big fan of stainless steel, as it is affordable and durable, but it's also heavier than aluminum or titanium. I am against cooking in aluminum, as over the long term it can negatively impact health, but if you just need to get from Point A to Point B over a few days rather than a long term thing, I’d have no issue with boiling water in aluminum vessels (the human body routinely cleans out aluminum ions, but too much can overwhelm the system).
If you are really pinching pennies and just need it for insurance in your go bag, or are really trying to cut weight for a short term survival kit such as on an aircraft, aluminum is the best value and weight option.
If you need something to cook with long term, and are pinching pennies, stainless steel is your best choice.
The cost premium is titanium, which is a good long term cooking option that is lighter than stainless steel (but not lighter than aluminum), but the weight savings only really matter if you're going to be walking a lot.
My recommendation is that you get a titanium burner since the cost difference is minimal at best, and stainless steel cups with at least one lid since they cost half that of the titanium equivalent.
Whichever setup you choose, I highly recommend keeping some black teabags in your kit in a ziplock bag. They weigh just a few grams, and heating up the 750 ml cup in the morning with two Tetley brand tea bags gave me and my partner a hot, caffeinated drink that tasted pretty good. In Mammoth 2023 I used Starbucks Cafe Vita instant coffee packets, but those are expensive, and I honestly think the hot tea was easier on our bodies this year, especially on Saturday when it rained from 0100 until 0900. There's nothing like ruck marching in the rain, soaked to the bone, and when your life really sucks a hot beverage is great, and tea just brews easier than instant coffee (and cleans up easier too).
Additionally, if you search Amazon for “long handled titanium camping spoon” you’ll see quite a few options. I didn’t use one the last two years, but it is now on my purchase plan because when you're rehydrating freeze dried meals, the long handle allows you to stir the food without sticking your hand deep into the bag.
One final thought: a three day endurance event isn’t a disaster “get home” rehearsal, but it is pretty close to the same level of physical exertion and “outdoor surviving” required to go from point A to point B. I never had to worry about getting clean water (it was provided to us, and I never needed to carry more water than I planned to drink on the ruck march), but you probably will, so bring at least a Sawyer Mini filter or iodine tablets.
Due to the price of gasoline (and airline tickets over the holiday season) my wife and I decided to take the extra time and drive from Georgia to Washington state. The problem was that our two vehicles aren’t great options for a family of 4 on a long road trip. My Nissan Frontier is fine, but doesn’t have a canopy over the bed and the gas mileage is not great (seriously, it’s shaped like a brick; not the most aerodynamic option). The wife’s Subaru Outback is better on gas by about 5 miles per gallon, but even with the station wagon-level storage, there wasn’t enough room for everything we’d need. We looked at hard-shell roof cargo options, but I ended up purchasing a soft roof cargo bag.
These are cheap, and you get good quality for the price. They also fold up into a really small storage bag so you can throw one on the shelf in the garage, or toss it inside the car if you need to bring it with you to pick up stuff.
The Bad
These aren’t very secure at all; anyone with a knife or improvised cutting tool can get into your stuff. They also aren’t convenient to access routinely, and they can slip a bit over a 3,400 mile drive (we had about two inches of slipping, as the front straps got tighter and tighter).
The Utility
You can hold a lot of stuff in these bags. About five fully packed out green GI duffel bags fit snuggly, which represents a lot of sleeping bags, tents, and other stuff you might need to bring along, so long as you don't need it inside the car for immediate access.
Mileage
Over the course of 3,400 miles the Subaru Outback averaged 23.7 miles per gallon. This didn’t concern me too much, but it does represent a drop from the 30 - 32 miles per gallon a Subaru Outback would normally get on mostly freeway driving. Even with that decrease, it was still more efficient than using my pickup. With the bag installed and filled, the Subaru's top profile only came up to match the Frontier).
The Interesting
I went with the “international safety orange” version since I plan on re-using this bag to support my local Trail Life troop in the future. Having a great big, highly visible beacon has a lot of utility for normal outdoor recreational activities. However, if you wanted to be more clandestine, there is a grey option available. If you need to camouflage an orange version, keep some olive drab spray paint on
hand, or actual fabric paint to reduce the visible signature.
The Final Verdict
If you have a car with a roof rack or rail system, this is a great option. Even beyond using it to haul stuff from point to point, having a weather-resistant storage bag has plenty of utility at a campsite or location where some additional protection from the elements is needed (such as hand tools, spare batteries, extra rope, etc).
This recipe is a staple from my childhood. I generally make this soup for my family on Sunday afternoons, as it’s quick to put together and makes a filling meal. It also makes a pretty decent “refrigerator magnet” for any other leftover proteins you may have; just chop them up and add to the soup (although I’ve never tried leftover fish, the beef, pork, and chicken have all been successes).
Ingredients
One 14 oz or larger smoked sausage (Kielbasa works fine)
One can stewed tomatoes
One can each: pinto beans, black beans, kidney beans, great northern beans, black-eyed peas (technically a bean, despite the name), and whatever else you have on hand
One quart of savory fluid (stock, broth, etc)
Seasonings (to taste)
Directions
Slice up the sausage into bite-size rounds and add to pot.
Dump stewed tomatoes into pot.
Rinse the beans before putting into the pot. This will remove a large amount of the specific carbohydrate that ferments in your gut to give you gas.
Cover the bean/sausage/tomato mix with the savory fluid, and heat until it boils.
The notes are after the recipe, because we have manners
This recipe is much like “The Pirate Code” in that it’s “more like guidelines, really.”
My wife and I have made this recipe with beans we pressure canned ourselves. Even with Aldi generic canned beans coming in at under a dollar per can, it’s hard to beat the economy of canning your own legumes.
What do you do if you can’t get sausage? This is where tinned meats, or pressure canned meats, come into play. The majority of the flavor from the sausage is a “smoky” note, but that’s not important from a nutrition standpoint. You can add back in a lot of “umami” flavor with soy sauce (which is shelf stable almost indefinitely) or even pressure can sausage ahead of time.
If you keep Kosher or Halal, then obviously your meat options are more limited, but tinned chicken seems to work fine. If you are vegetarian, then there are all sorts of shelf stable “textured vegetable protein” soy options to mix in.
The best part about this recipe is that it is cheap, quick, and filling, but whether or not it ends up “delicious” really depends on how you season it. I like a few slices of hot pepper (or a few dabs of pepper sauce) to liven it up, along with a few bay leaves, basil, and black pepper for more depth. Sometimes I’ll use “Italian stewed tomatoes” with the basil and oregano already mixed in. One time I used miso soup as the savory liquid, and it worked well enough that my younger son asked for that variation specifically.
There is one trick I’ve learned for rinsing the beans, and that is to use a cheap set of kitchen strainers. I bought mine from Ikea, but any set will do. If you don’t want to waste the water rinsing beans, justdump the contents of each can into the pot; your gut flora will eventually adapt to the non-digestible carbohydrates and the flatulence will diminish quite a bit.
So if you are ever in a survival situation where water is at a premium you can, as Benjamin Franklin once opined, “Fart proudly.”
Betty is a professional canner that started with her grandmother at 5 years old. She is the owner of Homespun By Betty, and makes jams with personality in Statesville, NC.
Visit www.homespunbybetty.com to order jams, jellies, butters, and to check out new recipes.
Green beans are one of my favorite things to put up in the summer. They are delicious, and are a staple side dish in my house at least once a week.
Green beans are also a low-acid food and therefore have a higher risk of botulism, a toxin that is produced by a bacterium called Clostridium botulinum which is naturally occurring in soils and can be found on all vegetables. This bacteria doesn’t usually produce toxins, but when sealed in an anaerobic environment (one without oxygen), the bacteria grows and makes the botulism toxin.¹ Unfortunately, the canning process removes all the air from the jars and creates this anaerobic environment where Clostridium botulinum can flourish.
To destroy the botulism toxin, you can process the vegetables in an acidic environment, such as pickling, or pressure can them to a temperature of 240° F for an extended period of time.² Always use a trusted recipe, and make sure you do your research to verify all information. State universities with a strong agricultural department provide excellent resources for home canning, and another great resource is the National Center For Home Food Preservation website.
Once you have your green beans, wash them multiple times to remove any dirt, insects, or pesticides, then snip off the ends. You can either leave the beans whole or snap them into about 1-inch pieces.
Next add the beans, any seasonings you want to use, into the jar. When choosing your seasoning, you’ll want to avoid using sage because it becomes very bitter when canned. I like to add fresh garlic, onion, and Rusty’s Original Southern Rub.
Fill the jars with water or broth, leaving 1 inch of head space, and de-bubble the jars. To de-bubble, take a wooden or plastic stick and move it around inside the jars. This will bust any air bubbles and allow the jar to heat evenly. Wipe the rims with white vinegar and then put the lids and rings on, screwing the lids fingertip tight.
Fill your canner with the recommended amount of water (see the instruction manual for your canner), and place a rack in the bottom of the canner. Place the jars onto the rack and then close the canner according to the instruction manual.
Heat the canner on the stove over high heat and allow it to come to temperature. When the canner starts consistently pushing steam out of the vent pipe, allow the canner to vent for 10 minutes. Then place the weight or jigglier onto the vent pipe and allow it to come to the correct pressure based on your elevation:
For elevations of 0 to 1,000 feet, use a 10 pound weight.
For elevations above 1000 feet, use a 15-pound weight.
Process pint jars for 20 minutes and quart jars for 25 minutes.³
After the processing time is complete, turn off the heat and allow the pressure to drop to 0 psi. Do not manually vent the canner. Remove the weight or jigglier and allow the canner to rest for 10 minutes before opening; this allows the temperature of the jars to come down slowly and prevents losing any ingredients caused by rapid temperature change.
Remove the jars from the canner and set them on a towel to rest for 24 hours, then check the safety button in the lid to confirm the jar is sealed. Wash and label the jars, and store them in a cool dark place with the rings off.
Footnotes
About Botulism, Centers for Disease Control and Prevention
Hello intrepid readers! My name is Stephen, and I am a recovering gearhead. My first camping trip was at age six when my family drove 12 hours to the Upper Peninsula and spent a week at various campgrounds there. Between family and Boy Scouts, my memories have only gotten more numerous and there are too many trips of all sorts to count.
In a 72-hour bug-out scenario, you can survive on cold rations or starve, but what if that situation goes longer? What if you are bugging in without power? Hot food provides morale as well as sustenance.
Four basic fuel types exist: wood, solid, liquid, and gas.
Wood can be scavenged so you do not have to carry it, but takes longer to get lit, gives inconsistent heat, and requires more effort to collect fuel.
Solid fuel tabs are easy to use, but lack temperature control since they are all-or-nothing.
Liquid fuels work in a wider variety of temperatures and are scavengeable, but lack the quick plug-and-play of a butane or propane canister.
Gas, for all its ease of use, suffers in performance when temperatures are below freezing and may even stop working when it's cold enough.
So which one did I pick?
Let me introduce you to the MSR Dragonfly, a multi-liquid fuel backpacking stove.
My dad bought this stove in the 90s as part of his preps for Y2K, and in the early 2000s we dug it out to use on a 50 mile backpacking trip with my best friend and his dad. As an illustration of the usefulness of having a liquid fuel system: we forgot to fill the fuel bottle, but since this will burn anything from gasoline to jet fuel, we were not out of luck, and a gas station sufficed to get us topped off.
As with any liquid fuel stove, pressurizing the fuel tank -- in this case steel bottles that, other than the red color and warnings all over them, could be mistaken for a water bottle -- takes some elbow grease. Also, as the fuel runs low, you'll have to pump more to get the same pressure. Since you don't want to carry or store the bottle pressurized, this means you will get a workout with each meal.
The stove folds up fairly compactly, and will store in a pot as MSR advertises. Its three legs provide much more stability than a pocket-rocket style stove (which Erin reviewed back in April 2022) since the footprint is wider than your typical fuel canister.
One other difference in usage is the pre-heating step where you let out a little fuel, then ignite it with the fuel turned off. This takes some getting used to; I remember the little fireballs we created at first, learning to control how much fuel was released. Once the flame dies, open up the fuel again, ignite, and proceed to cook.
Although it definitely had some adjustability, my dad’s version didn't simmer as the website claims. We burned some pancakes in our 70’s Boy Scout mess kits, though it was probably just as much of a cookware and/or batter technique issue as stove functionality. It served us well on that trip, and when I moved out on my own I purchased one. They've definitely changed the model over the 20 years since then, because my much more recent purchase looks drastically different.
The MSR Dragonfly is not the lightest stove, weighing 1 lb 3 oz without the fuel bottle, but I want it for it size. As an apartment dweller for the time being, I am at risk of losing cooking capabilities with a loss of electricity, so having a backup is comforting. What's more, it will hold my two liter stove-top pressure cooker, which I bought for the exact purpose of cooking beans and rice in a more fuel-efficient manner. No, I won't carry that pot in a bug-out situation, but bugging in whenever possible is always preferable.
Fuel flexibility is also a huge consideration for my prepping lifestyle. I can burn five different liquid fuels (gasoline, diesel, jet fuel, kerosene, and white gas) with just the change of a nozzle, using only a screwdriver. Even at current prices, gasoline will provide way more burn time than a small cannister of isobutene at the same price: Amazon has butane canisters for $2.14 per oz, versus $0.04 per oz of gasoline (presuming $3.99/gallon). If you stock up diesel or kerosene you also get more than twice the energy efficiency per MSR specs, though kerosene does burn dirtier; I lack experience with diesel to comment.
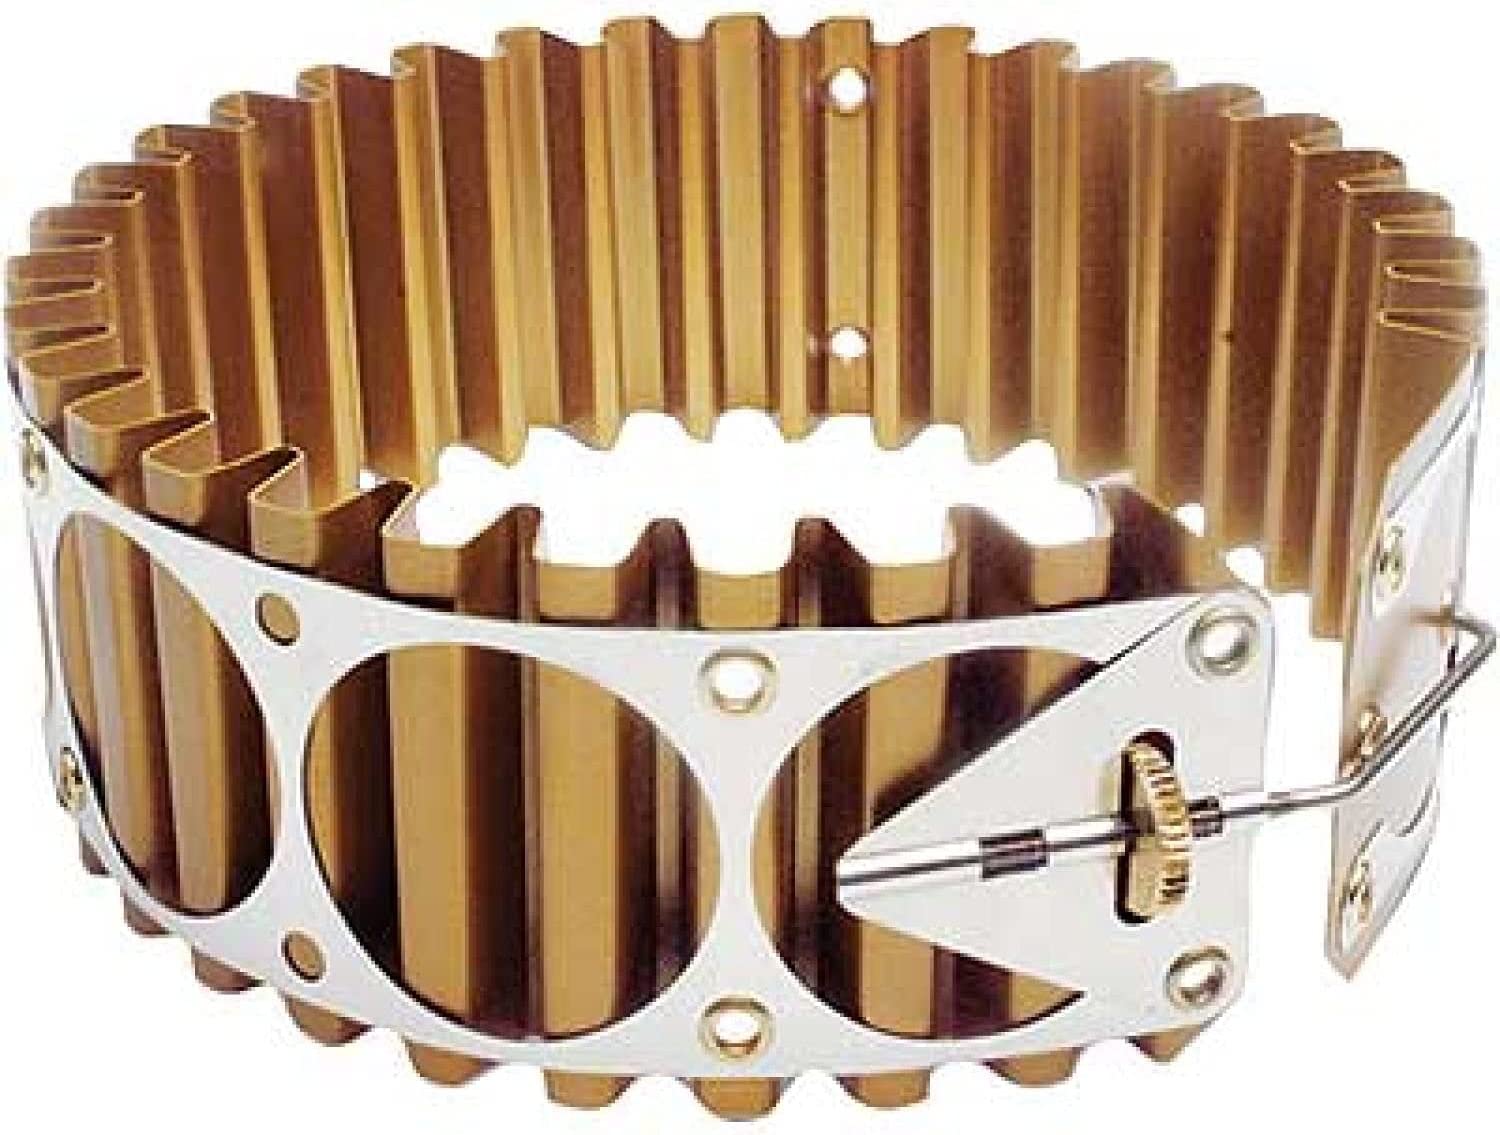
If money and weight are no issue, another way to increase performance is to get the heat exchanger which clamps onto the bottom of a pot. This prevents the heat escape around the edges of the pot that Erin saw in using the pocket rocket at full blast. My dad owned the heat exchanger, and it needed a little monkeying around, but we definitely noticed a difference in performance.
In theory, the Dragonfly stove will need more maintenance than many stoves, such as the replacement of o-rings. MSR recommends this be done on a yearly basis regardless of use, but my dad’s stove sat at least a decade without use and worked perfectly fine.
I know of backpackers who only use the MSR Pocket Rocket, and its price, weight, and ease of use are definitely appealing; it's for those reasons that I want to add it to my fiancée’s bag when I have the funds. In my opinion, though, the Dragonfly’s capabilities make it worth its extra weight and complexity.
Erin Palette is a participant in the Amazon Services LLC Associates Program, an affiliate advertising program designed to provide a means for sites to earn advertising fees by advertising and linking to amazon.com.