Showing posts with label Shelter. Show all posts

Tuesday, November 30, 2021

The Cheap Dome Tent

Not actually Erin.
& is used with permission.

You know what I'm talking about: Small dome tents, usually marketed as "for kids", found in the sporting goods section of Walmart and Target and retailing for around $20. Yeah, those.

You should get one. 

I promise you I'm being completely serious here. I know they're not rugged, I know they're small. But you know what else they are? They're lightweight and will fit most adults, even if you have to sleep diagonally. 

Buy one and put it in your car. 


If your car ever gets stranded, you'll have a place where you can stretch out. You'll have a shelter that will keep the sun and bugs off you, and has better airflow than a car. You'll have somewhere dry to put your gear if you need to stay in the car for warmth, and if the car becomes an oven you won't worry about your preps going bad in the heat. 

If you need to walk home, it weighs something like 3.5 pounds. Compared to the food and water in my GHB, that's nothing. The shock-corded poles means it sets up quickly, which gives me more time to do other things. 

https://www.walmart.com/ip/Ozark-Trail-2-Person-Jr-Dome-Tent-6-x-5-Blue-NEW/197340435

Sure, the stakes are awful. Carry better ones

Sure, the fabric might tear or the poles might break. You have duct tape, don't you?

Sure, it won't withstand a tropical storm or keep you warm in a blizzard. It's a lightweight tent that you paid $20 for, and if it holds together long enough to get you home, then it's done its job and you've gotten your money's worth. You can always buy a new one if need be. 

https://www.target.com/p/wakeman-happy-camper-two-person-tent-green/-/A-54521249

Think of it like an umbrella you can lie down in. You've lost umbrellas before, or they've broken in rain storms, and you end up buying another to keep you dry "just in case you need it". 

Buy one, put it in your car, and don't worry about it until you need it. 

Thursday, February 6, 2020

Shelter Essentials

Lately we've been discussing skills and the need to practice them, and one of the most important skills that I can think of is providing some form of shelter in an emergency. I'm going to take a generalist approach to my methods and ideas on shelter in order to cover as many variables as possible, as this is one of those times where knowing "why" helps take care of the "how".

These are general ideas work for improvised shelters, portable shelters, and impromptu or expedient shelters. You're going to want the same basics in any tent, debris hut, basement, or bunker. If you're looking at a damaged or abandoned structure, these are the things to give extra scrutiny.

Parts of any shelter, in my order of importance:

Roof
  • Most of what we'll need shelter from is going to come from above. Rain, snow, fallout, and sunlight are all things to take shelter from, so having a proper roof over our heads is important. 
  • A proper roof should stop most of what you're trying to get out of. Nothing is perfect, so look for ways to improve what you've found with what you have.
  • Of slightly less importance is heat; heat rises, and a good roof will trap it closer to you and therefore shrink the amount of heat you'll need to generate to stay comfortable. 
  • For the most basic shelter, a flat roof leaned against a solid structure or another section of roof (to form a tent-like shelter) is quick to build and simple enough to throw together from debris and scraps. Additional heat is usually provided by an open fire outside the shelter, near the opening, for safety. 
  • More advanced shelters should include some method of allowing smoke and excess heat out through an opening in the roof, so include that in any planning.

Floor
  • Heat may rise, but it is also carried away by conduction. Placing a floor between your body and the ground will break the physical connection between the two and reduce heat loss from conduction through the earth.
  • Anything placed on the bare ground will be better than nothing. Packed earth is a building option, but should be on the bottom of the list.
  • If you're going to be using an open fire inside as a source of heat, you'll want to make sure the floor is not going to catch fire. 
  • You'll want your floor to be above ground level to prevent water from entering. If you can't get that, make sure the floor is sloped enough to allow water to leave. The standard for water drainage is at least one-eighth of an inch of drop for every foot of length.

Walls
  • A simple debris hut or lean-to won't have actual walls, but anything more complicated than those will have them. 
  • Walls have to support the roof and block weather, and are normally built before the roof. Plan ahead and make sure you have some way to get the roof pieces up on top of the walls, or you'll have an animal pen instead of a shelter.
  • They also should be constructed in a manner that will let you control air-flow through the shelter, especially if you are using an open flame as a source of heat.
  • Walls will give you more room to move around inside, but will also increase the amount of air you'll have to heat or cool, so plan your shelter according to your fuel supply.

Openings
  • Opening don't have to be doors and windows, but those are the most common. Chimneys, ventilation holes, and loose construction methods also count as openings. Openings should have some method of closing when they're not in use.
  • Doors and shutters are a great way to add a layer of security to your shelter while they help keep out the weather. The tighter they fit, the better they will keep out dust, snow, and vermin.
  • Windows don't have to be made of glass. Early pioneer cabins and houses didn't have access to glass, so they used oilcloth or greased paper to keep the bugs and dust out while letting some light in. 

Materials
  • Modern plastics are common enough to be useful in emergency shelter construction. Clear plastics make passable windows, but add layers if it's very thin. Opaque plastics make good waterproofing for roofs and walls.
  • Wood comes in many forms, from sticks, logs, and branches to mill-cut lumber. Easy to work with and easy to find anywhere outside of a desert or arctic plain, wood is the most common material in the US.
  • Masonry like brick and stone is common in many areas, but requires a binder of some sort (like mortar) to hold them together, unless you're lucky enough to find flat stones that will stack securely. A good source of clay and a fire will provide you with masonry bricks.
  • Dirt makes a fair construction material, but takes a lot of time and manpower to use correctly. Sod cabins were common 150 years ago around my area; adobe is more common is the Southwest; and baked mud bricks were used for centuries in other parts of the world. Google "rammed earth construction" if you want more information on a rather rare method of building.

This isn't an exhaustive list, but rather more of a way to spark your imagination and powers of observation. I've got a fair amount of experience building and repairing things, so I can look closely at a structure and get a good idea of how sturdy it is, but some of you may not have much experience and will have to learn as you go. Just remember that practice makes permanent, so if you practice something wrong, you'll always get it wrong. I'll be practicing a couple of methods of making emergency shelters this spring and summer, so watch for updates with pictures.

Monday, November 18, 2019

A Little Fun Practice Shelter Assembly

All work and no play makes for some psychotic little preppers, so I decided to make an igloo out of cargo pallets.


Godspeed to you all.

Thursday, November 7, 2019

Fallout Shelters

One of our readers on Facebook brought up fallout shelters as a form of prepping. Done properly, a fallout shelter is a moderately expensive ($5,000 -  $10,000) bit of prep because they're not as prevalent as they once were.

First, a disclaimer: fallout shelters are not the same as bunkers. A full-blown nuclear war bunker will have an armored door, air and water filtration systems, and months or years of supplies for the occupants, whereas a fallout shelter is a temporary shelter to get people out of the elements and away from the residue that will drift out of the sky following a nuclear blast (fallout). These shelters were designed and stocked to be used for a week or two, just long enough for the worst of the radioactive materials to burn out. Erin has explained radiation in past articles, but the short version is that the most energetic (dangerous) isotopes burn out quickly, so a couple of weeks underground is a good way to avoid exposure.

Sixty years ago, during the Cold War between the US and the USSR, nuclear war was a very real possibility and people prepared for it as best they could. An old neighbor's house had a decent one built into the basement with built-in shelving, bunks, and a double-turn entrance, meaning that the entrance was built so that there was no direct line of sight from the inside to the outside which provided a barrier to radiation. The neighbors turned it into a pantry for storing bulk foods, but it was still useful as a storm shelter. The threat of nuclear war has subsided, but having some place safe from tornadoes and other environmental hazards is still a good idea.

During the Cold War, our government actually set up a department of Civil Defense (CD) to provide information and supplies to the civilian population. I won't get into politics (we don't do that here), but this was an example of government actually trying to help the taxpayers. Unfortunately, the CD was replaced by FEMA in 1979, and their focus shifted to other threats. Simple supplies, well marked and pre-positioned where they will be needed, is something I'd like to see come back.

If you look around in the lower levels of older buildings, you may see a sign like this. These signs designated areas that the building's owners had loaned to the government for use as shelters. 

I was recently “promoted” at work and was handed a location of my own to run. The “new” location is a grain elevator that was built in 1955, in a very small town about an hour's drive from a major Cold War target. While digging through the accumulated papers and files, I found the original “license” papers for the fallout shelter on our site and some of the shipping papers for the supplies that the US government had placed there in 1962. Since the elevator is made of reinforced concrete and has a rather spacious “basement” area underground for pipes and conveyors, it would have made for a fairly comfortable shelter. The supplies had a limited (5 year) shelf-life and are long gone, but I did find the radiation detection kit sitting on a shelf in the back office. I'll do an article on that box later.

Here's a list of what was stored in my location for a maximum of 50 people and the descriptions from the official paperwork (the shipping papers didn't match the instructions exactly):

Crackers 5 gallon, 24.5# (11 cartons)
Food package, biscuit, survival. A wheat flour baked biscuit similar in taste and texture to a graham cracker. Each package provides 10,000 calories per person for 7 people. Each cardboard container contained six 6-pound cans of biscuits (390 biscuits, each 2.5”x2.5” and providing 30 calories).

Drum, metal, water storage (10 each)
17.5 gallon metal or fiber water containers, providing one quart of water per person per day. They were shipped empty with a plastic liner provided to keep the water clean and were to be filled once they reached the shelter. Remember the 5 year shelf-life?

Bag, liner, polyethylene (20 each)
For the water drums. The extras are so the drums can be used as toilets once the water is gone.

Sanitation kit, model 5K 1V (1 each)
A fiber (cardboard) drum, 16” diameter and 21” high containing:
  • 1 polyethylene liner bag
  • 5 pints toilet chemical (deodorant/disinfectant)
  • 1 privacy screen (5'x8' sheet of plastic)
  • 1 roll twine (for the privacy screen)
  • 6 wire ties (to close filled bags)
  • 20 rolls toilet paper
  • 1 can opener
  • 6 bottles of 50 Globoline water purification tablets (iodine-based water tablets)
  • 1 toilet seat
  • 1 pair plastic gloves
  • 20 plastic canteens (for rationing the water)

Medical kit A (1 each)
Medical kit A was the smallest and designed for 50 people. The B kit was for 100, and the C kit was for 300 and contained medications that wouldn't be allowed in today's political climate. The A kit contained:
  • 5 bottles of 100 aspirin
  • 1 bottle of 100 Aluminum Hydroxide Gel tablets (antacid)
  • 1 bottle of 10 Bismuth Subcarbonate tablets (similar to Pepto-Bismol)
  • 1 2 oz bottle of Calamine lotion (for skin irritation and rashes)
  • 2 bars surgical soap
  • 1 1 oz bottle of Eugenol (the active ingredient in cloves, useful for toothaches)
  • 2 4 oz containers of surgical jelly
  • 1 1 oz container Tetracaine ointment (similar to Lidocaine, a topical numbing agent)
  • 1 qt Isopropyl Alcohol (disinfectant)
  • 1 bottle ear drops
  • 8 4 oz containers Elixir Terpin Hydrate ( an expectorant, used to loosen mucous in the lungs)
  • 2 ½ oz eye and nose drops
  • Various bandages, dressings, sanitary pads and belts (ask your grandmother)
  • An official Civil Defense Medical Self-help Manual.
As you can see, the water and food supplies were subsistence level, and the medical supplies were mostly medicine cabinet grade. Since the occupants were expected to be mostly sedentary, with no heavy work or exertion, two weeks on this diet wouldn't have been pleasant but it would have been survivable. Being in a grain elevator there would have been plenty of wheat and corn to supplement the rations, with a few rats for extra protein.


There are a lot of resources online for designing or buying a fallout shelter. If you just want to see some of the history of the CD system, I recommend the Civil Defense Museum. I'm trying to contact the owner of that site to see if he wants any of the stuff I've found; otherwise, it will probably go to a local museum.

Wednesday, April 27, 2016

Prudent Prepping: Shelter!


The dust has settled and the First 72 Hours have passed. Now we concentrate on what to do in, and how to plan for, the long term via Prudent Prepping.

Back in March I mentioned my purchase of a tent, and how there was no room inside my house to set up and evaluate it. Complicating things was all the rain (Yay!) California has received -- all on my days off, it seems. I didn't want to set up my tent in the rain or on wet ground, as I don't have a place to put it to dry out before re-rolling for storage.

My new tent is a Coleman Hooligan 2. purchased from a friend. I still don't have a complete test of the tent, as it needs to be staked down and my back yard has no lawn areas, but I was able erect it using blocks as anchors. This allowed me to set it up to check it over and see how everything works together.

Here is a Youtube video showing how to set up the Hooligan 2.


In less than 5 minutes I had the tent up and ready to place the rain fly, and I expect to be able to do it faster using actual stakes instead of blocks. As seen in the video, I also put the rain fly on backwards at first, but since it is held on by simple open end hooks, rotating everything 180 degrees was easy.


Here is the rain fly, incorrectly installed, and about to be blown off in the wind. I was not able to get everything completely assembled, due to setting the tent up on patio pavers in fairly breezy winds. Right after this, a gust of wind blew hard enough to tip the tent over and send the fly into the weeds, ending the photo session.

I like this tent, even if it isn't the lightest (7 lbs) since it IS a tent and I needed one for so long. I now have the last item on my prepping list!

Recap
  • One seriously needed tent, from a friend, priceless. Both of them.
  • Thank you.

Just a reminder: if you plan on buying anything through Amazon, please consider using our referral link. When you do, a portion of the sale comes back here to help keep this site running!

If you have comments, suggestions or corrections, please post them so we all can learn. And remember, Some Is Always Better Than None!

NOTE: All items tested were purchased by me. No products have been loaned in exchange for a favorable review. Any items sent to me for T&E will be listed as such. Suck it Feds.

Thursday, January 28, 2016

Area Air Purification, Part 3: Monitoring

I've covered the basics of sealing off a “clean” room and filtering the air for it, and now comes the hard part: measuring air quality. It is a science, and the methods used vary by the pollutant that you're trying to measure. I'll try to break it down into major groups and give some simple examples of testing methods.

Oxygen Level
OSHA defines “safe” breathing air to have between 19.5 and 23.0% oxygen (O2) by volume. This band is narrow for regulatory reasons, and it can be stretched a bit lower if the gasses displacing the oxygen are not dangerous and a bit higher if you control sources of ignition.

I know all of you are trained in CPR and mouth-to-mouth resuscitation. Do you realize that the air you're exhaling into that unconscious person is about 16% O2? That falls below the OSHA standards, but is enough to keep a person alive. You'll likely pass out at around 10-15%, which is why I use 15% as a lower limit. Once you've passed out, you are no longer functional and are as good as dead in a crisis/emergency situation. Physical condition and various health issues are going to determine your personal threshold.

On the upper side, you can breathe 100% oxygen for short periods of time (hours) without permanent damage. The major problem with any concentration over 25% is the increased risk of fire. Oxygen itself doesn't burn, but it combines with other substances to create fire. Oxygen enriched environments require special attention to the choices of clothing, electrical equipment, and other things that may ignite or cause a spark.

So, how do you measure the oxygen level in a room? There are various detectors on the market that use electrochemical sensors to measure specific chemical concentrations in the air, but they're not cheap. A typical 4-gas detector will measure O2, Carbon Monoxide (CO), Hydrogen Sulfide (H2S), and combustible gasses, but will cost between $500-1000 and require frequent calibration. I found the test results from an experiment that gives a much cheaper method: a candle will go out if the O2 drops below about 18%.

For years, the US Coast Guard used “flame safety lamps” to check for sufficient O2 in holds and other shipboard spaces, since a flame can't be sustained with less than 16.5% O2. Miners used similar lamps when canaries got to be too expensive (just kidding, they needed a light that wouldn't cause an explosion). Simply put, if a candle won't burn, you can't breathe the air and expect to live... but remember that a flame is consuming oxygen as it burns.

Carbon Monoxide (CO)
CO is formed by the incomplete burning of organic material. CO is flammable (in the range from 12.5-74% by volume) as well as toxic (it binds to the part of your blood that normally carries oxygen, preventing your cells from getting sufficient oxygen). It is a colorless, odorless gas that will cause headaches at about 1-1.5% by volume, and death at about 4% after 30 minute's exposure. This is a nasty chemical that used to be piped into houses as “man-made gas” or “coal gas” for lighting and cooking, and was replaced by “natural gas” (methane). There are tons of battery operated CO detectors on the market, most of them are less than $30. Get one.

Carbon Dioxide (CO2)
CO2 makes up about 5% of what you exhale with each breath. It can also be formed by fire, decomposing organic material, dry ice, and leaks in food service soda machines. CO2 is heavier than air and will settle into low spaces, like basements and cellars, and displace the oxygen that was there. CO2 will cause unconsciousness and death at 10% by volume, and intoxication at 5%. The regulatory limit for exposure is 0.5%. CO2 detectors are available, but they're hard to find (search engines assume that you're an idiot and meant to type CO so they don't give proper results). They're also not cheap, running around $100-125. For local suppliers, ask around at bar and restaurant suppliers or greenhouses.

Flammable/Combustible Gasses
This is a wide category that covers everything from hydrogen (H) to volatile organic compounds (VOC). Any gas or vapor that will burn in air is a flammable or combustible gas, and is one of the main things that commercial gas monitors check for. Something as simple as an idiot getting too liberal with a spray can of penetrating oil can ruin your whole day (been there, seen that) if there is an ignition source present. If you're going to be working around or expect to see combustible gasses, get a monitor/detector. Broken gas lines after an earthquake or tornado are common, but natural gas and liquid petroleum, both colorless, odorless gasses, have an additive that stinks (methyl mercaptan) just to make them easier to notice.

Dust
Normal household dust is an annoyance, made up mostly of dirt, dead skin cells, and minerals that are not a hazard. If you live in an older building with the potential of having asbestos insulation, dust caused by a natural disaster could be a long-term health hazard. Unfortunately, there is no simple test for asbestos, so if in doubt, get out the respirator. Wood dust, concrete dust, volcanic ash, and silica (fine sand) dust all have health risks similar to asbestos and are visible in the air before they reach dangerous concentrations.

Other dusts can be an explosion hazard. Any vegetable-based dust will burn rapidly. If suspended in the air and ignited, the flame will spread (propagate) fast enough to be classified as an explosion. Visual testing is the easiest: if you can see it in the air it is too much. At your own risk, toss a handful of flour into the flames of a campfire some time for a demonstration or do a search on “Cremora pots” for some interesting videos. We're not responsible for your lack of eyebrows, arm hair, or any other injury if you try these.

Chemical Warfare Agents
There are people on this planet who have, and will use, chemical warfare. Terrorists have been known to use some of the simpler nerve agents, usually in subways or other enclosed spaces. Without the proper testing gear (which is normally only found in military units and is in the “if you have to ask you can't afford it” price range), the only method I can suggest is the miner's canary. Birds breathe differently than mammals, and are more susceptible to anything in the air. Canaries, chickens, geese, or even sky rats (commonly called pigeons) can be used as a warning method. If you're sitting inside watching the birds through the window and they start to fall over, it's time to take some action. Caged sky rats placed within sight can give a few seconds or minutes of warning, if this is a potential threat you want to prepare for.


If there are any questions or you would like me to expand on any of these, feel free to leave a comment here or on ourFaceBook page. I will try to answer as well as I can and I enjoy getting the feedback.

Thursday, January 21, 2016

Area Air Purification, Part 2: Filtration

In Part 1, I explained the basics of how to seal off a room or other small area to keep contaminated air out. Before I start on Part 2, "How to Clean the Air," I need to answer a few questions that arose from Part 1. 

What kind of plastic should I use?
Any solid plastic sheeting will work; the thicker they are, the more durable they are. Plastic painter's drop cloths are cheap and don't take up much room on a shelf, but a roll of 4 or 6 mil (thousandths of an inch) “clear” plastic is easier to work with. Be aware that “clear” often means “translucent” instead of “see-through”. Black plastic may work better if you're trying to provide blackout curtains on exterior windows.

What kind of expanding foam should I use? 
Where do I find it?
I like the Great Stuff brand. It comes in two flavors, normal (for cracks under 1 inch wide) and widegap filler (for larger cracks). Most hardware and home supply stores carry it, as well as Amazon.com.

If you have a lot of cracks to seal, there are semi-pro systems out there that use a wand and a disposable cartridge.

What kind of tape do I use?
I keep blue painter's tape on hand for business reasons, and I know for a fact that it works to hold up plastic over a broken window in an Iowa Autumn. Duct tape varies in quality by brand, and I have seen some of the cheaper duct tape fall off of a vertical seam after less than a day. “Gaffer's”tape, 100mph tape, and Gorilla brand have all worked well for me in the past. Packaging tape, normally used to seal cardboard boxes, sticks to plastic very well and is easy to apply if you have a tape gun. Basically, any tape that will stick and is at around 2 inches wide is what you're looking for.

Part 2: How to Clean the Air
Once you have your area sealed off, you need to have a way to pump filtered air into it. That means you'll need an air mover and a filter.

Air Movers
I've read of hand-operated air pumps in prepper novels, but I'm not sold on them. The amount of air that you can pump through a bellows or similar system is tiny compared to a powered fan. Unless you're thinking of building a very small, totally sealed underground bunker, plan on using some form of electricity to move the air for you.

Most home heating/cooling systems use a squirrel-cage fan to move the air through the unit. They're small, quiet, and move a large volume of air at relatively low pressure. If you can access your furnace and isolate the input or return air ducts (hint: they'll be on the side with the filters) and you have a way to power the blower, you're already set. Finding a small squirrel-cage fan isn't that hard, and they aren't terribly expensive.

In-line duct fans are another option, and are easy to fit into a lot of DIY projects. I've used them to boost air flow into rooms that didn't get enough air flow when the AC was running and they last about ten years if you keep your filters and ductwork clean. Dust will kill them within a couple of years.

Whichever method you choose, you need to be able to move enough air through your filters to maintain a slightly positive pressure inside your clean space. This will force your plastic sheeting against any holes, and it will keep contaminated air out if your seams aren't perfectly taped.

You'll also need to figure out how much air you're going to need to move and size your blower accordingly. A good rule of thumb is to calculate the volume of your clean space (length x width x height) in cubic feet and expect to pump that much air at least five times every hour. You could probably get by on less, but it is going to depend on how many people you have breathing the air and how active they are. As a point of interest, when doing confined space entries we often use 20 ACH (Air Changes per Hour) when calculating air movement.
  • Example 1: a small bedroom of 10 x 12 x 8 feet = 960 cubic feet (cf) of air. 5 ACH (Air Changes per Hour) would be 960 x 5 = 4800 cf per hour. 4800 cf / 60 minutes per hour = 80 cf per minute (cfm). That's not a very big blower when you look at the ratings of most fans. 
  • Example 2: an enclosure around a child's playpen, roughly 4 x 4 x 3 ft = 48 cf. 5ACH x 48 cf = 240 cf per hour. 240 cf / 60 minutes per hour = 4 cfm. That's possible with a battery operated 12V fan.
Filters
Okay, you've got a sealed area and have a way to push air into it. How are you going to filter the air before you move it? I can't recommend a set of filters that will remove everything possible, but I may be able to point you towards something that will meet your needs.
  • Household filters that you'll find in the hardware stores are ranked by Minimum Efficiency Reporting Value (MERV) going from 1 to 16, where the filters that stop smaller particles earn higher numbers. Follow the link for a good explanation of the different ranks and example of what they'll stop. 
  • HEPA (High Efficiency Particulate Air) filters are the standard and correspond to a MERV of at least 16. A proper HEPA filter will remove at least 99.97% of all particles larger than 0.3 micron. 0.3 micron means that a HEPA filter will stop most bacteria and all pollen or dust, but won't catch all viruses or smoke. 
  • Hospitals use HEPA filters backed up with strong ultraviolet (UV) light to clean the air in operating rooms and infectious disease wards. The UV lamps are placed in the ductwork and kill off viruses, molds, and yeasts that might be floating around. They are placed inside the ducts to prevent damage to human eyes, since UV light is mostly invisible and very destructive to living tissue. 
  • Electrostatic filters work by passing the air through a series of electrically charged grids, something like a very fine mesh bug zapper, that causes particles and chemicals to cling to the grid due to the difference in electrical charge. They are quite efficient at removing pollutants like smoke, but needs to be cleaned , usually by running them through the dishwasher or something similar. Some of the small room “air purifiers” work on the same principle but I have no experience with them. 
  • Ozone generators work by using high voltage electricity to create small amounts of ozone, a form of ionized oxygen that chemically attacks volatile pollutants and breaks them down into less dangerous compounds. Think of it as the air filtration version of using bleach to clean up water. Like bleach, ozone in large quantities is corrosive. 
  • Carbon filters (activated charcoal) work to clean air the same way it does water, by trapping contamination in the microscopic pores of the carbon. Good for removing chemicals and odors. 
  • Potassium permangenate is another water treatment that is used to clean air. Useful in removing hydrogen sulfide, but......
  • Chemical filtration is a technical field that is beyond the scope of this humble blog. If you're expecting to be dealing with nerve agents or other airborne chemical weapons, you need to consult with experts in that field.

Putting It All Together
  • I recommend placing your filters and air mover outside of your clean space. This may mean you'll have to wear a respirator while servicing it (a wise precaution anyway), but it will keep the concentrated filtrate (whatever gets caught in the filters) out of your clean space. There's no use going to all of the trouble of filtering it out of the air and then keeping it where you live. 
  • Place the filters on the intake side of the blower. This will keep the blower fan cleaner, ensuring a longer life. 
  • Make sure your source of air has enough oxygen in it to be worth filtering. No filter will provide more oxygen, so you need to make sure your source isn't deficient. Avoid drawing from underground spaces, since CO2 is heavier than air and will displace it in stagnant spaces.
  • Keep your ductwork as straight as possible. It doesn't take many sharp turns to slow down air flow. 
  • If you don't have metal ducting to connect your filter to your blower, improvise. Cardboard and duct tape with a layer of plastic over it will suffice for several days. The same goes with getting air into your clean space -- use flexible drier vent pipe or whatever else you can find to make it work.


As always, I will try to answer specific questions and help you find the information you need. Feel free to comment here or on our Facebook Page.

How to monitor for contamination is Part 3, since it gets fairly technical.

Wednesday, January 20, 2016

Prudent Prepping: Gimme Shelter

The dust has settled and the First 72 Hours have passed. Now we concentrate on what to do in, and how to plan for, the long term via Prudent Prepping.

For the last year or so, I have tried to find a good quality, used 2-3 person tent. I've come very close -- for example, the famous Craigslist "I just sold it 20 minutes before you got here"; quality and condition not as advertised; or even the wrong brand and size from the posted picture. I'm still looking and hoping that a good one will turn up before camping season rolls around or I need it in an emergency.

This lack of personal shelter has led me to begin...

Thinking Inside the Dome
As I am going to be Bugging In, and the likely disaster is going to be an earthquake, I've been thinking about other forms of shelter that are bigger than a backpacking tent and slightly more permanent. Repairs to structures to bring them back to livable condition could take months, if the Big One hits.

I have a sister with a family close by, and I've kicked around the idea of a dome as a way to shelter 4-6 people cheaply and in a form that, when not in use, would take up a small amount of storage space. 

Desert Domes has very complete directions for building domes from simple and small to large and very complex. What I like are the very detailed instructions such as the cut tube calculator, jig building diagram and bending illustrations found on this page.

I really need to sit down with my brother-in-law and work out if this is something that might work for all of us, but I figure that a dome 16' across would use less than fifty 10' long sticks of 3/4" electrical conduit. 
Similar to what I am planning
If you have a minimum assortment of hand tools (electric drill, hack saw or power saw, vise and wrenches) total cost for your dome frame should be approximately $175 and weigh less than 50 lbs. I'm not good with math so I can't calculate the area of the dome (Here's a dome calculator for you -- Erin), but I'm guessing another $100 in tarps will make it waterproof.

With the right wrenches and some help, a geodesic dome of this size could be built and covered in tarps in a day. Domes are very stable in winds when anchored correctly, and are popular at the Burning Man festival in the Nevada desert for that reason (not just for the hippie 'cool' factor).

Warning! Potential time sink ahead!

I am a do-it-myself person because of cost, but there are some other options that would blow up most BCP'ers budgets, like some of the pre-built and packaged domes from a company such as Pacific Domes. These are a much fancier option, with galvanized tubing, doors and covers included.

Another option is a variation of the Mongolian yurt called Hexayurt with a very link heavy and cluttered website here. The Tiny House Blog has a much cleaner and easily-read version of how to build a Hexayurt. Please look at the links on the bottom of the page for an interview with the developer of the Hexayurt!

These designs are fairly simple and, in my mind, shouldn't be considered as permanent or as stable as a dome. Having built neither, I really don't know.

All of these structures can be purchased and laid out with a minimum investment of dollars and time, stored away in a small space and assembled quickly when needed.

The Takeaway
  • In a disaster like an earthquake, plans may need to include more permanent shelter than a tent. 
  • Decide what is affordable and stick to your plan. 
  • Whatever you decide to build, having extra hands will make the job easier.
Recap
  • Nothing was purchased this week, 

As always, if you have comments, suggestions or corrections, please post them so we all can learn. And remember, Some Is Always Better Than None!

NOTE: All items tested were purchased by me. No products have been loaned in exchange for a favorable review. Any items sent to me for T&E will be listed as such. Suck it Feds.

Thursday, January 7, 2016

Area Air Purification, Part 1: Making a Clean Room

Since there was interest in an article covering air purification for more than just personal protection, I'll do my best to cover filtering air for a small area. This is a fairly deep subject, so I'm going to break it into at least two parts.

Filtering air isn't all that much different than filtering water. If you think of a personal respirator as analogous to a personal water filter, then it isn't too much of a stretch to think of a room air purifier as a small water filtration plant or a large water filter (like a Big Berkey).

If you have to shelter in place through a disaster, it's worth considering having to filter the air you'll breathe:
  • Claustrophobia is a real issue for some folks, and a mask is just not an option for them. 
  • Having a filtered enclosure that you can drop over a crib or playpen is worth looking into if you have ankle-biters crawling around. 
  • Setting up filtration for small children, the elderly, and the infirm is also much easier physically and emotionally if they have space in which to move.
There are some steps to go through, I'll cover the first two in this post:
  1. Identify what is in the air that needs to be filtered out (contamination).
  2. Keep the contamination out of your air supply.
  3. Filter the air coming in.
  4. Monitor for contamination.
Identify the Contamination 
This is the step where you figure out what you need to remove from the air you want to breathe.
  • If your main concern is the eruption of the super-volcano under Yellowstone National Park, the main contaminant will be fine ash or dust. 
  • Forest fires a few hundred miles upwind can make life miserable for people with breathing problems; the smoke and ash in the air travel a long way. 
  • If you live near a chemical plant that you fear may catch fire, the contaminants will be varied and considerably harder to remove. 
  • Chemical warfare attack is the worst-case scenario, requiring filters designed to remove the specific chemicals used by the military. 
  • Biohazards are another possibility that can be filtered out of the air with the right equipment. Anthrax has been used to contaminate buildings before, and may be used again. Airborne diseases are a medical research field all by themselves, but the filtration is fairly standard.

    Keep the Contamination Out
    Sealing a room or two is about as much as most of us will be capable of doing without spending more on filters than on the house itself.

    The choice of which room to use as a "clean" space will take some thought and planning. Ideally you'll want a room with as few openings and as little exposure to the outside air as possible, like a basement room. Dirt makes a good seal against the foundation and will keep out more air than most common house walls. Basement windows are usually smaller than those above ground, and entrances often have a "mudroom" or stairway leading outside which can be turned into an "airlock" for entering and exiting the clean area. An airlock is a small sealed area with two doorways, one leading to the clean area and the other leading outside. This arrangement minimizes the loss of clean air when you have to go in and out of the clean area and also gives you a place to leave dirty or contaminated clothes before entering the clean area. The idea is to never have both doors open at the same time unless there is an emergency.

    If you don't have a basement (perhaps you live in an apartment building), you'll want to pick an interior room with enough space to be comfortable in and as little contact with the outside walls as possible. Use as many existing barriers between you and the outside as you can, because each one is going to slow down or stop a portion of the contamination. Think of it as allowing that muddy water to settle out before running it through your LifeStraw.

    Creating a Clean Room
    Plastic sheeting and duct tape will take care of sealing up large openings like doors and windows, and expanding spray foam will work around cracks and gaps. (If you've ever winterized a house, you'll know where to start.)
    1. Close the windows and place a layer of plastic over them, holding it in place with duct tape. Tape along the whole border to get a good seal around the frame.
    2. Find and seal (plastic and/or duct tape) all vents coming into the room. This covers heater vents, floor drains (most of which have a P-trap to prevent sewer gasses from coming up through the pipe), drier vents, sink drains (the S-trap under the sink will stop more than a P-trap but isn't perfect), showers/tubs, and toilets. If you're in a hurry, a quick shot of expanding foam into a drain will seal it in a few minutes and the foam is easy to dissolve (acetone, gasoline, etc.) or remove later, when the crisis has passed.
    3. Electrical outlets and switches on outside walls should have the covers removed and expanding foam sprayed in the cavity around the wiring box. If you don't have any foam, duct tape over the switches or outlets to seal them as much as you possibly can.
    4. Doorways that are not going to be used should be sealed the same as windows. The doorways you are going to use to enter and exit the clean area (assuming you're not sealing yourself inside for the duration) will need to be closed off with overlapping sheets of plastic that will allow you to pass through without creating a 20 square-foot hole in your sealed area. 
      1. In an open doorway, tape a sheet of plastic -- wide enough to cover the doorway and long enough to hang all the way to the floor -- to the top of the frame, leaving the sides free. 
      2. Tape a second sheet of plastic to the top of the frame over the first one, but tape the sides of the plastic sheet to the sides of the frame and then carefully slice the second sheet from top to bottom in the center of the doorway. The idea is to make a plastic "valve" that blocks most of the airflow but will still allow a person to squeeze through. 
      3. Two or more doorways like that will help keep dirty air out and clean air in. 
      4. If you want to be able to close the actual door, you can nail wood to the frame of the doorway and attach the plastic sheets to that.
    5. If you live in a house or apartment with unsealed wood floors (polyurethane is great), you'll need to either get underneath the floor and tape plastic to the joists, or lay plastic down on the floor of the room and cover it with rugs after taping securely. 
    6. Ceilings are usually sealed better than floors, but look up and decide if there is anything that should be covered in plastic. Light fixtures and ceiling fans may need a layer of  plastic and tape if the wiring goes through to an unsealed attic or crawl space. Acoustic tiles or a drop ceiling are an indication that you'll need to get a ladder and investigate what's above your head.
    Positive Pressure
    Positive pressure is keeping the air pressure inside your clean room slightly higher than the pressure outside. Positive pressure systems are commonly used in hospitals for patients with failing immune systems, since they do a good job of keeping isolation rooms clean. Maintaining positive pressure will take energy to drive a blower, and sizing the blower gets difficult without knowing how well the room is sealed. More on this when I get to filters in part 2.

    You don't need a lot of pressure -- typically not more than 0.05- 0.10 inches of water column*. This will force your sealing materials against any openings (providing a better seal) and prevent outside air from seeping in through cracks or openings that you may have missed.

    The Next Step
    Once you have a clean area established, seal up windows and other openings in the building as time and materials allow. All forms of protection are best done in layers and this is no different.

    Part 2 will cover the expensive parts -- filters and monitors.


    *inches of water column (iwc) is a low-pressure scale of measurement. One atmosphere of air pressure at sea level is about 14.7 pounds per square inch (psi), a common scale of measuring air pressure. 1 psi = 27.7 iwc, and 1 iwc = 0.036 psi. For reference, a 25mph wind exerts about 0.30 iwc of pressure on your skin.

    Monday, November 9, 2015

    Rhi and Evie get a good Knight's Rest

    About two months ago, Evelyn and I got to talking. After comparing notes, we decided that we both needed a bit of a sabbatical. We needed to get away from "civilization." And people. And stress.

    You know, go hide in the woods away from the modern world for a few days - or in our case, just shy of a month - to re-center ourselves within ourselves. by getting our hands dirty destroying a few things, and building a few other things, and generally just hiding in the woods for the sake of hiding in the woods.

    Since I have multiple ongoing projects out at a farm owned by friends, where we're busy trying to build a reproduction Viking Village, I offered Evelyn a chance to come visit rural Oklahoma and help out with a few projects out there.out at Knight's Rest Retreat, in Bristow, Oklahoma. Those of you who are regular readers probably remember me mentioning projects on the Village when I helped build the Earth Oven.

    Over the next several weeks, Evelyn and I will both be posting various stuff about our Most Excellent Adventure. Some will be individual efforts, some will be joint efforts, and they will be a mishmash of things ranging from product reviews (we both tried out several new gear items) to general knowledge & advice for prepping and camping, to some of the more wild (but true!) tales of what all happened during Evelyn's month here in Oklahoma!

    Just to whet your appetites, some of the things we'll cover will include:
    • What happens when horses decide to go stomping through your tent?
    • Dealing with pregnant livestock and getting kicked by calves
    • Butchering Fowl 101
    • Puppies, and sheep, and horses, oh my!
    • Stumbling across wild bee hives
    • Old wives' remedies - bunk or beautiful relief?
    • Pygmy rattlesnakes and Evelyn's skillful shooting
    • Underfished ponds and lure-eating fish
    • Dogs that can work zippers
    • Why camp cooking doesn't have to taste nasty


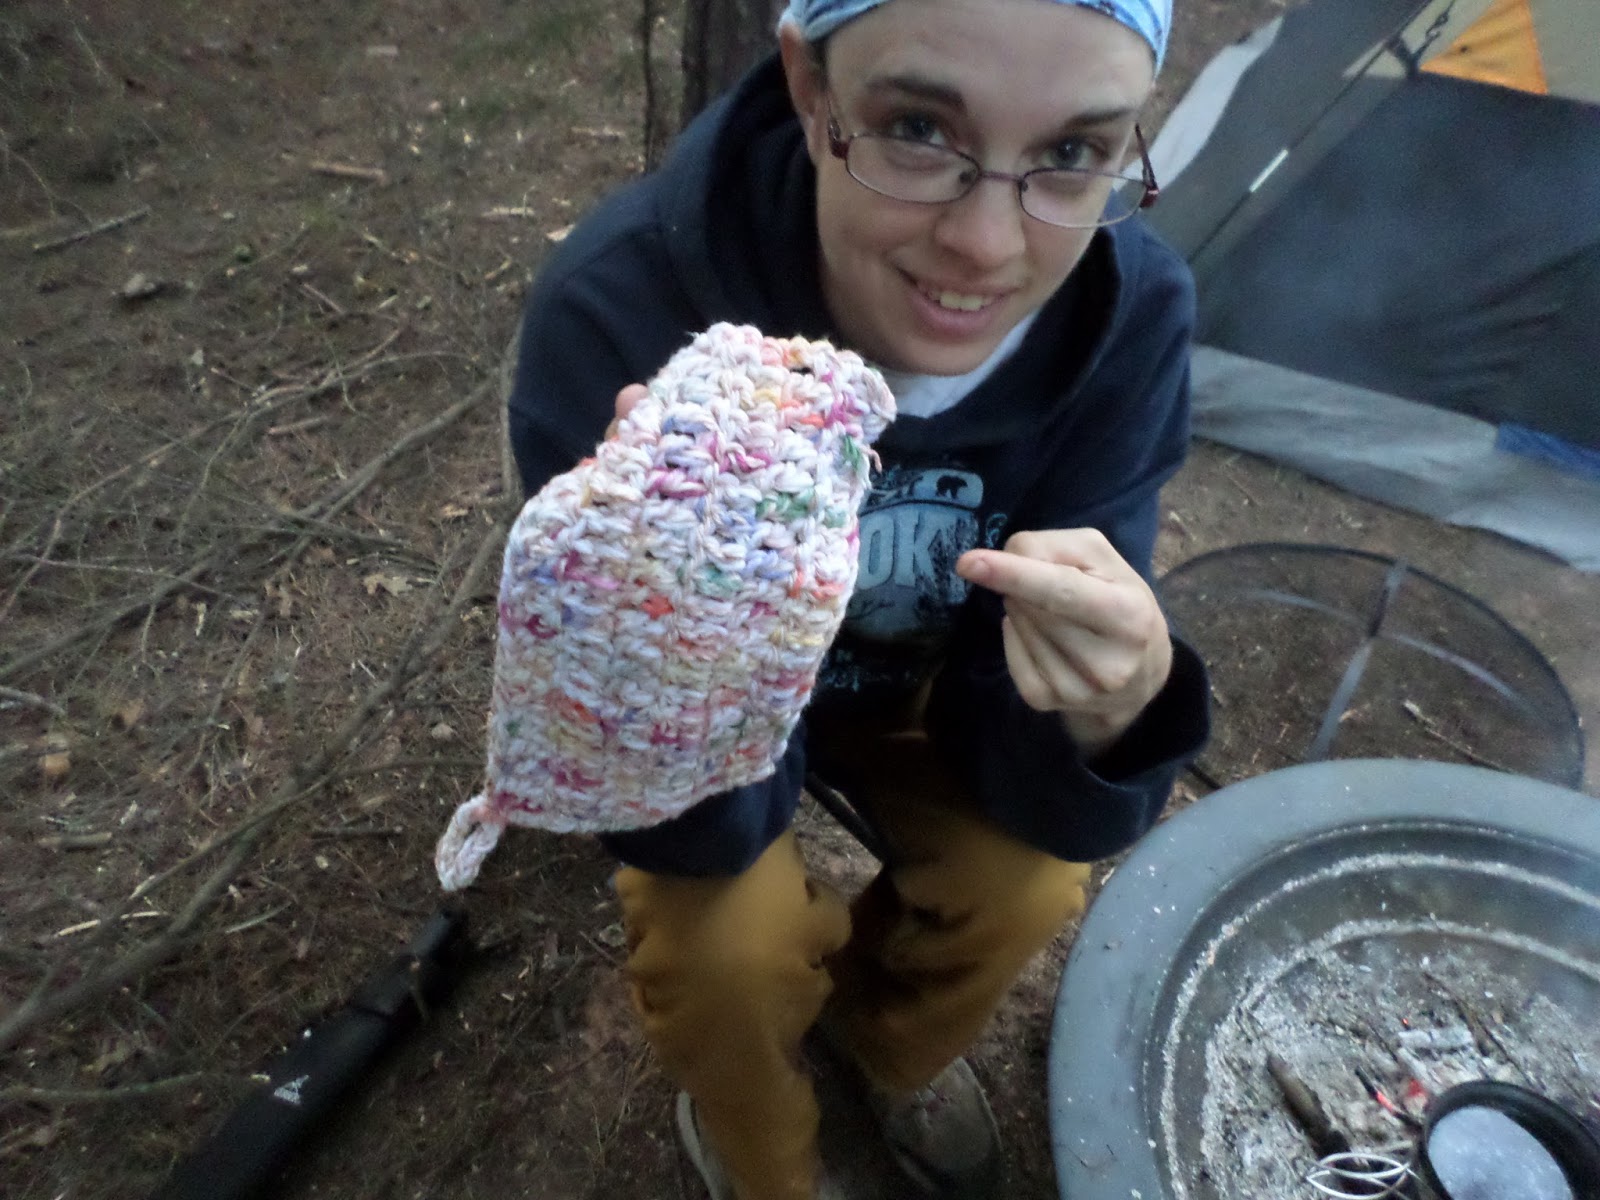
    Needless to say, it was an educational and entertaining month full of both fun and surprises. Some of the surprises started before we ever left for camp, when Evelyn decided to raid my yarn stash because she decided we were going to need pot holders for the various pots and cast iron that were going as part of our combined camp kitchen! Those are the pair of potholders and the dish cloth that she completed in about an hour the night before we headed out.


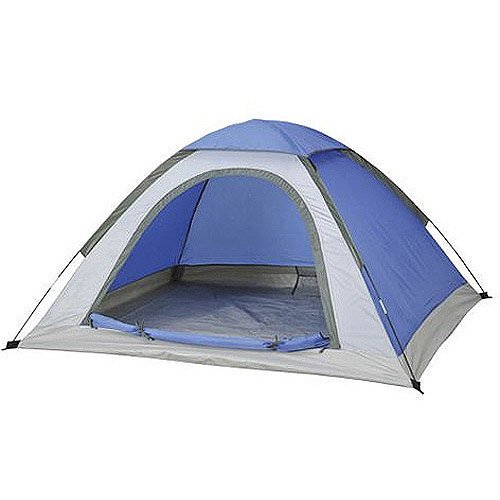
    This was Evelyn's original tent, while she was still busy organizing.  Oh, the joys of figuring out where to put everything on that first day in camp!  This tent did not survive the month, thanks to one of the horses.

    Evelyn uses a tent that can be easily carried as part of a backpacking rig. It's a great size for keeping in your bug-out out gear, and easily sets up in just a few minutes. It doesn't have a lot of weight to deal with either, so it won't weigh someone down while hiking out to a location away from chaos in the event of needing to get the heck outta dodge in a SHTF.

    My tent, unfortunately, is a massive beast of a cabin tent.  It will sleep 8 comfortably, 12 in a pinch if everyone is really cozy and concerned with staying warm.  It weighs a significant amount (about 65 lbs, when you count fabric and poles) and is absolutely not suited for something like backpacking to your bug out location. It will fit comfortably on a travois though, which would help in the event of being unable to use the car to get there. My cabin tent takes much longer to set up than Evelyn's smaller one, though if you're very familiar with the set up of whatever tent you choose, that cuts down on the time spent.


    This is my tent. And my bed. That's a king-size air mattress on a queen-size expanding accordion frame.


    Just for perspective - Evelyn's tent will Comfortably fit INSIDE my tent - and still leave room to set up my bed!

    This was our camp kitchen, other than the fire pit which was off to one side. I've had this particular camp kitchen table for about 9 years now, and it has seen some serious use during that time. It's still dependable as ever and going strong, being an old model of Coleman Camp Kitchen. You can find something similar at Amazon for about the same price that I paid so long ago. Bass Pro has a slightly nicer model, but it's significantly more expensive, so unless you have extra money to throw at a camp kitchen or plan on using it a lot for a long time (like I have) it isn't necessarily the best choice available out there. Personally I'm looking to upgrade my camp kitchen to this setup, simply because I use it so frequently. However, this upgrade is much more expensive than either of the first two, being a "gourmet" model with sink included!


    This was the fire pit we used the first couple of days in camp. It is a backyard fire pit that my boyfriend and I purchased 2 years ago during Black Friday sales. It's fantastic for a little fire in the back yard, but not so great for camping! So we talked to the great folks who own Knight's Rest, and they delivered something better to our camp up in the pines: a recycled tire rim from a tractor! They use several in the main camping area for moveable fire pits, and it didn't take Evelyn and I long to figure out why!

    That's a full-size grill across the top of that bad boy! And it could take a lot more wood, of a lot larger diameter and length, than my rather limited backyard fire pit.


    That's all for now. We'll both be writing up the rest over the course of the next few weeks, so don't worry - you'll get the whole story before we're done!

    Thursday, February 19, 2015

    Layers (and I don't mean chickens)

    Living in an area that provides all four seasons every year (sometimes all four within 24 hours), I've learned the philosophy of layers. Dressing in layers is a staple of cold-weather survival, with the basic idea being to add light layers of clothes as you get colder and removing them as you warm up.

    An Example Of Layering
    Let's say I need to go out to cut firewood in January -- something that is not wise, but yet sometimes has to be done. I know I'm going to be traveling in a truck with no heater (it didn't come with one from the factory), dragging a chainsaw up a hill to the trees, felling a tree or two, trimming off the branches, cutting the wood into lengths that will fit into the stove, and then loading and unloading the truck.

    I'll start off in the morning fully dressed with thermal underwear under jeans and insulated bibs over them, a T-shirt under a shirt and sweater with a heavy insulated coat over that, wool liners inside leather gloves, and a stocking cap. Once I get to the trees I'll take off the coat and leave it in the truck. As the day warms up and I start working, I'll take off the bibs and take the wool liners out of the gloves. By the time I have a load cut and it's time to start loading the truck I'll take off the sweater and do the heavy lifting in just the thermal/jeans and T-shirt/shirt. The work will be paced to prevent working up a sweat, since sweating kills the insulating value of most material and leaves you cold and damp when you stop working. 

    Clothes will be put back on as needed for the trip back home in the unheated truck depending on how cold it is, and taken back off for the unloading. The trick is to stay cool enough that you don't sweat, but warm enough that you don't shiver.

    The concept of layering gives me a variety of options for staying warm that a single heavy layer would not. If all I had was a snowmobile suit or heavy parka over normal clothes, I would have only the choice of hot or cold with no options in between.

    This concept also works for other prepping subjects:


    Shelter
    If you're in a tent, you probably also have a sleeping bag and a rain-fly for that tent. These, along with a ground cloth and sleeping pad, are your layers of shelter. In warm weather you'll be comfortable with the tent flaps and vents/windows open, but if you're out in the Spring or Fall you'll want to use all of the layers available to keep heat inside with you. Many sleeping bags are now “sleeping systems” that consist of two or three individual bags designed to be used separately for mild/cool weather and then combined, one inside the other, for colder weather. 

    If you look at how houses are constructed, you'll again see the concept of layers in action. The outer skin is usually wood or plastic siding with a Tyvek vapor barrier. Underneath that is the sheathing, a plywood or Oriented Strand Board (OSB) layer that attaches to the studs and reinforces the frame as well as providing another barrier to anything trying to get inside. Insulation is placed between the studs, and a layer of drywall is placed on the inside. Some builders will place another vapor barrier under the drywall if humidity is a serious problem.


    Security
    The best security has always been designed in layers. Look at a normal bank: they have a vault at the core of the building, with alarms and solid walls surrounding it, and guards in place during business hours. They also have monitored cameras trained on each teller position as well as the outside of the building. Each teller station has an alarm button, and a lot of the cash trays have a secondary alarm switch built into them (empty out more than one bill slot and it triggers an alarm).

    Security around your home should be set up in a similar layered fashion, with the specific barriers and measures dependent on your particular situation. Threat analysis is a specialized field, but you should at least have an idea of what you'd like to be able to keep out in order to develop a security plan. Locks, alarms, solid doors, cameras, and all of the other home security measures are parts of your security layers.


    Storage
    Food in individual servings packed into a box, and then stored on a shelf in a basement, is an example of layered storage. In order for anything to get to the food, it first has to defeat the protection of the house walls, then get up to the shelf, and work through the box and packaging. Grain stored in Mylar bags inside of a bucket in a pantry is the same idea, and works just as well. Having caches and storage sites other than where you live is a good example of having layers of storage.

    When you plan out how you're going to pack things in your bug-out bag, it's a good idea to think of the layers that will be formed by stacking things on top of each other. Place the things you're going to need most often towards the top to make them easier to get to, and prevent having to unload everything in the pack just to get to that dry pair of socks.


    Hygiene
    Staying healthy requires good hygiene practices and layers of cleanliness are good ways to plan them. Start with the innermost level (where you have the most control) and work your way out to where you run into circumstances you have little or no control over. 
    1. Personal hygiene consists of washing your hands and keeping your body as clean as possible. 
    2. The next layer is your clothes: keeping them clean and dry helps prevent diseases and parasites from getting a foothold. 
    3. Your living quarters are the next further out from your body. Keeping your house clean and free of vermin minimizes disease vectors and secures your food from pests. 
    4. Placing your sanitary facilities (outhouses and trash pits) well away from living spaces and water sources is a common sense hygiene step. Removing or preventing others from placing trash and waste near living spaces is about as far as you can reasonably go in improving your physical layers, but there may be benefit to helping others improve their hygiene practices.


    Communications
    Face-to-face communication is the base layer, followed by short-range radio or intercom/field phones, and then long-range radio. If you live in an area with a population that speaks a language other than your own, plan on having translators handy to make communications possible. Cell phones, text messaging, and e-mail fill more than one layer and are harder to classify as devices. I prefer to think of their uses, rather than the devices themselves, as layers.


    And the Rest
    If you look at other parts of your preps you may be able to find similar patterns in areas like scouting, food production, and bartering. It's a tool you should use to check your preps for a shortcoming or two. There are other methodologies that will work just as well; if you have one that works let me know in the comments below.

    Unlike some in the prepper-sphere, I have no pretensions of knowing everything. I am learning something every day and I try my best to share what I have learned. If you have anything that you'd like to share with fellow preppers, leave me a note in the comments and I'll contact you -- or check out our Guest Articles link at the top of the page.

    Tuesday, February 17, 2015

    Simple Shelters

    Last week, I talked about the basics of shelters, what makes them work, and what to look for when establishing one. This week, we'll take a look at a couple very basic shelter setups.

    Both of these shelters start with the same base: a waterproof tarp. I prefer using 8x10 tarps for shelters, because they're large enough to provide good cover, but small and light enough to be easily packable. For an even more compact piece of kit, an 8x10 square of heavy-gauge plastic would perform almost as well, at the cost of a slight decrease in durability.

    The first shelter is a basic tent or lean-to. This is a place for the paracord that we've all talked about in the past to shine. The basic lean-to is mostly useful in warmer conditions, but built up properly, it can provide lifesaving shelter even in very cold temperatures.

    A basic lean-to.  Image from www.cleversurvivalist.com
    String your paracord between two trees or other supports; high enough to fit under, but low enough to be snug. Drape your tarp across the cord, and anchor it to the ground to give it strength. In warm weather, this may be enough shelter, especially if you keep the area inside relatively tight as smaller shelters retain heat better. If need be, light branches or other foliage can be used to insulate the shelter, as well as insulating your body and bedding from the ground. Building the lean-to with the open side facing some manner of wind break will also make a huge improvement in heating and protection from the elements.


    If you lack supports or paracord, a simple "burrito" shelter works quite well. This is exclusively a warm-weather shelter, useful 6-8 months of the year in Utah, but potentially a 12-month shelter in southern California or Florida.


    Start by centering your sleeping bag in your tarp.  You want roughly a one-foot overlap at both the head and foot of the bag.  If you happen to have a sleeping pad as well, place it on top of the sleeping bag at this point.


     Fold one side of your tarp over the top of your sleeping bag.


    Fold the other side over to match.

    Flip the whole assembly over, and tuck the portion below the foot under the burrito roll.

    The overlap left at the head of the bag provides a sheltered area for your head, boots, and other small gear.

    The only insulation provided by the burrito shelter is that of your sleeping bag, so be sure that the bags you buy are rated appropriately for the conditions where you live and travel. While it does a rather admirable job of keeping out modest amounts of water, heavier storms will intrude on it, but they intrude on virtually all impromptu shelters and even some tents. 


    A burrito can also be made using larger tarps; they just need to be folded down to roughly 8x10 or so. The tarp I used to demonstrate this shelter was 10x20, and simply happened to be the most convenient tarp I had. It worked very well.

    Stay warm and dry out there!

    Lokidude

    The Fine Print


    This work is licensed under a Creative Commons Attribution- Noncommercial- No Derivative Works 3.0 License.

    Creative Commons License


    Erin Palette is a participant in the Amazon Services LLC Associates Program, an affiliate advertising program designed to provide a means for sites to earn advertising fees by advertising and linking to amazon.com.