Thursday, June 30, 2022

Bag of Holding, Stealth Version

The dust has settled and the First 72 Hours have passed. Follow along as I build a long term plan via Prudent Prepping.

Yeah, I really miss that site. *
* "Bag of Holding" is a reference to a product made by a cool, now-defunct, company called ThinkGeek which sold fun, geeky stuff.
I was able to use my newest EDC bag in a very public setting, but not to its fullest, or designed, capabilities. I did however get to carry if for most of a day, and here is my After Action Report. 

To recap, please see this post for the basic purchase information and why it was cheaper than the current pricing at Maxpedition. 

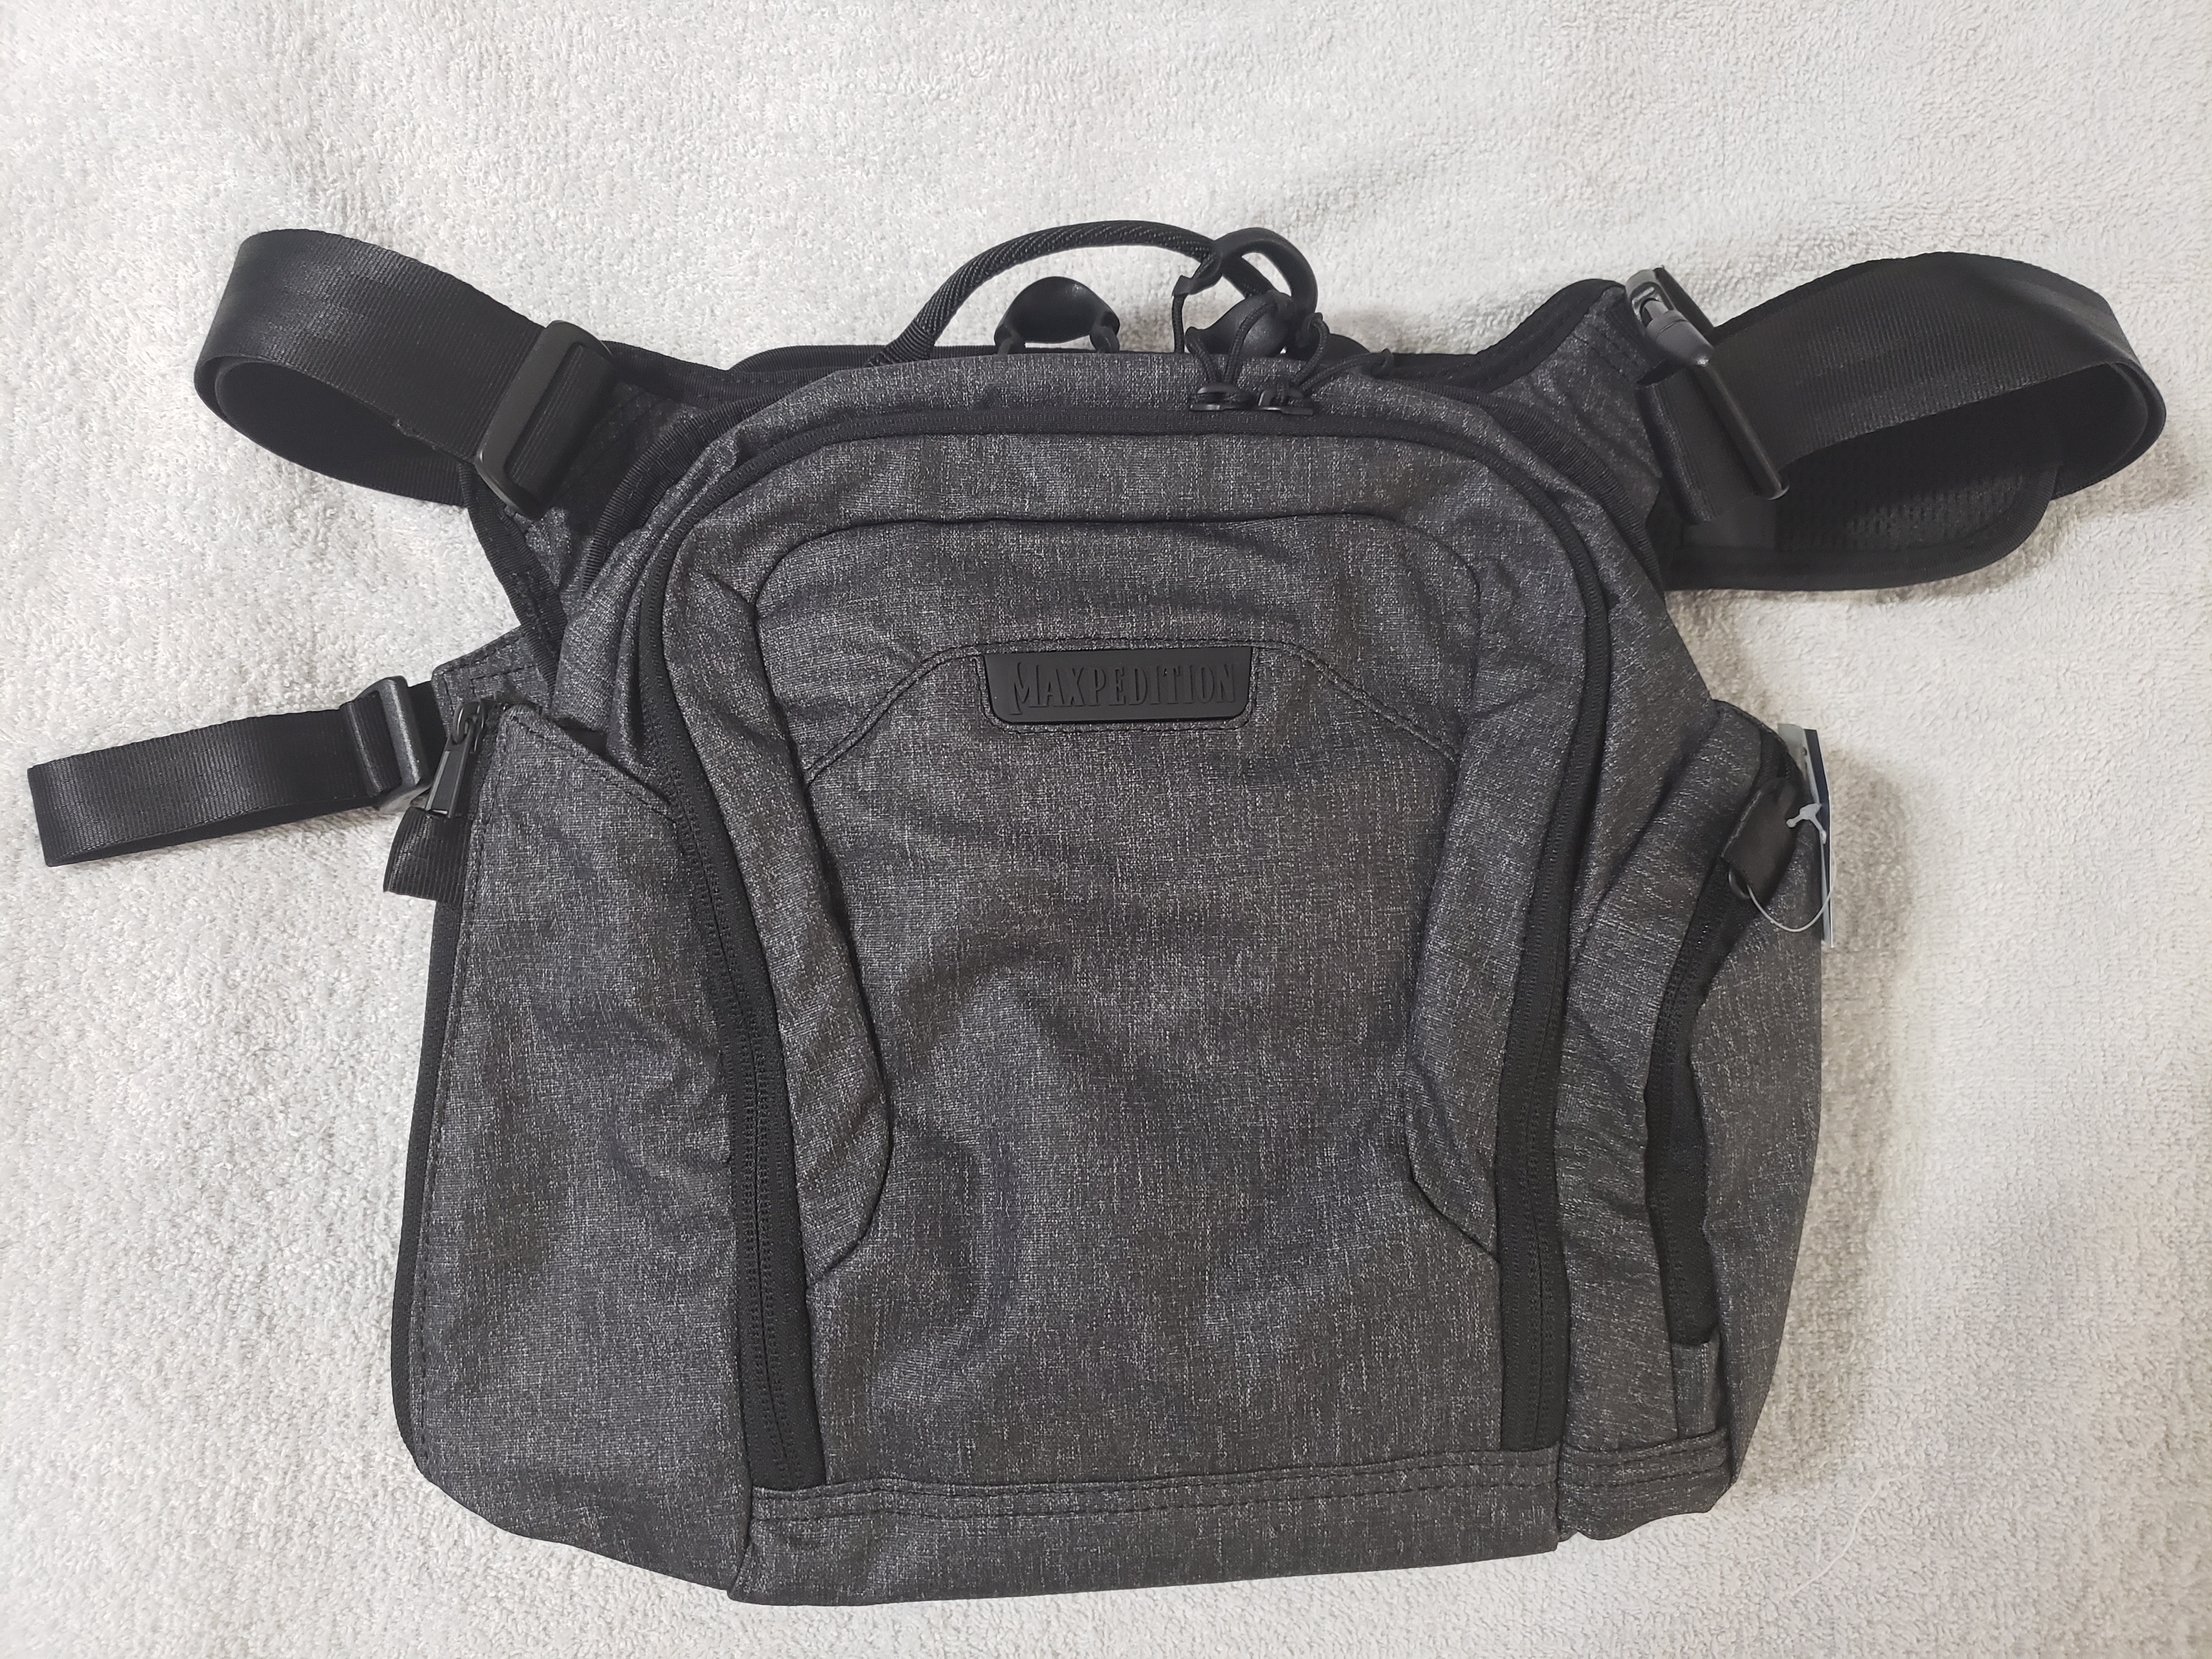
This is the Entity Bag, small.

Entity Bag, small size


And this is the same bag, opened and with the drawbridge straps attached.


The contents from Top Left:
Everything stores in a one quart Ziploc in the black elastic-edged pocket seen inside the bag. 

What can't be seen well are the finger loops attached to the pocket zippers. I really like the size and shape of a loop in place of a oversized zipper tab or a piece of paracord threaded through the pull tab.

As this is meant to be used as a Concealed Carry bag, and from my observation of the second compartment after loading in the First Aid gear I want to carry, the available space looks cramped even with a compact pistol in mind. However, if the First Aid baggie is removed from the pocket there appears to be more than enough room to accommodate just about anything. Even with the recent Supreme Court ruling there still appear to be hurdles that will delay most law-abiding Californians from using this bag as designed.

Drawbridge strap and bottle pocket
Drawbridge Straps
I'm still not sure why the flap/front of the bag has straps limiting the movement. Off the top of my head I think the intent was to maybe have a sorta-kinda shelf thingy to stop any loose items from falling out when it is worn. Limiting fallout even when placed on a table might be the answer too, but with no description listed from Maxpedition, it's a mystery.

Water Bottle Pocket
Now this is actually more interesting than I first thought. The pocket won't take a Nalgene bottle, but it will take a slightly larger and taller bottle than a .5L / 16oz size. The length of the tether can be adjusted and even moved up into a second set of holes, allowing taller bottles. I haven't tried, but 750ml "adult beverage" bottles appear to fit.  Allegedly. 

Since Maxpedition has optional accessories to make this a Bag of Carrying, I have bookmarked the proper pages, copied the assorted part numbers, and set aside funds for the parts and expedited shipping. While I won't hold my breath, I am cautiously optimistic!

Recap and Takeaway
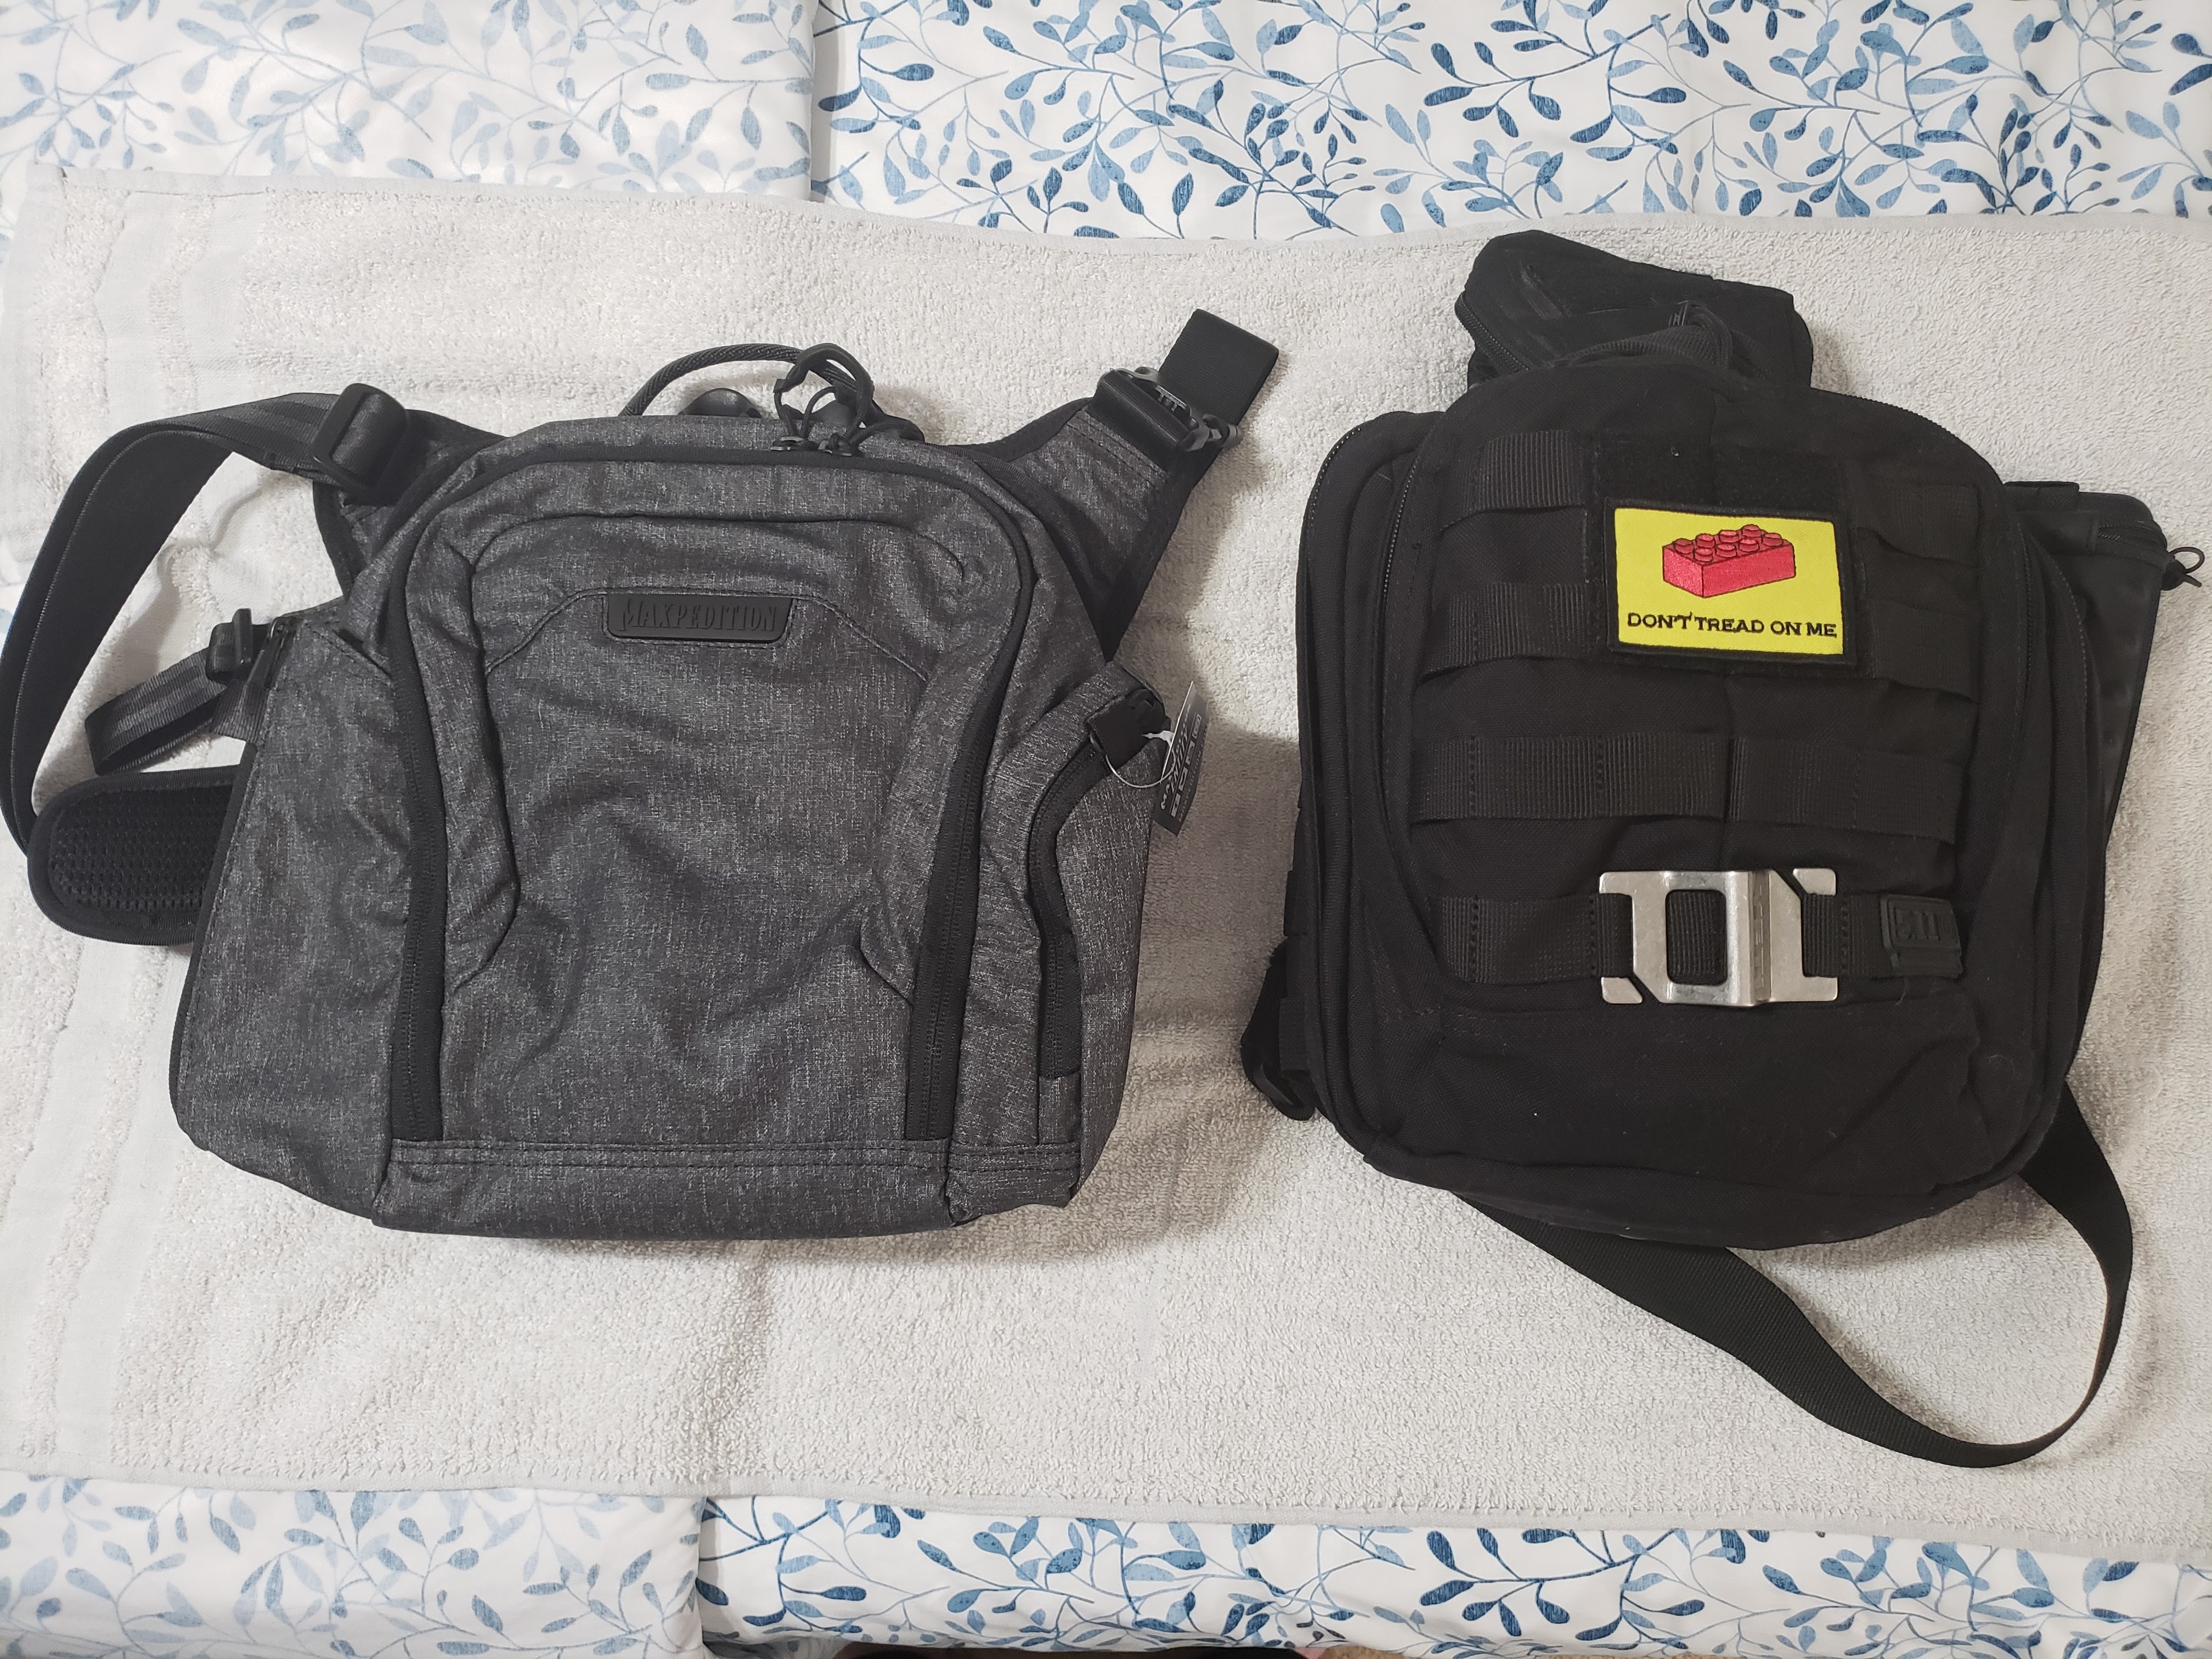
  • While it was extremely expensive, I am feeling really good about this bag. It's big enough to carry what I need, both now and what I might want to carry in the future.
  • Purchased from Maxpedition: one Entity Bag, size Small. The Ash color is discontinued and out of stock. 

* * *

Just a reminder: if you plan on buying anything through Amazon, please consider using our referral link. When you do, a portion of the sale comes back here to help keep this site running!

If you have comments, suggestions or corrections, please post them so we all can learn. And remember, Some Is Always Better Than None!

NOTE: All items tested were purchased by me. No products have been loaned in exchange for a favorable review. Any items sent to me for T&E will be listed as such. Suck it Feds.

Tuesday, June 28, 2022

Cookbooks

In a number of my previous posts I’ve talked about various food items every prepper should have in their pantry. I’ve also reviewed some of the food prep tools, techniques, and devices available. However, the utility of these ingredients, tools, and methods can only be applied if we know what to do with them.

This brings us to cookbooks. One of the earliest American examples of what we think of as a proper cookbook dates back to 1903 with Marion Harland's Complete Cookbook: A Practical And Exhaustive Manual Of Cookery And Housekeeping. If any of our readers find a copy of this treasure, they should make sure to have a good internet connection so they can look up some of the dated terms and ingredients, not to mention some of the odd measurements, such as "half a cone" of sugar or "a nickel of yeast". Even so, this book contains quite a bit of useful information, as well as a glimpse into a society and culture long passed away.

I hope everyone is familiar with the classic Joy of Cooking by Erma Rombauer, a cornerstone of any cookbook collection. It first hit bookstore shelves in 1936 and has been in continuous publication ever since, with editions regularly updated with new recipes and information. 

A pet peeve of mine is exemplified by this otherwise excellent book, and that’s the recipe listing itself. I prefer having all the ingredients at the top, followed by the steps below. When they are all mixed together I find it quite aggravating.

A sample recipe from the Joy of Cooking.
Note the ingredients interspersed with the recipe.

I’m a fan of older and unusual cookbooks and always keep my eyes open at yard sales and estate sales. While my wife has established a limit due to space requirements, I can usually find something of particular interest to us both. One of our goals with the cookbooks we own is to try and make a recipe from each of them at least once a year. If we can’t manage to do even that, it’s marked for demotion; eventually, it may be passed on to a friend or donated.

Most of the cookbooks stored in the author’s kitchen
(along with some nature books on the top right).


An excellent online resource for these "time portals of food" is the Internet Archive's Cookbooks and Home Economics category. There are a variety of online resources for recipes as well: two that I make somewhat regular use of are Instanthome.com and Allrecipes.com, though there are plenty more out there. For entertainment and education, there’s always the engaging B. Dylan Hollis and Alton Brown on YouTube.

Just like with any other skill, whether when just getting started or revisiting something after time has passed, it’s always good to read the manual.

Sunday, June 26, 2022

The Work Sharp Blade Grinder Attachment

Not actually Erin.
& is used with permission.

In my last post I sang the virtues of the Ken Onion Work Sharp Knife & Tool Sharpener, while at the same time saying that it had its limitations. Those limitations can be broken with the Work Sharp Blade Grinder Attachment

Some of you may say that it's foolish to have to buy an $80 attachment to a $130 tool just to make it work, and you might be right. All I can tell you is that this attachment made me very happy because now I can sharpen pretty much anything with this tool. It works great, and I'm happy with it, so it wasn't a foolish decision for me. Whether or not it's foolish for you is a question only you can answer. 

https://amzn.to/3mHKJ7H


Why do I love it?
  1. If I can lift it, I can sharpen it. I've sharpened axe heads and machetes without breaking a sweat. 
  2. It will sharpen at any angle between 10 degrees and 35 degrees. 
  3. It will even do vertical grinding. 
  4. It comes with 5 belts (extra coarse, coarse, medium, fine, and extra fine) just like the Knife & Tool Sharpener, only these are wider. 
  5. By adjusting the two rollers on top you can select a flatter grind (good for straight blades, like knives) or a convex grind (good for high curve blades, like axe heads). 
This may not sound like much to you, but the upshot of all this is "It does everything I ask of it, and does it easily." There's only one drawback to it -- and to me it's minor, but I understand that it might be a deal-breaker for a lot of people -- is that you have to free-hand the sharpening. 

https://amzn.to/3mHKJ7H


This is why the "blade rest", also called a reference plate in the instructions, is present. Here's how you use it: 
  1. You set the blade on the rest so that you know what position the blade should be in for sharpening. 
  2. You grasp the blade in a stable, two-handed grip. I like to hold it with one hand on the handle and the other pinching the spine near the tip. 
  3. You lift the blade, keeping it steady and maintaining the reference. 
  4. You place the blade against the belts and move from base to tip, backing off the belt when you are done so that you don't round off your knife point. I find it's best to rotate at the waist while doing this so that the blade is kept as stable as possible. 
  5. You smoothly set the blade back down on the blade rest. If it touches down without wobbling, then you know you did it properly. 

https://amzn.to/3mHKJ7H


Yes, this technique requires practice. It will take confidence and a willingness to practice on some beater knives. I was nervous at first, and I did it wrong the first few times. But I got better at it, and now I have the technique solidly memorized in my hands and arms. 

This tool isn't perfect. It's loud, and expensive, and dirty, and terrifyingly vague at first. But if you just give yourself permission to screw up, and you practice steadiness and confidence, you will soon be able to sharpen anything you can lift up to the belts. 

I love this. I wish I'd bought it sooner. 

The Knifegrinder by Goya 


Saturday, June 25, 2022

Walking It Off And On

The dust has settled and the First 72 Hours have passed. Follow along as I build a long term plan via Prudent Prepping. 

I have never had a job that was behind a desk, or one that allowed me to sit for long periods of time. I've always been standing, walking or moving to do my job. Now is no different, and staying comfortable is important.

How Important?
So important that the National Safety Council published several reports on workplace injuries that show fatigue is a major factor in injuries and deaths on the job. 

Now, I am not driving a big rig, flying planes or operating complicated equipment, but I am doing work that could seriously injure myself or others if I'm not careful. That's why I want to be tired at the end of my day, but not even close to exhausted.

I walk somewhere between 3-5 miles a day for my work. That is a lot of walking, but it doesn't really help me be or stay fit, since I don't get in any sustained walking. It certainly wears me and my shoes down though, much faster than I'd like, and the shoes in particular are a problem. I have very wide feet (EE or EEE, depending on the brand) with very high arches. Complicate things with a bad Achilles tendon, and this combination makes finding shoes that fit difficult and usually expensive. 

I've gotten around this in the past by finding inexpensive boots that come in wide widths, only for the brands to drop the style I need. Lately, though, even the brands I've bought have had their quality go down to the point where I'm not getting a year's wear before the boots fall apart. Relating my problem with shoes elsewhere brought a comment that perfectly illustrates my problem:

The reason that the rich were so rich, Vimes reasoned, was because they managed to spend less money.

Take boots, for example. He earned thirty-eight dollars a month plus allowances. A really good pair of leather boots cost fifty dollars. But an affordable pair of boots, which were sort of OK for a season or two and then leaked like hell when the cardboard gave out, cost about ten dollars. Those were the kind of boots Vimes always bought, and wore until the soles were so thin that he could tell where he was in Ankh-Morpork on a foggy night by the feel of the cobbles.

But the thing was that good boots lasted for years and years. A man who could afford fifty dollars had a pair of boots that'd still be keeping his feet dry in ten years' time, while the poor man who could only afford cheap boots would have spent a hundred dollars on boots in the same time and would still have wet feet.

This was the Captain Samuel Vimes 'Boots' theory of socioeconomic unfairness.”   
Terry Pratchett, Men At Arms

I am in a position (finally!) to buy the proverbial $50 boots this year, which I did. After shopping around and looking at and trying on several different brands, I found what fits me the best are shoes from Red Wing. Not only do they offer wide widths, there are multiple options for inserts to give me the arch support to keep my feet from hurting at the end of the day. No joke: it took a good 45 minutes to swap shoes and inserts to arrive at what fit me the best.

https://tinyurl.com/3k4cnhcj
Stay fast, cool and comfortable on your feet in these lightweight, light-duty soft toe shoes with abrasion resistant mesh upper, plus electrical hazard protection. CrossBreeze technology surrounds the foot with an instant cooling effect. Underneath, the Vibram SpeedSole delivers best-in-class slip and abrasion resistance.

I have worn these shoes for two months now, and while they are not a work boot nor have steel toes (which, fortunately, aren't a requirement for my job), there is more than enough support to keep my feet comfy. When I told my co-workers about these, one of them said "Hey, my sister is the district manager for Red Wing! I should check them out and see if there's a discount I can get!" 

This shoe also isn't waterproof or even water resistant. This isn't a big problem for me, since in the worst case I'm less than half a day's walk home, and as long as I'm moving wet feet have never bothered me as long as I have wool socks. With California's drought conditions, the chances of me walking home with wet feet are slim!

I know there are fans of other work shoes and boots, especially currently serving and former military friends who have their favorites (Danner) that I would really like to try on; my problem is no one close has a big selection to allow me do that, and I really do need to try before I buy. I also know I am able to order direct from Danner but I really, really hate the whole buy-and-return complication of online ordering. So while I certainly have nothing against another popular, well-respected and friend-referred brand, I had to use what was close.

Recap and Takeaway
  • I am finally able to shop smart. Not only for shoes, but other parts of my prepping supplies.
  • Sorry, there is no Amazon link for these shoes, and they are a bit more expensive than Capt. Vimes' boots, but they are worth it.

* * *

Just a reminder: if you plan on buying anything through Amazon, please consider using our referral link. When you do, a portion of the sale comes back here to help keep this site running!

If you have comments, suggestions or corrections, please post them so we all can learn. And remember, Some Is Always Better Than None!

NOTE: All items tested were purchased by me. No products have been loaned in exchange for a favorable review. Any items sent to me for T&E will be listed as such. Suck it Feds.

Thursday, June 23, 2022

You and Your Feet (Again)

Seven and a half years ago I wrote a post about taking care of your feet. Nothing has changed in that time; you're still likely to be relying on your feet for transportation after TSHTF. 

Back then, I wrote about a friend who had a minor wound on his foot get seriously infected. That wound is still a problem today. More recently, I've been working with a homeless vet for the last two weeks, trying to get him into a job and a place to live. He's living in conditions that most of us wouldn't have a clue about how to handle: no car, no income, nowhere to sleep, living hand-to-mouth off of the kindness of strangers. 

We get a few panhandlers at our local truck stop, but this guy wasn't begging, just looking for a way out of his crappy situation, so I'm doing what I can to give him a hand up rather than a handout. I have a good line on a job and am trying to arrange an interview with a place that has temporary housing for employees.

I gave him a tent and sleeping bag, and got him set up in a nearby park that charges $5 a night for tents. This gives him access to running water and bathrooms, and he now has a place to sleep where he can stretch out rather than trying to sleep in a chair at the truck stop. 

One of the problems he ran into was his feet. Being in a public place, he wasn't able to take off his boots for most of two weeks. He didn't have a change of socks or extra shoes, and bathing was limited to a sponge bath in the restroom sink. I got him a collection of toiletries so he could clean up at the park, along with some clean clothes and socks, but he'd already done some damage to his feet: edema (swelling due to fluid retention) of his lower legs was pretty bad, but being able to sleep laying down was reducing it. 

Today he contacted me to let me know his feet were getting worse. He took off his socks and found that flies had laid eggs in the open sores while he slept. That's right, he had maggots living in the skin of his feet. Maggots only eat dead flesh, so he was on his way to developing a serious infection that could cost him a foot. I made a few calls and got him a ride to the hospital, where the Emergency Room folks will get him patched up for free (it's a small, church-based hospital), but I'm out of town for work all week and can't check on him until Friday. I'll write an update this weekend after I get a chance to get more details, but it's looking like he'll be unable to work for a few weeks. 

Taking care of your feet is not optional. Read the post from the past for details, but you need to keep your feet in good shape if you want to be able to move without crutches or a wheelchair. Clean and dry feet are the main goals, with attention to blisters and treatment as soon as possible. Without access to modern medicine, failure to care for your feet will kill you as surely as catching a bullet.

Wednesday, June 22, 2022

DIY Ballistic Gelatin

One of the most important pieces of information to know about ammunition performance, whether for hunting or self-defense, is how it actually behaves when used.

There have been many different bullet testing systems used over the years, including live animals. For those with a morbid fascination, read up on the 1904 Thompson–LaGarde Tests. For any listeners with a more delicate constitution, avoid articles with pictures.

Back in the mists of time I would use a copy paper box full of phone books (kids, ask your parents) in order to test bullet penetration and expansion. If I was being really thorough, I would test twice, once with dry phone books and once after soaking them with water. The difference between wet and dry paper can produce some interesting changes in expansion of soft point and hollow point bullets. 

My phone book tests were certainly not scientific, but they did give me a relatively consistent medium to compare projectile behavior. Since phone books are pretty much a thing of the past now, other options need to be explored. Modeler’s clay has been used for this purpose with some success; it shows primary expansion and penetration fairly well. However, like the phone books, it’s really only comparable to other blocks of clay. The same can be said about water jugs, cinder blocks, and even peeps.

Ballistic gelatin is currently the industry standard for testing bullet performance. It can be purchased ready to use, or mixed up as needed. It can even be melted down, recast, and reused. It can even be made at home from scratch, considerably reducing the price, although the end result will generally be less consistent than the purchased type. 

The standard ballistic gelatin block is called 10% gelatin because the mixture is 10% gelatin to 90% water. There are also 20% ballistic gelatin blocks, but they are less frequently used and considerably more expensive. In order to make a 10% ballistic gelatin block at home, certain supplies and resources will be necessary.

  • An appropriate mold, preferably something smooth-sided and slightly wider at the opening for ease of removal.
  • Non-stick spray for coating the inside of the mold.
  • Unflavored gelatin (Knox brand is recommended).
  • Water.
  • A stirrer, such as a wooden spoon.
  • Measuring cups and spoons.
  • Enough space in a refrigerator for the mold(s).
This process requires a mixture of approximately 7 ounces of gelatin per 2 quarts of water for a roughly 10% ballistic gelatin product. The gelatin to water ratio may need to be adjusted slightly depending on consistency.
  1. While the gelatin powder and water can be combined right in the mold, I’ve read it works better if blended in a separate container. Use warm water and make sure the gelatin powder is fully dissolved.
  2. Once it’s prepared, spray the inside of the mold with a light coating of non-stick spray and pour the gelatin mix into the prepared container. 
  3. Place the mold in a level position in the refrigerator and let sit until fully hardened. This will take between 8 and 12 hours. Don’t harden the mix in a freezer, or the resulting block will be cloudy and possibly prone to splitting.
  4. After it’s fully hardened, keep the ballistic gelatin cool until ready to shoot.
For deeper penetrating bullets, several blocks can be laid end to end. Make sure to take pictures and record the results; after all, as said by ballistics expert Alex Jason and recounted by Adam Savage, “The only difference between screwing around and science is writing it down.”

Post shooting care is fairly simple: brush off any lose debris, extract any bullet fragments, and (if still relatively intact) use again. According to several sources, trying to filter any bits and pieces out of the gelatin can be challenging unless it’s heated to a more liquid state. If trying this, be careful not to over-heat or the gelatin may not fully harden again, then pour it back into the mold for another trip to the refrigerator. If prepared properly and maintained correctly, home-made ballistic gelatin can be reused a number of times before it’s no longer useful as a test medium.

I recently picked up some Kroger’s brand unflavored gelatin on sale and I will be experimenting with making up a batch of ballistic gelatin myself in the next few weeks. I’ll write up how that worked in a future post.

Remember, measure twice and cut (with water) once. Good luck and safe shooting.

Wednesday, June 15, 2022

A Stealthy Sling Bag

The dust has settled and the First 72 Hours have passed. Follow along as I build a long term plan via Prudent Prepping.

I've used several different sling bags with no real problems, except they all look tacti-cool with webbing and MOLLE loops everywhere. I've wanted something much more inconspicuous on the outside, without losing any internal functionality. I found that bag in the Maxpedition Entity Crossbody Bag (Small) 9L. I strongly recommend looking through the pictures and the video on the linked page, as my picture taking ability isn't great.

Entity Product Features
  • YKK® Zippers with Positive Grip Pulls
  • CCW Compartment with Security Lockout Strip
  • 500D N/P Hybrid Heathered  Fabric with Polyurethane Coating
  • Tuckable Magnetic Wings for Quick Closure
  • Reinforced MOLLE/PALS Attachment Points
  • Custom Fabricated Shapeshift™ Webbing
  • Detachable & Concealable Drawbridge Straps
  • Refined Construction with Elegant Inlays
  • Duraflex® Xlite® Buckles 
  • Fray-Resistant Gossamer™ Mesh
  • 420D Nylon Liner Embossed with Anti-Counterfeit Logos
  • Very Visible Grayscale Interior
  • Skin Friendly Nylon Seatbelt Webbing

the small (9L) Entity bag

This is definitely a smaller bag than the Maxpedition bag I'm using now, and I'm okay with that; the other one isn't going anywhere and can be swapped in and out easily. The width is very similar between the two but the depth is much smaller.

Front View

The black bag is a 5.11 that I have written about several times, but
this post explains what it is and does well. I will miss the YETI Tactical Bottle opener, the extra pockets inside the main compartment, and the smaller 'Office' pocket. 

As with most things I do, my tendency is to overload and carry too much for the situation I'm in. That's not to say I don't have the necessities packed, but Mission Creep is a problem, so having a slimmer option for most days is good for me. I believe I can make this work and do everything needed, in a smaller, lighter and less-conspicuous bag.


Edge view
I just received this bag and the "What Goes Where" fiddling is ongoing, so I will post a Progress Report soon. Right now, I have moved the pens, pencil and note book over, along with the First Aid gear. 

One little thing I think is cool and I will use is the water bottle pocket. It zips open when needed and has an elastic loop set up to slip over the bottle the keep it from falling out if you lean over or do something strenuous. It will only hold 16oz/0.5L bottles, however, so if you like to pack a Nalgene you are out of luck.

Now, if you looked at the price, the Entity line is seriously expensive, and way too expensive for me. What made this purchase easier was that I had gift cards just sitting around with more money on them than I remembered, so they went here. The other part of the deal is the "Ash" color version is on sale with a 40% discount and is Closeout, Final Sale, No Return.  

Recap and Takeaway
  • This is an extremely expensive bag at retail price, and if you can find a size you like in the Closeout listing and the price doesn't make your nose bleed, have a go!
  • The bag is everything I've looked for over the past 5-6 years: no tacti-cool straps or details while maintaining the ability to hold everything the average person might want to carry.
  • Purchased directly from Maxpedition: one Entity bag, size small at Closeout, No Return, 40% off retail price for $91.79.
* * *

Just a reminder: if you plan on buying anything through Amazon, please consider using our referral link. When you do, a portion of the sale comes back here to help keep this site running!

If you have comments, suggestions or corrections, please post them so we all can learn. And remember, Some Is Always Better Than None!

NOTE: All items tested were purchased by me. No products have been loaned in exchange for a favorable review. Any items sent to me for T&E will be listed as such. Suck it Feds.

Tuesday, June 14, 2022

Prepper’s Pantry: Flour

Many of the recipes I’ve shared in my posts involve some form of flour. At a basic level, flour is the ground product of any of a number of grains, beans, nuts, roots, or seeds. Humans have been grinding all sorts of plants to a fine powder for at least eight thousand years, though there’s some evidence it may go back much earlier in our development.

The biggest issue with long-term storage of flour, as with so many things, is oxygen. If the germ of the grain is left in during production of flour, the fatty acids present start to oxidize immediately, leading to spoilage. This high risk of spoilage led to the prevalence on the market of white wheat flour, which is basically whole wheat flour with the germ and bran removed. In fact, most wheat flour is processed as white flour, and then the germ is added back in after it’s treated for preservation, producing whole wheat flour.

Currently in the United States, the most common flour is made from wheat. Following that, corn is the next most popular source, and even these basic categories have a number of varieties. However, almond, various bean, buckwheat, chickpea, hazelnut, peanut, potato, rice, tapioca, and many other flours can be found in the baking aisle of many grocery and specialty stores.

It’s not uncommon in the baking aisle to see packages of flour labelled all-purpose, bread, biscuit, cake, enriched, pastry, self-rising, unbleached, and whole wheat. These divisions are generally based on the fineness of the grind as well as additives or supplements in the mix, though some labels are more for advertising purposes.

A selection of flours and friends from the author’s pantry.
L-R: Self-rising white; regular white; potato flakes; Semolina; 
whole wheat; White Lily soft wheat; corn Masa; corn meal; corn starch.

The most common uses of flour are for making things like bread, pasta, cookies, cakes, and as additives in a wide variety of other foods. For example, when making a roux to thicken gravy and sauces, some form of flour is essential to produce the proper consistency. In non-food use, when mixed with water and a little salt, flour is an essential ingredient in papier-mâché or wallpaper paste. It can also be used to make a sort of clay for children’s projects.

While it’s certainly possible to get un-milled grain and run it through a manual or electric mill, that’s a pretty significant investment in time and money. Most preppers are likely better off buying pre-milled flour in bulk and storing it in food-safe airtight containers with oxygen absorbers. Larger quantities can be kept in buckets, and smaller amounts in Mylar bags. In our house, we tend to store some flour in canning jars and zip lock bags because we have them conveniently at hand.

While there is some overlap between types and styles, it’s important to use the right flour for the job. Coarseness, density, water retention and other factors will determine how a particular flour affects a recipe. As they say, "Horses for courses."

Good prepping, and good cooking.

Sunday, June 12, 2022

The Work Sharp Knife & Tool Sharpener

Not actually Erin.
& is used with permission.

Last week I reviewed a sharpener which didn't solve my problems with hard-to-sharpen knives, and promised that this week I'd tell you what I bought which did finally solve those problems.

The answer to that is "a belt grinder"; specifically, the Work Sharp Knife & Tool Sharpener (Ken Onion Edition), which is a belt grinder designed especially for knives. 

I held off buying this for many years, partly because of its price but mainly because of the fact that it is a power tool and if I lose electricity then I cannot use it. For some reason, buying a tool that required electricity to work made me feel like a "bad prepper" and so I held off... until I finally lost my temper with not being able to sharpen things. Spite, as it turns out, is a marvelous motivator. 


https://amzn.to/3MHiy3n

For the record, I specifically recommend the Ken Onion edition ($130) over the standard Work Sharp Knife & Tool Sharpener ($80). I do this for three reasons:
  1. The Ken Onion edition will sharpen in 5 degree increments from 15 to 30 degrees, whereas the standard will only sharpen at 20 and 25 degrees. 
  2. The Ken Onion edition will accept standard belts, whereas the standard will not accept Ken Onion belts (their widths are different).
  3. The Ken Onion edition can sharpen much larger blades, either by rotating the sharpening module forward or by replacing it with another attachment, whereas the standard edition cannot. 


It's my opinion, born out through my experience, that this utility is well worth the additional $50 in price. Once you see how well it works, I'm sure you'll agree. 

And boy howdy does it work. It's fast, it's efficient, and like any belt grinder it can aggressively mess up a blade if you aren't careful. My advice is to practice with a banged-up knife first; it's not like you're going to make it any worse, and you might make it better. After that, work your way up, and soon you'll be sharpening almost any blade to a razor edge and mirror polish. 

https://amzn.to/3MHiy3n


Here's some more advice based on my experience:
  1. Changing the belts isn't difficult but it can be annoying, so if you have multiple knives to sharpen, group them by coarseness. "These are really bad and need extra coarse for re-profiling, these just need medium for sharpening, and I want to hone this one with extra fine."
    • If you do this, only sharpen at one angle setting. Trust me, it's super easy to get wrapped up in this and then midway through realize "Oh dang, that last knife was 25° instead of 20° like the others, and now I've just done them all at 25° with coarse grit."
  2. I highly recommend that you wear hearing protection. While not especially loud on its own, if you're sharpening a lot or working on a really banged-up blade you can end up subjecting your ears to some sustained loud noises, especially if you have the RPMs running high. 
  3. This is a grinder, so it will kick out a fair amount of ground metal in the form of dust. Don't use this in an enclosed area (or if you do, wear a respirator) and be prepared to sweep up a lot of blue-black metal dust. 
  4. Be very careful when sharpening a tanto tip as you can very easily grind that down into a curve if you aren't careful. I would suggest using the Precision Adjust sharpener for those. 
  5. Blades which are both long and curved (such as kukri) or which have very thick bodies (such as axes) don't do well here. For those, I recommend using the Work Sharp Blade Grinder Attachment, which is only compatible with the Ken Onion edition. I will review this attachment next week. 

https://amzn.to/3mHKJ7H


Despite its price and reliance on electricity, I really like this product. It's amazingly aggressive, which as far as I'm concerned is a feature and not a bug, as it solved in a few minutes problems which had bothered me for at least a decade. It took knives which had divots on the cutting edge and made them sharp and shiny (if somewhat slimmer) again. This tool may not be for everyone, but if you absolutely need something sharpened and you have electricity, you can sharpen it. 

The Work Sharp Knife & Tool Sharpener Ken Onion Edition is available at Amazon for $130 with Prime shipping and it comes with one set of belts (extra coarse, coarse, medium, fine, and extra fine). Extra belt kits may be bought for $18 with Prime shipping. 

Friday, June 10, 2022

Book Review: The Lost Superfoods

While wandering a bunch of prepper sites I saw an ad for a book called The Lost Superfoods. The ad mentioned that it had a recipe for the emergency ration crackers used by the US government in the 1960s when they stocked the fallout shelters around the country. Since I have an interest in most things from the Cold War era, having served in the military back then, I spent the $27.00 and had a copy delivered.

This is a review, so don't expect me to copy the entire book; I'll give an overview and my opinions on the quality and quantity of information in it.

https://amzn.to/3Hb3tpM

The first chapter covers the emergency rations that were stockpiled to feed people in fallout shelters in the event of a nuclear war with the USSR. This was a short-lived program, but thousands of shelters were stocked and ready. The rations were a thick cracker, sort of a hardtack crossed with a graham cracker, with hard candies to provide extra calories. Less than 1000 calories per person, per day, for two weeks was enough to keep people alive in a shelter where there was little chance of strenuous activity. All of the original rations were recalled in the 1970s, but I've seen a few examples that were not sent back and they were inedible by the 1990s; 30 years was just too long for a cracker to survive. The recipe and baking is pretty simple, because most survival foods are simple. If I get the time this fall I may test this one and see if my limited kitchen skills can pull it off.

Other chapters cover various ways to store meat and fish for long periods. Going back to the recipes used by sailors and explorers hundreds of years ago, long before refrigeration was available, the authors present each in a chapter with clear instructions and plenty of color pictures to help you get it right. (Spoiler: preserving meats uses a lot of salt.) Some of the items are a bit odd, but that makes them fit into the category of "forgotten" foods. Jerky, pemmican, biltong, home-made Spam, bully beef, potted meat, and bacalao (salted cod) are covered in sufficient detail to get you started on storing animal protein.

Canning several different things is covered fairly well, and I liked the chapter on canning butter. It's been a long time since I last used a pressure cooker, but I know several families that put up a lot of food in them every year. Fruits and vegetables are staples when canning food, and this book covers the basics. There are plenty of recipe books for canning fruits and vegetables and the information doesn't get old, so look in used book stores and garage sales for grandma's old cookbooks.

About a third of the book is general prepper knowledge, things like how to grow your own yeast, what to do with the food in your freezer if the power goes out, and how to use Mylar bags and oxygen absorbers to store food.  Good general information, but only lightly related to "lost superfoods".


In my opinion, this is a good book to have on the shelf. The price isn't horrible for the amount of information presented, and the color photos and clear descriptions are rare in prepper books. You can buy the book at Amazon for $27.00 (shipping is extra). 

Tuesday, June 7, 2022

Prepper’s Pantry: Pasta

Being partially of Italian and Sicilian heritage on one side of my family and Eastern European on both, pasta of various types is a staple in our kitchen as my genetics require regular servings of pasta and egg noodles to remain content. Pasta is also pretty simple to make and doesn’t require much in the way of ingredients, making it an ideal dish for preppers. 

At its heart, basic pasta is a simple combination of flour (usually Durum Semolina) and water in the right proportions. A good noodle dough can also be made with flour and egg, or a combination of flour, water, egg, and oil, but these extra ingredients aren’t an absolute necessity for good noodles. Beyond those basics all sorts of additional flavorings can be added to fresh noodles, most commonly herbs and spices, and if rolled out carefully small seeds can be mixed in, although there is a concern with tearing the dough.

While pasta can be made entirely by hand, there are a number of labor saving options, from the classic Marcato Atlas manual pasta maker, an attachment for a KitchenAid mixer, or a dedicated electric pasta maker. Yard and estate sales are good places to look for these items, often at a sharp discount.

The author's Marcato Atlas

Most pasta makers will come with a small recipe book, but there are many more comprehensive ones available. My personal favorite is an older copy of The Pasta Machine Cookbook, but there’s also an updated edition. For those who like ravioli, there are manual, Atlas, and KitchenAid options to make those as well. Since I don’t make them very often, I only have an older variation of the manual ravioli press, though I have considered getting the Atlas attachment.

Preparation of most types of flat noodles is extremely straight forward: Mix the ingredients according to the recipe, roll out to the appropriate thinness, and then cut into the desired shapes. Unless it’s being cooked right away, pasta needs to dry a bit before being stored; there are a number of racks available on the market (such as this or this) for that step. While most are made of wood or plastic, metal drying racks can occasionally be found.

Short term storage (a few days) can be in any container with a tight fitting lid in the refrigerator; any longer than that and the pasta should be more thoroughly dried, wrapped tightly in plastic wrap or vacuum sealed to reduce oxidation, and then frozen. Even then, it should be eaten within a month or so, as its flavor and texture are likely to change over time.

Once the pasta is made, it’s ready to be cooked: just drop it in a pot of water boiled with a pinch of salt, which increases the boiling temperature slightly. If you made the paste with an egg, the suggested minimum cook time is usually around five minutes to make sure any C. botulinum spores are killed; pasta made without egg can be cooked for a shorter time based on desired tenderness.

Once the pasta is done to the desired tenderness, drain the water, top with your preferred sauce -- conventional wisdom states that the thinner the pasta, the lighter the sauce: gravy for thick egg noodles, a hearty tomato sauce for linguini, and a simple olive oil (or butter) and garlic for angel hair -- serve, and enjoy.

Bon appétit!

Sunday, June 5, 2022

The Work Sharp Precision Adjust Knife Sharpener

Not actually Erin.
& is used with permission.
This isn't going to be a review in my standard style. I've been putting off this review for about 2 months, and I'm not really sure why, but I figure an informal ("unprofessional," I guess) review will make this easier. 

I have several knives which have thwarted my attempts to sharpen them for many years (one of which for over a decade). I've tried many different sharpening systems, and none of them really satisfied me. When my friend Oddball, who is the knife guy among my friends, recommended the Work Sharp Precision Adjust Knife Sharpener system to me I figured it couldn't come with a better endorsement. 

And... 

Well... 

I don't hate it; I just don't love it, and that bothers me


https://amzn.to/3Npck9t

Before you get the wrong idea, let me reassure that this system does work... for pocket knives or smaller. Heck, it even returned my Derma-Safe folding knife to a razor's edge, thanks to its ability to sharpen to an angle as narrow as 15°. And if your knife has a tanto tip, this system will handle that easily. 

It just doesn't work very well on blades much beefier than a Mora Clipper, mainly because the vise which holds the knife in place has a triangular cutout (to accommodate the slim spine of most pocket knives, I assume) and all of the "outdoorsy" fixed-blade knives I've seen have a much thicker spine with definite right angles. As you might assume, a robust rectangular spine doesn't fit well in a triangular vise. 

There's also the fact that the vise holds the knife in place via a non-locking thumbwheel, so a knife with any appreciable weight will not be held securely. 

Also also, the jig which holds the sharpening abrasive actually obscures my view of the edge as it's being sharpened. This is such a well-known issue that pretty much any Google or YouTube recommends that the first thing you do is get a mirror and put it right up against the base so that you can see the blade in its reflection. This is a valid solution to the problem, but the fact that I have to fix a known problem to make my sharpener work properly bothers me on a visceral level. 

Also also also, given that the abrasive jig travels on a guide rod means that there is a limit to how high (edge to spine) my knife can be. For example, I can't sharpen parts of my Cold Steel kukri machete all in one go; I have to sharpen pieces, then unclamp and move the blade. 

All of this is really annoying, and if it weren't for the fact that it works so very well on my smaller knives I'd have sent it back for a refund. I can't hate it, because it does its job... so long as I have a mirror, and my blade isn't too long and/or too thick and/or too heavy. 


Personally, I'd give it a solid "C" rating. It's A+ at sharpening pocket knives, but anywhere from a D to an F for larger knives. 

Next week, I'll talk about what I ended up getting which actually did sort out my problems with uncooperative knives. (Hint: it's a power tool.)

The Fine Print


This work is licensed under a Creative Commons Attribution- Noncommercial- No Derivative Works 3.0 License.

Creative Commons License


Erin Palette is a participant in the Amazon Services LLC Associates Program, an affiliate advertising program designed to provide a means for sites to earn advertising fees by advertising and linking to amazon.com.