Showing posts with label Prepper's Pantry. Show all posts

Thursday, December 5, 2024

Uncle Loki's Essential Seasonings

The important thing is the spices. A man can live on packaged food from here 'til Judgement Day if he's got enough rosemary.
- Shepherd Derrial Book, Firefly, "Serenity"

Yes, this is a cooking post. No, I'm not David in disguise, though it is indeed inspired by his Prepper's Pantry. While it's all about seasoning, it's not seasonal. 

The Basics
The top of the list starts with salt and pepper. I like my salt kosher, and my pepper to be coarse ground black. The coarser texture plays far more nicely with what and how I like to cook, and gives a bit bolder flavor notes. 

Past that, the biggest basic need is powdered garlic. Fresh cloves or pre-minced "jarlic" are better, but they don't keep as long as powdered does. I keep both on hand for just that reason.

Sage and parsley are okay, but more on the niche side. Shepherd Book knew what was going on, though; the real workhorses are rosemary and thyme. They're incredibly versatile, working to season soups, meat and poultry, and even savory baked goods. 

The Unconventional
Cinnamon and smoked paprika seem a bit odd, but again, they're very versatile, pairing well with meats, baked goods, soups, and some vegetables. They also are readily available and rather inexpensive. I also am never without at least one kind of smoked chili, be it ancho, chipotle, or generic chili powder. This adds both heat and a bit of smoky complexity.

The Out of Left Field
Have a bit of faith and hear me out on this. The last of my essentials is crystallized lemon and/or lime. Ambitious folks can make this on their own, but I personally prefer the True Lemon/True Lime brand. They add bright, bold citrus flavor without being overly tart or adding acid like citrus juice does. The other essential (and the only blend I consider such) is Tajinand it's good on literally everything I've tried it with. Cheesy things, meats, even watermelon is delicious and zippy with Tajin on it.


Once you've got your own version of this list figured out, you can expand in any direction you like; the variety in spices and seasonings is virtually endless. Expand your palate, expand your options, and food will never get boring.

Stay spicy, folks.

Lokidude

Tuesday, November 19, 2024

Prepper's Pantry: Garlic Cheese Biscuits

I saw these tasty treats mentioned online, but when I tried to go back, I couldn't find the source. I decided to try my hand at making them myself, based on what I remembered of the description.

While I made mine from fresh ingredients, nearly every component of this recipe can be found in a well-stocked prepper's pantry. 
  • Harder cheeses, if prepared properly, can last without refrigeration for quite a while. 
  • Canned cheeses are also available, and they have shelf lives measured in years. 
  • The same is true for butter. 
  • Jarred crushed garlic, if unopened and stored in a cool dark place, can last quite a while, and powdered garlic lasts even longer.
  • Home-made biscuit dough can be used, though the article I read called for the pre-made kind found in the refrigerated section of the grocery store.
I've made these biscuits twice now, once with each type of dough. A lesson I learned was not rolling the home-made kind too thin.

Once the dough is prepared, assembly can begin.

Garlic Cheese Biscuits

Ingredients

  • Biscuit dough
  • Cheese, cubed or shredded
  • Garlic, crushed
  • Butter

Recipe

  1. Roll the biscuit dough no less than ½" thick and cut into 3" rounds.
  2. Place approximately ½ teaspoon of butter in the middle of the dough.
  3. Add preferred cheese, enough to cover the butter. (I used mozzarella.)
  4. Add ½ teaspoon or so of crushed garlic.
  5. Carefully fold the dough over the contents and pinch closed.
  6. Bake at 350° for 14-16 minutes, or until lightly browned on top. Don't be concerned if some of the biscuits open during baking.

If desired, drizzle with melted butter, and serve while still warm. 

Biscuit rounds cut and rolled out with filling added

Folded over and ready for the oven

Out of the oven and ready to serve


These biscuit can be reheated... if there are any left over, that is. 

Enjoy!

Tuesday, November 12, 2024

Prepper's Pantry: Cooking in the Dark

In a previous article, I talked about different choices for power free ingredient prep. However, this does us only so much good unless we are also able to cook without power. Thankfully, there are a number of different options available to us for this process as well. While some of these alternatives are more accessible for those living in a less urban environment, there should be something available for everyone.

WARNING: several of these methods can produce dangerous combustion residue, such as carbon monoxide, and should never be used indoors.

Whether running off propane or natural gas, a traditional non-electric stove can usually still be used during a power outage. Some of the more modern versions of this appliance may be encumbered by computerized controls (such as touch pads) that limit their utility; however, if there are manual knobs to turn on gas to the burners and matches to light them, then cooking can commence.

Traditional Gas Oven


While this process may not work for activating the oven, many meals can be prepared solely on the stovetop. Just make sure the gas is properly turned off when cooking is done.

Grills
Available in sizes from large to small, and fueled by either charcoal or propane, grills are the next option to discuss. While generally not viable for apartment dwellers (unless they have a balcony or access to a park or other common area), there are a wide variety of choices in this area.

Small cast iron charcoal grills, commonly called hibachi, are the most basic example of this category. Don't let their minimal size mislead you; they can certainly be used to prepare full meals.

Classic Hibachi Style Grill


From here, grills move up in size and expense. Next up are the traditional Weber Buoy or Kettle style charcoal grills and similar designs. There are a variety of options, capacities, and accessories to choose from with these grills.


Propane grills have really taken off over the past few decades, and there are a dizzying variety of sizes, styles, options, and accessories available in this area.


Camp Stoves
On a related (but much more portable) note are classic camp stoves. These come in many sizes, from small enough to perch on top of a small fuel canister...


...to large enough for heating two pots at the same time. These days, most run on propane, but there are other options as well, such as butane.


An even more compact version of the camp stove concept is the small, folding Esbit-type pocket stoves, which are designed to be run off fuel tablets. However, they also can use twigs or even small candles in a pinch.


Fire Pits
For those with appropriate space and zoning, another possibility is a fire pit, either as a permanent emplacement or a free-standing unit.

The Author's Backyard Fire Pit


If you plan on going this route, some sort of grate or pot hanger should be purchased to simplify cooking over an open fire.

Folding Cooking Grate


There are even fire pits on the market that come with cooking surfaces included.


These are just some of the available considerations for cooking when electricity isn't available.

Regardless which option is used, it's always a good idea to have some sort of fire suppression system on hand in case of accidents or emergencies. 

Have fun, and cook safely.

Wednesday, October 30, 2024

Prepper's Pantry: Manual Kitchen Tools

One of the things my wife and I try to prepare for is loss of power. Whether that's by having a generator, solar panels, flashlights, candles, oil lamps, or a combination of options, we have plans. If the outage is extended, some of those alternatives may become issues. For example, how much fuel do we have for our generator?

Since the triangle of immediate survival involves food, potable water, and shelter, those are the places to look for energy savings. A relatively easy one can be in our food prep tools. Our grandparents or great grandparents got along with few, or even no, powered kitchen tools. We can still learn something from their example.

The basic categories of ingredient preparation are cutting, chopping, slicing, grinding, and mixing. All of these can be done with basic tools; however, there are still labor saving options that don't require electricity.

Cutting is the easiest to address, as everyone should have a selection of kitchen knives. In a bug out situation, we should still have a few knives in our preps. Though I have quite a few cutting implements in my kitchen, the two I find myself using most often are a 3.5" paring knife and an 8" chef's knife.

The Author's two favorite kitchen knives


Though somewhat limited to firmer foods, a chopping alternative is a hand-powered vegetable chopper. These can allow for quicker dicing than most people are comfortable doing with a knife.

The Author's KitchenAid brand chopper


A Mandoline works quite well for rapid slicing of vegetables and harder cheeses. It has more cutting options than the chopper, though with greater risk of injury if used improperly.

A basic Mandoline with blades and hand protector


Along similar lines, but safer, there are graters and shredders of various types. I prefer one of the self-contained units with different cutting inserts.

The Author's food grater


When grinding and straining cooked or soft foods, like tomatoes, nothing in my experience beats a hand-cranked food mill. Some, like mine, are very basic units, but others come with replaceable disks for different output sizes.

The Author's vintage Foley Food Mill


An old-fashioned manual meat grinder, while heavy and often relatively expensive, can handle practically anything that fits down its gullet.

The Author's classic meat grinder


Finally we have the classic egg-beater type mixer, a fixture in 1960s TV sitcom kitchens. Despite its age, it's very useful for its intended purpose. Anything from dry baking mix, batter, and puddings, to sauces and even eggs, fall within its capabilities.

A modern, but traditional, Egg-Beater


There are numerous other manual kitchen tools, but this selection covers all of the basic operations for ingredients preparation. While these items can still be purchased new, keep an eye out at local thrift shops and yard sales where they can frequently be found for pennies on the dollar. That's where I bought most of my kitchen gadgets shown above.

Good luck, and good eating.

Monday, September 30, 2024

Prepper's Pantry: Hydration

As we all know by now, proper hydration is extremely important for both survival and health. Back in August I attended the Gun Owners of America GOALS Expo where I encountered two interesting products which directly address hydration.

First is the Iceplate by Qore Performance. Simply put, it's a ballistic plate-shaped water bottle that can be frozen for cooling the wearer or filled with hot/warm water for use in winter environments. There are two main models, one plain and one with a drinking tube attachment. If Qore Performance had a cooler full of these on range day, they would likely have sold out before noon.

Iceplate by Qore Performance

From their website:
Worn close to the body, ICEPLATE® Curve is a Medium ESAPI-shaped water bottle that cools/warms/hydrates you with 50 fl oz (1.5 L) of drinking water, delivering 70 watts of cooling power or 52 watts of heating power with hands-free plate carrier or backpack hydration for unparalleled control over your environment. Another way to think of ICEPLATE® Curve is like a booster rocket designed to put you into orbit with a full gas tank, not necessarily to last the entire mission. Engineered for elite users looking for every edge in the performance of their duties, ICEPLATE® Curve creates decisive competitive advantages where none previously existed by weaponizing temperature to enhance performance and survivability.

Fill and freeze ICEPLATE® Curve for an unparalleled 70 Watts of Cooling Power per plate, keeping your core body temperature where you want it for hours. As the ice melts, you will have ice cold water to drink. Fill with hot water and enjoy 52 watts of conductive heating power.

Qore offers several other products as well, including plate carriers compatible with the Iceplate, safety vests, iPad cooling cases, and more.


The other hydration-related product which caught my attention was Liquid IV Hydration Multiplier, a powdered and flavored potable water additive. While I find most of these to have an unpleasant chemical aftertaste, the Liquid IV didn't. I especially enjoyed the lemon lime flavor.* Even though I almost certainly exceeded the recommended daily usage, I stayed hydrated and comfortable throughout the day, despite the heat and sun.

From their website:
Get faster hydration than water alone. Powered by LIV HYDRASCIENCE™, our science-backed formula contains an optimized ratio of electrolytes, essential vitamins, and clinically tested nutrients. Hydration Multiplier® has 3x the electrolytes of the leading sports drink, and 8 vitamins and nutrients in every stick.

Mix one stick of Liquid I.V. with water as directed on packaging. For Hydration Multiplier® we recommend mixing 1 stick with 16oz of water.

Remember, hydrate or die-drate.


* It's got to be good, it's got electrolytes. It's what plants crave. 

Thursday, April 25, 2024

Prepper's Pantry: Hot Sauces

As I've mentioned in some of my other food related articles (spices, canning [1 and 2], and pickling), home-preserved foods are generally nutritious and filling but can eventually get monotonous. There are many different additives available to add variety to meals, the simplest and most common being salt to enhance flavor and pepper to add some zing. Another option, and one with great variety, is hot sauce. 

My Wife and I grow some form of hot pepper in our garden most years. In addition to using them throughout the growing season, we also preserve them in different ways: sliced and frozen; in salsa, which is also frozen; dried and crushed; bottled in vinegar; and, of course, in hot sauce. We make a number of different hot sauces of different levels of heat and flavor, depending on the harvest and our mood. Neither of us likes heat for the sake of heat, preferring flavor with some spice. With that in mind, we also make some hotter sauces that are intended for use in soups or stews, where a tablespoon of hot sauce will go a long way.

Speaking of heat, peppers are measured on the Scoville Scale, starting with the sweet bell pepper and going up through the truly insane.

Scoville Scale

Recipes
At their most simple, hot sauces are an acid (such as cider vinegar) and a flavoring (such as hot pepper paste). Frequently, salt will be added for its preservative and flavor-enhancing properties. In the following recipes, carrots are used as a thickener and to moderate the heat level. Habaneros are obviously not the only peppers that can be used; feel free to substitute different peppers and experiment.
WARNING!
When making hot sauce at home, the most important precaution is to avoid transferring any of the spice molecules to your mucous membranes, such as your eyes, nose, mouth, or genitals. Gloves and goggles or lab glasses can help with this, as can rigorous washing-up.

Habanero Hot Sauce
  • 1 ½ cups chopped carrots
  • 1 onion, chopped
  • 1 ½ cups lime juice
  • 3 cloves garlic, minced (minimum)
  • 2 tsp salt
  • 1 cup chopped habaneros, about 12 chilis (minimum)

  1. Combine all the ingredients, except the habaneros, in a saucepan and bring to a boil. Boil for 10 minutes or until the carrots are soft.
  2. Add the habaneros and simmer until at the desired flavor and heat. Adjust the heat by adding more habaneros or by increasing the carrots, but this can alter the flavor.
  3. Place all the ingredients in a blender or food processor and puree until smooth. Strain for a smoother sauce.
  4. Pour in sterilized jars and refrigerate.


Habanero Pepper Sauce
  • 12 habanero chilis, stems removed, chopped (minimum)
  • ½ cup chopped onion
  • 2 cloves garlic, minced (minimum)
  • 1 Tbsp vegetable oil
  • ½ cup chopped carrots
  • ½ cup distilled vinegar
  • ¼  cup lime juice


  1. Sauté onion and garlic in oil until soft.
  2. Add carrots with a small amount of water.
  3. Bring to boil, reduce heat, and simmer until carrots are soft.
  4. Place mixture in blender with chilis and puree until smooth.
  5. Combine puree with vinegar and lime juice; simmer 5 minutes to combine flavors.
  6. Put mixture into sterilized bottles and seal.


For those interested in more information, Ian (aka LawDog) has a good discussion on hot sauce characteristics which you can find here.

Bon appetit!

Thursday, April 11, 2024

Prepper's Pantry: Yogurt Bread

This is an extremely simple bread with a prep time measured in minutes. Including baking, the entire process took me less than an hour from start to finish. It's perfect for those days where bread is desired, but time is limited.

Yogurt Bread

Ingredients

  • 3 Cups self-rising flour or all-purpose flour
  • 5 tsp Baking powder
  • ¾ - 1 tsp salt
  • 1 ¾ Cups lowfat vanilla yogurt 
    • (if using Greek yogurt, increase to 2 Cups)

Recipe

  1. Combine flour and yogurt in a large bowl. Mix with a spatula until no lumps of flour remain. Hand mixing may be required. When done, the dough should be moist and slightly sticky. Add small amounts of flour or yogurt to get the desired texture.

    Dough mixed and ready

  2. Grease or line a loaf pan with parchment paper and add the dough. Use the spatula to smooth and level the surface if desired.

    In the parchment paper-lined loaf pan

  3. Bake in a preheated 375° F oven for 35-40 minutes, or until the surface is lightly browned.

    Fresh out of the oven

  4. Cool on a baking rack before slicing.

    Transferring to the cooling rack
This bread has a slightly heavy texture and a rich flavor. It can be eaten as-is, but works wonderfully with a fruit spread or honey for breakfast, or any other time. There's also an alternate version that uses sour cream in place of the yogurt I intend to try as well.

The crumb

Bon appetit.

Tuesday, October 24, 2023

Prepper's Pantry: Shepherd's Pie

With the weather starting to get colder in much of the United States, the desire for comfort food grows. In previous Prepper's posts I've talked about soups and stews, chili, and most recently lasagna. All these dishes are distinct, yet they also all have in common a tendency to be hearty, possibly even heavy; are generally served hot; and can provide us with plentiful leftovers. The recipe for this post is no exception. 

Shepherd's Pie is one of my favorite fall and winter comfort food, although since my version uses beef instead of lamb, it's really more of a Stockman's or Cottage Pie. Any meat or meat substitute can be used, however. 

As this is a family recipe, I don't really have precise quantities. I tend to make it to fit the baking dish, which is usually either a glass 8x8 casserole dish, or the same deep 9 x 13 metal dish I use for lasagna.

Shepherd's Pie

Filling Ingredients

  • Ground beef (3-5 lbs)
  • 2-3 6-oz cans Tomato paste
  • 1-2 lbs Frozen or otherwise preserved vegetables (peas, carrots, corn, green beans, etc)

Topping Ingredients

  • 3-5 Potatoes
  • 4-8 oz Butter
  • 1-2 cups Milk and/or sour cream (measurement is total)
  • Salt & pepper to taste
Recipe

  1. Brown and drain the ground beef.
  2. Mix in the tomato paste and frozen vegetables.
  3. Spray an oven safe baking dish with non-stick spray and pour in the filling.
  4. Boil the potatoes until soft then drain.
  5. Mash and add butter, milk (and/or sour cream), and salt and pepper to taste.
  6. Cover the top of the filling with an even layer of potatoes.
  7. Bake at 350° F for 45 minutes, or until the potatoes are nicely browned, and the filling is bubbling up around the edges.

Alternate Biscuit Topping

Ingredients

  • 2 cups Self-Rising Flour (White Lily preferred)
  • (Or 2 cups regular flour, 3 tsp baking powder, ½ tsp salt)
  • ¼ cup Crisco shortening or 1 stick butter - softened
  • ¾ cup buttermilk or 2/3 cup milk

Recipe

  1. Place flour in a large bowl. Cut in shortening (or butter) with pastry blender or two knives until crumbs are the size of peas.
  2. Add buttermilk, stirring with fork just until flour is moistened.
  3. Turn dough onto lightly floured surface.
  4. Knead gently 5 to 6 times, just until smooth.
  5. Form over top of the filling.
  6. Bake as above.

The first piece always comes out messy.

This dish is best served hot while looking out the window at unpleasant weather.

Keep warm, and eat hearty.

Friday, October 13, 2023

Prepper's Pantry: Lasagna

The history of traditional foods is deeply connected with the history of poverty, for many of our favorite cultural dishes are direct descendants of meals that were developed when that culture (or subculture) was at a low point economically.

Lasagna is just one example of this. There are an infinite variety of lasagna recipes; it can be made with nearly any type of meat (or none at all), a variety of cheeses, and all sorts of vegetables and sauces. Many of these ingredients are available canned, or in other forms of long term storage.

What all these recipes have in common is the separation of the different ingredients with layers of noodles or other sheets of starchy foods, such as thin rolled flat bread. According to the Bread Cube Law, this makes lasagna a cake.

www.cuberule.com


What follows is an estimation of my family recipe. I say estimation, because as with any multi-generational set of instructions, people, tastes, and ingredients change. For example, my great-grandmother mixed peas in with the ground beef. However, My Wife (tm) doesn't like peas, so I leave them out.

The noodles can be store-bought, or home-made if a pasta maker is available. For my latest batch, I used a combination of both store-bought and home-made as I had a half box of noodles in the cupboard from the last lasagna I baked.

The Ingredients

 
Ingredients for one 9x13 tray of lasagna:

  • Minimum 3 lbs ground beef/pork
  • Minimum 32 oz Ricotta cheese
  • 1 lb mozzarella
  • Minimum 2 quart jars tomato sauce
  • 1-2 cans tomato paste
  • Minimum 8 hard-boiled eggs
  • Minimum double batch of pasta dough (2 cups flour, 2-3 eggs, 1-2 tbsp olive oil, Roll noodles out to at least setting 5 on an Atlas pasta maker)
  • Or 2 boxes standard lasagna noodles

Recipe

  • Brown the meat and drain the grease.
  • While still warm, add the paste and about half a jar of sauce, mix well.
  • Slice the hard boiled eggs.
  • If using home-made noodles, store them under a damp towel until needed.
  • In the bottom of a tall, 9x13 oven safe pan, cover the bottom with a layer of sauce then follow with the following:
    • Noodle
    • Ground beef
    • Noodle
    • Cheese
    • Noodle
    • Hard-boiled egg
    • Noodle
    • Cheese
    • Noodle
    • Ground beef
    • Noodle
    • Sauce
    • Shredded cheese topping

Assembled and ready for oven or refrigerator


Once done, the lasagna can be covered with plastic wrap and stored in the refrigerator for a few days. When it's time, bake at 350° F for about 45 minutes to an hour, or until the cheese is nicely browned and bubbling.

Cooked and ready to eat


Serve with garlic bread and, if you like, a nice red wine. Buon appetito!

Thursday, September 28, 2023

Prepper's Pantry: Stocks and Broths

previously wrote about different options for utilizing the essential flavors of fruits, vegetables, and herbs, both for storage as well as in recipes. There are also methods for concentrating the rich flavors of meats for future use, which are commonly known as broth and stock

The terms broth and stock are often used interchangeably, which is a somewhat divisive topic in the culinary world. Stock is also sometimes referred to as bone broth, referencing its origin while muddying the waters. Generally speaking, stock is made (as the alternate name implies) from cooking bones in liquid for an extended period of time to extract all the meaty goodness inside. Stocks are sometimes referred to as "fonds de cuisine", or foundations in classical cookbooks, since they are used as the basis for other dishes. While stock will usually be made with added vegetables, spices are often not added during preparation as they will be added in the final dish. In contrast, broth is usually prepared with some meat, as well as the bones of whatever animal. In addition, broths are made with spices and other flavorings, and are cooked for a shorter time than stocks.

Stovetop Stock
I used to make stock on the stovetop using the following simple process, but once I got my InstantPot, I never prepared stock on the stovetop again.

Ingredients

  • Meat bones (chicken, beef, or pork)
  • Onion
  • Carrot
  • Garlic
  • Other herbs as desired
  • Water

Recipe

  1. Place everything in the pot and add water to cover. Chicken bones will likely float; this isn't an issue.
  2. Bring the water to a boil, then reduce heat to a simmer.
  3. Cook covered six or more hours, until either the water is reduced by half, or to taste.
  4. Keep an eye on the pot as it may try to boil over.
  5. Strain all the solids, and store the remaining liquid for no more than a week or two in the refrigerator or up to a year in the freezer.

Note: some people like to roast the bones and vegetables in the oven before boiling, which is reported to add richness to the flavor. I've never done this myself.

For the InstantPot version of this recipe, the ingredients are the same, other than the water. Depending on the size of the InstantPot, either ½ or 1 cup of water is added. The directions are also the same, except I run the InstantPot for two or more hours at high pressure.

If I'm doing several batches, I'll use the rendered broth from the first as the liquid for the second, and so on. This produces a rich, dark brown broth (even with chicken) that will assume the consistency of Jell-O when cooled, due to the gelatin extracted from the bones.


Chicken Soup
For a broth, I present you with my mother's general purpose chicken soup recipe. This is the classic Jewish soup imbued with mystical healing powers. As with many family recipes, the ingredients are not precise measurements.

Ingredients

  • Celery – 10 stalks + leaves
  • 2 onions
  • 2 large carrots
  • 3 parsnips
  • Parsley (fresh)
  • Dill (fresh)
  • Garlic (to taste)
  • 1 Plum tomato
  • Chicken*
  • Salt and pepper
  • Gizzards
  • Water to cover
  • Thin Egg Noodles

*If possible, get what is called a “stew” chicken or “soup” chicken.  This is an older bird and will hold up much better and be more flavorful than a regular chicken.

Recipe

  1. Carefully wash the chicken, removing the giblets and setting them aside for use in other recipes.
  2. Cut the chicken up and place in a very large pot with the gizzards. 
  3. Cover chicken with water, then lid the pot and bring to a boil for a total of 1 hour. Skim the water occasionally.
  4. Cut up the veggies, tying the carefully washed herbs in bunches so it is easier to remove them.
  5. Add the veggies and cook for another hour, covered.
  6. Remove veggies and chicken from soup and skim off as much fat as possible.
  7. Strain the soup through a very fine strainer. I usually do this twice, and the second time I put a piece of paper towel in the strainer to make it really clear. 
  8. Refrigerate soup, and skim off any hardened fat before heating to serve.
  9. Cut up the chicken and remove from the bone. Set aside, and serve in the soup if desired.
  10. Cut up carrots and parsnips to serve in soup.
  11. Cook the egg noodles separately, then add before serving.

While I've never made it myself, there are also vegetable stock recipes; here's one.

Enjoy, and eat in good health.

Wednesday, September 13, 2023

Prepper's Pantry: Extracts and Syrups and Reductions, oh my!

When it comes to food preservation, there are many methods. One trait that most of them have in common is using most (or all) of the fruit or vegetable being preserved. However, another option is the extraction of only the flavor, or essence, of the food for use as an ingredient in recipes. Almost any herbal or aromatic plant, most fruits, and many vegetables can be processed using these techniques. Most of these methods are fairly simple, and require few (if any) ingredients other than the flavoring in question. The most common extra ingredient for the extracts, as an example, is time.

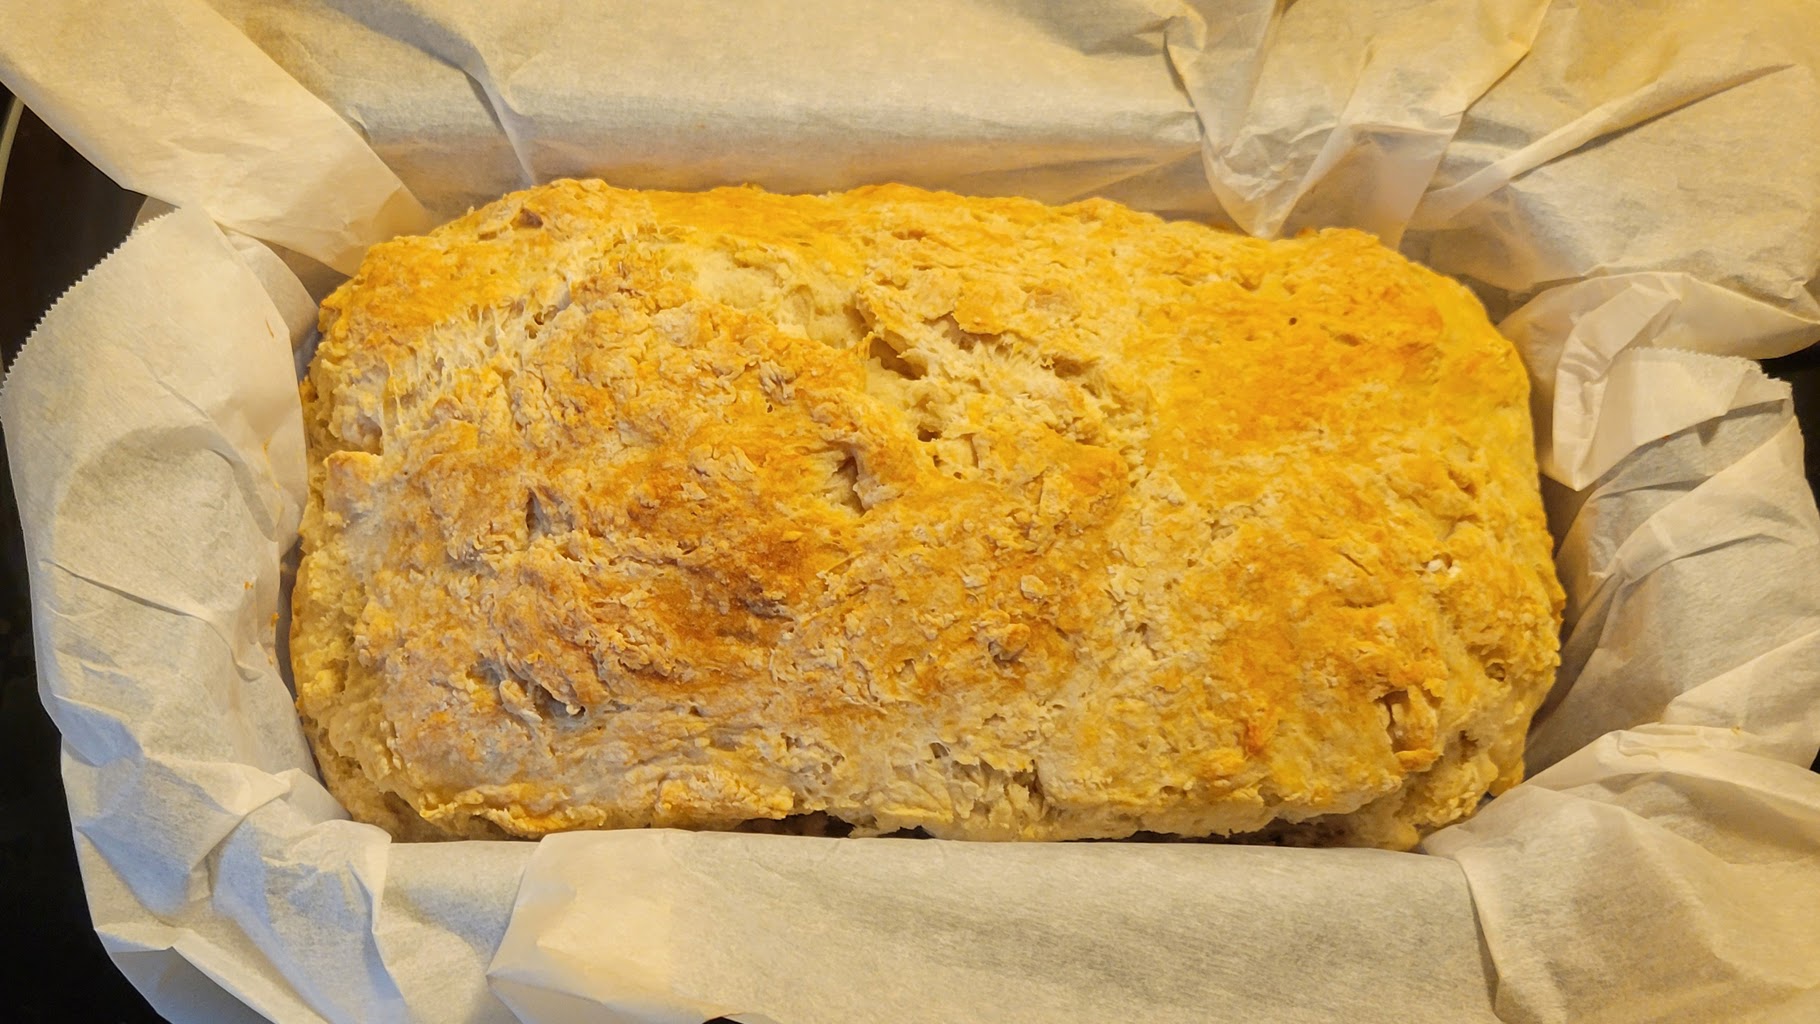
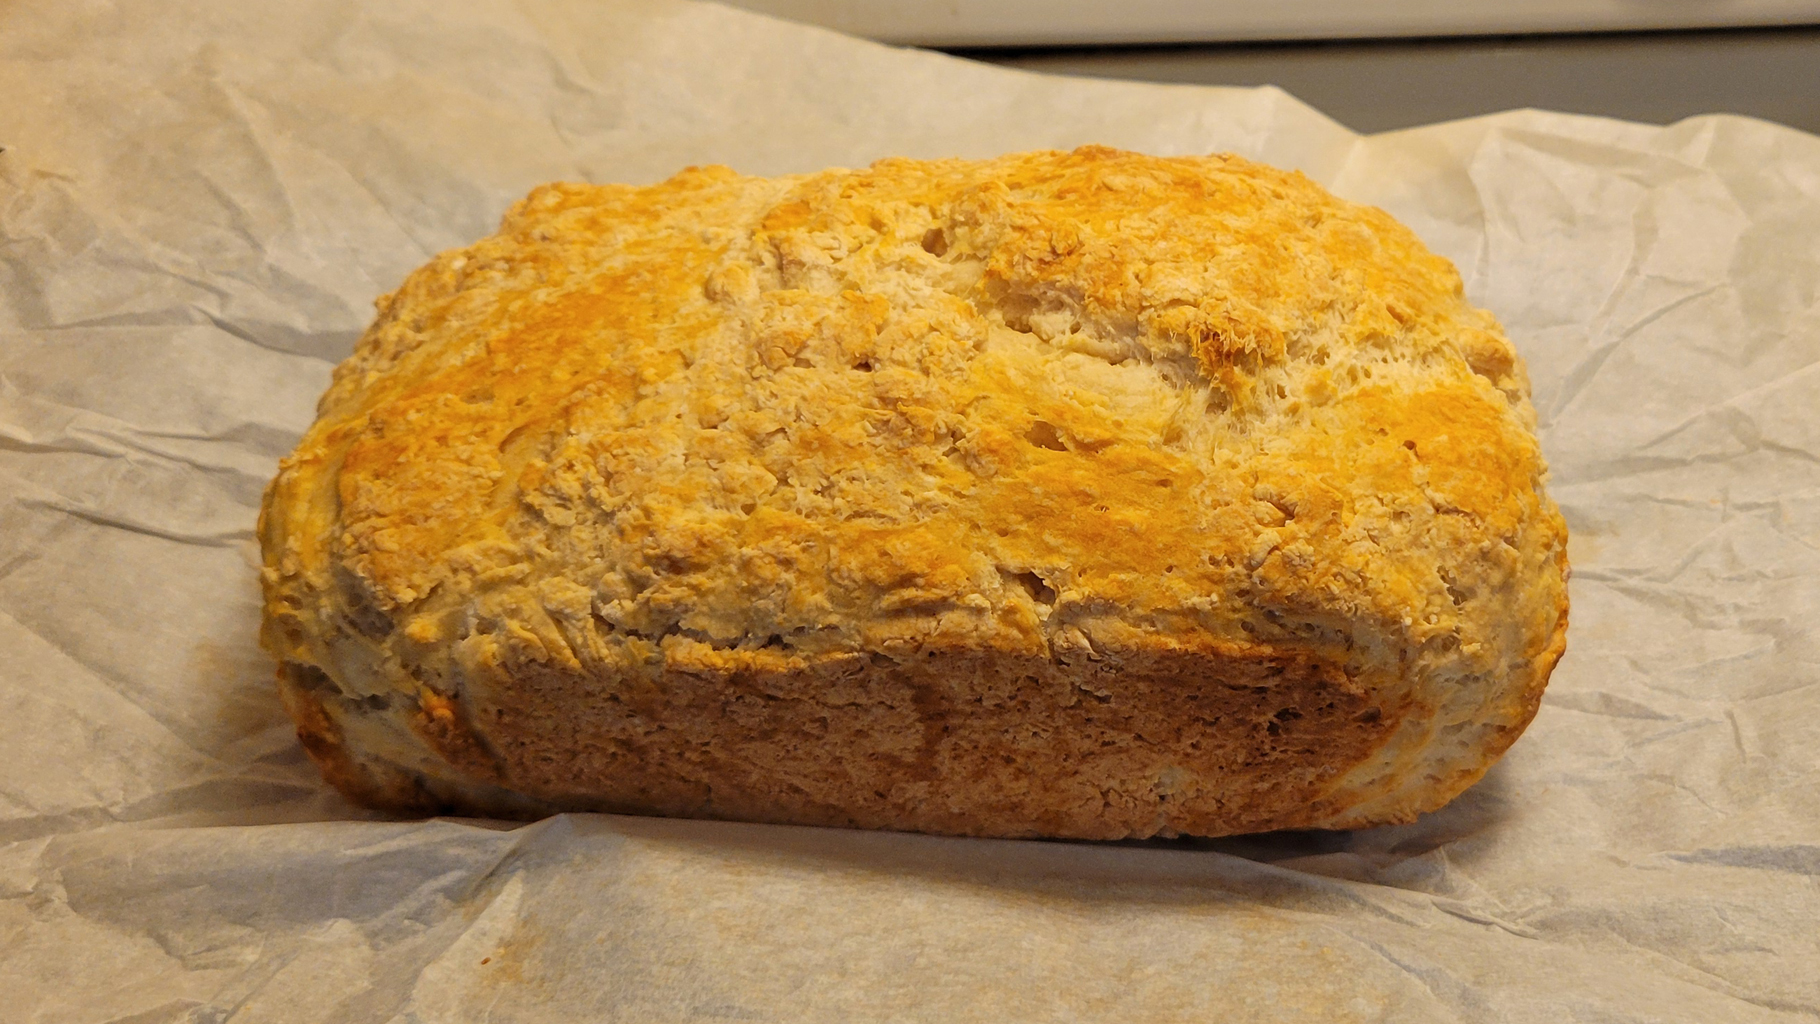
Filtered and bottled extracts in the author's pantry
 
Extracts
These are usually made by submerging a flavorful herb in alcohol for a variable amount of time. The resulting liquid, once strained, can be stored in a cool dark place almost indefinitely.

Every baker is familiar with the benefits of vanilla extract when making cookies or pastries.

Ingredients:

  • 6 vanilla beans
  • 1 cup 80 proof (minimum) vodka (or bourbon, or brandy, or even rum)
Instructions:

  1. Slit the vanilla beans so the beans are exposed. If the length of the vanilla beans don’t fit in the bottle or jar, cut them into smaller pieces.
  2. Place beans into bottle or jar.
  3. Pour the spirit on top, using a funnel if needed. Ensure the beans are fully submerged. Shake a few times.
  4. Store at room temperature out of direct sunlight. Shake every week or two. 
  5. This can be ready to use in as little as 8 weeks, but 12+ months is better.

When I make vanilla extract, I use a quart canning jar and approximately 24 oz of vodka. When done, I break it up into smaller glass jars and put a few pieces of vanilla bean in each one. These make great gifts for fellow bakers.

Mint is an extremely versatile plant. It can also be a nuisance with its tendency to take over any area where it's planted.

Mint extract: the beginning

Ingredients:

  • ½ cup mint leaves
  • 1 cup vodka
Instructions:

  1. Place the mint leaves in a clean mason jar.
  2. Using a muddler or a wooden spoon, crush them gently to release some of the oils.
  3. Pour the vodka over the leaves, then push them down to keep them submerged.
  4. Store in a cool dark place for 30 days, shaking occasionally.
  5. Strain and store in a lidded bottle in the pantry.
Mint extract: second straining


As with the vanilla extract, I use a larger quantity of both mint and vodka. When done I strain it twice, once to remove the leaves, then a second time through a coffee filter to remove any sediment.

Not only can mint extract be used in baking, but it's also a good insect repellent, and can help keep rodents out of cars. Just sprinkle a few drops on the cabin air filter and in the air vents every few months.

Mint extract: final product

Syrups
 
Basic Simple Syrup
For those who enjoy cocktails, simple syrup is a fairly common ingredient. At its heart, it's a super saturated solution of sugar and water used to add sweetness to, or counter bitterness in, mixed drinks.

Ingredients:
  • 1 cup water
  • 1 cup granulated or brown sugar
Instructions:

  1. Add water and sugar to a saucepan over medium-high heat.
  2. Bring the mixture to a simmer.
  3. Stir occasionally until the sugar has completely dissolved.
  4. Cool then store in an airtight container, in the fridge, up to four weeks.

Some simple syrup recipes advise reducing the volume by up to half during the simmering phase.

Ginger Simple Syrup
This can be used as is to calm an upset stomach, in baking, or mixed with seltzer for home-made ginger beer.

Ingredients:
  • 1 lb peeled and cut ginger
  • 2 to 2 ½ cups of water
  • 1 cup of sugar
Instructions:

  1. Measure the depth with half the water added, then add the rest and cook the mixture down to approximately that level.
  2. Strain and bottle when done and it should last in the fridge for three months or so.

This is an even simpler version, as no cooking is required, only time.

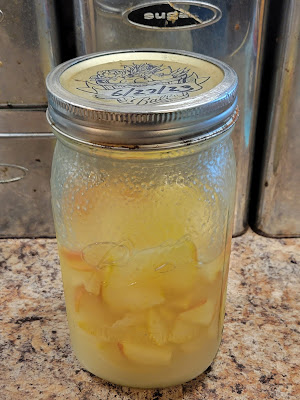
Apple simple syrup mid-process


    Ingredients:

    • 1 apple, cored and sliced thin
    • Equal weight in sugar, plus some for topping
    Instructions:

    1. Coat the apple slices in sugar and put them in an airtight jar in the refrigerator for 20-30 days. Make sure there is a layer of sugar on top.
    2. Shake every few days to break up the sugar that settles to the bottom.
    3. As with the ginger syrup, strain and bottle when done and it should last in the fridge for three months or so.

    When done, dehydrate the apple slices for a bonus tasty treat.

    Reductions
    A reduction is related to a simple syrup, but generally refers to savories that have been cooked down to thicken and concentrate the flavor. A similar concept is a glaze. The distinction between the two isn't a hard line, but glazes usually have a sweetener added.

    Beef or Pork Reduction

    A classic reduction is made from the juices left in the bottom of a roasting dish or pan after cooking a roast, generally beef or pork. Due to the variable nature of the main element, I'm going to list approximate ingredients and measurements the reader can adjust to taste.

    Ingredients:

    • Juices from cooking a roast
    • 1 tsp to 1 Tbs olive oil or bacon fat
    • 1 small to medium onion, diced
    • 1-2 cups red wine or red wine vinegar
    • Salt and pepper to taste
    • Garlic to taste, diced or crushed
    • 1 to 3 Tbs herbs appropriate to the type of meat
    • 1 Tbs butter (optional)
    Instructions:

    1. Add the oil, onion, and wine/vinegar to the pan.
    2. Over medium heat, scrub the bottom of the pan to incorporate the browned bits.
    3. Cook until the onion is soft, and the liquid is reduced by approximately half.
    4. Taste the liquid and add salt and pepper to taste.
    5. Add the garlic, herbs, and (if desired) the butter.
    6. Cook until the butter is melted and fully incorporated, or the flavors are blended to taste.

    Some people like to add a cup of beef or pork stock before the salt and pepper and cook down by half again. For a smooth result, use a stick or stand blender, or a food processor, to liquefy any remaining solids before serving.

    Ingredients:
    • 2 cups balsamic vinegar
    • ½ cup brown sugar
    Instructions:

    1. Mix in a saucepan over medium heat, stirring constantly until the sugar has dissolved.
    2. Bring to a boil and reduce heat to low.
    3. Simmer until volume is reduced by half (about 20 minutes).
    4. Let cool, then pour into a lidded jar. Seal and store in the refrigerator.

    This will last indefinitely. I use it on pork and chicken, as well as drizzled over mozzarella and fresh bread.

    Note: when chilled it will thicken considerably, as in "a spoon will stand up in the jar" thick. Heat it in the microwave in 10 to 15 second intervals until the desired consistency is achieved. A hot water bath can also be used, but will take longer.

    I said the balsamic glaze was thick (or should I say "thiccc"?)

    There are many other flavorings that can be preserved through these methods. Bon appétit, and happy experimentation. 


    The Fine Print


    This work is licensed under a Creative Commons Attribution- Noncommercial- No Derivative Works 3.0 License.

    Creative Commons License


    Erin Palette is a participant in the Amazon Services LLC Associates Program, an affiliate advertising program designed to provide a means for sites to earn advertising fees by advertising and linking to amazon.com.