Yes, this is a cooking post. No, I'm not David in disguise, though it is indeed inspired by his Prepper's Pantry. While it's all about seasoning, it's not seasonal.
The Basics
The top of the list starts with salt and pepper. I like my salt kosher, and my pepper to be coarse ground black. The coarser texture plays far more nicely with what and how I like to cook, and gives a bit bolder flavor notes.
Past that, the biggest basic need is powdered garlic. Fresh cloves or pre-minced "jarlic" are better, but they don't keep as long as powdered does. I keep both on hand for just that reason.
Sage and parsley are okay, but more on the niche side. Shepherd Book knew what was going on, though; the real workhorses are rosemary and thyme. They're incredibly versatile, working to season soups, meat and poultry, and even savory baked goods.
The Unconventional
Cinnamon and smoked paprika seem a bit odd, but again, they're very versatile, pairing well with meats, baked goods, soups, and some vegetables. They also are readily available and rather inexpensive. I also am never without at least one kind of smoked chili, be it ancho, chipotle, or generic chili powder. This adds both heat and a bit of smoky complexity.
The Out of Left Field
Have a bit of faith and hear me out on this. The last of my essentials is crystallized lemon and/or lime. Ambitious folks can make this on their own, but I personally prefer the True Lemon/True Lime brand. They add bright, bold citrus flavor without being overly tart or adding acid like citrus juice does. The other essential (and the only blend I consider such) is Tajin, and it's good on literally everything I've tried it with. Cheesy things, meats, even watermelon is delicious and zippy with Tajin on it.
Once you've got your own version of this list figured out, you can expand in any direction you like; the variety in spices and seasonings is virtually endless. Expand your palate, expand your options, and food will never get boring.
In a previous article, I talked about different choices for
power free ingredient prep. However, this does us only so much good unless we are also able to cook without power. Thankfully, there are a number of different
options available to us for this process as well. While some of these alternatives are more accessible for
those living in a less urban environment, there should be something available
for everyone.
WARNING: several of these methods can produce dangerous combustion residue, such as carbon monoxide, and should never be used indoors.
Whether running off propane or natural gas, a traditional
non-electric stove can usually still be used during a power outage. Some
of the more modern versions of this appliance may be encumbered by computerized
controls (such as touch pads) that limit their utility; however, if there are
manual knobs to turn on gas to the burners and matches to light them, then cooking
can commence.
While this process may not work for activating the oven, many meals can be prepared solely on the stovetop. Just make sure the gas is properly turned off when cooking is done.
Grills
Available in sizes from large to small, and fueled by either
charcoal or propane, grills are the next option to discuss. While generally not
viable for apartment dwellers (unless they have a balcony or access to a park or other common area), there are a wide
variety of choices in this area.
Small cast iron charcoal grills, commonly called hibachi,
are the most basic example of this category. Don't let their minimal size
mislead you; they can certainly be used to prepare full meals.
From here, grills move up in size and expense. Next up are the
traditional Weber Buoy or Kettle style charcoal grills and similar designs. There are a
variety of options, capacities, and accessories to choose from with these
grills.
Propane grills have really taken off over the past few
decades, and there are a dizzying variety of sizes, styles, options, and
accessories available in this area.
On a related (but much more portable) note are classic camp
stoves. These come in many sizes, from small enough to perch on top of a small fuel
canister...
An even more compact version of the camp stove concept is the small, folding Esbit-type pocket stoves, which are designed to be run off fuel tablets.
However, they also can use twigs or even small candles in a pinch.
Let's say you've got a good sourdough starter going, but circumstances arise where you won't be able to use it for quite a while. It has to be fed regularly, or it will die. Or let's say you want to send some to someone, and shipping a container of working starter isn't really an option.
The solution is to dry your starter.
This started as a "Will this work?" experiment, and it does. I spread some starter out on a plate and left it on the table. A couple of times a day I'd stir it around as it dried, and after a few days I had a lot of little chunks of dried starter. I put some in a baggie, squeezed out most of the air, and left it on the table for several months.
To determine if the starter was still alive, I put some of those bits into a bowl, added half a cup of unbleached flour, stirred in enough warm water to make a very soft dough, put on a loose-fitting lid, and set it out of the way. By the second day it was bubbling, showing that the yeasts had come out of hibernation and were growing, and it worked normally for baking. Success!
The next method I tried was easier. I spread out some of the starter on a sheet of no-stick aluminum foil, then set that in a safe place while it dried. By spreading it thin it can dry faster, and when dry you can flex the foil and it will flake off, giving thin, light pieces that can be crushed up easily or stored as-is.
At this time I haven't tried vacuum-packing it, which is next to on my list of things to try, but it should work nicely.
As I've mentioned in some of my other food related articles (spices, canning [1 and 2], and pickling), home-preserved foods are generally nutritious and filling but can eventually get monotonous. There are many different additives available to add variety to meals, the simplest and most common being salt to enhance flavor and pepper to add some zing. Another option, and one with great variety, is hot sauce.
My Wife and I grow some form of hot pepper in our garden most years. In addition to using them throughout the growing season, we also preserve them in different ways: sliced and frozen; in salsa, which is also frozen; dried and crushed; bottled in vinegar; and, of course, in hot sauce. We make a number of different hot sauces of different levels of heat and flavor, depending on the harvest and our mood. Neither of us likes heat for the sake of heat, preferring flavor with some spice. With that in mind, we also make some hotter sauces that are intended for use in soups or stews, where a tablespoon of hot sauce will go a long way.
Speaking of heat, peppers are measured on the Scoville Scale, starting with the sweet bell pepper and going up through the truly insane.
At their most simple, hot sauces are an acid (such as cider vinegar) and a flavoring (such as hot pepper paste). Frequently, salt will be added for its preservative and flavor-enhancing properties. In the following recipes, carrots are used as a
thickener and to moderate the heat level. Habaneros are obviously not the
only peppers that can be used; feel free to substitute different
peppers and experiment.
WARNING!
When making hot sauce at home, the most important precaution is to avoid transferring any of the spice molecules to your mucous membranes, such as your eyes, nose, mouth, or genitals. Gloves and goggles or lab glasses can help with this, as can rigorous washing-up.
Habanero Hot Sauce
1 ½ cups
chopped carrots
1 onion,
chopped
1 ½ cups lime
juice
3 cloves
garlic, minced (minimum)
2 tsp salt
1 cup chopped
habaneros, about 12 chilis (minimum)
Combine all the
ingredients, except the habaneros, in a saucepan and bring to a boil. Boil for
10 minutes or until the carrots are soft.
Add the
habaneros and simmer until at the desired flavor and heat. Adjust the heat by
adding more habaneros or by increasing the carrots, but this can alter the
flavor.
Place all the
ingredients in a blender or food processor and puree until smooth. Strain for a
smoother sauce.
If you've spent any amount of time baking bread, you have likely read or heard about sourdough bread and the substance known as a "starter". So what is a sourdough starter?
Put simply, it's a colony of wild yeast and bacteria raised in a medium of flour and water, and any bread product leavened with this mixture (as opposed to commercial yeast) can be considered a sourdough bread.
Why is this relevant for preppers?
The biggest reason is that bread is a staple in most cultures around the world, and yeast is a requirement for a majority of these breads. As we saw in the 2020 COVID-19 Pandemic, disruptions to the labor force and supply chain, plus a massive interest in hobby baking, meant that commercial yeast vanished from store shelves. There's no reason why this might not happen again.
As you'll see in this article, making sourdough is very easy. Even if you decide that keeping a starter in your kitchen isn't for you, after you've learned the techniques I'm going to teach there's nothing stopping you from doing it in the future if you ever change your mind.
One component of the starter culture is yeast, but the other is the bacteria Lactobacilluswhich consumes the starches in your flour and produces carbon dioxide (which is our leavening gas) and lactic acid. The acidity of this starter is the "sour" in sourdough, but this acidity also has anti-fungal properties. This means that products leavened with sourdough starter will be less likely to grow mold than products made with commercial yeast.
A standard loaf of bread has just four ingredients: flour, water, salt, and yeast. Of all those ingredients, yeast has the shortest shelf-life, and even frozen commercial yeast will expire and die.
Eating bread baked at home is going to be better for your health than eating store-bought bread, because there will be no need for the additives and preservatives that keep bread soft and fresh.
Hopefully I have your interest. Now let's get to work making a starter.
For reference, I relied heavily on this video and this website.
Growing a Sourdough Starter
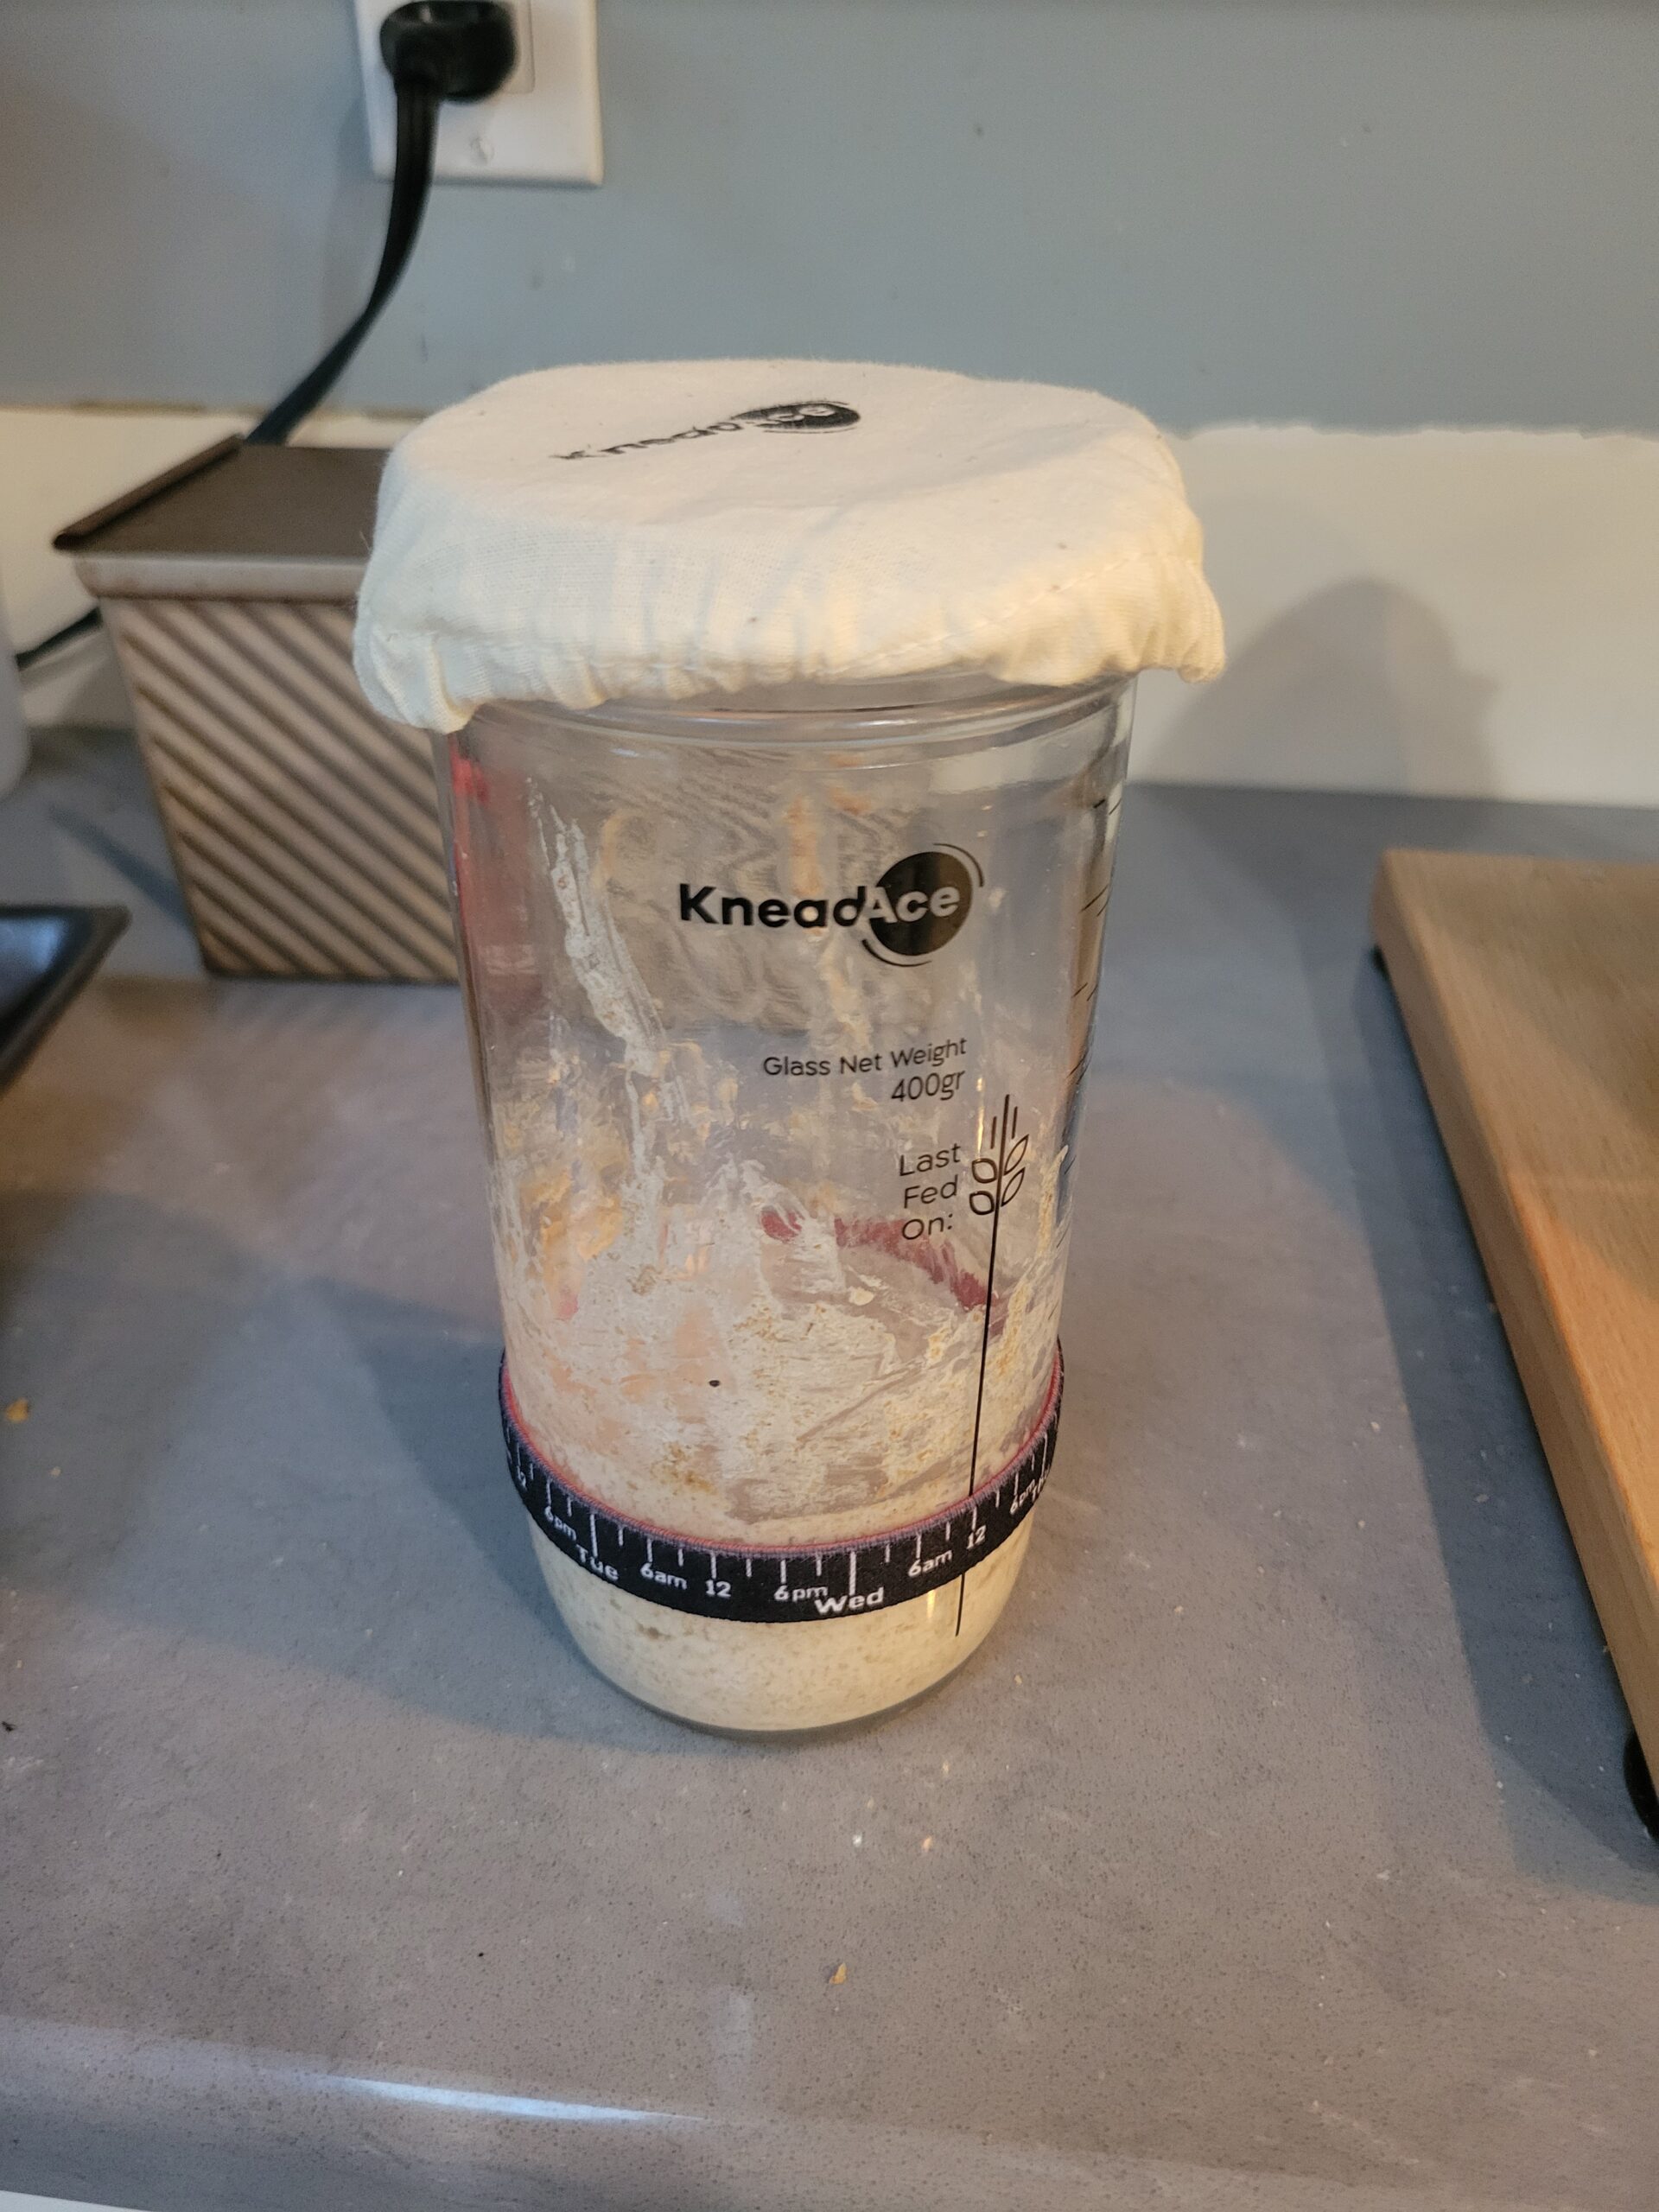
First, you'll need a container. I panic-bought a bunch of commercial yeast during the pandemic and I was worried it would die, so I ended up spending a lot of time talking about sourdough before I actually started making it.
Because of that, my wife bought me this kit, which is nice but honestly not necessary. You'll be fine with any glass container that has a wide mouth and relatively straight sides, so a drinking glass, a pickle or tomato sauce jar, a canning jar, etc. and a paper towel, a piece of cloth or a clean rag secured with a rubber band or twine is just fine. (Also, remember to save the cap if you re-purpose a jar. I'll explain why later.)
After you thoroughly clean and rinse your container, add about two tablespoons of flour and two tablespoons of water to the bottom of the jar and mix them well. For this initial phase I suggest that you use water that's been de-chlorinated (well water, bottled water, or water that has been boiled but then allowed to cool to room temperature) and whole wheat flour. This will likely work with tap water and AP flour, but whole wheat and chlorine-free water will give the wild microbes a bit of an advantage to start out.
Keep the jar someplace warm but sheltered from sunlight. If you have a place where you keep your fresh fruits or vegetables on the counter, that would be ideal. Fruits and vegetables will also have wild yeast growing on them, so in theory the air around these will have more spores and will foster growth.
After 24 hours, give it a good mix and scoop out about half the material (about 1 tablespoon) and replace it with an additional tablespoon of fresh flour and water. Give it another good mix and scrape down the sides as best you can. The fresh flour and water will give the microbes fresh nutrients to grow, and by removing half the material you're giving better odds that the microbes you end up growing will be the right kind. The scraping isn't necessary for the starter's survival, but once flour and water dry they turns into library paste and will make a mess and make it harder to see the progress, so this is more of a quality of life kind of thing.
Every day for a week you'll want to do the same thing: mix, discard, add, mix, scrape. By about day three or four you'll start seeing bubbles and activity. At this point you should start smelling the mixture before you discard half.
You see, we co-evolved with these microbes, and the waste products of these critters (lactic acid for the Lactobacillus and ethanol for the yeast) are not only chemicals that are safe for humans to consume, they are also lethal to many bacteria and fungi that might make us sick. Because of this you will likely start noticing a pleasant smell coming from the mixture, and what it smells like will vary from house to house and may change over time.
When my starter first started, the smell reminded me of stale beer. This summer, it took on a scent more like overripe fruit. Now that the weather has gone cold, the smell reminds me more of a really nice aged cheddar. My buddy who lives in the next town has a starter that smells more like an aged Parmesan cheese.
My point is that the smells coming from this should be invoking scents that remind you of foods or drinks, not of unpleasant objects like a wet dog, dirty feet, or dirty laundry. In the event that your mixture starts smelling foul, don't give up yet. Keep dividing and feeding it for another week and see if things improve, as there's a good chance the yeast and lactobacilli will crowd out whatever nasty critters have taken up residence.
After your first week you should start seeing noticeable activity in your jar, and you can start feeding it twice a day. Once a starter has been sitting for a few hours, it starts developing a foamy top layer with a layer of liquid over the less active bottom layer.
I like to think of that line as a "fuel gauge". When a starter is freshly fed that line of liquid will be evenly distributed, but after a while a well-fed starter will be mostly foam with a small line of liquid near the bottom. When you see this line, stir it up so that the top doesn't dry out and form a crust and see where the next line forms.
If a head doesn't form and the liquid rises to the top, then the bulk of the starches have been consumed and the starter is ready to be fed again.
After about 10-14 days your starter should be very active when fed and have a pleasant smell. Once this happens you can start maintaining it, and a well-maintained starter should rarely need to be discarded.
Maintaining Established Starters Now you can start gaining volume if you need it; just remember to feed at least roughly half the volume in the jar of flour and water. You can also switch to tap water and AP flour if you desire (I use tap water, but I still use whole wheat starter because I feel it's better for the microbes and a small amount of whole wheat flour makes for a better bread).
Always remember to leave plenty of space at the top of the jar, because it will expand as the microbes consume the starches!
If you have a good volume of starter and you think it'll be a few days before you need it, you can cover it with the solid lid and put it in the fridge for up to a week.
Using Your Starter The easiest answer is to look up sourdough bread recipes and follow those, but you can also convert existing recipes to sourdough by adding a volume of starter instead of the yeast, and then subtracting that volume of flour and water equivalent to that volume of starter. The standard rule of thumb is "1 cup of starter is equal to one packet of yeast (which is a little more than 2 teaspoons of active dry yeast) then subtract one cup of flour, and one cup of water."
This conversion will require longer rise times because wild yeast isn't a race horse bred for speed like commercial yeast is. Because of this, I prefer using less yeast and taking a longer time.
Mix well to combine, then give the dough at least 8 hours to rise.
Once risen, pour into a greased loaf pan and allow to proof until it's close to the top of your pan (note that the rise time won't be too different between starter and conventional yeast, but the proof time will be at doubled at the very least, depending on the air temperature).
Place proofed dough in 450 degree oven for 30 mins. Then take loaf out of the pan and allow it to cool on a rack before cutting.
Sourdough Crackers
Since these crackers use no oil, and the sourdough starter has lowered the PH of the cracker they will keep for a very long time in an airtight container.
1/4 cup sourdough starter
2 cups AP flour
1 tsp salt
2/3 cup cold water
Combine all ingredients in a bowl. Dough should be soft but not sticky. Let rise at least 8 hours.
Give dough a quick knead until smooth, then turn out onto a floured surface (divide dough into manageable pieces) and roll out into a rectangle approximately 1/8".
Salt the surface and roll the salt in, adding other seeds or spices if desired.
Take a fork and prick the surface evenly. If you skip this step the crackers will puff up like oyster crackers, which isn't a bad thing.
Cut to size using a pizza cutter or a sharp knife.
Place pieces on a baking sheet, making sure they have a little space between each cracker, and put into a 400 degree oven for about 10-15 mins. Watch closely because once the crackers start to lightly toast they are done, but they will go from toasted to burnt very quickly.
You can double this recipe just by doubling the flour, water, and salt, and keeping the same amount of starter.
Tips for Managing Sourdough
If you happen to use up all your starter while baking, simply add more flour and water to the dirty container. There are enough microbes remaining to completely revive the starter.
Once your starter is established, I recommend freezing at least a cup's worth. In the freezer, a starter will last at least one year with no maintenance. To use simply thaw it, feed it as soon as it becomes liquid, and it's ready to use as soon as it's frothy and active again.
To make a large batch of starter you can just put a small amount of starter in a bowl and simply put equal parts flour and water in and give it a good stir. It'll be all starter by the next day.
I hope you found this guide useful and can see the advantages of knowing how to make and use sourdough starter as a prepper resource!
In January of 2023 I participated in the Mammoth Sniper Challenge, a three day endurance event where you have to pack everything except water and live out of your pack. This year I used an ALPS OutdoorZ Commander freighter frame and pack bag, stowing an AR-15 in the rifle retention system on the pack and carrying 150 rounds of 5.56x45 and 100 rounds of 9x19 on the opposite side pouch to balance the load. Magazines went in the outer utility pockets. My food, clothes, cooking kit, and pistol went in the upper compartment, my sleeping system went in the bottom compartment, and my sleeping pad was rolled up and strapped to the bottom.
All told, my pack weighed in at 59 lbs at the beginning. I had 2.2 lbs of food per day, with around 3,000-3,500 calories per day. At the end, with most ammunition expended and two days of food gone, my pack was around 45 lbs.
Cooking
I’ve served in the US Army for 25 years, and I have plenty of experience long distance rucking, but I always had the opportunity to make a small cooking fire or to re-supply with MREs at logistics points. Since fires aren't allowed during Mammoth by Fort Eisenhower Range Control, I had to purchase a packable cooking solution. I went to Walmart and picked up this Coleman Peak One butane-propane stove for my cooking needs.
The good: It works, it’s small, and it is easy to use. It was available at my local Walmart for about $14 when I bought it in 2022.
The bad: It’s 6.7 ounces, or nearly 200 grams. 6.7 ounces feels light in the hand, but I learned the hard way, again, that ounces make pounds, and pounds make pain.
For Mammoth 2024, I used a titanium stove that weighs only 26 grams:
The good: It works, it’s small and it's light. At $24, its price is competitive with the Peak One whose 2024 price has risen to $22 at Amazon.
The bad: It’s slightly less efficient at turning fuel into heat than the Coleman, adding about 20 seconds of time to boil one liter of water. My partner for Mammoth picked up the same stove, and neither of us had any issues actually using it throughout the event.
Fuel
Another thing I learned is that I should pack the absolute smallest isobutane canister possible. Since Mammoth only lasts three days, I only really need to cook about seven meals, and even the smallest fuel container can cover boiling water to re-hydrate nine freeze dried camping meals.
In 2023 I bought the “econo-size”450g canister at Walmart, and I’m still using it multiple campouts later. While it was good value for my money, it was also weight that I didn’t need to carry for three days. This time I bought the absolute smallest canister I could, and it lasted the entire event just fine, and because the location hardly ever drops below 25° F, I chose a pure isobutane fuel instead of an isobutane/propane mix. If you live in an area where it does get colder than the boiling temperature of isobutane, you’ll want an alternate cooking method.
Mess Kit
The second upgrade to my kit was going from two stainless steel cups to a titanium cup and a titanium pot. The 450 ml cup was 20 dollars and comes with a lid...
As you’ll see later, the real upgrade is going to vessels with lids, which makes it easier to cook over a fire without cinders or ash falling back into your food.
Weight Savings
Between the burner and the two vessels, I’m shaving six ounces off my load.
Old Stainless Kit: 14.9 ounces (no lids). This “heavy” loadout cost me about $23 because I got the burner on sale and one of the stainless cups from the Goodwill thrift shop for 99 cents.
Stainless Steel
Pure Titanium Kit: 8.9 ounces, including lids. This new loadout cost about twice as much, for just over half the weight. My partner at Mammoth 2024 used a stainless steel Stanley cup with a plastic nesting cup, and he’s already decided to replicate my Titanium loadout if he competes in Mammoth 2025.
I also have two teenagers, one of whom needs his own backpacking setup, so he can get the “heavy” option until something better comes his way.
Pure Titanium
If you're curious, my old stainless kit with a new titanium lightweight burner weighs in at 9.2 ounces, but don't get any lids for the cups, and I have no idea where you can get my bigger cup that I got from Goodwill.
For me, the weight savings are worth the cost. For those of you who might need a “get home bag” that isn’t carrying a long gun with 150 rounds of ammunition and a pistol with 75 rounds of ammunition, your weight budget might easily handle a stainless steel cup or pot, or even a 1.7 lb Kelly Kettle. If you plan on “bugging in”, then having a stainless Kelly Kettle at your location is very good at rapidly boiling water.
If your “get home bag” doesn’t need to include food prep items, this entire article doesn’t apply.
I am a big fan of stainless steel, as it is affordable and durable, but it's also heavier than aluminum or titanium. I am against cooking in aluminum, as over the long term it can negatively impact health, but if you just need to get from Point A to Point B over a few days rather than a long term thing, I’d have no issue with boiling water in aluminum vessels (the human body routinely cleans out aluminum ions, but too much can overwhelm the system).
If you are really pinching pennies and just need it for insurance in your go bag, or are really trying to cut weight for a short term survival kit such as on an aircraft, aluminum is the best value and weight option.
If you need something to cook with long term, and are pinching pennies, stainless steel is your best choice.
The cost premium is titanium, which is a good long term cooking option that is lighter than stainless steel (but not lighter than aluminum), but the weight savings only really matter if you're going to be walking a lot.
My recommendation is that you get a titanium burner since the cost difference is minimal at best, and stainless steel cups with at least one lid since they cost half that of the titanium equivalent.
Whichever setup you choose, I highly recommend keeping some black teabags in your kit in a ziplock bag. They weigh just a few grams, and heating up the 750 ml cup in the morning with two Tetley brand tea bags gave me and my partner a hot, caffeinated drink that tasted pretty good. In Mammoth 2023 I used Starbucks Cafe Vita instant coffee packets, but those are expensive, and I honestly think the hot tea was easier on our bodies this year, especially on Saturday when it rained from 0100 until 0900. There's nothing like ruck marching in the rain, soaked to the bone, and when your life really sucks a hot beverage is great, and tea just brews easier than instant coffee (and cleans up easier too).
Additionally, if you search Amazon for “long handled titanium camping spoon” you’ll see quite a few options. I didn’t use one the last two years, but it is now on my purchase plan because when you're rehydrating freeze dried meals, the long handle allows you to stir the food without sticking your hand deep into the bag.
One final thought: a three day endurance event isn’t a disaster “get home” rehearsal, but it is pretty close to the same level of physical exertion and “outdoor surviving” required to go from point A to point B. I never had to worry about getting clean water (it was provided to us, and I never needed to carry more water than I planned to drink on the ruck march), but you probably will, so bring at least a Sawyer Mini filter or iodine tablets.
With the weather starting to get colder in much of the
United States, the desire for comfort food grows. In previous Prepper's posts I've talked about soups and stews,chili, and most recently lasagna.
All these dishes are distinct, yet they also all have in
common a tendency to be hearty, possibly even heavy; are generally served hot; and can provide us with plentiful leftovers. The recipe for this post is no exception.
Shepherd's Pie is one
of my favorite fall and winter comfort food, although since my version uses beef
instead of lamb, it's really more of a Stockman's or Cottage Pie. Any meat or meat substitute can be used, however.
As this is a family recipe, I don't really have precise
quantities. I tend to make it to fit the baking dish, which is usually either a glass
8x8 casserole dish, or the same deep 9 x 13 metal dish I use for lasagna.
Shepherd's Pie
Filling Ingredients
Ground beef (3-5 lbs)
2-3 6-oz cans Tomato paste
1-2 lbs Frozen or otherwise preserved vegetables (peas,
carrots, corn, green beans, etc)
Topping Ingredients
3-5 Potatoes
4-8 oz Butter
1-2 cups Milk and/or sour cream (measurement is total)
Salt & pepper to taste
Recipe
Brown and drain the ground beef.
Mix in the tomato paste and frozen vegetables.
Spray an oven safe baking dish with non-stick spray and pour
in the filling.
Boil the potatoes until soft then drain.
Mash and add butter, milk (and/or sour cream), and salt and
pepper to taste.
Cover the top of the filling with an even layer of potatoes.
Bake at 350° F for 45 minutes, or until the potatoes are
nicely browned, and the filling is bubbling up around the edges.
The history of traditional foods is deeply connected with
the history of poverty, for many of our favorite cultural dishes are direct
descendants of meals that were developed when that culture (or subculture) was at
a low point economically.
Lasagna is just one example of this. There are an infinite
variety of lasagna recipes; it can be made with nearly any type of meat (or none at all), a
variety of cheeses, and all sorts of vegetables and sauces. Many of these ingredients are
available canned, or in other forms of long term storage.
What all these recipes have in common is the separation of the
different ingredients with layers of noodles or other sheets of starchy foods,
such as thin rolled flat bread. According to the Bread Cube Law, this makes
lasagna a cake.
What follows is an estimation of my family recipe. I say
estimation, because as with any multi-generational set of instructions, people,
tastes, and ingredients change. For example, my great-grandmother mixed peas in
with the ground beef. However, My Wife (tm) doesn't like peas, so I leave them out.
The noodles can be store-bought, or home-made if a pasta
maker is available. For my latest batch, I used a combination of both store-bought and home-made as I had a half box of noodles in the cupboard from the
last lasagna I baked.
The Ingredients
Ingredients for one 9x13 tray of lasagna:
Minimum 3 lbs ground beef/pork
Minimum 32 oz Ricotta cheese
1 lb mozzarella
Minimum 2 quart jars tomato sauce
1-2 cans tomato paste
Minimum 8 hard-boiled eggs
Minimum double batch of pasta dough (2 cups flour, 2-3 eggs,
1-2 tbsp olive oil, Roll noodles out to at least setting 5 on an Atlas pasta
maker)
Or 2 boxes standard lasagna noodles
Recipe
Brown the meat and drain the grease.
While still warm, add the paste and about half a jar of
sauce, mix well.
Slice the hard boiled eggs.
If using home-made noodles, store them under a damp towel
until needed.
In the bottom of a tall, 9x13 oven safe pan, cover the
bottom with a layer of sauce then follow with the following:
Noodle
Ground beef
Noodle
Cheese
Noodle
Hard-boiled egg
Noodle
Cheese
Noodle
Ground beef
Noodle
Sauce
Shredded cheese topping
Assembled and ready for oven or refrigerator
Once done, the lasagna can be covered with plastic wrap and
stored in the refrigerator for a few days. When it's time, bake at 350° F for about 45 minutes to an hour,
or until the cheese is nicely browned and bubbling.
Cooked and ready to eat
Serve with garlic bread and, if you like, a nice red wine. Buon appetito!
I previously wrote about different options for
utilizing the essential flavors of fruits, vegetables, and herbs, both for
storage as well as in recipes. There are also methods for concentrating the rich flavors of
meats for future use, which are commonly known as broth and stock.
The terms broth and stock are often used interchangeably, which
is a somewhat divisive topic in the culinary world. Stock is also sometimes referred to as bone broth, referencing its origin while muddying the waters. Generally speaking, stock is made (as the alternate
name implies) from cooking bones in liquid for an extended period of time to
extract all the meaty goodness inside. Stocks are sometimes referred to as "fonds
de cuisine", or foundations in classical cookbooks, since they are used as
the basis for other dishes. While stock will usually be made with added vegetables,
spices are often not added during preparation as they will be added in the
final dish. In contrast, broth is usually prepared with some meat, as
well as the bones of whatever animal. In addition, broths are made with spices
and other flavorings, and are cooked for a shorter time than stocks.
Stovetop Stock
I used to make stock on the stovetop using the following
simple process, but once I got my InstantPot, I never prepared stock on the stovetop again.
Ingredients
Meat bones (chicken, beef, or pork)
Onion
Carrot
Garlic
Other herbs as desired
Water
Recipe
Place everything in the pot and add water to cover. Chicken
bones will likely float; this isn't an issue.
Bring the water to a boil, then reduce heat to a simmer.
Cook covered six or more hours, until either the water is reduced
by half, or to taste.
Keep an eye on the pot as it may try to boil over.
Strain all the solids, and store the remaining liquid for no
more than a week or two in the refrigerator or up to a year in the freezer.
Note: some people like to roast the bones and vegetables in
the oven before boiling, which is reported to add richness to the flavor. I've
never done this myself.
For the InstantPot version of this recipe, the ingredients are the same, other than the water. Depending on
the size of the InstantPot, either ½ or 1 cup of water is added. The directions are also the same, except I run the InstantPot for two or more hours at high pressure.
If I'm doing several batches, I'll use the rendered broth from
the first as the liquid for the second, and so on. This
produces a rich, dark brown broth (even with chicken) that will assume the consistency of Jell-O when
cooled, due to the gelatin extracted from the bones.
For a broth, I present you with my mother's general purpose
chicken soup recipe. This is the classic Jewish soup imbued with mystical healing
powers. As with many family recipes, the ingredients are not precise
measurements.
Ingredients
Celery – 10 stalks + leaves
2 onions
2 large carrots
3 parsnips
Parsley (fresh)
Dill (fresh)
Garlic (to taste)
1 Plum tomato
Chicken*
Salt and pepper
Gizzards
Water to cover
Thin Egg Noodles
*If possible, get what is called a “stew” chicken or “soup”
chicken.This is an older bird and will
hold up much better and be more flavorful than a regular chicken.
Recipe
Carefully wash the chicken, removing the giblets and setting them aside for use in other recipes.
Cut the
chicken up and place in a very large pot with the gizzards.
Cover chicken with water, then lid the pot and bring to a boil for a total of 1 hour.Skim the water occasionally.
Cut up the veggies, tying the carefully washed herbs in
bunches so it is easier to remove them.
Add the veggies and cook for another hour, covered.
Remove veggies and chicken from soup and skim off as much fat as possible.
Strain the soup through a very fine strainer. I usually do this twice, and the second time I put a piece of paper towel in the strainer to make it really clear.
Refrigerate soup, and skim off any hardened fat before heating to serve.
Cut up the chicken and remove from the bone.Set aside, and serve in the soup if desired.
Cut up carrots and parsnips to serve in soup.
Cook the egg noodles separately, then add before serving.
While I've never made it myself, there are also vegetable stock recipes; here's one.
Erin Palette is a participant in the Amazon Services LLC Associates Program, an affiliate advertising program designed to provide a means for sites to earn advertising fees by advertising and linking to amazon.com.