

Since the AR family of rifles is probably the most popular
semi-automatic rifle in the country right now, I’d like to discuss some of the
malfunction causes and solutions that the average owner can take care of at
home.
The heart of the AR is its gas system, commonly referred to as gas impingement. In this system, gas is diverted from the barrel and fed back into the gas key on the bolt carrier group. This channels the gas into a chamber behind the bolt, pushing the bolt forward and the carrier back. Since the bolt can’t move forward, being locked into the barrel extension, the carrier has to move back. This movement of the carrier causes another component, called the cam pin, to rotate and unlock the bolt. The bolt and carrier then move back together during the action cycle.
All of this is very dependent on a few components being in good repair and properly set. Specifically the gas key bolts need to be properly tightened and staked and the gas rings need to be within spec and replaced when they wear enough to cause function issues.
Happily, most carriers come with the gas key bolted down and
properly staked. Unfortunately, not all of them are. Knowing the signs of gas
key leakage or worn gas rings and how to remedy the situation can prevent your
rifle from being transformed into a really awkward straight pull bolt action.
A replacement gas key won’t be staked and will look similar
to this one from Rubber
City Armory.

If the gas key is loose, don’t just tighten the screws and call it a day. The key needs to be removed and the mating surfaces thoroughly cleaned before reassembly. Once that’s done, the bolts need to be tightened and properly staked. There’s no need to really crank down on them; firmly hand-tightened with a proper bit driver is all that’s needed.
Once this is done, it’s
time to stake the bolts. No special tools are needed for this job other than a center
punch. I prefer an automatic center punch like this model from JelBo, though a manual center
punch and ball peen hammer can work just as well.
Make sure the carrier is properly secured. I use a bench
vice with padded soft jaws, but a couple of pieces of wood clamped to a table
can suffice.
All that needs to be done is to displace some metal from the
gas key into the head of the bolt to prevent it from turning under vibration. Don’t
go crazy.
This is one in my collection. The first attempt as staking turned out to be insufficient, so it had to be done again. That’s why the staking looks more aggressive.

In case anyone was wondering, I’m not a fan of thread locker
on firearms. There may be some instances where it’s warranted, but much less than
it’s used. If you must use some kind of thread locker on a firearm, blue shalt
be the color thou shalt use, and the color of the thread locker shall be blue. Green
shalt thou not use, nor either use thou red. Black is right out.
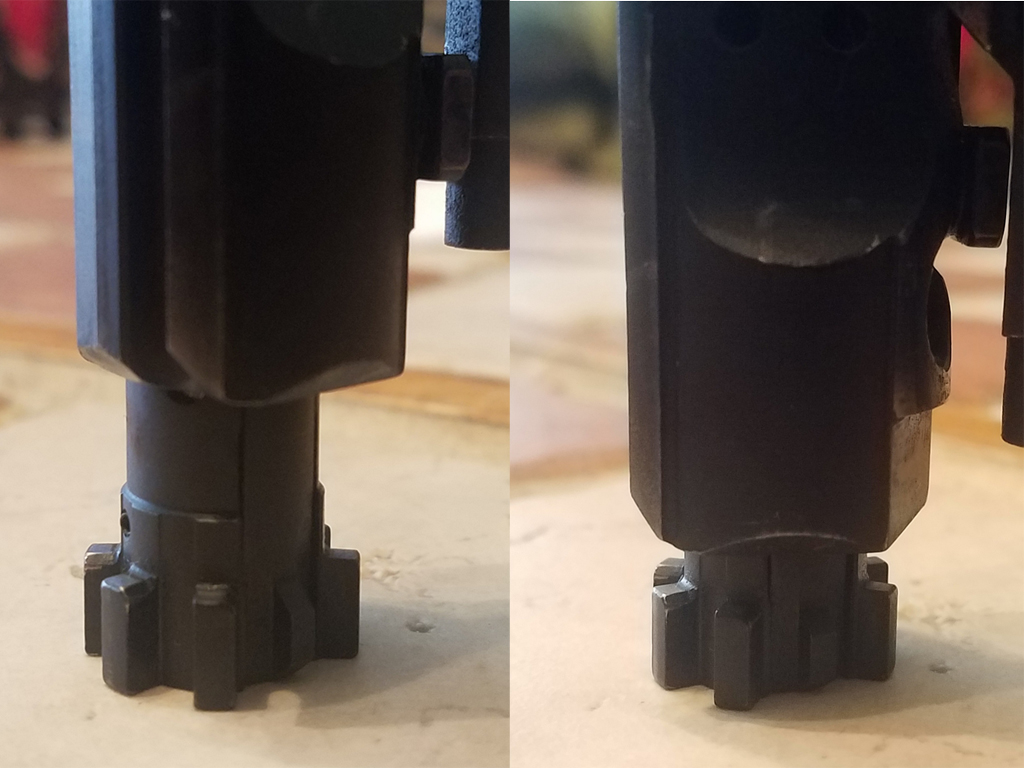
After removing the bolt/carrier group from the rifle, make
sure the bolt is in the forward position and gently stand it up on the bolt
face. If the carrier stays up, the rings are fine. If it slides down the bolt,
it means the rings are sufficiently worn to require replacement.
The bolt requires three rings and they are usually sold in convenient
three packs, like these from Brownells.
Remove the bolt from the carrier and wipe off any grease, oil, or loose carbon. Using a knife point or sharp pin (do not use the firing pin) find the gap in the rearmost ring and pull it towards the tail of the bolt, stripping the ring out of the retaining groove on the bolt. Repeat for the other two.

Remember, take care of your tools and they’ll take care of you.

No comments:
Post a Comment