

The
first step is making sure it's clear of ammunition. Always unload and make safe a firearm before attempting to clean it!
The second step is disassembly. Having
the manual that came with the gun is a good start; if you don't, there are a
variety of online resources, both video and text, available for most firearms. Pretty
much every modern manufacturer has their manuals available for download on their
websites, and I've found this website very helpful for older firearms.
Once the gun is disassembled into its component
pieces (aka field stripped), the cleaning process can begin.
Semi-Automatics


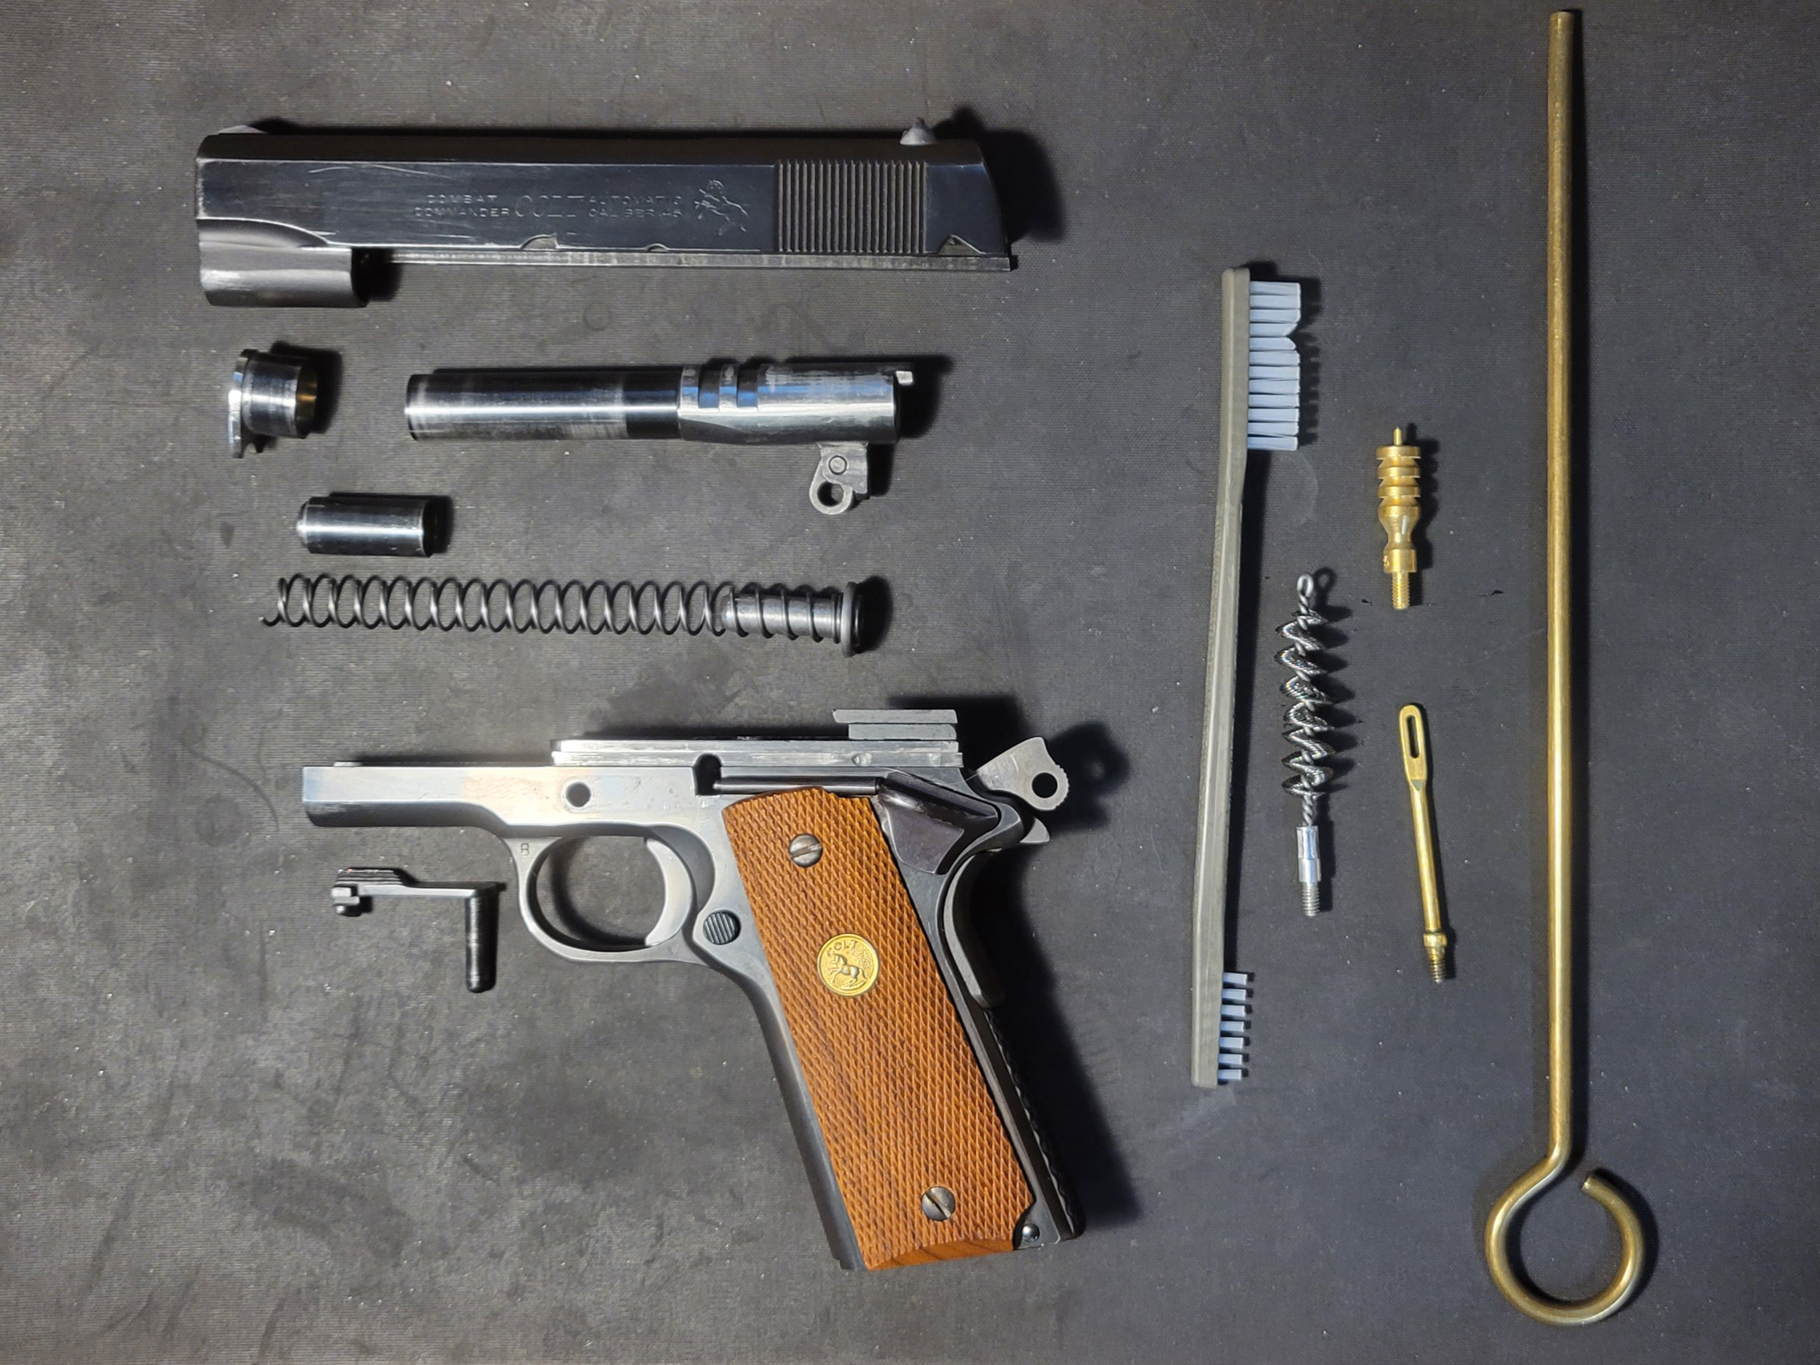
- After disassembling your pistol, run a patch wetted with solvent back and forth through the bore a few times, then set the barrel aside. This allows the solvent time to work on softening any fouling.
- Moving on to the frame, pay special attention to the feed ramp and guide rails. Give all the surfaces a good scrubbing using a small brush (either military-style or a dentist giveaway toothbrush) and solvent.
- Look for carbon buildup on the feed ramp and barrel lug, and around the top of the magazine well; this is where a scraper can come in handy. Clean the magazine well by using the brush, followed by pushing a larger cloth up from the bottom of the mag well and out the top of the frame.
- The slide is next, and you need to pay special attention to the rails as well as the breech face. If this is a locked breech pistol, look for any peening or wear on the locking surfaces. Scrubbing with solvent and brush is generally all this part needs.
- Examine the recoil spring for signs of wear. If it’s a free spring, such as in the 1911, compare the current length of this spring to a new one of the same resistance weight. If it's a captive recoil spring, such as in a Glock or Sig, look for cracks on the washers that retain the spring on the guide rod. This can show if the spring is close to needing replacement.
- After cleaning and wiping down the slide, frame, and any other parts, such as the recoil spring, guide rod, etc., it's time to complete cleaning the barrel. Put a few drops of solvent on a bore brush and start the brush into the chamber end of the barrel. Give it a few twists in the chamber before running it all the way through the barrel. Whenever possible clean barrels from breach to muzzle; this helps protect the barrel crown at the muzzle from being damaged by the cleaning rod. Similarly, never reverse the brush when inside the barrel; instead, go all the way out and then all the way back to prolong the life of the brush.
- Finish the barrel by running dry patches through until they come out relatively clean.
Put a drop of oil on the rails, and on the locking surfaces if recommended, then reassemble the gun and perform a function check.
Revolvers

The process is simpler, as
disassembly is usually limited to opening the cylinder. Many double action
revolvers, however, allow you to remove the crane and cylinder for easier access by loosening a single screw.
- As with the pistol, run a solvent wetted patch down the barrel as well as into each chamber of the cylinder.
- Get to scrubbing, paying special attention for signs of wear to the recoil shield where the firing pin protrudes, the forcing cone where the bullet enters the barrel, and the top strap right above the forcing cone.
- Clean the chambers and barrel the same way as described for the semi-auto barrel. Since most revolver barrels can't easily be cleaned from the breech, take care that the cleaning rod doesn't rub against the crown of the barrel as wear here can damage accuracy.
- Take special care to look for any carbon buildup near the forward end of the chambers in the cylinder.
- Wipe everything down, reassemble the cylinder if necessary, put a drop of oil on the crane surface, and another inside the action on the hammer pin.
Next week I will explain how to clean long guns.
Happy cleaning!

No comments:
Post a Comment