Showing posts with label Maintenance. Show all posts

Monday, September 18, 2023

Vehicle Check: Winter Is Coming

The dust has settled and the First 72 Hours have passed. Follow along as I build a long term plan via Prudent Prepping.

Checking our vehicles is something we should be doing regularly, and it's important to do that now since winter with its cold weather, rain, and snow will be here soon.

Easy Checks
If you know when you bought your last set of tires, you're probably okay, but if you can't remember the year, grab a penny and put Honest Abe's head in the groove of the tire. If you can't see the top of his head, then you're set for a few more miles. But if your penny is showing all of Lincoln's head, then those tires should be replaced as soon as possible. 

While you're there, check your tire pressure. Don't know what your tire pressure should be? The number is molded onto the tire, and is also shown on a plate mounted to the driver's door frame showing pressure for front and rear tires as delivered from the factory.

https://nasaspeed.news/tech/wheels-tires/setting-air-pressures-for-hpde/


Tire Information
Many people change tire sizes, so the actual pressure shown on your tire should be your guide. Your tires may not have the numbers molded quite this large, but the information is there. Tire pressure should be checked on a schedule that is best for you; I check mine every third fill-up or once a month, depending how much I drive those weeks. 

Spare tires needs to be included in this as well; now might be a good time to clean out the junk in your trunk so that you can get to your spare in an emergency.

https://us.v-cdn.net/5021717/uploads/editor/1o/qhb6z50zixo9.jpg
 

Other Easy Checks
I checked the washer reservoir and topped up that with fresh fluid. I only use regular bug remover on my car, since it doesn't freeze here and I don't drive my car in the snow if I can avoid it; when there is a freeze warning, I add a small amount of lower-temperature washer fluid to get me through. 

Change your wiper blades now, if you haven't done it this year.
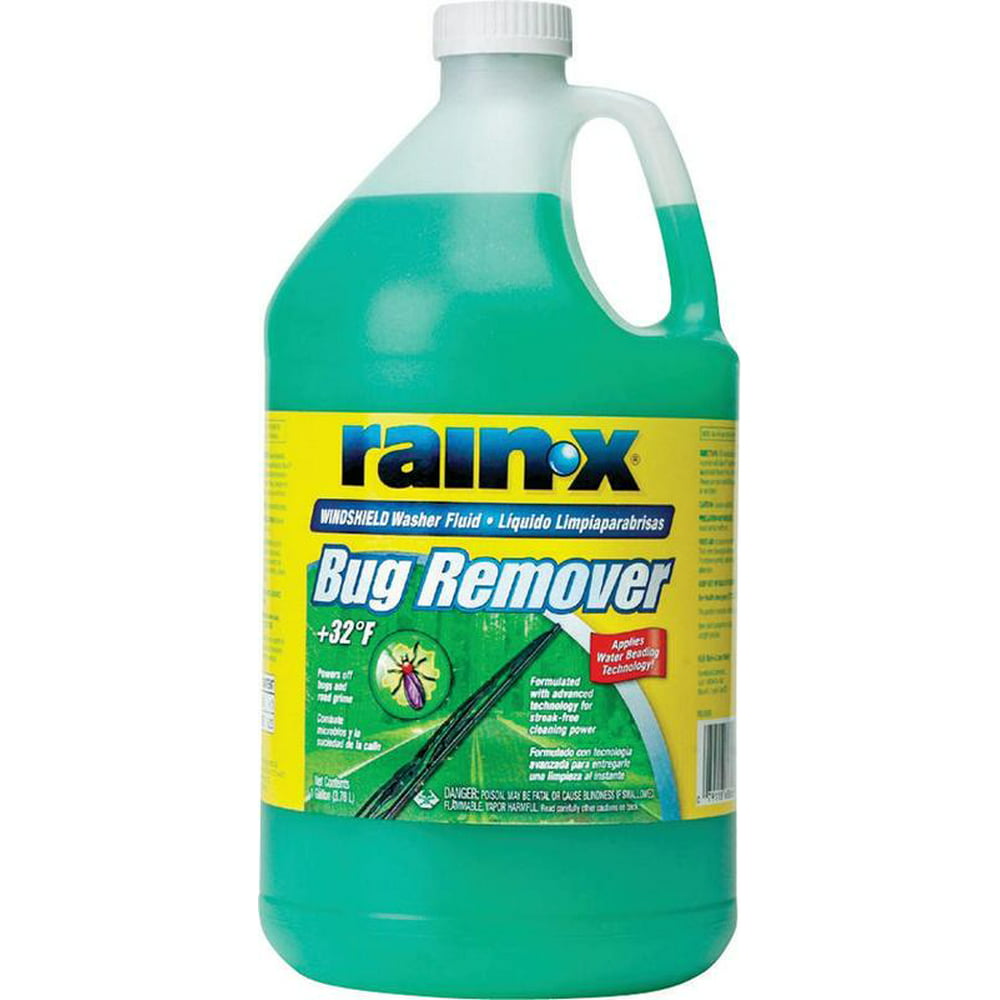
https://i5.walmartimages.com/asr/6d25174f-342a-432f-84fc-1fc8265d5e71_1.20469c6cc0c4e9a889858e6825c434a7.jpeg?odnWidth=1000&odnHeight=1000&odnBg=ffffff
My favorite

Not-So-Easy Checks

Brakes
If you have the room, the equipment and the skill, checking your own brakes is fairly simple. If you don't feel comfortable doing that type of work, the store where you purchased the tires will usually check them for free when you rotate your tires. Oh, you don't do that? Start now; you'll get more miles from your tires before Abe's hair starts to show.

Coolant
This is another thing that I don't have to worry about much, since it never gets below freezing for extended periods here and I don't drive in the snow if I can avoid it. In most cases, keeping the overflow tank filled to the minimum line with your recommended fluid is fine. If you don't know what that is, or can't find your Owners Manual, I would suggest driving to a trusted repair shop to look at your car.

The Really Simple But Expensive Way to Check All This
Most oil change stations can do all of these inspections and replacements for you while you are over the pit; just be aware that the prices you pay will be higher than doing the work yourself. But, it will be done all at once and correctly, with the ability of blaming someone else if something goes wrong!


Recap and Takeaway
  • Check your tires (including spares). 
  • Check your brakes. 
  • Check your fluids. 
  • Check your wipers. 
  • You are a prepper, so make sure you are doing things before the emergency!

* * *

Just a reminder: if you plan on buying anything through Amazon, please consider using our referral link. When you do, a portion of the sale comes back here to help keep this site running!

If you have comments, suggestions or corrections, please post them so we all can learn. And remember, Some Is Always Better Than None!

NOTE: All items tested were purchased by me. No products have been loaned in exchange for a favorable review. Any items sent to me for T&E will be listed as such. Suck it Feds.

Friday, June 30, 2023

Prepper's Armory: Magazines, Part 1

As semi-automatic magazine-fed handguns and rifles are the two most common categories of firearms currently encountered, I thought it would be useful to go over the different types of magazines as well as some details on their care and maintenance.

Detachable magazines come in two main types: single stack and double stack.  Single stack magazine have the cartridges lined up one above another, creating an even column of rounds.  This makes for a slim profile, but limits capacity in magazines of reasonable length.

With double stack magazines, the cartridges are staggered in a zig zag pattern. Basically, two columns of rounds offset by half a cartridge diameter.  This provides for more capacity in the same length, but at the cost of a wider magazine.

Magazine Types

With double stack magazines, there are also two ways the cartridges can feed into the firearm’s action: single feed and double feed.

In single feed, the rounds are positioned to the centerline of the magazine and then stripped out by the firearm mechanism.  All single stack, and the vast majority double stack, handgun magazines operate this way.

With double feed, the rounds are presented first to one side then the other and are stripped out by the mechanism alternately left then right.  Nearly all rifle and sub-machine gun magazines are of the double stack, double feed design.

Single Feed (L) vs Double Feed (R)

This feeding characteristic also affects how magazines are loaded. At the top of a magazine, the sides of the magazine body come towards the middle and hold the cartridges in place. These are called the feed lips.

On a single feed magazine, the space between the feed lips is smaller than the diameter of a cartridge. This means that when being loaded, the round must push down the follower, or preceding round, in front of the feed lips and then be pushed to the back.  Once in place, the pressure of the magazine spring will hold the round against the inside of the feed lips and prevent it from coming out until needed.

On double feed magazines, the space between the feed lips is wider than a single cartridge.  This means that you can load rounds into the magazine by aligning them at the back and pushing straight down until they’re retained by the feed lip on one side or the other.

After some use, just like any other component, magazines need to be cleaned. At a minimum, the follower, feed lips, and outside of the magazine body should be wiped down with a solvent dampened cloth. Avoid getting solvent or oil inside the magazine body as this can contaminate the ammunition, potentially causing misfires, hangfires, or squibs

If they’re really grungy, magazines may need to be disassembled for thorough cleaning.  This can be simple, tricky, or profanity-laden, depending on the design.

Warning: Magazines contain compressed springs! Wear eye protection and take reasonable precautions throughout this process.

If the magazine doesn’t have a removable baseplate, the disassembly process is usually fairly simple:
  1. With the empty magazine in hand and the base on a firm surface, use a non-marring tool to depress the follower about halfway down. 
  2. Use a punch or pin through one of the witness holes to trap the spring in this position.
  3. Make sure the follower is still free to move.
  4. Invert the magazine and the follower should fall out.  This may require a little gentle shaking or slight manipulation.
  5. With the follower out, position the mouth of the magazine over a soft pad and carefully remove the cross pin. The spring will release with some force.  
  6. Take note of the orientation of the spring as it’s removed from the magazine body.  This is important for proper function.
  7. At this point, the magazine is fully disassembled and can be cleaned.
  8. Make very sure no solvent or oil is left on the spring or inside the magazine body. The best things to use on magazine internals are dry lubes, like Mag Slick by Krunch Products.

Stripped Single Stack Magazine


Magazines with removable baseplates generally disassemble in a consistent manner:
  1. Remove the baseplate. This may be easy, or it may require a special tool.
  2. Once the baseplate is removed, there may be a locking plate in there, or only the spring and follower. The spring in double stack magazines is also under tension, so make sure there’s a way to control it before the baseplate is all the way off.
  3. The follower may be attached to the magazine spring or it may rest on top, held in place by spring pressure.
  4. Once again, take note how things fit together.

Stripped Double Stack Magazine

Reassembly for all types of magazines is generally the reverse of how they were taken apart.


In addition to cleaning, you will also need to perform occasional maintenance. Springs weaken from cycling, not from load; what this means is that if I were to load a magazine and leave it in a comfortable environment for fifty years, that spring would be just as strong as the day it was loaded. However, if you take that same magazine and load and unload it twice a day for a few months, the spring will be noticeably weaker.

One way to tell it might be time to replace the magazine spring is if a specific magazine stops locking the slide or bolt back after firing the last round in a semi-automatic firearm.  This can have other causes, but if it’s a particular magazine, replacing the spring is a simple solution.

Sourcing springs is not a problem. Wolff Gunsprings has springs for pretty much any firearm, both modern and vintage. They can also be sourced from Brownells and other resellers.

If we take care of our magazines, our magazines will take care of us.

Friday, May 26, 2023

Prepping the Grill

Now that spring has fully sprung in most of the US, people are looking forward to more outdoor activities, one of which is grilling. It's always a good idea to have an alternate method of cooking food, and a small grill is an excellent option. Whether it uses charcoalpropane or gas, a grill is a combination cooktop and oven. While it isn't as easy to regulate temperature with a grill as it is with regular appliances, it can work quite well with some practice.

Ideally, we all prepared our grills for winter storage, by which I mean making sure as much food waste and drippings were cleaned off the grill as possible, the exterior was wiped or washed down, and the cover was securely fastened.

Note: Never put a cover on a hot grill. 
Let it cool completely first.

Unfortunately, due to unexpected circumstances I only did the last one of these for our grill, a small Weber Spirit. This meant I had a bit more work to do this spring.

Author's grill, covered and uncovered

After removing the cover, I gave the exterior and underside of the grill a thorough going-over with the garden hose to remove loose debris before going to work on the interior. My first step was to make sure the grill hadn't become the home of one or more critters; thankfully, all was good there. That's where the good news ended, because the drip tray was frankly disgusting; to get an idea, visualize an unintentional suet feeder. Lots of hot water, dish soap, and elbow grease got it clean. 

I then removed the cook surfaces and heat diverters. Since I'm in the habit of cleaning the cooking grates both before and after each use, they were in relatively good shape. The heat diverters -- upside down V shapes of metal under the cooking grates -- were slightly rusty, but that's actually fairly normal with regular use. Heat diverters will rust and, eventually, will need to be replaced.

Interior with one cooking grate removed, revealing the heat diverters.

The last part of the cleanup was taking a look at the burners themselves. Our grill has two, one across the front and the other at the back. These are simply metal pipes with a row of small holes for the gas, and over time, these apertures will get clogged. The easiest way to clean them is with round toothpicks dipped in vegetable oil. One. Hole. At. A. Time.

Finally it was time for a function test. I turned on the gas and ignited the grill. Fortunately, I had no issues there either.

Note: Propane tank valves twist open in reverse compared to other items, and should be kept closed when not in use.

Our grill has a piezoelectric ignitor. This is a crystal-based system that generates a spark when struck, igniting the propane. Other grills have battery-powered ignitors, and their batteries should be removed at the end of the grilling season and replaced at the start of the new one to reduce the chance of corrosion. Some gas, and all charcoal, grills don't have an ignitor and need to be lit with a fireplace match or grill lighter. Once the grill was lit, I closed the lid and let it run up to temperature. Ours will exceed 500 degrees if I let it go long enough.

I mentioned cleaning the cooking grates before and after each use. Once the grill is hot, I take a piece of scrap cotton or a washcloth, roll it up, and dip it in vegetable oil. I use this to wipe down the grate. Once I'm done cooking, I turn the heat back up, use a grill brush to scrub off any loose particles, then repeat with a fresh piece of cloth and oil. This keeps the grate clean and ready to use, and also seasons the metal slightly to reduces sticking and rust.

Prepped, clean, and ready to grill

Grillers of the world, ignite! You have nothing to lose but your hunger!

Wednesday, September 7, 2022

Prepper's Armory: Cleaning Long Guns

Last week was pistols; now we finish this series with cleaning long guns.

Rifles
Rifles have more variety than handguns due to their many different types, so this section will be bit more general, but I’ll add a few asides for specific actions or components.


Start with basic disassembly (this varies by rifle pattern) and run a patch wetted with solvent down the bore, working from chamber to muzzle if possible. If the barrel has to be cleaned from the muzzle, such as with the M1 Garand, use a muzzle guide to help protect the barrel crown.

Another option with rifle barrels that can’t be cleaned from the chamber is to run a bare cleaning rod down the barrel from the muzzle, attach the patch or brush in the chamber area, and pull the rod back through. While it is more effort to repeatedly attach and remove rod end accessories, this reduces the chance of the rod flexing and the metal patch holder rubbing on the rifling.

Make sure to use a properly sized patch. If it feels like it’s taking too much force to get the patch through, stop, reassess and try again with a smaller patch. A patch that’s too big for the caliber can get wedged in the barrel, possibly breaking the patch holder at the same time, and this can present a challenge to remove. The best solution is often to use a corkscrew-like rod attachment called a worm to pick out the patch a bit at a time. Under no circumstances should you try to force the patch out with another rod, as this will almost certainly make the problem worse. 

Once the solvent is soaking into the barrel, clean all the action parts, making sure to get into the nooks and crannies where fouling can hide. While cleaning the bolt, pay special attention to the breech face and locking lugs for signs of wear or peening. This is especially important with heavier recoiling rifles. When checking the bolt face, look for any brass fragments that might interfere with the extractor or ejector.

For the AR-15 family of rifles, a special chamber brush is available that cleans both the chamber and the space between the locking lugs and the chamber. This gap is a prime spot for residue to hide and impede function. In fact, a chamber brush is a good idea to have in any firearm cleaning kit.

Clean any carbon residue from the tail of the bolt and inside the carrier (another good use for a homemade scraper), and check the gas rings on the bolt and the gas key on the carrier for wear.

Clean the magazine tube, box, or well as appropriate to the type of feed system. Once reassembled, check the magazine and/or feed spring for proper tension. Dummy rounds or snap caps can help with this test.

Finish cleaning the barrel, wipe down all the parts, reassemble, and perform a function check.

Shotguns
Overall, break-open (also called break-action) shotguns are probably the easiest to clean due to their simplicity. Semi-automatic and pump shotguns can be more complicated depending on disassembly and reassembly requirements.
 

With most break-open shotguns, disassembly consists of removing the fore-end, opening the action, and removing the barrel. With pump and many semi-auto shotguns, disassembly involves unscrewing a retention nut from the end of the magazine tube and then removing the barrel.

Getting into the fire control parts can be more complicated, sometimes considerably so. Thankfully, these components are fairly well sealed against firing residue, so more detailed disassembly isn't usually required.

Things to look for in shotguns include:
  • Loosening of the hinge pin in break-open shotguns
  • Wear to the barrel lockup and magazine spring in repeating shotguns
  • Damage to the firing pin(s)
  • Wear to the firing pin opening(s) in the frame
  • Dents in the relatively thin barrels
  • Plastic wad reside stuck in the barrel
  • Cracks in the stock
Wooden shotgun stocks are prone to cracking above the wrist (the location where the stock attaches to the frame), due to oil draining down out of the action and soaking the wood. Semi-automatic shotguns frequently crack at the rear of the fore-end, often caused by over-tightening the barrel retention nut.

Cleaning consists of the usual wet patch down the barrel; cleaning the action, bolt, breechface, and other parts depending upon the type of shotgun; cleaning the barrel; then wiping everything down and reassembly. Action testing dummy rounds and snap caps are available in shotgun calibers as well.

Shotgun patch holders and bore brushes require a special adaptor to work on rifle-sized rods. If you’re going to be cleaning shotguns frequently, I recommend getting a dedicated shotgun rod, which are heavier and thicker than rifle rods.

Hopefully this overview has given you some useful information for keeping firearms clean and reliable.

Stay safe, and good shooting.

Tuesday, August 30, 2022

Prepper's Armory: Cleaning Handguns

Now that we have the tools and the solvents & lubricants needed to clean a firearm, let's discuss the actual cleaning procedure. This week is handguns.

The first step is making sure it's clear of ammunition. Always unload and make safe a firearm before attempting to clean it!

The second step is disassembly. Having the manual that came with the gun is a good start; if you don't, there are a variety of online resources, both video and text, available for most firearms. Pretty much every modern manufacturer has their manuals available for download on their websites, and I've found this website very helpful for older firearms.

Once the gun is disassembled into its component pieces (aka field stripped), the cleaning process can begin.

Semi-Automatics

  1. After disassembling your pistol, run a patch wetted with solvent back and forth through the bore a few times, then set the barrel aside. This allows the solvent time to work on softening any fouling.
  2. Moving on to the frame, pay special attention to the feed ramp and guide rails. Give all the surfaces a good scrubbing using a small brush (either military-style or a dentist giveaway toothbrush) and solvent. 
  3. Look for carbon buildup on the feed ramp and barrel lug, and around the top of the magazine well; this is where a scraper can come in handy. Clean the magazine well by using the brush, followed by pushing a larger cloth up from the bottom of the mag well and out the top of the frame.
  4. The slide is next, and you need to pay special attention to the rails as well as the breech face. If this is a locked breech pistol, look for any peening or wear on the locking surfaces. Scrubbing with solvent and brush is generally all this part needs.
  5. Examine the recoil spring for signs of wear. If it’s a free spring, such as in the 1911, compare the current length of this spring to a new one of the same resistance weight. If it's a captive recoil spring, such as in a Glock or Sig, look for cracks on the washers that retain the spring on the guide rod. This can show if the spring is close to needing replacement.
  6. After cleaning and wiping down the slide, frame, and any other parts, such as the recoil spring, guide rod, etc., it's time to  complete cleaning the barrel. Put a few drops of solvent on a bore brush and start the brush into the chamber end of the barrel. Give it a few twists in the chamber before running it all the way through the barrel. Whenever possible clean barrels from breach to muzzle; this helps protect the barrel crown at the muzzle from being damaged by the cleaning rod. Similarly, never reverse the brush when inside the barrel; instead, go all the way out and then all the way back to prolong the life of the brush. 
  7. Finish the barrel by running dry patches through until they come out relatively clean.

Put a drop of oil on the rails, and on the locking surfaces if recommended, then reassemble the gun and perform a function check.


Revolvers

The process is simpler, as disassembly is usually limited to opening the cylinder. Many double action revolvers, however, allow you to remove the crane and cylinder for easier access by loosening a single screw.
  1. As with the pistol, run a solvent wetted patch down the barrel as well as into each chamber of the cylinder. 
  2. Get to scrubbing, paying special attention for signs of wear to the recoil shield where the firing pin protrudes, the forcing cone where the bullet enters the barrel, and the top strap right above the forcing cone.
  3. Clean the chambers and barrel the same way as described for the semi-auto barrel. Since most revolver barrels can't easily be cleaned from the breech, take care that the cleaning rod doesn't rub against the crown of the barrel as wear here can damage accuracy. 
  4. Take special care to look for any carbon buildup near the forward end of the chambers in the cylinder.
  5. Wipe everything down, reassemble the cylinder if necessary, put a drop of oil on the crane surface, and another inside the action on the hammer pin.

Next week I will explain how to clean long guns.

Happy cleaning!

Tuesday, August 23, 2022

Prepper's Armory: Firearm Cleaning Chemicals

Solvents and lubricants are another area that can cause information overload. Everyone has their favorite, as well as a product they dislike for whatever reason. Among the commercial solvents I’ve used are Ballistol, LSA, CLP, Frog Lube, Hoppe's No.9, Outers, Sweet's 7.62, and Shooter's Choice. I’ve also used World War II/Korean War vintage US Military Surplus bore solvent. They all worked reasonably well, but as expected, they all have their pros and cons.

One of the considerations when choosing a solvent is the type of projectiles being shot. When primarily shooting lead bullets, cleaning requirements will be different than with metal jacketed or plated bullets. For the latter, eventually a solvent that can remove jacket fouling from the barrel will be needed.

A selection of solvents and lubricants

  • Of the various solvents I’ve used over the years, CLP has become my go-to for maintaining my firearms. While it doesn't manage copper fouling, CLP does a good job of removing powder residue, old grease and oil, dirt, and general grime. In addition, it acts as a lubricant and, according to the literature, leaves a protective coating on the metal.
  • For copper fouling I tend to rely on Sweet's 7.62. It works as advertised, so long as I remember to use a plastic or stainless steel bore brush, as it will react poorly with a bronze brush.
  • Solvents used in cleaning black powder guns are generally not the same as those used to clean smokeless powder firearms. Of the products commercially available for cleaning black powder residue, I only have personal experience with Ballistol.As far as I’m aware, it’s one of the few that can be used on both black powder and smokeless powder guns. It worked quite well.
Am I claiming that any of these is the be-all end-all of cleaning fluids? Absolutely not. All I’m saying is they work well for me.

In regard to oils, both wet and dry lubricants are available and both have their place in any cleaning kit; grease, on the other hand, is less frequently used on firearms than in the past. (The M1 Garand or similar rifles are exceptions in that certain parts do require a small dab of grease; generally, LubriPlate or something similar is recommended.) This biggest difference between the two is viscosity. Oils tend to be less viscous, while grease is more so. In other words, oil has a more liquid texture, while the texture of grease is more creamy.

Climate and intended use can also have an effect on the type and quantity of gun lubricant applied.
  • People who live in a hot and dry climate, like Arizona, are likely better off using a dry lubricant, as liquid oils will attract grit and the resulting slurry will act as an abrasive, quickly wearing close fitting parts.
  • During winter in northern states, a light coating of oil is all that’s recommended at most, as oil thickens in the cold and may affect function. Dry lubricants are also an excellent choice for this climate as that was part of their original design criteria.
  • In a hot and humid climate, a heavier application of oil may be needed as the higher temperature will cause oil to thin. This can also be a good place for some of the lighter grease options. While dry lubricants can work in these environments, traditional oils and greases are believed to give better protection against humidity-induced rust.

Keep in mind that a little lubrication can go a long way, and when in doubt, follow the manufacturer’s recommendation.

Tuesday, August 16, 2022

Prepper's Armory: Firearm Cleaning Equipment

The number one cause of firearms malfunctions is, by far, a poorly maintained gun. Properly cleaned and lubricated firearms generally operate more reliably and last longer than ones that aren’t.

I’m sure many of our readers, especially those with military service, are already very familiar with cleaning firearms; hopefully this series of posts will add to that knowledge, and possibly suggest some alternatives.
IMPORTANT: Do not have any live ammunition in the cleaning area!  Confirm this before starting and make it a regular habit whenever firearm maintenance is to be performed.

The basic tools for cleaning a firearm are:

  1. Aluminum or
  2. Brass cleaning rod
  3. Scraper
  4. Jag
  5. Patch holder
  6. Cleaning brush
  7. Bore brush
  8. Patches (not illustrated)


There's an impressive variety available in all these different components; there are a number of options just for patch holders, from simple multi-caliber loops to more specifically-sized jags. Patch holders are available in both metal and plastic.

Patches need to be properly sized to the barrel. The best patch material is cotton, either light flannel or T-shirt style weave. They can be purchased pre-made or cut out of old t-shirts.

Brushes are another area of great variety. They are caliber specific, so it’s important to use the correct size. These brushes are consumables and need to be replaced when they show signs of wear.
  • Nylon bristle brushes are not as aggressive as the others, but they can be used with solvents designed to remove copper fouling which would damage bronze brushes if used together. 
  • Bronze bristle brushes, an the other hand, are more aggressive and tend to last longer before needing replacement.
  • The stainless steel tornado brush is even better at removing bore fouling without presenting any sharp ends that could scratch the barrel. However they don't get into the corners of the rifling as well as the bristle style does.
Cleaning rods come in brass, aluminum, coated, and carbon fiber.  Metal cleaning rods are available in segmented and one-piece styles. 
  • Rods made of softer materials may embed particles, potentially causing scratches to the bore.  
  • With segmented rods the joints often don't line up and can present an edge to the inside of the barrel.  
  • One-piece cleaning rods, in addition to being more challenging to store, are often more expensive than segmented ones -- sometimes significantly so.
Another cleaning tool is the bore snake, which consists of a caliber-specific length of material with built-in bronze bristles. In use, it's treated with solvent, the weighted end is dropped down the barrel, then the body is pulled through.  This combines the function of both patch and brush at the same time, which is useful for a quick cleaning at the range or in the field. However, it's much less thorough than dedicated, individual tools.

In addition to the above items, there are other tools and supplies I’ve found useful:
  • First and most important is a bench mat. This is a dedicated, pliable, cleanable surface on which to perform firearms maintenance. These mats shouldn't be used for any other purpose, and should be wiped clean after each use. This not only preserves the mat, but also reduces the chance of grit or metal fragments getting stuck in the mat and scratching the finish of a firearm.
  • Any firearms that have to be cleaned from the muzzle will benefit from a bore guide, which helps protect the barrel crown from being damaged by the cleaning rod. The crown is the last thing the bullet touches when it leaves the barrel and is an important element to accuracy.
  • A set of quality, properly fitting screwdrivers is a must for disassembling many firearms past the field strip stage.  They should be hollow ground so that they lock into the screw heads instead of damaging them.
  • Punches, especially roll pin punches, are another must-have. 
  • A small double-headed brass and nylon hammer is a good companion for these.
  • Finally, there are all sorts of picks, hooks, and scrapersdental pick sets can often be found for a reasonable price. These are excellent for getting into small nooks and crannies.
One of the best old-school scrapers is home-made by taking an empty brass cartridge casing and hammering the case mouth flat. I always have several in my kit, with various edge contours, for removing carbon buildup from differently shaped surfaces.

I hope this helps you with building a gun cleaning toolkit.

Friday, September 3, 2021

Witness Marks

I asked a question on MeWe the other day and received a response that mentioned witness marks. To be honest, this topic is something that I learned as a child, had reinforced in the Army, and now I do without thinking about it.

Witness marks are any kind of marking on two or more assembled parts that show their alignment. Used to show that the parts haven't moved, or how those parts were properly assembled, witness marks are a good way to save time and ensure that things stay together.

  • A line scratched at the junction of two metal pieces is one common form. Using a scratch awl or pin punch to mark a nut/bolt or a joint between metal parts that aren't supposed to move will show you if those parts need to be snugged up. This is also handy when disassembling something intricate or precise, as it shows you where things have to go when you put it back together. I've also seen groups of dots lightly punched into sheet metal parts to mark which edges go together on panels that have been removed for maintenance.
  • Using a permanent marker to draw a line on pipe joints to indicate proper alignment. When working with plumbing, especially in older houses, there are a lot of obstacles to route around. “Dry fitting” your pieces of pipe in place before soldering or gluing the joints saves frustration and time. Putting witness marks on those joints when they're in the right place makes final assembly much easier.
  • A dab of nail polish or lacquer on a bolt/nut to show any motion in the nut from vibration or tampering. Working on missile components in the Army, we used a very rugged form of lacquer (named Glyptal) to seal and mark important bolts after assembly. It wasn't used as a form of Lock-Tite to prevent movement; rather, it was there as a security seal to warn that the assembly had been tampered with. Safety wire was used if we needed to make sure a nut stayed where we wanted it, but that's almost a lost art today.
  • Larger assemblies often have the fasteners marked after they've been torqued. This is a quick visual check to make sure nothing got missed. Torqueing the 32 bolts that hold a 6' tall tire onto a piece of farm equipment can be a challenge, so we use a paint pen to mark each bolt as it is torqued in the proper pattern. It's also an easy way to check each morning to make sure none of them shook loose as the machine bounced through the fields the day before.
  • Prefabricating small structures for final assembly elsewhere is a common prepper project. It may be an ice fishing hut, deer blind, or even something as mundane as a tent, and using witness marks on the parts makes things go together faster in the field. Older-style tents with metal pole frames can be a challenge the first couple of times you set them up or if it has been a while since you tried it. We color-code the metal pipe joints with different numbers of stripes to make sure they all get put together the same way every time. Colored electrical tape works and is easier to use on thin round pipe than paint, but that can add thickness to the pipe and make it harder to slide through loops and channels in the tent fabric.

Some of my examples may seem a little OCD, but when you're an hour away from the nearest hardware store or repair shop, you don't want to have things come apart on you. Security, safety, and peace of mind are all part of being a prepper, and using simple things like witness marks can help in all three.

Thursday, May 20, 2021

Getting Into Hot Water

 Ah, the joys of owning a home, one of which is maintaining said home so it can continue to provide shelter without endangering you and yours. The range of maintenance you can do yourself will vary with your skills, training, budget, and time, but preventative maintenance is always cheaper than repair or replacement.

We all like hot water. It's not essential, but it makes cleaning clothes and dishes much easier and bathing our bodies more comfortable. Hygiene is important in everyday life, and it becomes more important if TSHTF and medical facilities are scarce or overloaded. Cold showers suck, and back when I had to shave every day having hot water meant I could do so without bleeding all over the place. Think about it: what's the first thing you want to do after coming home from a camping trip or a long day of hard work? A hot shower will be on the top of the list for most people.

Type of Hot Water Heaters
Most homes and apartment buildings will have a water heater hidden somewhere in a utility closet or corner of the basement. Water heaters are a common household appliance, but they have the potential to become bombs if not maintained. I won't link to them, but there are plenty of videos on the Internet of the devastation caused by exploding water heaters. One of the insurance companies runs an ad on TV that mentions covering damage from a water heater that landed on a neighbor's car. Mythbusters covered them pretty well; the one video I saw had a 50 gallon tank launch itself 500 feet into the air. That's enough force to send a hundred pounds of tank through several floors and walls.

Electricity, liquid propane (LP), or natural gas (NG) are the main power sources for heating water, although I have seen wood-fired water heaters and add-on heat exchangers for wood stoves. Remote or limited-use facilities may have a tiny point-of-use heater tucked under the sink to provide hot water for personal hygiene. There are “tankless” water heaters available, but they're expensive and require more maintenance. There are also municipal hot water systems in large cities that provide very hot water or steam to buildings near a generating plant (sometimes as a byproduct of generating electricity), but that's beyond our control, so the maintenance for it is outside the scope of prepping. The same goes for living in an apartment building, since the owner has control over the central utilities. Let's stick to the common tank style water heaters that you'll find in home improvement stores for today.

Tank-style water heaters come in a variety of sizes and use the three heat sources I mentioned (electric, LP, or NG) depending on what's available. A lot of new houses are “all-electric”, while rural areas lack the NG pipelines found in town and have to rely on LP stored on-site. Electric units don't need to be vented (no combustion, no exhaust) while the gas units are more efficient and “recover” faster in my experience. They all have the same basic design: a vertical tank with cold water inlet and hot water outlet on the top, anode rod inserted through the top, heat source at or near the bottom, drain valve on the bottom, and a relief valve (T&P valve) on the side or top. They also all share a few ways to ruin your day.

Temperature & Pressure
The T&P valve is a safety device that will open and vent the tank if the temperature (T) or pressure (P) gets too high. Water expands when heated, and some expansion is expected and the tanks are engineered for it. Since water heaters are a closed system except for when the water is in use, this expansion leads to an increase in pressure. If the pressure gets above 150 psi, the T&P valve should open and relieve the pressure by venting water to a drain. The valve will also open if the temperature gets to about 210°F, which is just short of boiling. Boiling water produces steam, which takes up 1700 time as much space as liquid water (at standard pressure). Water heater tanks are not designed as boilers and will explode if the water inside starts to boil. 

By most building codes, the T&P valve has to be piped to a drain with an air gap between the end of the pipe and the drain, so that you can see water flowing if the valve opens or is leaking. Testing the T&P valve a couple of times a year will let you know that it isn't leaking, stuck, or plugged. Having a stuck or plugged relief valve is the same as not having a relief valve, so read the instructions on the tag or look up how to test your particular valve.

Hard Water and Sediment
If you have hard water or a lot of sediment in your water, sand and scale will settle out on the bottom of the tank. This layer of sediment will act as an insulator, causing the heat source to run longer to heat up the water and potentially overheat the water. A water heater that has a lot of sediment will start to take longer to recover after use, so watch for longer intervals between having hot water. If the thermostat sensor that controls the heating element or burner gets covered, you can have a runaway heater that will stay on until something pops. 

The drain valve on the bottom of the tank is there so you can shut the heater down once a year and drain the sediment out. Most drain valves are threaded for garden hose fittings, which makes it easy to connect to,  but you don't want to run hot water through a garden hose because they'll melt. Instead, turn off the heat and either let the heater cool down or open a faucet to let cold water in to cool it.

Popping
If you ever hear a “popping” noise coming from your water heater while it's in operation, that's a sign that you have scale building up. Water trapped between layers of scale will boil and “pop” as the steam escapes into the water. Old, limed-up teapots make the same noise and will often bounce or move on the stove when they do. This is from the energy released by the steam as it hits the water around it; now imagine your 40-50 gallon water heater “dancing” in the basement rather than a half-gallon teapot on the stove. 

Any movement of an appliance attached to gas lines needs to be accounted for, so make sure your gas line have a flexible section where it connects to the heater. They're usually yellow in color to designate that they carry a flammable gas. Gas leaks in a basement are a good way to destroy a house! I've seen it happen a few times; one was fairly minor and it blew out every window and lifted the house off of the foundation. A few others I've driven by looked like a tornado had hit the house, with nothing but a hole in the ground surrounded by debris.

Rusting
Most tanks are made of steel and will rust on the inside. This is minimized by the use of a sacrificial anode rod of zinc or some other metal that is more reactive than iron. The sacrificial rod will slowly erode over a few years and should be replaced when it is almost gone. The rod is usually threaded into the top of the tank and replacements can be found in home improvement stores. If your hot water starts to look reddish or develops a sulfur smell, it's time to replace the sacrificial rod; not replacing it means allowing the tank walls to get thinner as they rust away, which reduces the pressure that it can withstand. That rust will also add to the sediment building up on the bottom of the tank that I mentioned above.


Avoiding trouble is one of the tenets of prepping, so do your maintenance. If you have any doubts about your ability to work on anything, call a professional or get the training. Plumbers and electricians are expensive, but not as expensive as a house fire or cleaning up after burst pipes.

The Fine Print


This work is licensed under a Creative Commons Attribution- Noncommercial- No Derivative Works 3.0 License.

Creative Commons License


Erin Palette is a participant in the Amazon Services LLC Associates Program, an affiliate advertising program designed to provide a means for sites to earn advertising fees by advertising and linking to amazon.com.