

There's a knurled nut on the end of the shaft, and by holding the shaft with one set of pliers and using another pair on the nut, it broke loose and unscrewed. That's the original crank base at the bottom right.

The crank base has a oblong hole to fit onto the shaft, and I had some small steel stock out back, so I figured I could do something with this. Stuff needed:
- A suitable piece of steel for the crank.
- A hacksaw to cut the steel.
- Files. Large to round corners, needle files to cut the slot.
- Jeweler's saw (optional).
- Center punch to mark spots for drill.
- Drill. A hand drill will work, drill press if you have/have access to one.
- A handle. I think the handle can be removed, if so then I can use it. If the shaft it's on is long enough I may be able to rivet the end to hold it on the new crank; if not, I'll need a small-diameter machine screw or something similar, and a nut to hold it in place.
Step One: Cut a suitable piece of steel

This is a piece of mild steel, 0.38" wide and 0.10" thick by my caliper; not quite as thick as the original, but being steel instead of what looks like zinc, it will be a lot stronger.

At the spot marked by the arrows -- as far as the nut will screw on -- the space is thinner than the thickness of the steel, so there's no need to add in a washer or something.
Step Two: Remove the handle from the broken crank
I used a file to cut off the spread-out (upset, riveted, however you want to say it) end, and then the shaft and handle slid off.

I'll note that the crank is made of some lousy metal; I used a vise to hold the shaft, and every time I put pressure on it, another piece cracked off.
Happily, the handle shaft is long enough (and steel) that I should be able to use it with the new crank.
Step Three: Make the slot
The threaded portion of the shaft is flat on two sides so the crank will turn the shaft instead of just spinning around. That means a slot is needed, not just a hole.
I found a drill bit that's smaller than the width of the slot; smaller because I planned on making the slot a bit undersize and then filing to fit. I made the guide lines by holding the base in place, and then using a needle to run around the inside of the slot to mark.

I used a punch to mark where the first hole needed to go and drilled it. Then I held the base in place and double-checked where the other end hole should be, and then punched and drilled.
You can do this two ways: one is to mark a centerline, then drill holes along it, then use a needle file to link them up and then cut to size. The other is to drill the ends, then use a jeweler's saw to join them and then file to fit; that's how I did it. If you often wind up messing with things needing fine cuts, you can get one of them and a bundle of blades for not much; I recommend them.
Note: my plan was to "punch and drill", but after I drilled the first hole, I realized that there wasn't enough area left to drill another hole for that slot length. I wound up using the jeweler's saw to cut a bit at the edge of the first hole along the marked lines, and then used a round needle file to cut that out to the proper length.
Here's the crank after the slot was cut:

Step Four: Make a hole for the crank handle
This one's simple: measure the shaft, mark the spot, drill it, and clean off any burrs. If the hole is too small, use a round file to open it up just a touch.
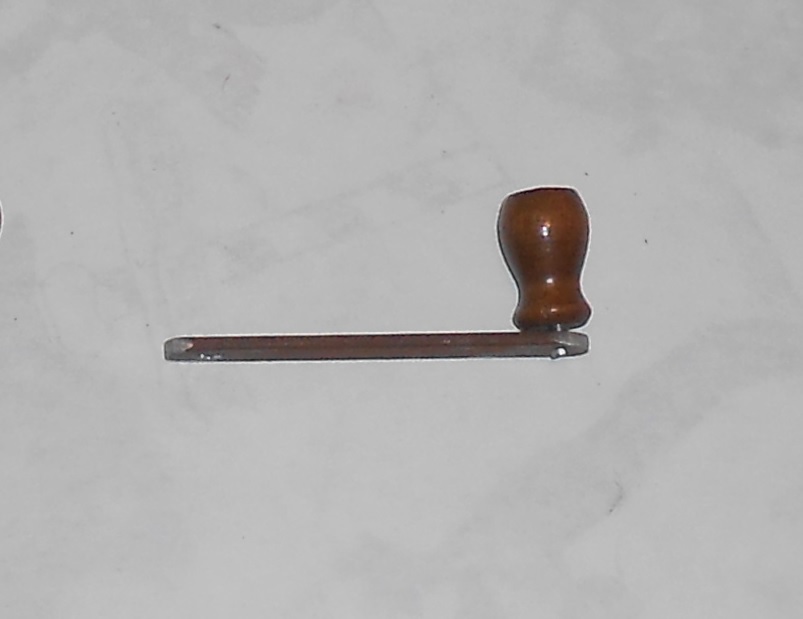
Finished crank body:

With the handle in place, but not yet riveted on:
Step Five: Make it pretty
Being somewhat unable to leave things alone, I decided a little show-work couldn't hurt. I took a half-round file to the new crank and got this:

Then I hit it with the propane torch and a pair of pliers to get this:

Step Six: Put on the handle
To lock the handle on, I put the handle shaft into the vise and used the jeweler's saw to cut a shallow 'X' into the end to help it spread. Then I put the shaft in the handle, and then into the crank.
You can see the 'X' here:


A little file work to smooth it, and it's done.

Final Thoughts
As a end note, if you're going to screw around with drilling, filing, sawing,et cetera, get a vise. It doesn't have to be a Wilton machinist's vise or something equally spendy; it can be something like this. Go to Harbor Freight, or Lowe's (to pick two examples) and take a look. If you're short on space, you can find some smaller ones that'll clamp onto a table or bench when needed.
I'll throw in this: if you can bench-mount it, get a heavy, solid, smooth-working one; it'll cost more, but in the long run it'll be worth it.

No comments:
Post a Comment