 |
Not actually Erin. & is used with permission. |
For those who don't know, the BioLite CampStove is a double-walled camp stove in the style of the Solo, except that has a battery-powered fan to drive air into the fire, not only keeping it burning but also supercharging it. While the battery can be charged via USB, the really clever part of the CampStove's engineering is that the fan is also powered by the temperature differential between the fire and a probe that extends into the burn chamber, which means that the simple act of combustion will turn on the fan when it hot enough. The fan feeds air to the fire, which makes it burn hotter, which then charges the onboard battery. Moreover, you can use this battery to charge USB electronics, either directly as the fire burns or by using the battery-fan unit as a power bank.
As someone who likes fires but has problems getting them started, and who also likes electronics, you can see why this would intrigue me. I truly wanted to like this camp stove, but... well, you'll find out.
Again, the tests are:
- How easy is it to light and keep fed, using natural materials.
- How quickly it will bring 16 ounces of water to boil in a steel mug.
- How quickly it will bring 24 ounces of water to boil in an uncovered aluminum pot.
- How quickly it will cook a single egg on an aluminum skillet.
All tests were performed on my back porch where wind would not be a factor. I used natural fuels, but since this was not a referendum on my fire-making skills, I used a lighter to start them.
 |
| https://amzn.to/3IohxvQ |
First Impressions
The BioLite CampStove stores inside the KettlePot in a handy, but rather bulky, 10.2" high by 5.2" across cylinder that weighs 3.1 lbs in total. The stove assembles quickly, and the instructions are pretty idiot-proof; I have full confidence that I will achieve a spectacular burn with this stove.
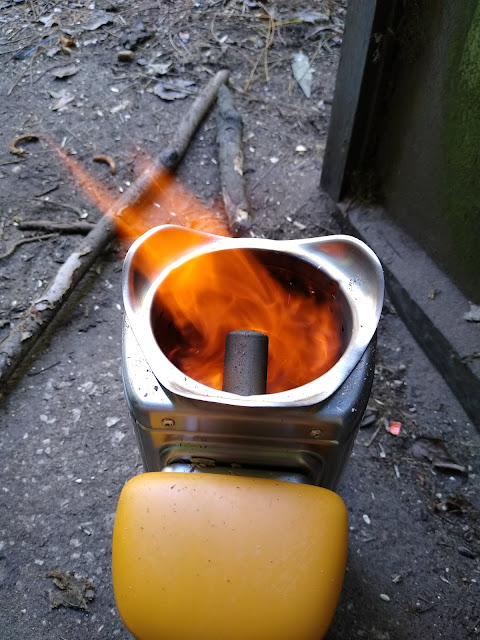
I do have concerns, however. First, the burn chamber isn't very large, especially since the fire sensor/charging probe extends a good way into it.
 |
| https://amzn.to/3IohxvQ |
 |
| https://amzn.to/3IohxvQ |
Finally, the mouth of the stove is shaped such that I cannot place my 16 ounce steel mug on it, because doing so will completely cover the combustion chamber.
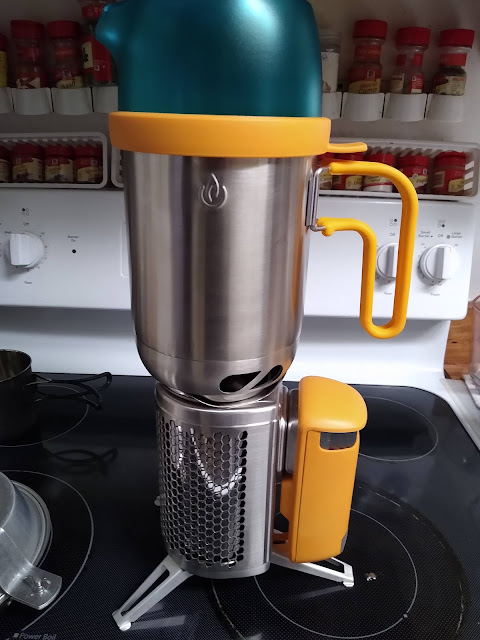
Fortunately, I had the KettlePot, which is designed to sit atop the CampStove.
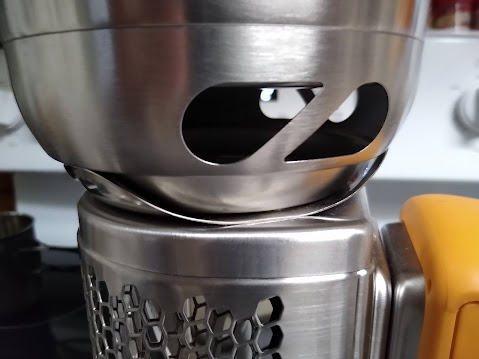
You can see it has a raised bottom with vents cut into it to prevent obstruction of the burn chamber.
This forced me to change the parameters of some of the tests.
Test 1: Fire Starting
As I predicted, starting a fire inside the CampStove was insanely easy. I filled the burn chamber with locally sourced sticks, set them on fire, and turned on the fan. Within seconds I had a very pleasant whirlwind of flame roiling within the stove. I tried to capture a picture of it, but my phone's camera isn't good enough. Just imagine a tornado of flame and you have the right idea. I wish to make it clear that I used the highest fan setting for these tests, not only because I was timing them, but also because the instructions for the stove say that when you trying to boil you should have the fan on high. Lower settings are for using the grill accessory or for slower cooking.
 |
| From left to right: Fire intensity gauge, fan speed setting, battery charge level. |
Test 2: Cup KettlePot Boil
Since I couldn't use my regular cup, I placed 16 oz of cold water into the KettlePot, and because I had to change the testing medium anyway I decided to put the top onto the kettle because that's how the instructions say it's supposed to be done. Protip: if you use the KettlePot, instead of firmly affixing the silicone ring around the kettle's lip, just place it gently on top of the kettle. This is because the transparent lid of the kettle becomes covered with condensation pretty much the moment the water starts to bubble, making it impossible to see if the water has reached a rolling boil or not. If the lid is firmly affixed you will need to look through the pour spout, in which case you get a face full of steam. However, if the lid is just resting on the kettle, you can lift it up to see the status of the boil and then put it back down. Just don't forget to put the top firmly in place before pouring!
 |
| Be careful! |
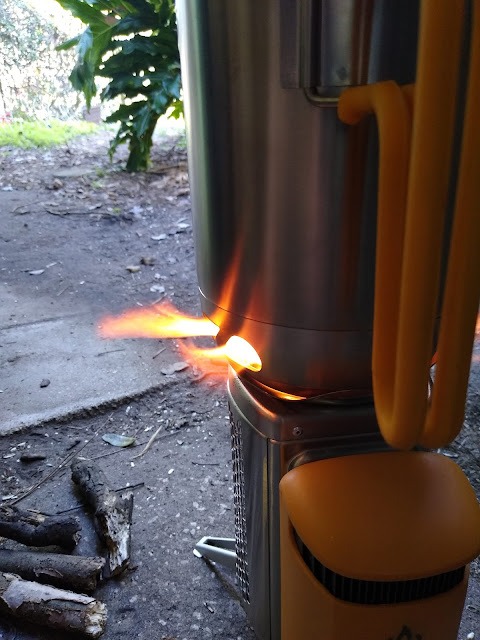
It took 8.5 minutes to get 16 oz of water to boil. At first the fire was blazing along merrily, with jets coming out of the vents -- which means you need to be very careful with people giving it enough space! -- however, the fire dwindled fairly rapidly to the point where I was able to feed small sticks through the vents. Eventually it reached a point where the fan shut down, and I had to take the kettle off to add more fuel and re-start the fire.
Test 3: Pot Boil
This simply didn't work. While my pot did fit on the stove, there wasn't enough room between it and the burn chamber to feed fuel into the fire, and after 10.5 minutes the fire dwindled. I picked up the pot by the bail, but somehow I didn't lift it just right, and I managed to knock the Campstove Over. I'll repeat that: Lifting the pot to add more fuel resulted in a BURNING STOVE falling on its side. Fortunately, neither I nor my porch were burned, but I decided that using anything except the KettlePot wasn't safe.
I allowed the kettle to cool, filled it with 24 oz of cold water, and restarted the test. It took 14.5 minutes of work just to get it bubbling, and by 17 minutes it was mostly boiling (but not rolling), By this time I was out of fuel and patience and ended the experiment.
A Realization: Use Wood Pellets!
I was about to give up on this stove when I realized that wood pellet fuel existed, and I could fill the stove pretty full with it. This would give me a longer burn time, and if I needed to refuel it would be easy to do.
Let me tell you, wood pellets makes all the difference with this stove. I recommend you use this fuel exclusively, as you will see from the performance below. This eliminates the CampStove from consideration as a backpacking or survival stove, but it is still a very convenient tool for use while car camping.
Test 2.5: 16 oz KettlePot Boil with Wood Pellets
4 minutes to a rolling boil, and I didn't need to add more fuel. Then I extinguished the fire to allow the kettle to cool. Test 3.5: 24 oz KettlePot Boil with Wood Pellets
6 minutes to a rolling boil, and still I didn't need to add more fuel.
Test 4: Egg Cooking
1 minute, and I still had enough fuel to perform a bonus test.Bonus Test: the Kelly Kettle
If you don't recall my original test of the Kelly Kettle, go here. It's an amazing way to boil water, but it's not good for much else.
The Kelly Kettle was able to sit on the CampStove fairly well, but at a slight angle. I positioned the pour spout such that it was on the high side, because the last thing I wanted was for boiling water to spill out onto the stove, especially the electronic fan.
It only took 2.5 minutes to bring 16 oz of water to boil, and though my fire was burning there wasn't much fuel left.
While this combination doubles the bulk, it's pretty much an ideal combination for car camping, although it might be advisable to look for a grate to stabilize the kettle. Picking up a hot Kelly Kettle is a special technique at the best of times, and doubly so when it's sitting unevenly. Still, I managed to do it and not get burned.
My Rating
This is one of those "Well, it depends" situations. If you're going car camping and have a bag of wood pellets with you, its performance is A+. However, given its price and limitations, I can't say that it's a good use of your money. I think you're better off cooking with a gas stove while camping, and a barbecue grill at home.
For a camping or survival stove, it's a C- at best. The fan is useful, but I can build a fire in the much lighter and much easier to feed Solo Stove that works just fine without a fan. The ability to charge your electronics is nice, but the same can be achieved with any number of solar-powered banks or hand-crank generators.
I really wanted to like this stove more, and I am disappointed that it didn't live up to my expectations.


No comments:
Post a Comment