Showing posts with label Chemistry. Show all posts

Monday, September 6, 2021

Activating Charcoal

Not actually Erin.
& is used with permission.
You've made charcoal. But how do you activate it Before we go into that, a few disclaimers:
  1. Store-bought activated charcoal will always be superior to home made. This is because you cannot control the environment and perform the procedure under rigorous conditions. 
  2. That said, this method will produce activated charcoal that is moderately effective for water filtration or poison treatment. This is for those "It's better to have this than to have nothing" situations. 

Ingredients
  • Charcoal
  • Mortar and pestle (or other grinding implement)
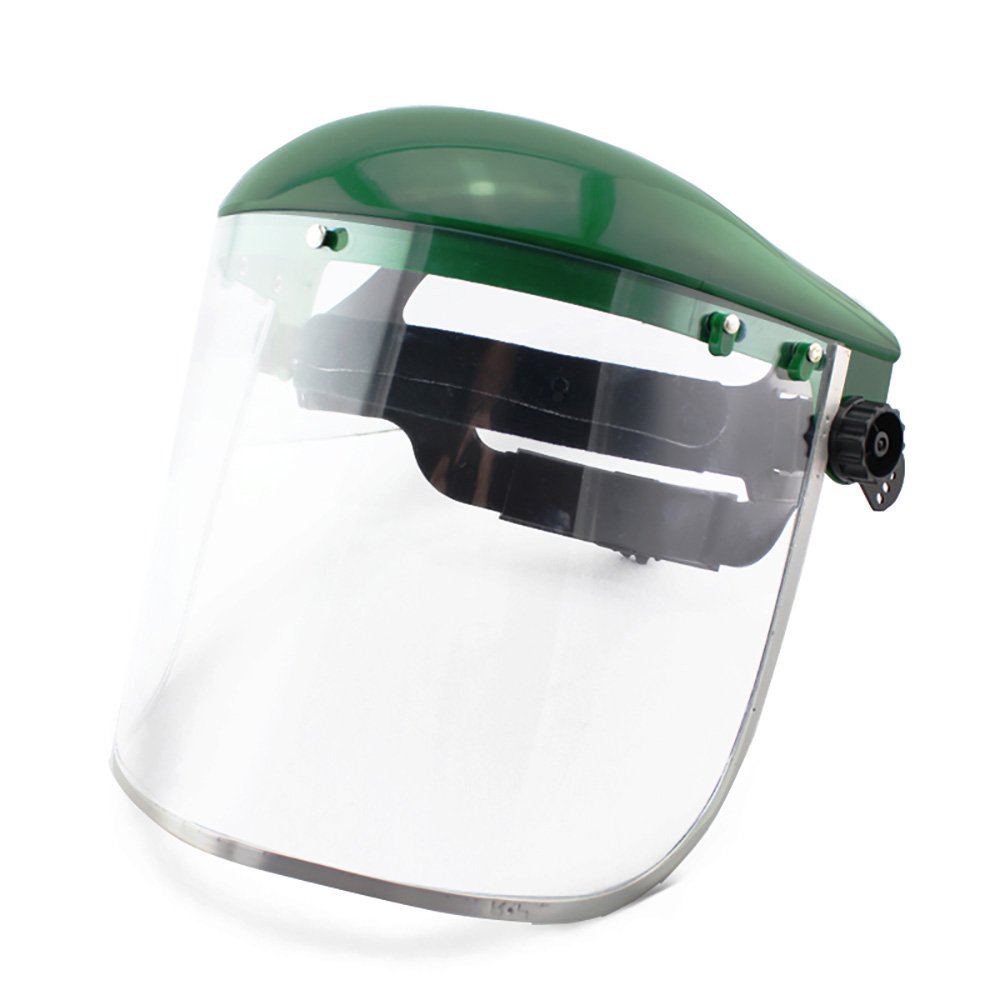
  • A glass* jar with a solid lid, such as a Mason jar
  • Steel or ceramic* mixing bowl
  • Calcium chloride, aka Pickle Crisp.
  • Water
  • Measuring cup
  • Heat-resistant gloves and eye protection
  • Mixing spoon
  • Coffee filters
  • Cheesecloth (a bedsheet will do in a pinch)
  • Cookie sheet
*You may use plastic if they are sturdy enough. What's important is that you not use aluminum containers, as that metal is reactive with heat and you don't want it leaching out of the container, into the water, and then into your activated charcoal. 


Instructions
  1. Make or acquire charcoal. If bought at the store, make sure that it is pure hardwood charcoal and not soaked in lighter fluid or other additive chemicals. 
  2. Powder the charcoal. This is messy business, so wear your grungy clothes. Grind the charcoal as finely as you can, because  this process is not 100% effective and you need the smallest pieces of charcoal you can get. Place the powdered charcoal into steel mixing bowl and set aside. 
  3. Make a 25% solution (by weight) of calcium chloride. Weigh 3 parts of water and mix in 1 part calcium chloride. For example, you can dissolve 100 grams of calcium chloride in 300 grams (same as 300 ml) of water, or 3.5 ounces of calcium chloride in 1.3 cups of water. Seal jar lid tightly, then shake to mix. 
  4. The jar will heat up. This is normal. Wear gloves to protect your hands, and goggles to protect your eyes in case of a spill! (Calcium chloride is non-toxic, but no one wants hot salt water in their eyes.) Occasionally unseal the jar to release internal pressure, then reseal. 
  5. Make a paste. Slowly pour the calcium chloride solution onto the powdered charcoal and mix until a spreadable paste has formed. 
  6. Allow to dry for 24 hours. Cover if possible.  
  7. Spread the paste on the cheesecloth.  Use materials with the tightest weave possible. It's important that you use nothing which has scented detergent, bleach, or other substances on it, as the charcoal will adsorb that and you will lose efficiency.
  8. Place cheesecloth over bowl and rinse with clean water. Use the same amount of water as you did in step 3. The cleaner the water, the better. Ideally it ought to be carbon-filtered, distilled, or reverse-osmosis filtered. Do not use chlorinated city water!
  9. Pour caught water through a coffee filter to recover bits of charcoal you'd otherwise lose. The finer your carbon, the finer your filter must be when you rinse it, and this will enable you to catch as much as you can. If you have a large enough filter, you can simply use it instead of the cheesecloth to combine this step with the rinsing. 
  10. Bake at 250° F for 30 minutes. Place the coffee filter on the cookie sheet alongside. Let cool, then break apart. Store in an airtight and waterproof container. 
Your activated charcoal is now ready for use!

Tuesday, June 29, 2021

White Vinegar: the Miracle Acid

White vinegar, also called distilled or spirit vinegar, has been found on kitchen and bathroom shelves for hundreds of years. White vinegar is probably one of the most underappreciated kitchen chemicals most people have in their pantry. For such a simple compound its uses are legion, everything from cleaning glass to dressing salad.

Vinegar can be made out of anything that has alcohol in it: wine, hard cider, and beer are popular choices. White vinegar, like vodka, is distilled from grain. Grocery store white vinegar is generally made up of 5–10% acetic acid and 90–95% water. Industrial and agricultural grade white vinegar can contain up to 20% acetic acid but is not intended for human consumption. 

In the food realm alone, white vinegar has numerous uses, such as:

  • Pickling vegetables, fruits, and eggs
  • Salad dressing
  • Marinades and sauces for meats, seafood and vegetables
  • White vinegar combined with baking soda is a good leavening agent for certain types of baked goods
  • White vinegar and milk can be used to make certain types of cheese

Outside of edibles, white vinegar has even more uses when it comes to cleaning. 

WARNING: Never combine vinegar and chlorine bleach. This combination can release chlorine gas, which is potentially fatal.

  • Disinfectant and cleaner for a variety of items:
    • Countertops
    • Showers and tubs
    • Toilets
    • Floors
    • Dishwashers
    • Windows and mirrors
    • Coffeemakers
  • Removing adhesive from many surfaces
  • Drain cleaner and deodorant
  • Mold killer
  • Cleaning hard water stains
  • Stain remover in laundry
  • Weed killer, especially when combined with salt and dish soap
  • Removing skunk musk

Speaking of animals, a dilute mixture of white vinegar and water can be used to treat a pet’s itchy or scaly ears. Finally, white vinegar can be used to dissuade cats from using a location as a litter box. Since cats really dislike the smell of vinegar, spraying some on a place they’ve used as a bathroom can prevent them from reusing that spot. Simply apply straight vinegar on outside spots, or diluted 50/50 with water for indoor locations. You may need to reapply, especially with outside use, 

WARNING: Never use vinegar on marble or other stone surfaces. The acid in vinegar can permanently damage them.

A gallon jug of white vinegar generally costs less than four dollars and is available at grocery and hardware stores around the world. I highly recommend everyone have some of this miraculous wonder chemical in their household preps!

Friday, May 7, 2021

The Chlorine Shortage

Clean water is essential for life. Chlorine is one of the easiest and most common ways to disinfect (kill microbes) water, and has been covered several times here and on other blogs. I even showed the basics for making your own chlorine bleach, and there is a post in the archives about a solar-powered bleach producer.

Chlorine is a basic industrial chemical, used in a lot of processes, but a majority of it (~60%) is made in two plants. One of those plants burned last year, and the other was recently flooded. This has put pressure on the market; as supply goes down, prices go up. Add in the quarantine-based surge in home swimming pool construction and you can add increased demand to further raise prices. 

What does this mean for a prepper? 

  • Since most municipal water plants use Chlorine gas as a final disinfectant for the water they supply, we can expect higher costs for our drinking water.
  • Some places may try to get by using less Chlorine, which raises the potential for bacteria in our water.
  • Household bleach prices will rise and availability will drop.
  • Swimming pool bleach will follow household bleach.
  • Suppliers may switch to imported Chlorine, which raises costs and means more transportation. 

Chlorine is a gas at normal temperature and pressure, and is shipped as a liquid under pressure. Pure Chlorine stores well, but once converted to household bleach it has a shelf-life measured in months. (Pool bleach lasts longer, but is chemically different.) Stockpiling bleach is a waste of money, so if you're counting on using it for water purification you need to either make your own or investigate other methods. Erin has written about Potassium Permanganate as an alternative method of water purification (it has other uses, too) so give that some thought.

Some other things to consider:
  • Conserve water if you're on a municipal system. Reducing the demand will ensure they can treat what they are pumping.
  • Have a backup water purification system on hand. If your city declares their water unsafe, they will usually enact a "Boil Order", so keep an eye on the local news. Use the search box and look for Reverse Osmosis for my recommendation.
  • If you have a swimming pool (a great way to store lots of water), check with local suppliers for a season's supply of chemicals. Look into alternative methods, which is outside my realm of experience.
  • Keep a supply of drinking water on hand. Having been through a few floods and other disasters, you won't get much warning before they shut down the water supply.

We live in a connected world where a failure at one location will have ripple effects that can affect you and yours. Do what you can to avoid the worst of the problems.

Thursday, February 25, 2021

Hoof Glue

A couple of weeks ago I wrote about hide glue, an adhesive made from animal hides that has been in use for thousands of years. Very simple to make and use, hide glue is not the only “animal glue” that humans have developed over the years.

Hoof glue is exactly what the name says: a glue made from the hooves of animals. For most of human history people have not had the luxury of “too much”, and we figured out uses for every part of any animal used for food. “Use every part of the pig except the squeal” was the philosophy before everything became disposable.

Whereas hide glue is made from the collagen in hides and bones, hoof glue is made from the keratin in hair and hooves. Animal hooves are nothing more than very thick versions of fingernails and are mostly keratin, the same protein that is a major component of hair. Animal horns (but not antlers) are also made of keratin. 

Both collagen and keratin are proteins (chains of amino acids) that have binding or adhesive qualities. When hydrolyzed (dissolved in water), they become “plastic” in the material sense -- soft, workable, and easily molded -- and when the water is removed they revert to their hardened state. Hoof glue retains more flexibility when dry than hide glue, making it a better choice for binding things that need to move or flex in use.

One of hoof glue's many uses was for sealing and bonding the sinew or fiber cordage used to hold arrowheads on the shafts of arrows. While not waterproof, the hoof glue was flexible enough to stay in place though the shocks of being launched from a bow and hitting a target. Binding layers of wood together to form a laminate which is stronger than solid wood was another use.

Like hide glue, hoof glue has a very long shelf-life. When stored in a dried form, there is a slight chance of fungal growth, but periodic heating and using it will keep it fresh and clean.

Making hoof glue is as simple as making hide glue but can be done on a smaller scale.

  1. Collect hooves or pieces of hooves (if you trim your livestock's hooves you have a good source).
  2. Break them into small enough pieces to fit into a small pot. Smaller pieces create more surface area and speed up the process.
  3. Add enough water to cover the pieces.
  4. Gently heat the mixture until dissolved, skimming off any debris that floats to the surface.
  5. An acid can be added at this time to form a gel if you have one available.*
  6. Add water or continue to heat (to remove water) until you get the desired consistency of glue.
  7. Apply while hot and allow to dry.

I remember first seeing hoof glue in a museum of natural history, it was in a display of some of the methods native Americans used to make arrows and bows. The hoof glue was a blob of dark material on a stick; it looked like a grotesque lollipop more than anything else, and it had a small clay jar with it. Since most of the tribes in the center of the US were nomadic, anything they carried from place to place was carefully thought out and size and weight were minimized. The “glue stick” was used by placing hot water in the clay jar and then stirring the water with the “glue stick” until enough had dissolved to make the consistency of glue needed. Any leftovers in the jar were warmed near a fire to drive off the excess water and then scraped back onto the stick for transport. Efficient, conservative of materials, and simple to use, this was a good way to have a multi-purpose adhesive on hand without taking up space or weighing too much.

* I'll see if I can put together a post about naturally occurring acids and bases for addition to the “chemistry for preppers” category.

Thursday, July 2, 2020

Fireworks

It's the time of year for smoke, bright flashes of light, and noise: no, not a pop-music festival, the 4th of July. Many states allow their residents to celebrate their Independence Day with a variety of fireworks; the selection varies by state, and Federal law limits the amount of explosives available to mere consumers, many of which can be re-purposed by a prepper with a touch of imagination. If you live in one of the more restrictive states, check the laws in your neighboring states; I happen to have two bordering states that sell fireworks year-round and buying them in the off-season drops the prices dramatically.

I'll be the first to admit that I've always enjoyed fireworks, as the pyromaniac hiding in the back corner of my psyche gets a giggle out of watching things explode. Having handled military explosives and later studying chemistry, I have a healthy respect for anything that goes “BOOM”, but I also know a bit about how they work and what they can do. Lets break the common fireworks down into a few categories and see how a prepper might adapt them to their own uses.
DISCLAIMER: Fireworks contain black powder (BP) as an active ingredient. BP is flammable when in an open container, but explosive in a closed container. Some of the additives used to produce the colors and light are unhealthy to ingest or breathe. Use of gloves and other protective gear is highly recommended, but I (and BCP by extension) cannot be held responsible for your actions. Consider all of the information that follows as “for educational and entertainment purposes only”. Never mix the contents of dissimilar types of fireworks, the combination could be spontaneously explosive and the amount of energy stored in even tiny amounts can kill or maim you. If you have any doubts, don't do it.
Smoke
One of the most common and least regulated types, smoke bombs of various sizes are a slow-burning mix of black powder and something to give the smoke volume and color. The small, spherical ones last a few seconds, but the large ones that are about the size of a stick of butter can last for a minute or two. If all you can find are the small ones, they can be cracked open with a hammer or rock to extract the active ingredients. Combining the powder from several small ones and placing it in a tube of any sort will replicate one of the larger ones. Filling a beer can with the powder from a couple dozen large ones will give you something to rival a military smoke grenade.

Smoke is handy as a way to signal for help or mark your location for searchers during daylight. It can also be used to hide your location and movement if the smoke is thick enough. The high sulfur content in most smoke compounds makes the smoke unpleasant to breathe and the lack of visibility in the middle of a good cloud is disorienting, so they may have uses in crowd control.

Bright Light
Sparklers used to be common, but the nannies have decided that the glowing-hot metal rods can be dangerous (duh) so they're getting harder to find. Used individually, they burn hot enough to start a fire with damp tinder and they last long enough to be useful. They can take a bit to get started, though, and I've always used a cigarette lighter for 5 to 10 seconds depending on size and quality of the sparkler.

Strobes are a more recent product. They ones we see around here are about the size of a sugar cube and they produce an intense series of flashes of lights for 10-20 seconds. These are very useful as a night-time signal for help, and also very disorienting and almost blinding in a dark room.

Fountains and gerbs are the little cones or cylinders that produce a shower of colorful sparks when lit. These are common in the variety packs of fireworks because they're cheap and take up space. They're another handy way to start a fire if you are dealing with damp tinder.

Safety flares are not technically fireworks, but are rather pyrotechnics. The once-common road flare or “fusee” has been largely replaced by reflective triangles and flashing LEDs, but you can still find them in truck stops, on Amazon, and in forestry supply shops. They're designed to catch your attention, so use as a signal for searchers is a given. They also project a flame 6-8 inches from the end and burn for quite a while (15 minutes to 2 hours), so they could probably be used as a weapon, and they are very handy for lighting large or sustained fires, such as back-burning a field to stop a grass fire. 

Noise
The noisy fireworks are either explosions or screams. The explosions are BP, but the screamers use a specific chemical mix to produce the noise (although I have seen whistles built in to some rockets to produce noise). Remember, BP is a propellant in loose or open containers but an explosive in closed containers.

Firecrackers are being used as distractions in riots all over the world. They can mask the sounds of gunfire and will confuse the various forms of “shot-spottter” surveillance systems found in large cities which use a series of microphones connected to a computer to record and triangulate the location of gunshots, and which can be overwhelmed by increasing the number of “shots” in an area. The sudden, sharp noise also makes people instinctively look for the source, drawing their attention away from anything else that's happening.

Screamers use a mixture that burns at two speeds, low and high. When they burn, they produce gasses in low and high quantities at very high speeds, and the switching between low and high speeds produces an oscillating wave of gasses that we hear as a high-pitched scream. Very loud, these can be deafening in small spaces and the large ones will hurt your ears even in open areas. Useful as a signal, they can also be used to scare away predators.

Legalities
Consumer-grade fireworks are regulated to prevent stupid people from killing themselves. Darwin is over in the corner pouting, but since many idiots exist we have to put up with laws that protect them from themselves.

Firecrackers in the USA are limited to no more than 50mg of powder, which is 0.050 grams of noise-making composition. For the reloaders out there, that is 0.77 grains of super-fine BP. (Yes, you can slice open firecrackers and extract the powder, but I can't suggest that you do. Too many lawyers, not enough rope and trees.) I have broken open duds (they didn't explode when the fuse burned down) after a safe waiting period, and the powder makes a good fire starter and catches a spark from a flint and steel very easily. It's like in the movies where someone uses a flintlock firearm to start a fire.

Illegal firecrackers come in from various places. Other countries have more lenient laws, and I've seen some impressive explosives over the years. The “cannon crackers” (Knallkörper ) we used in Germany to celebrate New Year's Eve were about an inch in diameter and four inches long. You can find videos of them on the Internet, and they have an impressive amount of power. Some of the fireworks smuggled in from Mexico come close to that level, which is more than enough to take off a hand if you're stupid. I'll leave the use of actual explosives to your imagination, as I can hear the lawyers sharpening their pencils.


Stay safe this Independence Day. Let's all have the same number of fingers and eyes next Monday that we have today.

Friday, April 24, 2020

Purifying Water with Bleach, part 2

Not actually Erin.
& is used with permission.
Last month I was asked about how to purify stored water. This woman's concern was that the water was good enough coming out of the tap, but she was worried that long-term storage would result in bacterial growth which would render the water undrinkable.

Purification of water is something that we've covered extensively on this blog, and one of the earliest articles we made on that topic was Chaplain Tim's essay on using bleach to neutralize a toxin produced by an algal infestation of Toledo's water supply.

While filtration and boiling are still the best and easiest methods to purify water, sometimes they just won't work, as in the Toledo case. In that situation, the toxin was left behind by the algae as it died off, and even though filtration would remove the algae itself it would still leave the toxin behind. Worse, boiling the water would concentrate the toxin, actually making the problem worse!

I encourage you all to go read Tim's article, as it explains the chemistry behind why this works and how you should use it. Still, if you're like me and your eyes get a bit watery at all the math, I present to you this handy cheat sheet for storing and purifying water.


I don't recall where or when I found this image; all I know is that it was years ago during a web-wander. If you know where it's from, please let me know so I can give credit where due.

I added my own notes to this to enhance usability. We have teaspoons in my kitchen, but not 1/4 or 1/8 tsp and I don't trust my eyes to be able to accurately eyeball those amounts, so I used Tim's math from his post to convert their measurements into units I could use, which were drops.

Please note: This chart is for standard bleach, not concentrated bleach! Concentrated bleach is 8.25% NaClO (sometimes listed as Sodium hypochlorite) instead of the standard 5 to 6% solution, so you need to use less of it. According to his article, it's 4 drops of bleach to the gallon for clear water instead of the listed 8.

A few things I want to point out before I wrap this up:
  • Cloudy water is treated the same way as clear water because, as the text above indicates, you need to filter cloudy water before drinking it. 
  • If for whatever reason you can't filter it, I would treat it as surface water. 
  • Surface water gets special treatment because there's no telling what's in it. See this article for more explanation. 
  • Cold water needs more bleach because the cold inhibits chemical reaction. For a great example of this, do an experiment: take two mugs of water, one from the tap and one hot from the kettle or microwave, and stir in an equal amount of powdered coffee or cocoa. Watch how the hot water absorbs the powder easily, while the cold water causes the powder to clump. The same principle applies here. 
  • Allow at least 30 minutes for the bleach to do its job! If the water is cold, make that 60 minutes. 
  • The human nose can smell chlorine in water at a ratio of 3 parts per million. A ratio of chlorine to water which makes it safe to drink is 5 ppm. Therefore, if you can easily smell the chlorine without it being supter-strong, it's safe to drink. 
  • Chlorine loses its effectiveness years, becoming inert in 5 years. Powdered bleach lasts longer, although I don't know by how much. Here are directions on how to make your own bleach, although be advised that it will be more diluted than commercial versions. 

Thursday, March 5, 2020

Fertilizer Basics: Chemical

It's been 4 or 5 years since I mentioned fertilizer chemistry, and with spring around the corner a lot of farmers and gardeners are getting ready to plant this year's crop. The science of soil chemistry is a college-level subject, but I'll try to cover the basics and give you a base to build upon.

I'm not going to get into which fertilizer you will need for each crop or condition; that's an industry in itself known as Agronomy and I don't have the space to cover everything here. Do your research on what you're going to grow and take notes on what to look for that indicates possible nutrient deficiency. Unfortunately, without access to a lab and soil sample, you'll have to plan your fertilizer use by how the previous year's crop did.

Fertilizer is anything you add to the soil to provide nutrients that your plants need to grow and yield. A properly fertilized filed or garden will produce more and better food, so the cost of the fertilizer is usually offset by the increase in yield. This applies even if you're growing flowers: a properly fed row of flowers will give you more and bigger blooms and leaves, which is handy if you're growing herbs. Trees can also benefit from being fed the right things, especially when they are transplanted or young, as getting a good start means a longer life and a sturdier tree. I'll look at commercial (chemical) fertilizers in this post and cover manures and organics later.

Chemistry Ahead!
Plants require various chemicals to grow and produce fruit. They can pull carbon, hydrogen, and oxygen from the air and water around them, but they also need two classes of nutrients in smaller quantities.

Macro-nutrients are needed in fairly large amounts and are used in the production of the building blocks of life like carbohydrates and proteins.
  • Nitrogen (N): Essential for protein synthesis.
  • Phosphorus (P): Used to create new cells for growth and allow stored food energy to be converted to chemical energy.
  • Potassium (K): Helps maintain water balance and transpiration in the leaves of plants.
  • Sulfur (S): Part of many amino acids, the building blocks of proteins.
  • Calcium (Ca): An important part of nutrient transport through a plant and used in enzyme production.
  • Magnesium (Mg): Used in the photosynthesis of sunlight to carbohydrates.

Micro-nutrients are trace elements that are required in much smaller doses for optimal health, like the vitamins we give children. 
  • Zinc (Zn): Mostly used by the plant in growth regulation and protein production, one of the main limiting factors in plant yield.
  • Iron (Fe): Used in enzymes and helps make other nutrients available to the plant. Fe is also critical in the production of lignin, which is part of the plant stem or stalk.
  • Manganese (Mn): Makes S and P more available to the plant and is also used in enzyme production.
  • Boron (B): An important part of building and maintaining cell walls within the plant.
  • Chlorine (Cl): Important for many energy-transfer reactions within the plant, this one is rarely in short supply.
  • Copper (Cu): Activates many enzymes and is used in protein production.
  • Molybdenum (Mo): Used in the root systems to help bacteria bind N into a form that plants can use.

Commercial fertilizer is usually marked with a series of numbers separated by hyphens. The macro-nutrient chemicals are listed in the order of N-P-K and represent the percentage of each available in that fertilizer. These are the three numbers you will see on most bags of fertilizer in the garden shops and big-box stores. Urea is a common form of N, and it will be marked 46-0-0.

Some specialty fertilizers will have more than three numbers, with S and Zn being next in the list, so you may see something like 12-40-0-10-1 which tells you it has 12% N, 40% P, 0% K, 10% S, and 1% Zn. Ammonium Sulfate, a common fertilizer used to lower the pH of soil, would be designated 21-0-0-24 (sometimes 21-0-0-24S). Boron, Iron, and the others are usually designated with their chemical symbols.

Commercial fertilizers are heavily regulated, I have inspectors from the state come by and grab samples of what we sell every few months. The lab tests ensure that we're not “cutting” the expensive stuff with cheaper chemicals to cheat our customers, and I get the results back to make sure my suppliers aren't cheating me. Certain chemicals lend themselves to, let's say, “recreational” uses and are further controlled by various government agencies, and a certain monster that I will not name blew up most of a federal building with a rental truck full of fertilizer-based explosives resulting in that form of fertilizer no longer being on the market.

The meth labs used to steal anhydrous ammonia (NH3) for one of the steps in their recipe, so we had to have locks on every single valve on every single tank that holds it. The cartels in Mexico can make meth in bulk and ship it cheaper than the idiots can make it locally, so we've seen a huge drop-off in NH3 thefts. I used to get Sulfur in 2000 pound bags, but since a person can use it to make black powder the BATFE has made it a paperwork nightmare today.

Be careful of what you stockpile; if you ever end up in the news, some things can be reported as “bomb-making materials” or “drug-making chemicals”.


With the distinct possibility of disruption of  the delivery of food (and other goods), growing some of your own food is always a good thing to try. If nothing else, you'll have fresh food that you know you can trust.

Thursday, January 9, 2020

Superglue for Repairs

Our illustrious editrix Erin asked me about the potential dangers of using superglue to repair an item that would come into contact with drinking water, which is something that may come up if you're using your gear for a while in rough conditions. Things break, and knowing how to safely repair them is important.

CAUTION: chemistry ahead!

Cyanoacrylic glues (there are a few different formulas) may sound like they would be poisonous due to the part of their name which sounds like “cyanide”. This is incorrect; the actual root of the cyan- prefix is merely the Greek word for blue (kyanos), because many blue dyes contain some form of cyanide salt. Cyanide (CN-) is a naturally-occurring anion that reacts with other materials and forms numerous different molecules that form the cyano group, not all of which are dangerous.

Most people know that CN- was used in various gas-chambers over the years, but it was actually Hydrogen Cyanide (HCN) that did the killing. The spy movie cyanide capsules were Potassium or Sodium Cyanide (KCN or NaCN), which are very toxic and would also create HCN when it reacted with the acid in a person's stomach. The reaction with acid is how most capital punishment gas chambers were set up: a container of acid under the prisoner's chair would have a bag of KCN or NaCN lowered into it by remote control, forming a strong cloud of HCN gas inside the sealed room. HCN kills by blocking the use of oxygen inside the body and it was used as a battlefield chemical weapon in WW1. The Zyklon B used in the gas chambers of Nazi concentration camps was a liquid form of HCN absorbed into diatomaceous earth, HCN melts at 8° F and boils at 78° F, so it will vaporize at room temperature.

Once dry, cyanoacrylic glue doesn't have any of those dangers. Before I even looked up the specifics, I was able to assure Erin that superglue was food-safe because I've known several people that used it to repair broken dentures over the years with no ill effect. The “liquid sutures” that you see used to bind the edges of minor cuts are nothing more than cyanoacrylic glue. I have used it on myself and various animals, and it does a good job of sealing skin to skin - ask any kid who has superglued his fingers together how strong the bond is. Idiots will concentrate liquid cyanoacrylic glue in a container and “huff” it for the nearly-lethal “high” they will get as their bodies starve for oxygen, but once dried it is safe.

Looking into the subject a bit deeper, I found that surgeons in the 1960's used it to close wounds on internal organs like the liver, but it wasn't FDA certified for that use until recently because the patent had expired and nobody wanted to spend the millions of dollars that the testing would have required. Cyanoacrylic glue is considered non-toxic, with a rather high LD50* of 5 grams per kilogram of body weight. Compared to NaCN and KCN with a LD50 of 5-10 mg/kg, cyanoacrylic glue is literally a thousand times less toxic.

* LD50 is a common measure of toxicity. It stands for Lethal Dose for 50% of the test population. If you were to give 100 rats that weigh 1 kg each a dose of 5 g of cyanoacrylic glue, you could expect half of them to die from the dose. Various small mammals are used in such testing, and the results extrapolated based on body weight. It's not an exact measure, but it gives a baseline to measure toxicity. For example, a 100 kg human would require 100 times the dose that a 1 kg rat would. That means that the average American adult would have to ingest about a pound (~500 g) of superglue before hitting the 50/50 lethal dose. Since the glue is sold in packages measured in grams, you'd need a couple of hundred tubes just to get to that 50/50 dose.

There is however a type of repair that you don't want to use superglue for, and that is anything which will get heated. This will cause the glue to break down, releasing a small amount of HCN gas. The failure of the repair will probably be more of a hazard than the minor amount of toxic gas released, but it is still a hazard. 

Tuesday, March 12, 2019

Chemical Specialty PPE

I’ve discussed Personal Protective Equipment (PPE) a couple of times in the past, and for good reason: it's the last line of defense against injury when doing work. In addition to basic PPE, there are specialty protective items that are used to address dangers related to particular tasks.

One fairly common work hazard involves chemical exposure. Part of my work this week has involved repairing the power feed to some pumps in a sewer manhole. In addition, many of my hobbies involve volatile chemicals. Additionally, a lot of prepper tasks can leave you exposed to the same kinds of risks, so having the correct protective equipment on hand will help keep you safe and healthy.

Inhaled Particles and Fumes
https://amzn.to/2TEIuGs
When dealing with dust and particulate matter in the air, a basic dust mask works wonderfully so long as it meets the National Institute for Occupational Safety and Health (NIOSH) N95 standard. I also feel like the small extra charge for the exhalation valve is money well spent, because it keeps my face cooler and my glasses from fogging. This mask, however, does nothing to protect you from the gases in the air you breathe.


https://amzn.to/2TAN5t8
For fumes and harmful vapors, a chemical cartridge mask is what you need. Similar in principle to the classic “gas mask,” these masks use replaceable cartridge filters to remove harmful chemicals as you breathe. Each type of cartridge is only useful with specific chemicals, however, so make sure you’re using the right ones and changing them as recommended by the manufacturer. Each mask will come with complete instructions for the use and care of the product.

Cartridge masks are available in both half- and full-face configurations. My personal mask is a half-face, because it is cooler, works better with my prescription eyewear, and I don’t often deal with environments so hazardous that I need sealed full-face protection. However, if you feel you need this protection, it is available.

One other major concern arises with respiratory protection: facial hair. As anyone who has been trained in its use can tell you, facial hair is largely incompatible with respiratory masks. It makes getting a good seal between the mask and your face virtually impossible, which renders the mask itself almost useless. I have come to accept as a fact of life that I have to use my mask for anything, my beautiful ginger beard will get a heavy trim. It's a sad but necessary requirement to protect my lungs.

Facial Protection
https://amzn.to/2EUGj79
That same beard may get referred to as “face armor,” but it's worse than useless if caustic or otherwise harmful chemicals get splashed into my face, as the beard can hold the chemical against my skin or even ignite. Safety glasses protect the eyes in the event of a splash, but there’s a whole lot of face that is still exposed and can be grievously harmed. A face shield will keep sparks, splashes, and hot spatter away from you and keep your face away from harm.


Hands
https://amzn.to/2NZfHWW
Your hands are always vulnerable to harm, since they’re usually in direct contact with the hazards you’re addressing. Gloves are a necessary protective item, but when you’re dealing with chemicals, a cloth or leather glove can be at least as harmful as helpful, because it can trap dangerous and damaging materials and hold them against your skin. Gloves are also very difficult to take off in a hurry, so this prolonged contact can dramatically increase the damage suffered. Chemical-resistant gloves don't absorb dangerous substances or allow them through to contact the skin. They're also thicker than nitrile or latex gloves, meaning they last longer and are far less easily damaged or compromised.

Coveralls
Your clothes are also vulnerable to the same weakness as normal gloves. Chemicals can soak into your clothing, destroying it and harming you. When you’re working with very hazardous materials, or in an environment where spills and splashes are most likely, a disposable coverall suit with a hood gives a nearly complete body covering. Combined with the rest of the PPE I’ve discussed here and elsewhere, this outfit will protect you from almost any chemical exposure a prepper will encounter.

The kinds of exposures it won’t help with are the kind requiring very expensive, very specialized gear and training [e.g. MOPP gear, or Mission Oriented Protective Posture gear, usually designed for chemical, biological, radiological or nuclear weapons], and are situations into which one shouldn’t enter unless it is your job or your duty to do so and you have the gear and training available to properly handle them.


Chemical exposures can be very dangerous. The kinds of protective gear needed to deal with them are inexpensive and readily available. There is no reason to be unprepared.

Lokidude

Thursday, February 21, 2019

Li-ion Batteries in Winter

After listening to my coworkers whine about their cell phones going dead in the cold, I decided to look up an explanation for why it happens. (Keep in mind that I work outside a lot of the time and this has been one of the coldest winters in a generation. Temperatures hovering around 0° F every morning is getting monotonous.) It turns out that my habit of keeping my phone in an inside pocket, where it won't get lost, also protects it from an issue arising from the chemistry and construction of lithium-ion batteries.

Lithium-ion (Li-ion) batteries are becoming ubiquitous; they're what power most cell phones, small electronic devices, and common cordless tools. Chances are that your rechargeable flashlights, radios, etc. all have lithium-ion batteries in them and they are becoming common as replacement batteries for motorcycles and ATVs. Lighter and having a higher power per pound than lead-acid or nickel-cadmium batteries, they are also the choice of most electric car companies, but after looking into the issue of phones “losing” 70-90% of their charge when exposed to temperatures below freezing, I don't expect to see very many electric cars this far north. I know the cars have a heating system to keep the batteries from freezing, but since it uses power from the battery to produce the heat, that will drain the battery and reduce the range of the car even further.

The problem comes from the way all batteries work, with a slight twist on the lithium-ion system. Batteries work by storing energy in the form of a chemical reaction that is reversible; when you charge a battery, you are forcing electrons into it to move ions from the cathode (positive post) to the anode (negative post). In Li-ion batteries, the ions actually squeeze themselves into the spaces between the molecules of the anode and cathode instead of chemically reacting with the materials (bumping other ions off and taking their place). Incidentally, this is why some Li-ion batteries will swell as they age -- the graphite that the anode is made of doesn't contract to its former size once the Lithium ions have left during discharge. Samsung has a bad reputation as a battery maker because they ignored this tidbit of information.

Cold temperatures slow down all chemical reactions. In the case of Li-ion batteries, as the temperature drops the Lithium ions may follow an alternate reaction and “plate” out on the surface of the anode as metallic lithium during charging. This “plating” is not fully reversible, and the battery will lose some of its charge capacity because of the lack of free ions to be moved around. The layer of metallic lithium will also create a barrier to the free flow of ions which increases the internal resistance of the battery, causing heat. A much bigger problem is that you now have a layer of pointy, conductive, metal crystals on the anode, and if they puncture the insulating barrier, being forced against it by the normal swelling of the anode during charging and the thermal expansion from the added heat, they will cause an internal short-circuit which can be very energetic.

“Energetic chemistry” is a euphemism for an explosion. For this reason: NEVER CHARGE A FROZEN LI-ION BATTERY. It is theoretically possible to charge a frozen Li-ion battery safely, but the charge time would be measured in days instead of hours. Always warm the battery up to as close to room temperature (70°F) as you can before trying to charge it. A much more technical explanation can be found here.

A secondary problem with the slowed-down reaction inside a cold Li-ion battery is the fact that the battery won't be able to produce the voltage that a cell phone expects to see, with the circuitry inside the phone seeing the reduced voltage as an indication that the battery has lost its charge. Once the battery has had a chance to warm back up, the phone should read the charge more accurately. This is what is affecting my coworkers who keep their phones clipped to the outside of their coats, and once they let their phones warm up, they usually show most of the charge that they should.


The main reason I keep my phone in an inside pocket is because I have had them fall out of pockets in my outerwear without my noticing. When I'm wearing four layers of clothing, I lose some of the cues that something is missing. Keeping it warm is a side effect that ensures I have a working phone when I need it. If I'm carrying a radio for communications and it uses Li-ion batteries, you can be assured that it will be kept warm as well.

Thursday, September 7, 2017

Fire and Stone

If you need to build a fire for warmth, cooking, or morale, then you should be looking at being in control of that fire. Fire rings made of steel are common at campgrounds and the old standard for a campfire was a circle of (dry*) stones, both of which keep the fire from spreading to grass and nearby weeds. (I've dealt with a few grass fires; they take some skill and a lot of time to kill, so they are best avoided. Look at the West Coast any summer to see what a grass or brush fire can turn into.) A steel ring also provides a handy stand for supporting a grill or rotisserie to make cooking easier.

In the last year or so I have seen a bunch of “ideas” for building fire pits, most of which use common cement blocks and/or landscape blocks. Since we humans have enjoyed sitting around a fire since before recorded history began, I can understand the desire to have a “safe” fire on your patio or in the backyard. If the electricity goes out, having a way to cook all of the food in your freezer before it spoils would be a good thing. The problem I see with the plans being shared on various social media is the use of concrete to contain the fire.

Standard concrete is a combination of cement and aggregate. The aggregate is sand and small stones, which provide the strength (in compression**) of the concrete. The cement is the glue that holds the aggregate together. Cement is made by grinding limestone into small pieces and then heating them to about 2700° F long enough to drive off all of the water and carbon. When mixed with water, the cement turns back into limestone (admittedly, that's an oversimplification, but it's close to what actually happens), binding the aggregate together tightly.

As you can imagine, the transformation of limestone to cement is reversible if you add heat and evaporate the water. What happens when you build a fireplace or fire-pit out of concrete and then build a fire in it? Depending on the heat of the fire, it will start to degrade or fall apart.
  • Up to 212°F, concrete is safe and isn't damaged, so boiling your water isn't a problem.
  • At about 570°F, the cement starts to lose water and shrink, but the aggregate is going to be expanding and causing stress inside the concrete. The concrete will take on a pink color when it cools.
  • Between 850° and 1050°F, the hardened cement starts to decompose back to dry cement, leaving the aggregate unsupported.
  • Around 900°F, the cement starts to rapidly absorb CO2, which creates carbonic acid when mixed with water. This causes widening of the pores in the surface of the concrete, which exposes more surface area to damage from chemicals in the smoke.
  • When the temps get up to 1,100°F, any quartz in the aggregate explosively boils off into vapor. This will create small voids within the concrete, turning it into heavy styrofoam. The concrete will turn a light gray in color.
For reference: wood, kerosene, coal, and other organic materials have flame temps between 3,000-4,000°F. That's more than enough to destroy concrete in a matter of hours, assuming the concrete doesn't explode first.

The general rule of thumb after a house fire is to treat any concrete that is pink or gray as damaged and unsafe. If the goal is to contain your fire you don't want to use damaged material, so I suggest avoiding the use of concrete.

If you want to make your own fire pit for cooking, signaling, morale, or warmth, use firebrick (silica sand that is fused into blocks) or ceramic (fired clay) materials to be safe. Yes, they're more expensive, but they'll last a lot longer and are a lot less likely to hurt people by exploding. Better yet, use a ring of steel like a section of a barrel or a truck tire rim - I've seen tractor tire rims used to make really large fire-rings that a dozen people can sit around in comfort, but that seems to be a bit wasteful to me. To each his own, I guess.


*I specify dry stones because if you use stones pulled out of a lake or stream, they will likely have water trapped inside them. As the stones heat up from the fire, the water inside will boil off to steam, expanding 1500 times the original volume and turning the stone into a bomb.

** Concrete is very good at holding up heavy weights (compression), but poor at being pulled apart (tension) or twisted (torsion). Steel has the opposite strengths, which is why we use steel bars or rods to reinforce concrete structures.

Thursday, July 13, 2017

Salt of the Earth?

On our Facebook page, someone asked Erin “What other inexpensive,yet hard to produce in the field, multi-purpose consumables should agood prepper stack deep in their pantry?” My reply was “Salt, unless you are near an ocean”. OkieRhio wrote a post about salt back in 2015, so I will try to avoid repeating what she said.

Salt is one of the most versatile commodities on the planet. It is used to preserve food, is a raw material for producing a bunch of other chemicals, and is essential for staying alive. Humans have harvested salt from the oceans for at least 6,000 years according to archaeological evidence, and it has been used as currency is several time periods (the “sal” in “salary” is Latin for salt - some Roman legions were paid in salt). Since there are about 35 grams of salt (1.2 ounces) in every liter (quart) of sea water, harvesting salt is merely a matter of collecting sea water and letting the sun and wind evaporate off the water. If you see gray or black pieces of salt, it is due to sediment (mud) formed during the evaporation of sea water. The dark pieces can be sorted out and discarded if you choose.

For Food
Common table salt is Sodium Chloride (NaCl) with traces of other chemicals that vary by location and method of processing. These trace elements may be called “pollutants” or “additives” by some writers, see my article on FUD for an explanation of that marketing method. The benefits or dangers of any additive is a specialized branch of medical research (toxicology) that I'm not going to dig into today. Just beware of paying too much for a cleverly marketed "miracle" salt that is 95-99% NaCl.

If you're buying salt for table use, get a brand that has Iodine (I) added to provide a source of that necessary mineral. Iodine helps regulate your thyroid gland and its hormone production, and is lacking in most common in-land foods. Seafood is a good source of Iodine, but not all of us live near the oceans (and seawater alone doesn't contain enough Iodine to meet your body's needs anyway). Consuming the eyeballs of wild game is about the only reliable source of Iodine that I'm aware of for land-locked survivors. I pick up an extra one-pound container of Iodized salt at the grocery store when I need to restock the pantry, as it's fairly cheap and has no shelf-life. Bulk forms of salt can be ground as fine as you want for table use, and are a lot cheaper.

If you're buying salt for livestock (they need it to function just like you), the ubiquitous saltblocks are still out there. I suggest buying them locally at a feed and grain store since the shipping cost on them is horrible. White blocks are pure salt; the colored ones are mineral blocks that provide a source of trace minerals (amounts and types will vary). Pure salt is the same as what you'd get in the round cardboard containers at the grocery store, so it is safe to use in your food. If 50 pounds of salt is too much, check the local pet supply stores for the roundblocks designed for rabbits. A 3 ounce “wheel” of salt is easy to store and use, plus it won't spill. Regardless of which size you get, it's easy to store bulk salt when it is in a solid block, and shaving or grinding an edge will get you what you need to season your food.

For Chemicals
For chemical production, you can look for suppliers that can provide any quantity you need in a variety of forms and packages; 50 pound bags are common and cost less than $10.00. Most bulk salt is sold as a de-icer and may have additives, so read the Safety Data Sheet (SDS) and look for pure salt. De-icing salt that is advertised to work below 5° F is not pure salt.

Another source of bulk salt is your local grocery or hardware store (in most of the US). Look for softener salt, used to regenerate the resin beds of home water softeners. Solar salt crystals are usually the cheapest and are more pure than the varieties with chemical additives designed to protect a water softener. Rock salt is another name for solar salt; it depends on your regional dialect. A 40 pound bag of crystal or flake salt normally costs $5.00 or less here in the Midwest, but be warned, the pelletized forms usually have unwanted additives.

Do not consume anything that has “System saver” or “Resin Clean” on the label. The manufacturers have proprietary blends of additives that are trade secrets, so you have no idea of what they've added to the salt. In fact, I do not recommend using salt with additives for any food use, and any chemical uses would have to take the “adulterants” into consideration. At best you may end up with sludge in the bottom of your equipment, but at worst they may create explosive gasses. Do your research for potentially dangerous reactions.

Storage
Storing salt is about as simple as it gets. Since most of the salt sold in the US is mined from underground deposits, it should be obvious that it has an indefinite shelf-life. Those deposits were laid down a couple of thousand years ago (at least), so it's safe to let it sit on your shelf for a few more years. Keep it dry, since any water added to salt makes for a corrosive solution, but heat and cold - at least at the levels found in normal storage conditions - won't have any effect on it. You'd have to get it up to about 1500° F to melt it, so short of a house fire it will handle any heat you can give it.


Salt is cheap, easy to store, and is something that everyone physically needs to survive. Why wouldn't you have a stockpile set aside if you have the room for it?

Thursday, May 19, 2016

Chemistry for Preppers: Chemical Dangers and Lab Safety

Working with refined chemicals, or the act of refining them, can expose you to some pretty nasty substances. Staying alive and uninjured is a priority in a crisis, so you should have a basic understanding of lab safety procedures.


There are two main types of exposure to hazardous substances:

Acute Exposure
Rapid or instant exposure to dangerous amounts of a substance. Having concentrated acid splash on your arm is a good example of acute exposure, and I have a nice scar to prove it. Proper protective gear will reduce or eliminate the exposure.

Chronic Exposure
Exposure at a lower dosage over a longer period of time. Your body can get rid of a lot of crap, but some things build up in your tissues and create problems down the road. Lead poisoning from eating paint chips is a good example of chronic exposure. Over the years, the lead builds up and takes its toll on the nervous system.


There are four primary routes of entry or methods of exposure that can be controlled:

Skin
  • The largest organ of your body, your skin acts as a first line of defense against exposure to pretty much everything, but it will allow many chemicals to pass through into the tissues below. 
  • Cuts, scrapes, and other wounds must be covered when working around even fairly benign chemicals. Getting salt or vinegar in a cut hurts because it is doing damage to the tissue under the skin. 
  • Be careful when working with glass labware, as it tends to break at the worst time. Glass resists most chemicals and is easy to clean, so a lot of labware is fragile and prone to making very sharp edges when it breaks. 
  • Since your hands are generally going to be the closest part of your body to the chemicals, wear appropriate gloves. Latex gloves will work for most household chemicals (nitrile is better and not much more expensive), but you'll need to find something better if you're going to be playing with petroleum products. A good overview of how to select your gloves can be found here
  • Wearing a vinyl apron and shoe covers keeps the nasty off of your clothes, and prevents it from being carried to another location. 
  • Sanitation is vital. Wash your hands well after working with anything dangerous. Change clothes as soon as possible, and wash everything that came in contact with chemicals. Keep the work space clean to prevent accidental mixing of reactive chemicals.
Lungs
  • You have to breathe, even when working in a lab. Keeping the dust and aerosols out of your lungs requires anything from a dust mask to full-face respirator. I covered respirators pretty thoroughly in this article
  • Working with really nasty stuff should be done under a “hood”, which is a box with only one open side and a good fan pulling air out of it. The constant flow of air in through the opening (which you work through) pulls any dust, droplets, or fumes away from you. Make sure the exhaust is vented into a safe space, away from other people.
Eyes
  • Depending on the nature of the chemicals you're playing with, glasses with side shields are a minimum for safety; goggles are uncomfortable but safer, and face-shields work well to stop splatters from finding their way to your eyes. 
  • Your damp, open eyeballs have a direct connection to your brain via the optic nerve. They're also fairly delicate and easily damaged, causing horrible pain if injured. Being blind in normal society sucks -- now imagine being blind in an emergency.
Mouth
  • If you're around chemicals that are hazardous in any way, it is wise to avoid eating, drinking, smoking, or chewing gum. Ingesting things is what your mouth is for, but it also makes for a quick route to your blood stream. This is why nitroglycerin pills are placed under the tongue of someone having a heart attack: it gets into the bloodstream almost immediately. 
  • A bandanna around your face or a dust mask will keep unwanted things out of your mouth, while giving some protection to your lungs as well.

Always Be Safe
I realize that this may be overly simplified, but I want you to actually think about the basics of your own safety. 
  1. Do some research on the chemicals you're going to be playing with, especially if they are of the “highly energetic” type. 
  2. Know what you can and can't mix together to avoid extremely rapid reactions that can hurt or kill you. 
  3. Ask questions if you can't find the answers on your own. There are a lot of resources available, most of them online. 

Thursday, April 21, 2016

Chemistry for Preppers: Distillation

One of the most common and useful chemical processes for preppers is distillation. Everyone has seen the water purification systems that boil the source water, cool the steam, and produce pure (distilled) water. The simple “solar still” method of collecting water uses the same principle at a much lower production rate and without an extra energy source.

How It Works
Distillation is a method of separating mixed chemicals based upon their boiling points (BP). If the difference in boiling points is more than roughly 25° C a simple still will work, but if the difference is less than 25° C you'll need to look into fractional distillation. The boiling points for various chemicals can be found in most chemistry reference books as well as the ubiquitous Material Safety Data Sheets (MSDS or SDS) that producers are required to make available for every product they handle.

For most survival situations, specific chemical composition is not going to be known and resources are going to be scarce, so a simple still will be the best choice. For production of fuel or other trade goods, a fractional still will make a more pure product but requires more time and materials. Running your product through a still more than once will usually give a more pure product; before the introduction of reverse osmosis we used “triple distilled” water as pure water for general chemistry lab work.

There are mixtures that cannot be separated by use of a still. If the boiling points are too close to each other, or if they form an azeotrope (a mixture where the BP of the mixture is higher or lower than either of the constituents), you will not be able to get complete separation from a still. Be careful if dealing with petrochemicals or explosive compounds as they may decompose (violently) when heated, long before they reach boiling point.

If you are distilling anything for consumption, use only food-safe material in the construction of your still. Galvanized metal and lead-based solder will impart toxic levels of metals into your product. Stick with glass, copper, or stainless steel if at all possible.

Definitions

Bottoms: The material left over after you have distilled out what you want.

Condenser: A pipe or passage that acts as a heat exchanger to cool the vapors back into liquid phase. The common moonshiner's term for a condenser is “worm”, since they use coiled copper tubing that looks like a snake or worm. For cooling fuel-grade alcohol an old car radiator would work, but the metals present would make the distillate unsafe to drink. Running cold water over the exchanger will make it more efficient, but simply moving air past it will also work.

Distillate: The product that comes out of the still.

Fractioning Column: A vertical column rising above the pot, fitted with trays or packing. (Explanation below) Fractioning columns will often have more than one outlet, to allow the collection of parts of complex mixtures like crude oil.

Pot or Still-pot: The container that holds the raw or mixed beginning solution. It must be capable of being sealed to the condenser and withstand the heat need to boil the mixture.

Receiver: The container that catches your distillate.

Reflux: Recycling a portion of the distillate to pass it through the still again. Often used in continuous distillation processes instead of running batches through multiple times to increase the purity of the distillate.

Thump Tub: An intermediate cooling stage commonly found in moonshine stills. Vapor from the top of the pot is passed over a container of water on its way to the condenser. This allows for the removal of some of the chemicals that can impart bad flavors to drinking alcohol.

Simple Distillation
http://tinyurl.com/jprdu47
Purifying water or alcohol can be accomplished in a simple still. Here is a picture of a simple copper batch still, where the pot and condenser coil are easy to pick out. The pot is filled and placed on a heat source and the “worm” is placed in a tub of cold water (if available). There are electric and stove-top versions of this simple still on sale for purifying water, but as you can see they aren't that hard to cobble together. This one is almost a hundred years old and could probably still be used today.


Fractional Distillation
http://tinyurl.com/zu284p6
Here's a good diagram of a fractional distillation tower for separating crude oil into useful parts.

It is common practice to use the waste gas coming off the top to fuel the furnace that heats the incoming crude oil. Waste not, want not.

The trays are designed to allow the heated vapors to rise through the column, but the “caps” on the holes in the trays cause some of them to condense at the temperature present at that height. The condensed liquid helps maintain the temperature at that height and is drawn off in a continuous stream.

Fractional distillation would be useful for long-term situations as a way to recycle used motor oil or production of fuel from local supplies of crude oil (which is more common that you may believe, I've seen oil wells in Iowa and Nebraska). By using a taller tower with more trays, it would be possible to sort out the constituent parts of the gasses produced by roasting coal or wood to produce fuels and solvents such as methanol (wood alcohol) and acetone.

There is also a lot of research going on right now into the recycling of waste tires and various biological wastes into crude oil through pyrolysis. If we ever get to the Mad Max stage of survival, knowing how to produce lubricating oils and fuel could be a valuable skill.

Other Uses
This has been an extremely simple overview of distillation. There are so many uses for this method of separating compounds that it is difficult to keep things prepper-related. Distilling out essential oils for medicinal uses, concentrating the flavors of certain spices to make them easier to transport, making useful chemicals, and so many more all use the same basic mechanisms -- with special attention being paid to the details like temperature and pressures. If you need more specific information, please comment on our Facebook page and I will try to help as best I can.

Thursday, March 24, 2016

Chemistry for Preppers: Soil pH

Spring is finally here (at least according to the calendar), the time of year when some of us start to pull out the plans we made over the winter and start working on our gardens. Seeds should have been ordered months ago -- although there are still plenty of high-priced packets in the stores -- so it's now time to start playing in the dirt.

Since I don't live where you do, I can't tell you what or how you should grow in your garden, but there are some basics that apply. Soil pH is one of those basics and is chemistry-related, so I'm going to blend a gardening/farming post into a chemistry post. I'll even try to keep the math to a minimum.

What Is pH?
It is a number that represents whether something is acidic, neutral, or basic. Technically, that number is the negative logarithm (base 10) of the concentration of H+ ions present in a solution measured in moles per liter.

To break that down, if you measured how many moles (explained a few weeks ago) of H+ ions were present in a liter of a solution, you'd get a number. That number is commonly expressed in “scientific form” as a small number times ten raised to some power, like 1.8 x 10^6 which is a short way to write 1,800,000. Logarithms were used before the invention of calculators and computers to make working with large numbers easier and quicker. Multiplying two numbers is the same as adding their logarithms; dividing two numbers is the same as subtracting their logarithms.

You can find log tables in old math books, but the concept is similar to the “scientific form” of expression: every number can be expressed as a power of ten (1 = 10^0, 10 = 10^1, 100 = 10^2, 1000 = 10^3 and so on). For numbers between 1 and 10, the exponent (the number that ten is being raised to) is going to be a fraction of one. Lets go back to that example of 1,800,000 and find the logarithm for it.
1,800,000 = 1.8 x 10^6
Since there is a multiplication sign in there, we can find the logarithms for the two parts and add them together. The log of 10^6 is simply 6, and by looking on a table I see that the log of 1.8 is 0.255. Add the two together and we get 6.255 as the logarithm.

When dealing with pH, the number of moles of H+ ions per liter of solution is going to be a lot smaller -- generally between 1 and 10 mol/l. The pH scale is the inverse log of that concentration, so we need to flip the fraction upside down. Say we have pure water, which will have some free H+ and OH- ions floating around in it. They balance each other out at about 1.38mol/l H+. The log of 1.38 = 0.14, which is about 1/7, so the inverse log is 7/1, which is how we get the “neutral” pH of 7.0 for pure water.

Acids will have a lot more H+ ions present, so the inverse log will be smaller; alkalies will have fewer H+ ions and have a larger inverse log.

How pH Affects Plants
As plants grow, they take nutrients out of the soil. This can change the pH of the soil enough to hinder the growth of future plants. Fertilizer, especially manures that are too “green”*, can swing the soil pH enough to slow or stop plant growth. The dreaded “acid rain” that we were all warned about in the 70s and 80s can affect topsoil over time, as can ashes from forest fires carried on the wind. Trying to plant a garden in a new spot, or on soil that has been moved, can be a challenge if you don't make sure the soil is ready for planting. All of these, and more, are reasons to check the pH of your soil.

Plants generally prefer a slightly acidic soil. According to the Old Farmer's Almanac and various other sources, a pH of 6.0 to 7.0 works best for most crops. If you need to fine-tune soil for a specific crop, the optimum pH range for several common plants are found on this site, but I'll list a few of the common ones.
  • Corn: pH  6.0-7.0
  • Beans: pH   6.0-7.0
  • Potatoes: pH   5.8-6.5
  • Tomatoes: pH   5.5-7.0
  • Onions: pH   6.2-6.8
  • Garlic: pH   5.0-6.0
  • Carrots: pH   5.0-6.0
  • Cucumbers: pH   5.0-6.0
  • Cabbage: pH   5.6-6.6
How Do I Check Soil pH?
There are several types of electronic soil testers on the market, and they all work about the same. If you have access to one, they make testing a lot quicker. If you don't have one, then we need to find another way to check pH.
How Do I Adjust Soil pH?
Common lime (crushed gravel or limestone) is used to raise the pH of soil.

Powdered sulfur was once the preferred method of lowering the pH of soil, but with various government entities trying to keep all of the dangerous things away from us, sulfur is getting harder to find. (I work with agricultural chemicals, and our insurance companies are really getting anxious for us to stop selling it, due to the fire hazard and liability if someone uses it to make a bomb). Aluminum sulfate seems to be the most common, current choice for lowering the pH; organic matter will break down and cause a lowering of pH as the acid-forming bacteria digest it, but it takes a long time.

Nothing is going to change the pH of your soil overnight. Adding lime or sulfur should be done at least two or three weeks before planting, since it is going to take some time for the microbes in the soil and the chemical reactions within the components of the soil to make use of it, so till it in and wait. Aluminum sulfate does work quicker, taking days instead of weeks, but the effects may not last (the pH may trend upwards) as the growing season progresses.


I hope I didn't make too many eyes glaze over with the explanation of pH and logarithms. Logarithms and how to use them may come in handy if you find your self in a situation where you have reference books, but the batteries on your phone/calculator/computer have died. We sent men to the moon using slide-rules, which are physical logarithm tables for doing multiplication, division, and some geometry functions. Old tech is still good tech to know.


* Manure has to be aged for at least a year to break down properly and provide nutrients. More on that in a separate post.

The Fine Print


This work is licensed under a Creative Commons Attribution- Noncommercial- No Derivative Works 3.0 License.

Creative Commons License


Erin Palette is a participant in the Amazon Services LLC Associates Program, an affiliate advertising program designed to provide a means for sites to earn advertising fees by advertising and linking to amazon.com.