One of the ways humans manipulate their environment is through the use of tools. However, not everyone can afford all the tools they might need, and so being able to work around that limitation can be extremely important.
Back in 2012, the YouTube channel The King of Random posted a video on how to make your own spot welder, mostly out of parts scavenged from a microwave oven.
As I didn’t have a spot welder and could pick up a used microwave for under ten dollars, I decided to give it a try. The most time consuming part of the project was probably disassembling the microwave, mostly because I wanted more than just the microwave oven transformer (or MOT) when I stripped the microwave for parts. Once I had the parts I needed, it was time to rewire the MOT, which went pretty much as explained in this video.
Cutting the weld on the MOT, drifting out the transformer coils, replacing the primary coil, adding the heavy gauge wire, then epoxying the MOT back together were all accomplished with little trouble. However, since I don’t have a brother with a warehouse full of scrap, I went to a big box store and bought the 2 gauge wire along with some other components.
The main purpose in modifying the secondary coil on a MOT is
to convert the transformer from high voltage/low amperage to low voltage/high amperage.
This allows for high current which can be focused on a small point, enabling it
to fuse metal together.
The rest of the project was fairly basic wiring and
carpentry. I used the power cord from the microwave along with the power cord
standoff to supply power to the welder. I already had a light switch and cover
in stock, so I used those.
Rear view of the author's spot welder, showing power cord and switch.
As suggested in the video, I used one of the door sensors and some wire scavenged
from the microwave as an activation switch on the moving arm of the spot
welder. This adds a good safety measure as the welder won’t send power to the
tips until I close that contact.
Side view of the author's spot welder. Note the switch on the top arm.
Unfortunately, the heavy wire I purchased isn’t as flexible
as that used in the video, so I can’t separate the top arm to spot weld larger
or more awkwardly shaped pieces. Since I wouldn’t be removing the arm, one
change I made to the design was adding wooden spacers between the sides of the
main housing and the arm so that it’s less likely to twist or deflect when I close
the jaws of the spot welder.
The business end of the author's spot welder.
I could have spent more time and effort giving the spot
welder a nicer finish or giving it a snazzy paint job like in the video, but I’m
more interested in function than form, and my home-made spot welder works just
fine even if it’s not as pretty as some others.
All told, I spent just over $20 on parts and supplies for
this project. It could have cost more, but I already had most of the items in inventory
or the scrap bin.
In Memorium: Grant Thompson, The King of Random, died on July 29,
2019. May he rest in peace.
Steel isn't hard to find, generally not expensive, and you can do lots of things with it. But what kind do you use, and where do you find it, once you’ve decided on a project for it?
Mild Steel
For a lot of things (basic ironwork, braces, learning the art of forging) you can use mild steel. This is a basic steel, composed of iron and up to 0.2% carbon. It’s used in rebar (the bar with a textured surface used to reinforce concrete), angle iron, steel straps of many sizes, and lots of other things that require the strength of steel but don't need to be flexible or hold a cutting edge. You can get it at a salvage yard, or if you need a particular size (width, thickness, shape) you can call steel companies and see if they have it.
If you want to try to grind or forge cutting tools, keep it simple in the beginning. That means using a steel with at least 0.6% carbon, but not a highly-alloyed type that requires intricate heat treatment. There are two I recommend for this task: 5160 and O1.
Both of these types of steel are oil-hardening steels [which means that the alloy is heated and then quenched in oil], and people have used vegetable oil, commercial heat-treating oil (there are different types for different steels), and 5-weight motor oil. Both types need to be quenched to harden from a critical temperature of 1500º F (which can be reached in a charcoal or coal fire, or in a small fire-brick enclosure using a couple of torches), and can be tempered, depending on intended use, at anywhere from 375-500º F. Neither requires the very high and ‘must be just right’ temperatures of stainless or the highly alloyed steels, and they also temper at lower temperatures, In fact, you can do the tempering in a kitchen oven*.
5160 Steel
5160 steel can be found all over, as it’s used to make leaf and coil springs for car and truck suspensions. It can be found in many sizes as well; hit a salvage yard and you can get it for scrap price, which was around $0.20/lb the last time I bought some (prices will vary). The carbon content for this steel is 0.6% and you can use it for chisels, knives, swords, and springs. It’s really good for bigger knives that will be used for heavy cutting or chopping, but it will work well for a small knife as well.
O1 Steel
O1 is a high-carbon tool steel. It’s best to order/purchase this from an industrial supply so you know exactly what you’re getting; it’s also sold as “oil-hardening drill rod.” It’s not as good for big, heavy cutting blades, but is truly excellent for other knives and chisels.
Generic Medium-Carbon Steel
That’s steel for large projects addressed, but what about for small? Perhaps you need something with which to make a small flat or v-shaped spring intended for light duty?
Take a look around the hardware store, or someplace construction is being done. See that thin steel strap they wrap bundles of brick and such with? That just might work, as might a worn-out hacksaw blade. I’ve known of people making a new magazine spring for a bolt-action rifle using these.
One more source for small medium-carbon stock, good for springs and flint strikers and the like: overhead garage door springs. It's really handy, and you can often get a piece of a broken one for free (or at least cheap) from companies that install and maintain the doors.
*Make sure you clean all the quench oil off first; it smells bad if you don’t.
Steel, as you find it, can be anything from annealed (as soft as it'll get), to already heat-treated (springs, some tools). Some already heat-treated things can be ground to shape and use, as long as you don't overheat it. But if you have annealed stock, or forge a piece to shape, you'll have to heat-treat it if you want it to do the job at its best.
I'm going to stick with what I know, which is the basic heat-treatment of carbon steels, with a small bit on the more highly-alloyed stuff. Heat-treatment of steel to harden it is a two-step process:
Hardening: bring it up to critical temperature, then quench it (cooling it fast enough that it freezes the structure of the piece in a highly-stressed state).
Tempering: heat it up again, but to a much lower temperature. It's a balancing act, getting it hot enough remove enough stress to keep it from being brittle, but low enough that sufficient hardness remains for the desired purpose.
Hardening
With carbon steels, the critical temperature is generally ~1500° Fahrenheit. That's an important number, because if you get much below it, the steel won't be in a condition to harden completely; get much above it, and the heat causes the grain structure to enlarge, which weakens it.
How do you tell when you're at that point?
Experience via Trial and Error
Learn to see exactly what shade of red is that temperature range. The usual description is 'cherry red', but seeing people see colors differently, the best way I can describe it is 'watching the shadow'. I described it in my Introduction to Blacksmithing post and I'll repeat it here:
Take a piece of steel of small size - no more than 1/4" thick, better about 1/8" - and a propane torch. Start heating the piece with the flame directed at a point about 1/2" back from the end, shifting it back & forth just a bit so it heats a wider area, and watch. As it hits about 1000 F you'll start to see a visible heat glow, and as the temperature rises it'll get brighter. You'll notice - at the risk of sounding poetic - a shadow inside the steel, inside the red; as the heat rises the shadow will get fainter and fainter, and right at critical temperature the shadow disappears. That is the point at which you'd quench it to harden. May take some practice to see it, but it works.
You will screw up a few times doing it this way, but it's the original method and requires no special tools.
Use a Magnet
The critical temp for these steels is also their Curie point: they go non-magnetic. Get one of those magnets on a extendable shaft, and as the piece gets toward that color you can start touching the magnet to it; when the magnet no longer sticks, you're there.
Use a Tempilstik
A Tempilstik is basically a temperature-sensitive crayon -- draw a line on the piece, and as it hits that temperature, the mark will melt. They're quite accurate, and can be bought for temperatures useful for lots of other things (annealing brass, tempering, etc.)
Nowadays you can pick up a thermometer that lets you read temperatures on something a few feet away; I'm told that, used carefully, they work pretty well.
Quenching
As noted in my previous article, carbon steels come in types marked 'oil-hardening' and 'water-hardening'. Generally speaking, water-hardening steels need a faster quench than oil-hardening.
Usually.
The big "however" is because it depends on what you've made with it. Something with a pretty thick cross-section (like a hammer head) has a lot of heat to lose for it to harden deeply, and may require water, but something like a knife or other cutting tool is usually much thinner than that. If you cool steel too slowly, it won't fully harden; cool it too fast, and it may well crack. With blades I've always had better results using oil; when reshaping a hammer head, I used water.
Oil
Quenching oil should be warm: 100°F or a bit more. Warm oil flows better, which means a more even quench and less thermal shock. That 100°F may not sound like much when the steel is at 1500°, but it does make a difference.
Almost any oil, from light motor oil to corn oil to olive oil to specifically-made quenching oil, has been used successfully. The advantage to a quenching oil is it's a bit less likely to have the smoke flash-ignite, and if it does it goes out much sooner. A good quenching oil can also be reused many times with no problem.
Water
If you use water, I have two suggestions to make: Heat the water and add salt. Add a lot of salt. Salt water has a higher boiling point, which means somewhat fewer bubbles, and therefore a more even quench.
Lowering It
How you lower a blade into quench depends on the style of blade and how you want it hardened. You can start fights over whether to lower a blade into the oil point-first (vertically) or edge-first (horizontally). I've generally had better results with edge-first, but that's with single-edge knives; with a double-edge, like a dagger, you need the whole piece up to critical temp, and it all fully hardened. With an edge quench you can do a thing called differential hardening: you get half of the blade from the edge back up to critical temperature, the other half is a bit lower, and you quench. That gives you a fully-hardened half backed-up by a back that's not fully hardened; that back is going to be softer, but also tougher and springier, which reinforces the cutting area. This isn't a big deal on small knives, but on a big, heavy, chopping-capable blade it can be a very good thing.
Note that to put a knife in point-first, you've got to have something like a piece of pipe deep enough for the whole blade to be lowered into; for edge-first, you need a trough long enough.
These suggestions are for blades. Let's say you want to make a chisel or centerpunch. With either of these, you only want the edge/point and maybe 1/2" back to be fully hardened; the softer shaft means much less chance of pieces cracking and spalling off when you hit it when a hammer. Bring up to heat so that 1/2" or so is up to full heat, and quench vertically.
There are lots of other things that would need heat-treating (springs for instance), but I'll stop here.
Tempering
After the piece has cooled to ambient temperature, it needs a tempering heat*, and that heat will depend on what kind of steel you used, and what it'll be used for. Take that chisel, for instance; it has to be hard enough to actually cut into metal without dulling quickly, so it has to be hard.
Clean it off thoroughly and shine it up (sanding with fine paper will do) for at least an inch above the hardened area.
Keep some oil or water handing to cool it with.
Grab it by the back end with pliers or tongs, put the torch on low, and start heating it about 2" above the hardened end. Here you need light to watch the colors run, but not direct sunlight; that's too bright.
Colors?
Yep. This is how everything was tempered for a long, long time. As the heat nears about 350°F, a bright, shiny piece of steel will start showing a touch of yellow. As it heats the yellow will deepen (temperatures approximately 400-425°F or so), then start darkening into a bronze at around 450°F. As the heat rises, that will finally darken into a purple around 500°F, and then blue. Beyond that, it'll go to a grey, which means you've removed pretty much all the hardening.
The color you're going for depends on the steel and use. On a knife where edge-holding is a critical factor, or a wood-carving chisel, you might only take to a medium/dark yellow (which is where that chisel needs to be). Most knives should be more of a bronze. A prick punch, which is only struck lightly to mark the spot for a center punch to deepen, should be a light to medium yellow. Something that needs a lot of spring, like a sword, ought to be light to medium-purple (again, all this depends on the steel being used). A spring is probably a dark purple/light to medium-blue.
In the example of a chisel, as the body heats, watch for the colors to start. You'll be able to watch them moving down along the polished area. As the yellow approaches the hardened area, move the torch closer or further to keep the colors moving, but not too fast. Get it right, and you should be able to get that desired shade of yellow from the edge back a ways. As it reaches the edge, put it in the coolant to stop the tempering. For knives and springs, the easiest way is to use the oven**.
Example: Knife
Say I'm making a knife from O1 tool steel, it's got a 5" blade an inch wide. I know from past experience that about 450°F will be what I want for the edge.
After hardening, wash all the oil off so it doesn't smell up the place, and use a grinder, sander or just sandpaper to shine it.
To prepare the oven, either use a baking stone or a piece of clean steel plate (thin stuff will do) if it's an electric oven, and then bend some wire to make a rack that'll hold it horizontally with the edge up or down.
Place it in, turn the oven to the desired temperature, and let it heat. You are certain the oven settings are calibrated properly, don't you? If you're not sure, set the temperature 25 degrees below the desired temp.
Leave the blade in for an hour (you can get away with less with a small blade; with a bigger, thicker one give it the full time), then take it out and let it cool to room temp, and check the color. If it's good, put it back in for a second heat, give it the hour, then turn the oven off and let it cool down. If it's not quite to the color you want, turn the oven up 25° for the next heat.
If it's darker than you planned on, there's no going back. If it's softer (relatively speaking) than you wanted, the only way to get that hardness back is to harden it again... but not immediately, because you need to test it for proper hardness before you head back to the fire or start polishing.
Testing Hardness
There are two ways to do this on a knife.
First Method
Brace it solidly on something.
Take a sharp, new file, and work it on the edge with medium pressure.
If it just skates off without marking the steel, it's too hard for anything other than a scalpel.
If it ALMOST bites, you should be good (yes , I know that's subjective) for a general-purpose knife.
For something big like a brush knife, you might want to be able to sharpen it with a file, so you'd have to temper that down a bit more.
Second Method
Sharpen it to a good edge, then go to the vise.
Put a piece of brass rod in the vise.
With good light, lay the edge bevel flat on the brass, lift the back of the blade a bit so the edge itself is on it, then press and watch that edge.
If it chips, it's too hard.
If it flexes, and returns to true when you release pressure, should be perfect.
If it bends, may well be too soft (depending on intended use).
You have to watch CLOSELY here, as it's only a very slight deflection from true you're looking for.
Too hard? Increase the temperature by 25°F and give it another tempering heat. If it's too soft after some cutting, you'll have to start over with hardening.
Example: Springs
These can be tricky. You won't generally have to mess with coil springs made from music wire; they're hardened to start with, and the work of coiling will actually make them even more so. Flat springs, however, are where it gets interesting.
With a flat or V-spring, you need to finish the shaping, and clean and polish it well.
Harden it (it's easier to clean and polish before hardening).
Clean the surface again, as you'll have to see colors.
If the oven won't get quite hot enough, the best way I know is to get a piece of steel plate -- clean, so it won't put out any smoke or fumes -- and put it over a heat source like a forge fire, torch, range burner.
Put the spring on it and start heating as evenly as possible, turning it regularly, and watch the spring closely.
With most steels suitable for this, watch for a light- to medium-blue; have that oil handy to cool it down soon as it gets there.
Then test it carefully; if a bit too hard, you can take it to a slightly higher temp.
Example: Hammer Head
I've modified several hammers when I needed one face with a certain shape. Quenching was done in heated water (a BIG can of it was needed for a 4-pound slug of steel). To temper:
I cleaned it and polished both faces and a little ways back nice & bright.
Took a piece of steel bar that would fit in the handle hole, got it to bright red, stuck it in a vise and set the hammer onto it. (This takes a while, but the heat soaks in and moves out.)
You may have to re-heat the bar a couple of times, depending on the hammer size, but you can watch for the color to move to the faces, and when they're right quench it to stop the process.
I actually did that twice, just to make sure it was even all the way through. that gave a nice, hard face with a progressively softer body to help absorb shock.
That's the basic of it. This can get a lot more involved, but people were turning out every kind of cutting tool and spring known for centuries using these methods.
*A lot of knifemakers will do two tempering heats, letting it cool completely between. I've known a couple of people who do three, depending on the steel. **Some ovens can't get high enough to properly temper some springs. You're talking 500°F or more.
There are all kinds of stell for all kinds of purposes. Which can you use without a fairly fancy setup, or sending pieces out for heat-treatment?
Basic Steel 101
An alloy is a substance made of two or more elements mixed together. Steel, at base, is an alloy of iron with a tiny amount of carbon added. 0.1%, one tenth of one percent, changes iron to mild steel; the carbon content is low enough that, while it's stronger than iron, it can't be heat-treated to make it harder and/or tougher.
Increase that amount to about 0.4%, and you're into medium-carbon steel; it won't get very hard, but it will get harder than mild steel, and will be considerably tougher. Here you're getting into steel that can be used for some springs and other such pieces. Medium-carbon has a range between 0.4 to 0.7% -- the low end of that will harden enough to make some springs, and the high end is good for heavy chopping-type knives and tools.
At 0.8% and up, you're in high-carbon steel territory, generally running as high as 1.2% for the top end. Those tend to be specialized alloys that can require some fairly intricate heat-treatment to get the most out of them. Generally, the highest you'd want to work with would be ~1.0%
Common Steels and Their Uses
Rebar is a common use for mild steel, as well as just about anyplace the strength of steel is needed, but it doesn't have to be flexible*. The usual alloy for rebar and a lot of other mild steels is 1020; the alloying element is only carbon, the '20' meaning the amount (0.2%).
Medium-carbon steel is easily available as well. For instance, leaf and coil springs from car and truck suspension are generally an alloy called 5160. It contains the following:
Carbon 0.56 to 0.64
Manganese 0.75 to 1.00
Silicon 0.15 to 0.35
Chromium 0.70 to 0.90
The '60' means 0.6% carbon
Why all that? Adding those elements to the alloy along with carbon does two things: makes this steel very tough and good for springs, and one more very important thing in heat-treatment:
Generally speaking, the lower the carbon content, the faster the quench needs to be for the steel to fully harden. Stuff 0.5% or below has to be quenched in water or salt water, or it won't cool fast enough to make the changes in structure that make it hard (below 0.4%, it won't harden at all; at least not enough to tell). As the carbon content rises, however, the faster the quench, the more likely it is that it might crack in the quench. But if it doesn't cool fast ENOUGH, it won't fully harden. So, over time, it was discovered that if you add small amounts of the right stuff, it changes the reaction of the steel to the quench; 5160, for example, can be quenched in oil -- a much slower quench -- and still fully harden. This means that, especially in thin pieces like a knife blade, the thermal shock of putting red-hot metal into much cooler liquid is much less likely to cause it to crack.
Some high-carbon steel still has a pretty simple composition: 1090 or 1095 is basically iron with .90-.95% carbon content and is often used for files, rasps, wood chisels and other cutting tools. There's also W1 and W2 (the difference being one contains vanadium, the other doesn't); the 'W' stands for 'water-hardening', though for knife uses it'd be better to use oil.
Then you get into more complex alloys. For instance, one of the favorite steels of knifemakers for many years is O1, which has the following breakdown:
Carbon 0.85-1%
Chromium 0.4-0.6%
Manganese 1%
Nickel 0.3%
Silicon 0.5%
Vanadium 0.3%
Since I can't remember the specifics of what each adds to the mix, the short version is they allow it to be oil-quenched (in this case the 'O' means 'oil-hardening', the '1' nominally 1.0% carbon), the carbon content and other elements also add to wear resistance (which aids edge-holding ability in a cutting tool). This stuff will make blades that cut beautifully and hold an edge wonderfully, but heat-treatment is something the average guy can do without pulling hair out in frustration.
For a list of many knife steels, and their alloys, take a look here.
Exotics
Then there's stuff like stainless and stain-resistant steels. It contains much more alloying elements, and heat-treatment gets very tricky**. Those greater amounts of some elements explains why so many stainless steels won't hold an edge very well: generally speaking, adding enough nickel and chromium to steel gets you stainless, but adding that much actually reduces the wear-resistance of the alloy. An example of this is 440 stainless steel: it won't rust unless you work at it, but won't hold an edge very well unless it has very good heat-treatment; and even then it still won't keep sharpness as well as a good carbon steel like O1. On the other hand, stain-resistant steels like D2 (for example) will rust if you don't take care of them, but they're much more resistant to it than a plain carbon steel, and with good heat-treatment can hold an edge quite well.
Get more into the subject and you'll find shock-resistant steel, an alloy designed to be able to absorb heavy shock or impact in use without cracking or breaking; high-speed steel, like drill bits, able to get hot enough to ruin the heat-treatment of standard steels while still staying hard and sharp; and lots of other alloys for different uses.
That's a basic look at steel. Next, I'll talk in more detail about the subject of heat-treatment.
Footnotes
*'Flexible' meaning 'it will flex under stress, and return to original shape when the stress is removed', like springs. Rebar doesn't have to do that.
**What's 'tricky' heat-treatment? Higher temperatures for both quench and tempering, preferably in a controlled-atmosphere environment for the hardening, and for some you need to take it up to temperature in steps. Lots of these steels are air-hardening, which means when it's ready to quench you pull it out of the furnace and set it on a rack in the open air; the alloy will harden from cooling that way. Some, however, after cooling to ambient temperature, require a sub-zero (way sub-zero) quench to fully harden. And keeping something like liquid nitrogen around isn't something you generally do.
by Firehand (Editor's note: Firehand is a blogger and a part-time blacksmith. He is a frequent contributor to this blog and his previous articles may be found here.) Have a machine screw/ bolt/ threaded fitting whose threads have gotten dinged-up? You can use a tap or die to clean up (the technical term is "chase") the damaged threads. In fact, being able to modify (or, if need be, make) a bolt, nut or threaded fitting can be a pretty handy skill to have.
Modifying a sling swivel stud for a rifle is good skill practice, and it makes something useful when finished.
Note: I'm no machinist, so this isn't expert advice. This is "stuff picked up while making knives, working on guns, and generally fixing or modifying crap and the experience directly related to that."*. It's possible an actual machinist might read something here, grab their hair and scream "NO!"
Well, I'm writing this, so deal with it.
Tools
Left: tap. Right: die.
Depending on what you're cutting, you'll need either a tap or a die, and a wrench to make use of them.
A tap is designed to cut threads into a hole (internal, or "female" threads). A die is designed to cut threads into a shaft or rod (external, or "male" threads).
Both are made of tool steel that can be hardened: the threads are cut into a blank, flutes (taps) or holes (dies) are machined in, and then the piece is heat-treated.
The sharp remainder of the threads are the cutters: you rotate the tool on/in the piece and they do the cutting. The flutes or holes serve the purpose of giving the chips cut out of the metal somewhere to go; otherwise they either clog up the works and get in the way, or cause the tool to jam (this is absolutely something to be avoided, as a jam can easily result in a broken tap or work piece, thus ruining the project).
Left: tap wrench. Right: die wrench.
There are different styles of tap and die wrenches; these are the ones I have.
Not shown, but something you'll definitely need: cutting oil. In some places it may be difficult to find the specialized stuff, but be reassured that a small bottle will work for a lot of cutting. If you can't find it, or don't have the cash, remember that it's same as a gun: any lube is better than none.
Cutting oil serves two purposes:
It lubricates the cutting teeth, making the job easier and helping them stay sharp longer.
In the case of threading a deep hole, or a long piece of rod, it helps carry heat away. This is rarely a real with done-by-hand jobs, but is something to remember.
The Project
I've been working on a AR-10 rifle. It's almost finished, but it needs a sling stud on the handguard. The handguard company makes one for the quick-detach sling swivels; however, the buttstock is an A2, which has a standard sling loop. so I wanted a standard swivel stud that I could hook a regular detachable sling loop onto.
So off to the boxes of parts and "I might need this sometime" stuff, and lo! An old set of Uncle Mike's swivels and studs was located, the stud for the front having machine-screw threads, and the threads are the same as the holes in the handguard: 10-32, which means "Size 10 screw body, cut with 32 threads per inch".
Yes, I started this before I thought "I should take pictures!"
So imagine the last 1/8" or so of the screw being unthreaded.
Two problems, though:
The threaded portion is way too long (easy to fix, though)
The threads don't run all the way down to the stud part(or head, or whatever), which would mean it wouldn't fit flush against the handguard. This is where "cutting the threads" comes in.
2) Fold some paper a few times to protect the stud from the vise jaws and clamp it in the vise.
3) Put a couple of drops of oil on the threads, then run the tap onto the screw. When it reaches the unthreaded area, start cutting.
Important point: one side of a die is designed to be started onto the piece, the opening is funnel-shaped to make it easy to start.
4) The usual method is to turn the tool 1/3 to 1/2 turn, then back off 1/4 turn; this helps move chips into the flutes to clear them from the cutting teeth.
5) Continue until the die bottoms out on the stud and can't turn further.
6) Spin it all the way back off.
7) You'll find that this leaves a short distance of the screw still unthreaded, or only partially threaded (how much depends upon the die). However, I need them to run all the way.
Remember that 'start from this side' important point? Now you turn the tap over in the wrench, clean any chips off the piece and out of the die, add a drop or two of oil, and start cutting again. The cutters on that side of the die are (depending on the die) for the final diameter or may have a slight flare, so you can use it to cut the threads into the last portion of the screw.
8) Stop when the tap bottoms out; do NOT try to force it further. Back it all the way off and inspect the workpiece. You should now have nice, clean threads all the way. Wipe or spray them clean (I used brake cleaner) to get rid of the cutting oil and any chips.
Cutting It to Length
First, figure out just how long it has to be. You can measure, but I use a counting method: Starting by running the screw into the hole until it touches the barrel, I then back it out, counting how many turns it takes to go from touching the barrel to out (seven, in this case). Then I do it again just to be sure.
My method to mark where to cut: I take a 10-32 nut and run it all the way down, then I back the stud out the proper number of turns. The inside edge of the nut marks the max length.
Do that twice, too.
Now you can use a hacksaw or whatever else to cut the screw, I'm using a jeweler's saw, which is basically a hacksaw that uses very fine blades. Pick the right one and it will cut steel.
Clamp the exposed end of the screw into a vise, and start the saw cutting right against the nut. You can back the nut off a further one-half or one turn if you want a bit of fiddle space, which is what I did. Cut slowly and don't put pressure on the saw blade(see 'fine' above, which translates to 'a big delicate'). Just let the weight of the saw do the pushing, and do use a drop or two of oil.
That'll give you a clean end.
Clamp the stud in the vise (remember the padding!) and use a fine file to square the end, and then use it at an angle to give a slight taper( chamfer, to be technical) at the very end.
Clean it all up and try it. If you need you can always file a bit more off the end.
You now have the stud you needed. Pick your hole, set it in place with a bit of threadlocker, and it's done.
I'd suggest flushing the cutting oil and chips off the die, then put on a little regular oil to protect from rust.
Bonus How-To!
You just might want a washer of some kind to fit between the stud and handguard (I did). If you've got some leather punches, that's easy: find something suitable (I used a piece of innertube) and start punching.
You say you don't have leather punches? Do you have some fired cartridge cases and a deburring tool?
Use the deburring tool (you could also sand or file) to get an edge on the case mouth.
Put the material on a wood block or something else suitable and rap it with a hammer or mallet.
Take the cut piece, center the smaller case on it, and rap.
Washer!
*I read somewhere the definition of 'experience' is "What you learned when you were expecting something else."
** I USED to have one, but it's disappeared so one had to be bought; about $7.
by Firehand (Editor's note: Firehand is a blogger and a part-time blacksmith. He is a frequent contributor to this blog and his previous articles may be found here.) Disclaimer
I cannot claim any credit for coming up with this. There have been many different grill/smoker/heater ideas over time, this being one of them. I first saw it mentioned in a post on the BCP Facebook page; someone had posted a picture. Then, not long ago, I saw one in my father's copy of Backwoodsman Magazine. Being a blacksmith, I just had to try this.
Simple Directions
Take two steel car/truck wheels.
Stack one on top of the other.
Cut a hole in the side for lighting/feeding the fire.
Here I used one 15" and one 16" wheel.
If you use two wheels of the same size, you'll have to weld or somehow clamp them together, as they'll not be stable otherwise. If welded together, the stove will be heavier and more difficult to move, too. With the sizes an inch apart, they'll stack nicely, and can be disassembled for moving.
After doing a bit of fiddling I decided to put the 16" on top. This is no less steady than having the 15" on top, and gives you a slightly larger grilling surface to work with.
Tools
I used a drill, reciprocating saw, angle grinder, and wire brush. I'd planned on using a rotary wire brush chucked into the drill, but the house brownie has been playing games again and it's not to be found, so a hand brush it was.
Strictly speaking you could do all the cutting with a hacksaw, but I don't recommend it. You could definitely do all the cutting with the angle grinder and a suitable wheel. The drill is for two sets of holes to be described later.
Earmuffs or plugs are strongly recommended.
Useful Directions
Take two steel wheels*. If dirty or rusty or both, use a wire brush to clean a side of each so you can lay out your cutting lines.
Cutting lines laid out.
I used a wider opening at the rim, narrower inside. No science or plans there, just decided that would be sufficient size. Use a colored marker, paint pen, whatever you've got that shows up well enough to draw the lines, and then start cutting. cutting. The dimensions I used were 6.25" at the edge, 4.5" at the inside, 3.25" deep. Yes, that's measuring after I cut; we got real precision here.
I made the two vertical cuts on each first using the saw. Then I had to drill two holes side-by-side next to one of them to get clearance for the saw blade to make the horizontal cut. That gives you the cutout in each wheel.
Here's where I used the angle grinder to clean up the edges and get rid of any burrs (burrs are bad; think of reaching in to feed the fire and getting caught on one on the way out), leaving smooth edges.
This is where the drill made its second contribution. Both wheels have a series of holes in the face,
but they're covered on the bottom wheel when it's set on the ground. The hole in the side would probably give sufficient air flow, but just to be sure I went around the rim on the same side the valve had been and drilled a line of 5/16" holes (because that's the bit I had handy), spaced between the holes on the wheel face.
This step might not be necessary, but it certainly won't hurt.
That's it for the cutting, grinding and drilling. Now it's wire-brush to get rid of dirt, rust, and anything else that might keep the paint from adhering. Paint is not required, but it'll help keep rust from becoming a problem. I used some Rustoleum flat-black high-temperature spray paint left over from another project.
In Use
This is just a small fire,
but it gave me enough data to make a few notes:
Orient the stove right and it does a wonderful job of keeping the wind from messing too much with your firestarting.
This hole is quite big enough to feed wood through.
It does a fine job of directing the heat upwards. After about five minutes I found the lower wheel just warm, the upper wheel hot, and the top very hot, just from this small fire. It ought to do very well with a pot of stew.
It'd be easy to lay hot dogs or sausages on the top, though I don't know if the paint I used makes this a good idea. But a grill laid across the top would work well, as would using sticks to hold them up. A griddle for pancakes or other such edibles is also a notion.
If you want to get fancy you could fit a piece in the hub hole of the bottom wheel to make starting the fire easier(no wood falling through).
If you don't want to kill the grass under it, I'd suggest using a shovel to cut the sod and move it out of the way; after you're ready to move, wet the ground a bit and put the sod back in place. Or set it on some flat rocks, with some under it to catch the ashes and coals that fall through. I had another wheel handy, so I used it for this purpose.
*If they're aluminum or magnesium wheels, forget it. Aluminum will soften too much from the heat, and if you used magnesium, and it actually got hot enough to ignite... it'd get real exciting for a bit.
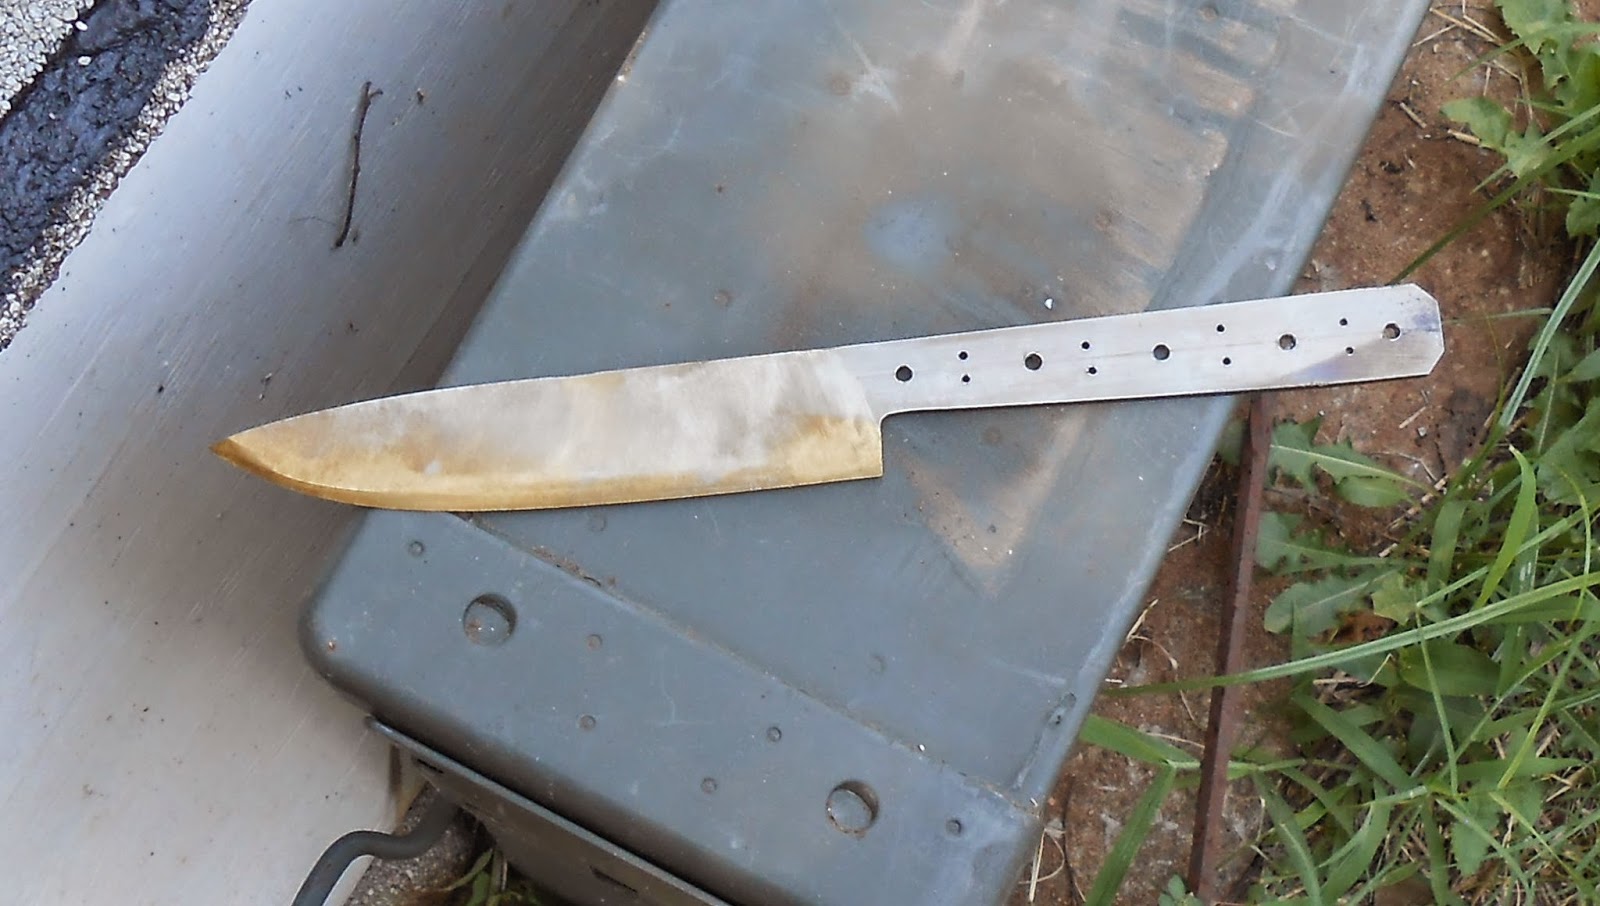
Firehand has turned his "making kitchen knives from O1 tool steel" into a trilogy by writing a post (with pictures) about doing it without power tools. That's proper old-school, right there.
Go over to Firehand's blog, Irons in the Fire, for a detailed description (with pictures!) on how to make kitchen knives from a flat piece of O1 tool steel.
(Editor's note: Firehand is a blogger and a part-time blacksmith. His previous article, An Introduction to Blacksmithing, may be found here.)
Or at least equal to the best.
I've made punches and chisels out of a lot of stuff; some worked pretty well, some not so much. The best have been made out of Star drills.
If you've never had to use one, be glad. These are how masons cut holes in stone before power tools and suitable bits were available. You can still find them new, or at flea markets, and they're excellent steel for the purpose, and can be found in a number of diameters.
Materials Needed
First, you'll need:
Star drills
Cutting torch (propane or acetylene will do)
Hacksaw
Some way to grind to shape.
Crafting Your Punches
Decide how long you want your punch to be and mark where you'll need to cut.
1) You're probably going to have to heat that area enough to anneal it (get it hot enough to 'soften' it by removing the hardness set up by the original heat-treating). Check it with the hacksaw; if it's too hard to cut or will only barely cut, get out the torch.
In a place where the light is a bit dim, start heating that area. You don't have to get it to a bright red heat, just a barely-visible red (which is why the dim light). Turn the piece as you heat, when you've got that color just set it aside to cool. Or if you have another area to anneal, do it now.
2) Once cool, clamp it in a vise and cut off.
You'll have to grind two bevels: a long one leading up to the actual point, then the point itself. I've got a belt/disc sander and use it. And here's how to keep the taper nice and even:
3) Chuck it in the drill.
If the end you'll be hitting with the hammer is sharp-cornered, you'll want to round it off a bit first, then turn the piece around to cut the bevels.
4) Hold it at a shallow angle and start cutting.
The nice thing about making this is you don't have to worry about keeping it from getting too hot, as you'll be hardening and tempering it later.
5) When you have the main bevel cut, you can shape the point.
The difference between a prick punch and a center punch is the angle: a prick punch has a longer, sharper taper; you use it to carefully mark the exact spot to drill with just a light tap with the hammer. A center punch has a shorter, wider taper; you use it with a suitable whack to make that starting point deep and wide enough that the bit won't walk when you start drilling.
6) Adjust your angle to suit, and cut the point.
Heat-Treating
Once that's done, you can heat-treat it. You'll need the torch and a can with some light oil in it; motor oil will work fine. I've heard of people using corn or olive oil when they didn't have something better. (No pictures for this part of the process; I couldn't take them because my hands were full.)
7) Start heating just behind the point; you want that end hardened for a good 1/4" or so behind the point, that way when it does get dull you can just sharpen it (unless you overheat it, in which case go back to the start). Turn it and watch carefully for the colors to change; in this case you want a medium red/cherry red evenly in that last quarter- to three-eighths inch, just as the 'shadow' disappears (as described in the blacksmithing post). As soon as you get that color, stick it point-first into the oil and swirl it around to cool.
8) Once completely cool you can check it with a file; with most of the drills I've used, when fully hardened the file will just skate off without biting. If you've got more than one to do, harden the other one while the first cools completely.
9) Clean off the oil and lightly sand the bevels - by machine or hand, either works - so you can see the tempering colors. And yes, you must clean the oil off first; if you have some on the shined surface it'll start burning when it gets hot and make the colors hard to see.
Do this in a place with good light, but not in direct sun, so you can see the colors change. Start heating - low flame, a good inch or so back from the point - turning the piece to keep it evenly heating. You'll first see the yellow appear around the heated area and start marching down (slowly, if you use a low flame; use a high flame and it'll move fast, sometimes too fast). Since this is a tool for a direct strike that has to be hard enough to cleanly cut into steel as well as any other metal you might be using, watch it closely: the sequence is faint yellow/darker yellow/bronze, and I'd suggest stopping it at darker yellow or light bronze by dipping the point - just that last half-inch or so - into the oil and holding it there about ten seconds, then lowering the punch most of the way in. The reason for doing it this way is that if you only cool the point and then take it out, there might be enough residual heat in the area you used the torch on to transfer down the piece and reheat the point, possibly enough to mess up your just-finished temper.
Here's the punch right after tempering. Note that between the oil from the quench and then washing it off, the colors are a bit darker than they were at the time it went into the oil to stop the temper.
10) That's it. Clean the oil off and give it a try; your punches should now be hard enough to stay sharp after marking.
I made two from that drill bit: prick punch on the left, center punch on the right.
You can make chisels with this exact process, except instead of grinding a point, you grind a flat bevel on each side, and then the edge bevel. Hardening is the same, but tempering depends on what you're using it on; for harder steel you might want to take it to a darker bronze.
Also, for a wider chisel, on the star end you can grind off two opposing arms, then use the other two as the main bevels; grind the end back to square, then grind the cutting bevels.
Editor's Note: Starting next Monday, I (Erin Palette) will be on vacation for an entire week. As such, today is spent in preparation for my trip, and next Friday I will be in Indianapolis for the NRA Annual Meeting. Therefore, this post and the next will be guest posts.
Steel Choices for a Bug-Out Blade
Our guest author for the next two weeks is Todd Gdula, a professional bladesmith and member of the American Bladesmith Society. He does custom work and his website is www.toddblades.com.
One of the questions most asked of knifemakers is “What’s the best steel for a blade?” The correct answer is, “It depends on what kind of knife it's for.”
Volumes could be written on this topic, but today we’ll make it short and simple by only talking about blade steel choices for a survival knife, and a general purpose survival knife at that. This is my opinion on what the best steel choice is if you can only put one knife in your bug-out bag.
To choose a steel, we first need to identify what the knife needs to do. A survival knife needs to be a jack of all trades and very reliable. It can potentially be used to chop and split wood, de-limb branches, gut and skin game; act as a pry bar or a hammer, and to defend yourself. That’s a pretty tall order, especially when you consider that each of these tasks has knives specially designed to do them.
There are three general categories of steel to choose from, and each category has many types of steel within it. The three categories are simple carbon steels, stainless steels, and high alloy tool steels. Some types of steel may fit in more than one category depending on whose definition you use.
Types of Steels
Simple carbon steels include what are known as the “10” series steels; 1045, 1050, 1060, 1075, 1084, 1095, etc., as well as the “O” and “W” series and 5160 and 52100. The 10 in the 10 series indicates that it’s low alloy – basically the 10 means it’s iron with whatever percentage of carbon; .45%, .5%, .6%, etc. The O stands for oil hardening and the W for water hardening. Neither is as simple as the 10 series, but the alloying is fairly low. The 50 series starts to have more alloying, but is still relatively simple. The 50 means it has some chromium; 51 is low chromium, 52 is medium chromium. The second two numbers indicate carbon content; .6% and 1% respectively. (Editor's note: see Firehand's post for a more in-depth discussion about what carbon content means.)
Stainless steels contain enough chromium so they form chromium oxide instead of iron oxide, which inhibits rust. Stainless is a large and varied group; 420, 440, CPM154CM, 12c27, ATS34, and on and on. By definition – which is also somewhat variable, stainless contains at least 10.5% chromium, but some types approach 20%.
High alloy tool steels have lots of stuff added to the smelting recipe and most were created for a specific purpose. They include the “A”, “S”, “H “ and “D” series, Vascowear, and overlap into some of the stainless types, as well as 52100 and some others. The A stands for air hardening; the S for shock resistant; the H for heat resistant; the D for die steel and Vascowear is a high vanadium wear-resistant alloy.
Which Steel to Use?
So it comes down to a process of elimination. I’m going to eliminate the high alloy tool steels first, because they have very specialized properties and we’re looking for a jack of all trades.
Next to go are the stainless steels. I can hear the outrage, so I’ll explain. The only advantage stainless has over non-stainless steels is that it’s rust resistant. And believe it or not, that’s not that important. However, it has two disadvantages that to me are very important: First, when it's heat treated, it through hardens, which means that the whole blade must become the same hardness. Second, compared to other steels, it’s not suitable for big blades because of its relative brittleness
We’re down to simple carbon steels then, and while there are several good choices here, there is one stand out: 5160. The main reason for this is it can be differentially hardened, which means that the edge can be made very hard and the spine fairly soft. This is important because it makes the knife very tough:
When subjected to lateral forces it will bend, rather than break.
You can strike the back of the blade with, or against, hard objects and it will deform rather than chip.
You can make a very large (even sword sized!) blade from it and it can handle tremendous chopping stresses.
You can easily sharpen it with a rock.
While there are a number of steels in its category used to make springs, 5160 is the spring steel.
While there are other good choices, 5160 is, in my opinion, the best all-around steel for all the things a survival knife has to do.
Next Week: Profile and Edge Geometry Choices for a Bug Out Knife.
Erin Palette is a participant in the Amazon Services LLC Associates Program, an affiliate advertising program designed to provide a means for sites to earn advertising fees by advertising and linking to amazon.com.