Sunday, February 8, 2015

Epilogue: Some Final Thoughts on my Bug-Out Bag

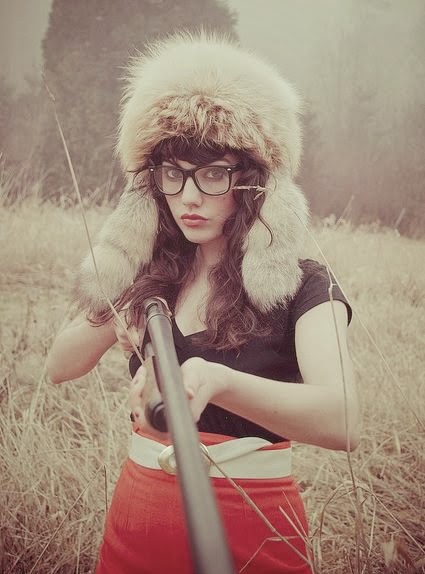
Not actually Erin.
& is used with permission. 
I realized that I had left some things out of Friday's post that I wanted to cover, and was worried that if I went back and edited them in then no one would see them. Thus, you get this post of semi-organized thoughts.

Pack Weight
Unfortunately, my BOB isn't light.

Fortunately, it's lighter than the rucksacks I used to hump when I was in college ROTC (which is, sadly, the extent of my military experience).

I shall do like I did for my Get Home Bag and give you its weight as a percentage of mine. This ought to result in useful data while still allowing me to retain some girlish vanity by not revealing my weight to you.

My Bug-Out Bag weighs one-third of my body weight. I realize this is quite a lot, as most hikers suggest that a pack should weigh half that. I don't disagree with them. However, let me say this in my defense:
  1. I don't plan to hike with it if I can at all help it. My primary means of bugging out is my car. If I do have to hike, something has gone terribly wrong. 
  2. That said, I can hike with it, at least a few miles. It may not be efficient, and I may be sore and hating life at the end, but I can haul it without sucking wind or feeling useless afterwards. 
  3. The pack that I have assembled specifically for walking long distances is my Get Home Bag, and that sucker weighs much less -- only one-eighth of my total body weight.
Contents
The main point to this pack, as I see it, is that it looks more like a camping kit than anything else. This isn't by accident, mind you; camping is essentially "taking stuff so you can survive outside your house", which is what bugging out actually means. 

This also makes it easier for me to test things:  I just sling up my pack, walk to a good site (hence how I know I can carry it), and go camping for a few days. 

Finally, it's good social camouflage: a hiking or camping rucksack doesn't draw attention and worry the way military gear might. Survivalists, and to a lesser (but growing ) extent preppers, are viewed with suspicion by most people, but camping is socially acceptable and normal. 

I do, however, worry that I might be missing something critical to bugging out by focusing on camping-style gear. Worse, I don't even know where to start looking for what I'm missing. 

Conclusion
Thank you for reading my 6-part series. Any advice you can give me on how to optimize by BOB will be accepted cheerfully and gratefully!

Friday, February 6, 2015

My Bug-Out Bag: Part 6 of 6

Not actually Erin.
& is used with permission.
Part 1
Part 2
Part 3
Part 4
Part 5

Welcome to the final post in my What does Erin have in her Bug-Out Bag series!

Last week, I showed you what made up the top half of my BOB's main compartment. This week is the bottom half, along with some miscellaneous items I couldn't get to fit.


Looking down at the second layer, you can see both the rear pocket which holds the water bladder (and other things) and the front access panel. On top are a mismatched pair of kevlar-nomex oven gloves that I got at my local supermarket. One of them has grip stripes, making it useful for lifting hot and smooth things like camp stoves and pots, and the smooth one can either assist in that manner or be used as a pot holder (in case I wanted to eat inside a tent, say) without worrying about prolonged exposure melting the grip surface.

With the gloves removed you can see how I have things arranged. Below this is just a zippable partition separating the main compartment from the sleeping bag compartment.

From top, clockwise:
  • Two survival books inside a drawstring pouch made of waterproof poncho material
  • A broken-down MRE, supplemented with other lightweight items like soups and teas
  • My first-aid kit (explored in detail here)
  • 3 days' worth of socks and underwear in a waterproof bag

I didn't waterproof the first aid kit because I wanted to be able to access it in a hurry, but upon reflection I think that may be foolish. I'm going to stick it inside a gallon Ziploc bag when I'm finished writing this -- it's not a perfect solution, but it's a good compromise and should protect it from everything except a dunking. 


Here are the contents, spread out. You can see that my two books are the SAS Survival Handbook by Lofty Wiseman (now in its third edition -- the one I have is only second edition) and Wilderness Living by Gregory Davenport.


Why those two books?  They're dense with information, are easy to read, and are tougher than regular paperbacks yet are lighter than hardbacks. I should probably have a dedicated book about medicine/first aid, but I have yet to find one that I like yet fits into my bag. However, you'll note that my medical kit, which is portable, has several books in that vein.

To the left of the books is a small backpack that folds into a fist-sized package. I keep this in case I need to go foraging for stuff -- firewood, berries, etc -- or I just need a way to carry something without hauling my entire BOB around. To the right is mesh bag with drawstring closure that I'd put wet clothes in to allow them to air-dry.  Both of these bags are pushed into the corners of the bag, and are therefore hard to see in the pictures.

This is the hydration compartment. The thing in the orange bag is a tent, and the Power Pot (from last week's post) sits right on top of it.

The tent is a Stansport "Black Granite" Star-Light Tent with Rainfly, which I will confess I haven't tested yet. If I don't like it, I'll take it out and replace it with something else; the quest for the ideal backpack tent at a budget price is a bit of a Holy Grail for me.


It's a two-person tent; having spent some time in one-person tents during driving rainstorms, I can tell you that they can get a bit claustrophobic after half an hour. I'd rather carry the extra weight and have extra room for myself and some gear that I want kept dry.


Also present:
  • A set of game knives (questionable quality, but they were free, and if I get anything better I'll replace them
  • Tent stakes, because the bent metal roundstock pins that come with tents are pretty craptastic
  • 100 feet of paracord
  • Two shish kabob skewers. (Why? Listen to my GBVC segment for an explanation.)

To conclude this article, here are some item that I really want to include in this bag, but I just can't find the space for.

  • My Ruger Bearcat with 150 rounds of .22 LR ammunition
  • Marksman slingshot and 1/4 inch shot
  • 35L dry bag. The size is awkward -- too large to hold my sleeping bag and still fold down to a reasonable size, and not large enough to be able to swallow my entire BOB for waterproofing. I'm not sure if going up to 40 L would actually help anything, and the smallest is 20L. I think I need an 8-10 L bag to fit the sleeping compartment. Still, a dry bag is a handy thing to have.
  • Cutting board
  • Mezzaluna. Sure, you look at it and laugh, thinking it's just for mincing herbs and trimming pastries. But I look at it and think "modern-day Ulu knife". 
If anyone can suggest what I ought to remove in order to add some of these, I've love to hear what you have to say.

And if you've made through this entire series -- thank you! I hope it was informative as well as entertaining, and I look forward to feedback from you as to what I should add, remove, replace or rearrange within my Bug-Out Bag. 

Have a great weekend!

Thursday, February 5, 2015

Basic Knowledge

There are as many types of preppers as there are preppers. Everyone has a slightly different set of circumstances that they are preparing to meet and has a slightly different way of looking at those circumstances.

The basics --water, food, and shelter -- have been (and will be) among the main topics on this and many other prepping blogs. My brother and sister authors here do a fine job of covering these basics, so I concentrate more on “skills, not stuff”. This week I'm going to ask you to look at what you know, and what you don't know, in the hopes that it will lead you towards finding out what you don't know that you don't know.


Basic knowledge for any prepper has to include knowing these 7 things:


What do I need?
Needs are not wants. To stay alive (physically alive) you need a certain amount of air, water, food, and shelter. The exact amounts are going to vary according to your location, weather and climate, health, and other variables. There is no “one size fits all” when it comes to prepping; you need to look at yourself and your surroundings and make your own decisions. A 72 hour kit that meets your needs in a forest may or may not be suitable for a three-day hike towards a bug-out location. Think about what you actually need and base your preps on that.


What do I have?
Your BOB/GHB is a good start, but you also need to look around and realize what is available for your use without you having to purchase or carry it. Water is a good example: you can choose to carry a five gallon jug full of purified water around on your back, or you can carry a filter capable of purifying water that you may find. The filter makes more sense if you're living near abundant ground water, but the jug makes more sense if you have to travel through as desert. Do you need to carry fuel for a fire, or are there plenty of wood/buffalo chips/pine cones in your area?


How do I use what I have?
Knowing how to properly operate and maintain the equipment that you have is vital. Before YouTube came about, we had to go to a local campground to watch people flail about trying to set up a new tent that they had just bought and had no idea about how to set up. Hilarious when it's someone else; dangerous when it's you. Having 18 ways to start a fire but not knowing how to use them is the same as having zero ways to start a fire. Knives, axes, firearms, and fire starters can be lethal to the user if they are not used properly. Train and learn how to use your gear before you need it.


How long will what I have last?
Nothing in this world lasts forever, and I doubt many of us could afford the few things that come close. Knowing the expected life-span of a tool, or how many meals you can make out of a bucket of wheat, will help you choose the proper amounts and storage for your supplies.Water filters will only treat so many gallons of water; the same goes for a bottle of bleach or iodine tablets. Temporary living quarters, like tents, are not generally made for long-term use and will start to wear out rapidly with daily use.


What am I missing?
Until I win the lottery, I won't have everything I would like to have in order to be prepared for whatever may befall me. I know what I have and I have most of the short-term (my definition of short-term is about 3 months) needs covered. Long-term preps are more expensive in time, labor, and capitol, so I am slowly working on them. I know what I'm going to need at this time, but things are fluid in some areas of my life and are likely to change, which will change the ratio of have/don't have in unpredictable ways. Accepting that things can or will change is a given for preppers; nobody preps for the status quo.


Where/how do I get the things I'm missing?
Water, food, shelter -- the three main needs -- should be scouted out wherever you are. Is there a source of water that you can access year-round? Small streams can dry up in the summer and even large rivers and lakes can freeze over in the winter. Wells can get poisoned. Do you have a way of obtaining water that doesn't rely on your primary source?

Food is fairly easy to store for short-term problems, but what if it truly is a zombie outbreak or World War 3 (or Civil War 2) and you need to eat from your supplies for a year or two? Do you have the knowledge, seeds, land, and equipment necessary to raise your own food, or a skill-set that you can exchange for food? Does anyone around you have what it takes to grow food? What do you have or know that could be bartered for food?

Shelter covers everything from the clothes you're wearing to a house fit to live in. Once it starts to snow it's a bit late to be thinking about getting an insulated jacket. Do you know someone who can make/repair clothes? Living quarters can be anything from a debris hut (useful to learn how to make) to a tent (good for three seasons around here- YMMV), to a cabin with a wood stove. Can you make or trade for any of those things?


What will I do if something I need breaks?
Learning how to do simple repairs can lead to learning how to do major repairs. Repairs generally require tools, so keep that multi-tool handy and set aside some real tools if you have the space. Every vehicle should have a basic tool kit to allow you to make minor repairs on the side of the road. Bicycles should have a tire patching kit and a set of “spoons” for fixing flats, as well as a tire pump.

I grew up around farmers. There are few groups of people more resourceful than old farmers. Reduce, reuse, recycle, repurpose, repair, and reclaim all come before “replace” in their dictionaries. If something breaks, they'll find a way to fix it. It may not look pretty or last very long but it will get the job done. I've seen things literally held together with baling wire and duct tape, just long enough to get back to the shop.

Have a flexible mind and look for other ways to get the job done until repairs can be made. Being willing to learn is more than half of the battle, once you accept the fact that you don't know everything you can start to learn.


This is basic knowledge, mainly about yourself and your surroundings. Don't lie to yourself about your knowledge or lack thereof; nobody is going to suffer from that type of lie but you and those you love. Be willing to learn new things, but remember that it's your life on the line and not that of the teacher (or the salesman). 

Wednesday, February 4, 2015

Prudent Prepping: Winter Clean-Up

The dust has settled and the First 72 Hours have passed. Now we concentrate  on what to do in, and how to plan for, the long term via Prudent Prepping.


Winter Clean-Up
Or, Life During Bug Time


  This is the continuing saga of my fight with Nature, in the form of moths, as first mentioned here several weeks ago.


Bugzilla Returns
I still have moths flying in the closet, even with the cleaning, vacuuming and traps that I put in place. From what I've read and been told, the traps will have to be in place for a minimum of 6 months and maybe up to a year. Flying moths also mean there are eggs hatching now, with more due as the weather warms up.

What this has forced me to do is clean out even more of what turns out to be useless junk in my closet and storage totes. I am a bit of a pack rat, and so there are things I have put away that don't really need to be saved, like:
  • 3 down vests, in colors I don't like. I have two in my regular gear.
  • Old Levis that are too worn to wear to work. They would be great for yard work... if I still had a yard.
  • T-shirts, both white and colored, also too old for work.
  • Long sleeve shirts and sweat shirts that are a bit small and also worn around the collar.
  • Several sweaters that show moth holes after closer inspection.
  • Two sport coats and a couple dress shirts that are not in style. (Don't ask.)
I decided to clean out the clothes in the active end of my closet while I was at it, so now any shirt that is showing collar wear or stains is going out as well. This led to cleaning out my dresser, which added even more t-shirts, socks and other clothes that I don't wear regularly. This added up to more than I expected, since I threw away or donated several boxes of clothing when I moved in August.

Here is a picture of the everything I cleaned out, minus the vests and jackets:

Two full boxes!


All of this is going to Goodwill, even if some of the clothing could go to resale. I'm not dealing with sorting things twice. Besides, it is going to a good cause that helps the local community.


The Takeaway
This does not really count as a prep, but it is needed! Not only does it keep my stuff organized for now, it is also a source of relief knowing that what I packed is as neatly stored as possible and that I can get to it in an emergency.


Other Items
One of these items are going into every 5 gallon bucket as money allows:
  • A manual can opener like this from Walmart. I can't plan on having an intact house, or the people getting this pail being prepared.
  • UCO Waterproof matches. Every bag or kit needs to have extra fire starting devices, and even inexperienced people know how to strike a match. However, not many people know that the protecting the striker is just as important as protecting the matches! To preserve it, I remove the striker pad from the outside of the container and CAREFULLY place it inside, with the striker pad facing  AWAY from the match heads. The striker is cardboard and will not work if wet, so protecting it is as important as the matches.


Recent purchases for the stash

  • Two UCO Matches, $6.64 each with free shipping!
  • Two manual can openers from Walmart, $3.38 each, plus tax


If you have comments, suggestions or corrections, please post them so we all can learn. And remember, Some Is Always Better Than None!

NOTE: All items tested were purchased be me. No products have been loaned in exchange for a favorable review. Any items sent to me for T&E will be listed as such. Suck it Feds.

Tuesday, February 3, 2015

Prepper Fitness

Fitness is important for a healthy lifestyle. It is even more important for someone who believes in preparedness and self-reliance. Erin talked about fitness a while back on the Gunblog Varietycast, and Sean and Adam touch on it each week. (You don't listen? You need to. Everyone on there is sharp, folks.) I'd like to expand on the thoughts they've shared.

Fitness, in a prepper sense, doesn't mean becoming Mr. Universe. Fitness instead leans toward the ability to pick up a pack and walk a couple miles without being entirely spent, or help move an injured person, or in general be able to readily and successfully employ the skills we teach here. A major part of my motivation for this is because I can feel my own fitness lagging, so I wanted to share that area of my prepping with you.

The benefits of improved fitness are numerous. In addition to being able to shoulder and haul more gear, you'll live longer and better. Fit folks are less susceptible to injury and heal faster, and improved fitness can mitigate other health concerns. As your fitness improves, you will become more of an asset and less of a liability and resource consumer to your tribe.

If looking like the cover of Men's Health isn't the metric of fitness, what is? Pulse, blood pressure, and weight are all good places to start and simple to measure and track. If your health is questionable, a visit to your doctor is the best place to start. If you're like me, you can start by being more active as well as paying attention to what you eat.

You don't have to be a gym rat, either. Take the dog for a walk, or take your significant other or kids for a bike ride. Set goals so that you have something to work for. Have a partner, so that on the days that you lack motivation, someone else can keep you honest and get you moving. Track your progress. Make a bulletin board and regularly note how far you've come, and take pride in your successes.

Me? My goal is my first 5K in June, with a partner who will definitely keep me moving.

Prep your body to keep up with your mind!


Lokidude

Monday, February 2, 2015

Spinning Wheel Got To Go 'Round

After the Storm
In my last post, I discussed getting fiber ready to start on its way to becoming cloth. Today, we're going to take the next step on that path, and look at what it takes to spin fibers into thread or yarn.

Producing a strong, resilient filament of interconnected fibers is essential to producing a long lasting cloth or rope of any sort. From thick yarns used to make comfortable, warm sweaters, to ultra fine thread used to sew cloth into a wearable form, all of it goes from the preparation stage to the spinning stage.


While the methods of spinning fiber into useable thread are many and varied, there are only three primary types of spinning technique:
  • Hand twisting
  • Drop Spindles
  • Spinning Wheels

Each of these methods has had its moment in history. Each of them has evolved from their earliest forms into their current form and usage.


Hand Spinning

The most basic means of twisting together the fibers of wool or cotton is by the simple expedient of your own fingers. Twirling the strands of fiber together by simply rubbing them between your hands, or rubbing them along a leg, and then adding more to the length as you go, has probably been in use since long before humankind settled down in agricultural settlements and became "civilized."

It's time-consuming, it's tedious, and unless you've practiced it for a long time, it doesn't offer much in the way of consistent results... all of which no doubt played major roles in the creation of simple tool assists in the form of spindles.


Drop Spindles, the longest-used spinning tool

A drop spindle is, other than a knife or hammer, perhaps one of the oldest tools mankind still uses. They are simple and elegant, consisting of little more than a straight shaft which is weighted at one end, with a small hook at the top end, and sometimes a small notch at the top of the shaft as well.

There are 3 distinct styles of drop spindle, and they are differentiated by where the weight is placed.
    A Top Whorl Spindle has the weight placed at the top end of the shaft - the end closest to your hand while in use. Weight placement at the top means this spindle turns very rapidly, but has a short spin time in relation to its speed.


    A Bottom Whorl spindle places the active weight at the bottom of the shaft, away from your hand while in use. These spin much slower than a top whorl, but the duration of their spin is significantly increased and I've found them to be more stable.

    A Center Whorl spindle places the weight in the middle instead of either end. This one has the speed and relative duration of the top whorl, but slightly better stability during spin.
      All 3 types work in the same manner, utilizing centrifugal force - just like spinning a toy as a child. Top and bottom whorl spindles are both fairly common, but I haven't seen many people utilize a central whorl.

      Once a small piece of thread (referred to as the leader thread) is attached to the shaft, the other end of the thread is attached to the beginnings of your bundle of fiber (called roving). The old thread works as a guide for the new thread, helping to keep it in place as you twist the fibers together and then wrap it around the shaft as it accumulates.

      The techniques for learning to use a drop spindle are easy to pick up. Moderate proficiency can be gained in very little time; it took me about an hour to learn how to use a drop spindle originally, and within two months of rather hit-and-miss inconsistent practice, I had gained enough proficiency that the yarn I produced no longer looked like a misshapen collection of thick and thin with oddly placed bumps and spacing. Had I been more diligent in practicing with my new drop spindle when I acquired it, it would have taken a lot less time to get any sort of decent consistency from it.

      I've used both bottom and top whorl spindles, and found very little difference in the two other than how frequently I needed to set it spinning again after it slowed down to a stop. Whichever you end up using is a matter of personal preference. My preference is for the bottom whorl spindle, simply because that's what I originally learned on, and therefore have the most practice with.

      The concept is actually very simple. Fortunately, there are several professionals who have posted videos on YouTube as instructional videos to get people started. I'm not going to confuse you by trying to explain the whole process; instead, I suggest you watch this video from a true professional instructor in fiber techniques. She makes it clear, concise, and simple in a way that I simply can't accomplish.


      Taking a Spindle to the Next Level


      Beyond the basic drop spindle, we have larger mechanical aids to creating thread in the form of Spinning Wheels. The introduction of the spinning wheel during the early middle ages was important because it increased a spinner's production rates by a factor of 10 or more. Suddenly, one person could produce the same amount of thread as 10 people, with the same consistency in quality. This meant that fewer people had to be working on the same project. Thread could be produced faster, which meant it could be turned into cloth faster, and subsequently prices came down.


      Today there are a variety of wheels produced for the fiber arts community by several companies. Some of them are large enough that even moving them inside a single room isn't very practical, while others are light and compact, meant to be portable and use anywhere.

      The basic concept is the same as using a drop spindle: centrifugal force is utilized to assist in twisting the fibers together to provide strength, durability, and lengths that are practical to use. The roving is fed slowly into an already twirling mass, thinned out as it goes along, to produce a single tightly wound but very elongated group of fibers.

      I've had only a bit of experience with a wheel so far. A close friend in the fiber arts community has allowed me to use hers a few times so that I could see the differences between using a drop spindle and using a wheel. Eventually, I'll have the money saved up to invest in a wheel of my own. They are significantly more expensive than drop spindles, however, and much more difficult to produce, so it's one of those items on the wish list for now. Taking a class - or even watching something like this video - will give you a better idea of how a spinning wheel works than I'm capable of explaining.


      I understand that investing anywhere from $500 (for a good used portable wheel) to $4000 (for a brand new great wheel that will become a permanent installation where you put it) is not lightly undertaken. I wouldn't suggest it for anyone who didn't already know for certain that it was going to be lovingly cared for and used on a regular basis. For those wanting something to keep "just in case", a drop spindle can be made from any straight shaft of wood or metal with a weight to attach to it to keep it spinning.

      Next time, we'll take a look at methods of dying your fiber, whether it be spun yarn or already woven cloth, and the pros and cons of synthetic dyes versus natural dyes.

      Sunday, February 1, 2015

      Gun Blog Variety Podcast #24

      Not actually Erin.
      & is used with permission.
      Adam and Sean bring you another amazing episode of The Gun Blog Variety Cast!
      • Erin Palette reminds us that putting all your prepping business on the internet is a bad strategic plan.
      • Obama goes to Saudi to King Abdullah's funeral. Nicki Kenyon gives us her thoughts on whether that was a good idea or not.
      • Miguel Gonzalez reminds us that just because it wears a police uniform doesn't necessarily mean it's an actual cop.
      • Download sites are serving up a big helping of crapware and this just irritates Barron B. to no end.
      • And Weer'd notes the PSH in the gun hater crowd when they found out that Kalashnikov was opening an AK pattern rifle factory in Pennsylvania.
      • And as a special bonus, Barron makes a book recommendation. 

      All this plus a your regular favorite segments like Felons Behaving Badly, Strange Laws, and Fun With Headlines. Sean updates you on his progress in The Quest for Sharpshooter, and we finish with an especially ranty Stuff that Grinds My Gears.

      Thanks for downloading, listening, and subscribing. And don't forget to recommend us to a friend!


      Listen to the podcast here.
      Show notes may be found here

      The Fine Print


      This work is licensed under a Creative Commons Attribution- Noncommercial- No Derivative Works 3.0 License.

      Creative Commons License


      Erin Palette is a participant in the Amazon Services LLC Associates Program, an affiliate advertising program designed to provide a means for sites to earn advertising fees by advertising and linking to amazon.com.