

The dust has settled and the First 72 Hours have passed. Follow along as I build a long term plan via Prudent Prepping.
Still more of some things I couldn't make into a full blog post right now.
New Flashlights: Part The Latest
The new NiteCore flashlights that are going into Purple Pack Lady's cars were charged and I was ready to mount them as I have done in my car, secured with velcro in the driver's door pocket. I had velcro glued to the flashlight holder, and just needed to clean the plastic on the door pocket when we had a minor setback: her car was stolen.
Luckily for everyone, it appears to have been taken for a joy ride only, since the car was later found only 6 blocks away. Plans have been delayed on the install as we work on security instead.
Car Protection
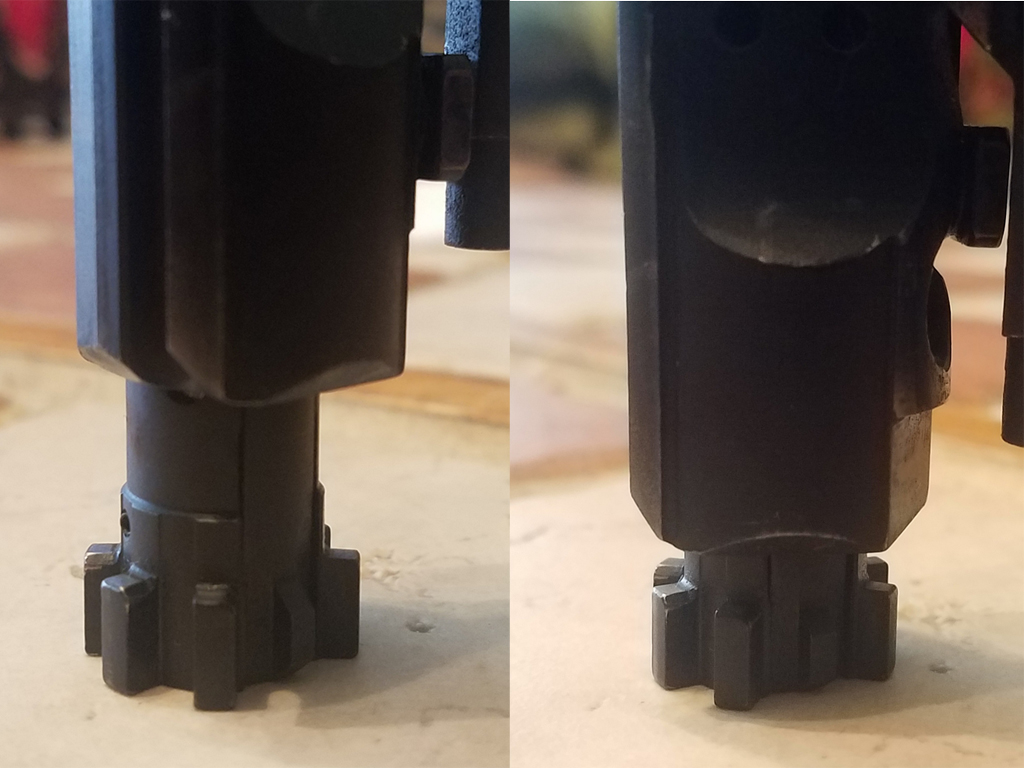
Due to the loss several months ago of the key fob/starter dongle that more than likely was used to take the car, I ordered steering wheel immobilizer units for her two cars When I started looking on Amazon, the listings were very large, and prices and types all all over the map! There were wheel-to-pedal, regular Club-like devices, wheel-to-dash and even one that covers the entire wheel. (That model was very nice and would prevent cutting the steering wheel to remove the lock, but it wasn't BCP budget compatible. Not even close.) What did work for my budget was a modified version of The Club with two sets of two hooks to hold the wheel.
The Club 3000 Twin Hooks Steering Wheel Lock
 |
| https://amzn.to/3tJOg7T |
From the Amazon ad:
- The twin hook design is tougher for thieves to defeat
- Universal fit that works on cars, vans, and SUVs. Max opening (inside of hooks) 365mm/ 14.4 inches
- New and improved lock housing for added strength
- The Club's patented self-locking feature locks with one pull
- Cro-moly steel construction resists sawing, prying, hammering, and freon attacks
I really like how the double hooks allow the Club to be mounted around the spokes of the steering wheel, since merely cutting one piece of the rim on each side will not allow the Club to be removed!
Purple Pack Additions
As I mentioned last week, I want to double up on gear so that everyone has supplies if something happens to one pack. I was able to make some headway and get a stove added to the Purple Pack! I'm adding an Esbit stove and fuel like this one to the bottom of the PP, since I was able to show exactly small and compact everything is. I believe this is going to be about all I can add until there is an opportunity to really use stoves for actual cooking. After that, there's the chance to upgrade to something easier to use and obviously cheaper to operate, like a Solo Stove!
Stay tuned for more reports on What's In The Pack!
Recap And Takeaway
- Some things just can't be planned for, like a stolen vehicle. They can, however, be prevented from happening again.
- Show and Tell, politely done and explained, worked for adding a needed stove to the pack. I hope adding other things in the future will go as smoothly.
- Purchased this week: two The Club 3000 Twin Hook Steering Wheel Lock from Amazon for $24.84 each with Prime shipping.
* * *
Just a reminder: if you plan on buying anything through Amazon, please consider using our referral link. When you do, a portion of the sale comes back here to help keep this site running!If you have comments, suggestions or corrections, please post them so we all can learn. And remember, Some Is Always Better Than None!
NOTE: All items tested were purchased by me. No products have been loaned in exchange for a favorable review. Any items sent to me for T&E will be listed as such. Suck it Feds.


