Thursday, September 28, 2023

Prepper's Pantry: Stocks and Broths

previously wrote about different options for utilizing the essential flavors of fruits, vegetables, and herbs, both for storage as well as in recipes. There are also methods for concentrating the rich flavors of meats for future use, which are commonly known as broth and stock

The terms broth and stock are often used interchangeably, which is a somewhat divisive topic in the culinary world. Stock is also sometimes referred to as bone broth, referencing its origin while muddying the waters. Generally speaking, stock is made (as the alternate name implies) from cooking bones in liquid for an extended period of time to extract all the meaty goodness inside. Stocks are sometimes referred to as "fonds de cuisine", or foundations in classical cookbooks, since they are used as the basis for other dishes. While stock will usually be made with added vegetables, spices are often not added during preparation as they will be added in the final dish. In contrast, broth is usually prepared with some meat, as well as the bones of whatever animal. In addition, broths are made with spices and other flavorings, and are cooked for a shorter time than stocks.

Stovetop Stock
I used to make stock on the stovetop using the following simple process, but once I got my InstantPot, I never prepared stock on the stovetop again.

Ingredients

  • Meat bones (chicken, beef, or pork)
  • Onion
  • Carrot
  • Garlic
  • Other herbs as desired
  • Water

Recipe

  1. Place everything in the pot and add water to cover. Chicken bones will likely float; this isn't an issue.
  2. Bring the water to a boil, then reduce heat to a simmer.
  3. Cook covered six or more hours, until either the water is reduced by half, or to taste.
  4. Keep an eye on the pot as it may try to boil over.
  5. Strain all the solids, and store the remaining liquid for no more than a week or two in the refrigerator or up to a year in the freezer.

Note: some people like to roast the bones and vegetables in the oven before boiling, which is reported to add richness to the flavor. I've never done this myself.

For the InstantPot version of this recipe, the ingredients are the same, other than the water. Depending on the size of the InstantPot, either ½ or 1 cup of water is added. The directions are also the same, except I run the InstantPot for two or more hours at high pressure.

If I'm doing several batches, I'll use the rendered broth from the first as the liquid for the second, and so on. This produces a rich, dark brown broth (even with chicken) that will assume the consistency of Jell-O when cooled, due to the gelatin extracted from the bones.


Chicken Soup
For a broth, I present you with my mother's general purpose chicken soup recipe. This is the classic Jewish soup imbued with mystical healing powers. As with many family recipes, the ingredients are not precise measurements.

Ingredients

  • Celery – 10 stalks + leaves
  • 2 onions
  • 2 large carrots
  • 3 parsnips
  • Parsley (fresh)
  • Dill (fresh)
  • Garlic (to taste)
  • 1 Plum tomato
  • Chicken*
  • Salt and pepper
  • Gizzards
  • Water to cover
  • Thin Egg Noodles

*If possible, get what is called a “stew” chicken or “soup” chicken.  This is an older bird and will hold up much better and be more flavorful than a regular chicken.

Recipe

  1. Carefully wash the chicken, removing the giblets and setting them aside for use in other recipes.
  2. Cut the chicken up and place in a very large pot with the gizzards. 
  3. Cover chicken with water, then lid the pot and bring to a boil for a total of 1 hour. Skim the water occasionally.
  4. Cut up the veggies, tying the carefully washed herbs in bunches so it is easier to remove them.
  5. Add the veggies and cook for another hour, covered.
  6. Remove veggies and chicken from soup and skim off as much fat as possible.
  7. Strain the soup through a very fine strainer. I usually do this twice, and the second time I put a piece of paper towel in the strainer to make it really clear. 
  8. Refrigerate soup, and skim off any hardened fat before heating to serve.
  9. Cut up the chicken and remove from the bone. Set aside, and serve in the soup if desired.
  10. Cut up carrots and parsnips to serve in soup.
  11. Cook the egg noodles separately, then add before serving.

While I've never made it myself, there are also vegetable stock recipes; here's one.

Enjoy, and eat in good health.

Tuesday, September 26, 2023

Writing Well

The dust has settled and the First 72 Hours have passed. Follow along as I build a long term plan via Prudent Prepping.

The title of this post is something I've never been accused of doing, ever. As a matter of fact, I was really, really tempted to call this post "Writing Good" but the thought was fleeting, which rhymes with beating, and I don't want that either. (Thank you, David. Bloodstains are a pain to remove. -- Editrix Erin)

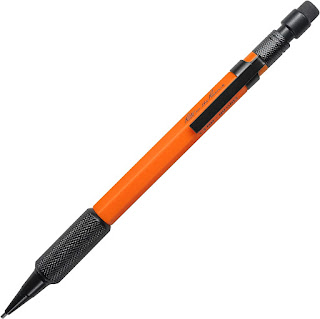
I've been upgrading my gear to stuff readily seen in the dark or in an emergency, which is hard since the default color for 99% of most gear is Tacti-Cool Black. If you look hard and are willing to spend a bit more (or a lot more in some cases), alternatives are out there. Luckily, I found one thing that isn't terribly priced for what it is: the Rite in the Rain Weatherproof Mechanical Pencil!

https://amzn.to/3Pv5QZ3

From the Amazon Ad: 

  • MECHANICAL PENCIL: The wide knurled grip offers wet or dry glove-friendly handling on the job site.
  • STRONG BARREL: Durable resin and metal barrel survives through the toughest conditions.
  • LEAD: The dark 1.3mm lead won’t snap at the tip or break in the shaft.
  • INCLUDED WITH PENCIL: Each All-Weather Mechanical Pencil comes with 1 lead in the barrel.
  • REFILLS AVAILABLE: Rite in the Rain has clean erasers (13ER) and leads (13BR) refill packs available.
  • Lead is 120mm long – the full length of the pencil’s barrel.
  • ONE-HAND OPERATION: Easy click advancement of the lead.
  • STRONG CLIP: All metal clip won’t break on your tool belt.
  • ERASE WITH CONFIDENCE: Specially formulated eraser removes marks while not chewing into the paper.
  • PRO TIP: Made for tough jobs; Contractors, DIY, Police, EMS, Fire, Field Research, Camping, Hiking, Surveying

This is an amazing pencil, even if it is about half the price of a 3 pack of standard Rite In The Rain pencils. I don't own any other writing instruments that might be called Tactical, but this is what I expect one would feel like. The pencil is heavy, really heavy; I don't have a scale, but it weighs close to two Zebra 402 pens*. I lose pens and the Purple Pack Lady always needs pens for work, so I buy extras. Don't judge me!

The description of "wide , knurled grip" doesn't describe the front of this pencil correctly, which is a textured metal that screws into the body, making this pencil very nose heavy. That's not a problem for me, and I believe it is a feature for a tactical writing instrument. The lead is nice and thick, and it shows up nice and dark on standard paper as well as their notebooks. Replacement leads are available, and erasers too, from Amazon.

I will be putting this into my GHB for now and possibly placing this pencil in my other bags as well, not to replace the pens but to be something easier to see in a panic.


*Editrix Erin says: according to Amazon, the orange pencil weighs 0.96 oz, whereas the Zebra pens weigh 0.8 oz. 

Recap and Takeaway

  • All the things that can't be replaced with brightly colored duplicates are either going to be wrapped in contrasting tape or painted. Examples will be coming soon!
  • This pencil was sitting in the box with the Rite In The Rain notebooks that I give as gifts until I took the notebooks out last week. I'm not sure why it wasn't used until now, but it's a keeper.
  • One Rite In The Rain pencil, in orange, ordered from Amazon for $8.95 with Prime shipping.  
* * *

Just a reminder: if you plan on buying anything through Amazon, please consider using our referral link. When you do, a portion of the sale comes back here to help keep this site running!

If you have comments, suggestions or corrections, please post them so we all can learn. And remember, Some Is Always Better Than None!

NOTE: All items tested were purchased by me. No products have been loaned in exchange for a favorable review. Any items sent to me for T&E will be listed as such. Suck it Feds.

Friday, September 22, 2023

The Pacific Bay Portable Water Pump

Not actually Erin.
& is used with permission.

Back in 2020 I wrote a post titled Hydration Tube Inline Hijinks wherein I demonstrated my system for refilling your water bladder without having to dig out of your backpack. While I don't claim to be the inventor of this concept, to the best of my knowledge I haven't seen it used anywhere else; all of the quick-detach mounts I've seen are shown being used where the hose meets the bladder. 

Regardless of who invented the concept, I have been very happy with my setup as it makes it a lot easier to refill my bladder in the wild. However, an oddity of the English language is that easier is actually harder than easy, and it isn't easy using a manual pump (in my case, a Katadyn Hiker) to push water up a tube and into a bladder. When I timed myself, it took 2 minutes to pump 2 liters of water, and by the end of it I was tired and my arms were beginning to ache. Yes, it was something I could do, but when you're hiking do you really need something as necessary and basic as hydration to further tire you out? I don't, that's for sure. 

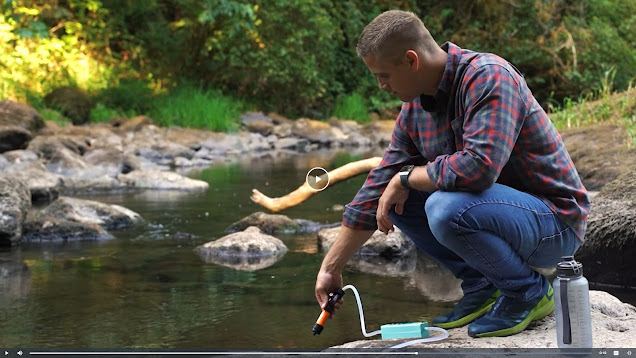
You won't be surprised, then, when I tell you that when I discovered the Pacific Bay Portable Water Pump on Amazon for $10, I bought it immediately to try it out. What follows is not specifically a practical review, as I have not put the pump "through its paces" over a weekend of camping, but rather my initial impressions and how it performs at home. 

https://amzn.to/3t7pOla


Performance
The hoses support standard quick-detach mounts used by Sawyer, Katadyn, etc. so I was able to easily adapt this to work with my inline system. 

The power button is big and clicks easily, making for "easy on, easy off" operation. It automatically shuts off after a minute of operation, but if you press and hold the power button it will pump for as long as you continue to hold. 

The pump filled a 2L Camelbak bladder from two 1L Nalgene bottles quickly and easily, taking about 45 seconds per bottle. (Yes, I paused the stopwatch while switching bottles.) Based on this information:
  • a 2L bladder fills in 1:30;
  • a 2.5L bladder should fill in 1:53;
  • a 3L bladder should fill in 2:15.
I'm not just being pedantic here; there is no pressure sensor in the pump, so there is the risk of overfilling a bladder to bursting if you can't see its fullness. 

I didn't detect any issues with performance when it ran out of water and started pumping air, although the sound changed pitch and there was gurgling in the hose.

Finally, the pump itself is slightly smaller than a standard 500 mL / 17 oz water bottle and weighs have as much, so it's quite convenient to pack. 


Problems
The biggest problem I had was making sure the hoses didn't kink, as they are a  softer and/or thinner gauge material than typical water bladder hoses. That wasn't even a true problem, but rather just a case of "Whoops, the hose is kinked, I need to straighten that out." I will need more experimentation to determine if I want to shorten the hoses or not. 

There's no battery charge indicator on the pump, so there's no way of knowing how much battery is left. However, the Amazon page states that "Performance tests show up to 78 liters can be pumped with a single charge of the battery. Lifetime expectancy of over 100,000 liters", so a charged-up pump will easily last for a weekend of hiking/camping unless you're pumping for a lot of people.

Given it's light weight I would not consider this a durable piece of equipment. I think it will likely break if dropped a few feet onto a hard object. 

This last point isn't a problem, but rather a question: should I put my Sawyer filter upstream of the pump or downstream? I'm not sure if unfiltered water would gum up the pump channel or not (although I do recommend using a prefilter, even if it's just an old t-shirt wrapped around it, just on general principles), but if so do I want to have a $30 filter protecting a $10 pump? 


The video on Amazon suggests having the Sawyer upstream of it, but then the video also shows someone just throwing the Sawyer filter into the stream. This bothers me greatly, not only because that's a great way to lose a filter if the hose isn't properly seated, but also because I'd worry that immersion in water could introduce contaminants into the clean water supply from seepage around the hose-filter junction. No, I'm definitely keeping my Sawyer out of the water, thanks. 


Verdict
This is a fun, inexpensive bit of kit that should make your life easier as long at it works. Since I have no firsthand experience with its reliability or durability, I won't suggest you put it into your BOB or GHB, but its lightweight convenience makes it a top candidate to bring along on pleasure hikes and campouts. Besides, at $10, it's cheaper and more entertaining than some movies I've attended.


Obligatory FTC Disclaimer: I bought this product with my own money. Go away. 

Wednesday, September 20, 2023

Prepper's Armory: Buying a Suppressor

In a previous post I talked about the history and function of suppressors, but only briefly referenced how to get one. I'd like to expand on this process, but please keep in mind that I'm not a lawyer and the information in this post is not legal advice.

Speaking of lawyers, do locate a good lawyer who's familiar with federal, local, and state firearms laws. For readers who are members of self-defense "insurance" programs like USCCA or US Law Shield, they usually have a non-emergency legal help line that may be useful in finding a local lawyer who specializes in firearms law.


Individual Ownership or Trust?
This is the first decision that needs to be made after deciding to acquire a suppressor, and there are pros and cons to each.

Individual ownership reduces the amount of paperwork and expense required. However, the suppressor cannot be out of the control of the owner or accessible to other people in the owners absence. Yes, other people can use the suppressor, but only under the owner's direct supervision. In my case, that would have meant getting a separate safe to store my NFA (National Firearms Act) items since my wife has the combination to our gun safe.

NFA Trusts add a lawyer's fee to the overall expense, and each member of the trust has to do a certain amount of paperwork, including fingerprints. Once done, it's the the trust (a legal entity) which owns the NFA items, and all members have authorized access. This can also simplify inheritance, especially if the inheritor is added as a member of the trust prior to final need.

Selecting a Suppressor
Suppressor shopping is the second most fun part of the process. There are numerous suppressor manufacturers to browse, and a large variety of suppressors available from each. However, take any decibel reduction rating with a grain of salt; as far as I'm aware, there are no industry testing standards for suppressors, so it's hard to compare apples to apples.

I'll use my latest purchase as an example. I wanted a suppressor that could be used on 9mm firearms or smaller, specifically my S&W M&Ps in 9mm and .22 rimfire, as well as my 9mm PCCs. One of the benefits of working for a gun shop is the occasional pro-deals available, and so I was able to get a SilencerCo Octane 9 at a nice discount.

Two of the main features that led me to this particular suppressor were the number of different attachment options, meaning that it would work on all the firearms I mentioned above, and the ability to dismantle the unit for cleaning and maintenance. Sealed suppressors can be less expensive, but they're harder to clean, and I prefer user-maintainable designs.

2 Guns, 1 Suppressor


Another consideration when choosing a suppressor is sight line. The vast majority of suppressors are cylinders with the bullet path in the center, which means the outer body of the suppressor can occlude the view through traditional height pistol iron sights. One of the few exceptions is the SilencerCo Osprey series, which places the bulk of the suppressor below the bore axis, much like Hiram Maxim's original designs.

Standard height sights with a suppressor mounted

To make sighting a suppressed pistol easier, regular height iron sights can be swapped out for taller "suppressor height" sights that allow a sight picture above the body of the suppressor. Alternatively, a red dot sight can be used.

Purchase
Once a suppressor is selected, make sure the FFL of a local dealer is on file with the seller, and order the suppressor. Most suppressor websites will have an FFL locator option to make this easy. 

Once the FFL has been confirmed, add the suppressor to the cart and pay. The item will be delivered to the FFL (anywhere from days to a few months) and the purchaser should be informed within three business days of receipt. Please, do not contact the FFL as soon as product tracking shows it arrived. There's paperwork involved in receiving any firearm, much less an NFA item.

Paperwork
Trust paperwork can be drawn up any time prior to purchase. However, the actual BAFTE Form 4 to start the acquisition process can't begin until a serial number is available; only after that point can everything start moving.

Sample BATFE Form 4

I purchased my latest suppressor through Silencer Shop. They have a fairly painless interface and trust documents can be uploaded as PDFs via the Silencer Shop user portal on their website. More importantly, Silencer Shop has SID (Secure IdentityDocumentation) kiosks in many retail locations, which streamlines the process considerably, including fingerprinting.

Waiting
Once all the documentation and fingerprints have been submitted, along with a check or credit card details for the $200 federal tax stamp fee, the waiting begins.

According to the BATFE, they've been trying to streamline the processing of suppressor tax stamp applications with a stated goal of achieving a 90 day turnaround time. We're still pretty far from that; my last suppressor (which was approved in mid-August of this year) took around 250 days from application. Current reported average wait times are available on this webpage.

Receipt and Final Notes
One of the recent changes to the suppressor process is that the BATFE no longer sends a physical copy of the tax stamp; instead, the applicant receives a PDF via email. I strongly recommend printing at least one physical copy and storing it in a safe place. In addition, I keep an electronic copy on my phone. By law, the stamp must be presentable to law enforcement any time the owner of an NFA item is in possession of that item.

Sample NFA Tax Stamp

Contrary to common belief, there is no paperwork requirement when transporting a personally owned suppressor across state lines. For any other NFA items, however, a form 20 must be filled out and approved prior to leaving the owner's state of residence.

Once the process is complete, the suppressor can be picked up from the receiving FFL. Then the most fun part can begin: attaching it to a firearm and shooting suppressed.

While some ranges may have restrictions on some NFA items, I've yet to find one that doesn't allow suppressors (as long as suppressors are legal in that jurisdiction, of course). Even though the range may not have legal authority to request viewing the owner's tax stamp, it's a common requirement. You can say no, but then they can just as easily say no to letting you shoot at their range. My advice is don't make a fuss and be prepared to show documentation.

Suppressor Mitt

Two final points. First, get a good heat resistant mitt or pad (another option is a suppressor cover), as suppressors get very hot very quickly. Use the mitt or pad to make sure the suppressor isn't loosening, at least for the first few range outings. If it starts working its way off the barrel, a baffle strike can result. If that happens, the best case scenario is that the end cap needs to be replaced; in the worst case, the suppressor itself is trashed.

Second, consider joining the American Suppressor Association.

Be safe, be careful, be suppressed.


Quality Suppressor Makers

Monday, September 18, 2023

Vehicle Check: Winter Is Coming

The dust has settled and the First 72 Hours have passed. Follow along as I build a long term plan via Prudent Prepping.

Checking our vehicles is something we should be doing regularly, and it's important to do that now since winter with its cold weather, rain, and snow will be here soon.

Easy Checks
If you know when you bought your last set of tires, you're probably okay, but if you can't remember the year, grab a penny and put Honest Abe's head in the groove of the tire. If you can't see the top of his head, then you're set for a few more miles. But if your penny is showing all of Lincoln's head, then those tires should be replaced as soon as possible. 

While you're there, check your tire pressure. Don't know what your tire pressure should be? The number is molded onto the tire, and is also shown on a plate mounted to the driver's door frame showing pressure for front and rear tires as delivered from the factory.

https://nasaspeed.news/tech/wheels-tires/setting-air-pressures-for-hpde/


Tire Information
Many people change tire sizes, so the actual pressure shown on your tire should be your guide. Your tires may not have the numbers molded quite this large, but the information is there. Tire pressure should be checked on a schedule that is best for you; I check mine every third fill-up or once a month, depending how much I drive those weeks. 

Spare tires needs to be included in this as well; now might be a good time to clean out the junk in your trunk so that you can get to your spare in an emergency.

https://us.v-cdn.net/5021717/uploads/editor/1o/qhb6z50zixo9.jpg
 

Other Easy Checks
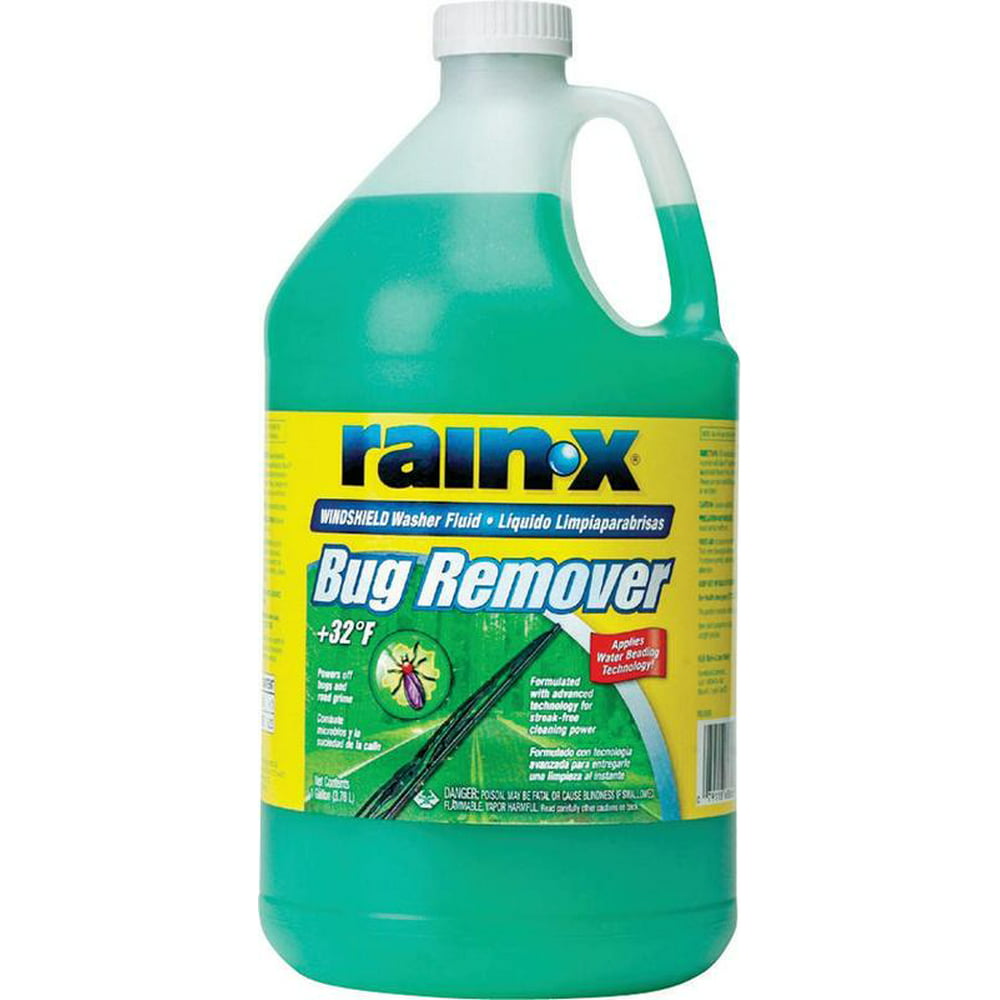
I checked the washer reservoir and topped up that with fresh fluid. I only use regular bug remover on my car, since it doesn't freeze here and I don't drive my car in the snow if I can avoid it; when there is a freeze warning, I add a small amount of lower-temperature washer fluid to get me through. 

Change your wiper blades now, if you haven't done it this year.

https://i5.walmartimages.com/asr/6d25174f-342a-432f-84fc-1fc8265d5e71_1.20469c6cc0c4e9a889858e6825c434a7.jpeg?odnWidth=1000&odnHeight=1000&odnBg=ffffff
My favorite

Not-So-Easy Checks

Brakes
If you have the room, the equipment and the skill, checking your own brakes is fairly simple. If you don't feel comfortable doing that type of work, the store where you purchased the tires will usually check them for free when you rotate your tires. Oh, you don't do that? Start now; you'll get more miles from your tires before Abe's hair starts to show.

Coolant
This is another thing that I don't have to worry about much, since it never gets below freezing for extended periods here and I don't drive in the snow if I can avoid it. In most cases, keeping the overflow tank filled to the minimum line with your recommended fluid is fine. If you don't know what that is, or can't find your Owners Manual, I would suggest driving to a trusted repair shop to look at your car.

The Really Simple But Expensive Way to Check All This
Most oil change stations can do all of these inspections and replacements for you while you are over the pit; just be aware that the prices you pay will be higher than doing the work yourself. But, it will be done all at once and correctly, with the ability of blaming someone else if something goes wrong!


Recap and Takeaway
  • Check your tires (including spares). 
  • Check your brakes. 
  • Check your fluids. 
  • Check your wipers. 
  • You are a prepper, so make sure you are doing things before the emergency!

* * *

Just a reminder: if you plan on buying anything through Amazon, please consider using our referral link. When you do, a portion of the sale comes back here to help keep this site running!

If you have comments, suggestions or corrections, please post them so we all can learn. And remember, Some Is Always Better Than None!

NOTE: All items tested were purchased by me. No products have been loaned in exchange for a favorable review. Any items sent to me for T&E will be listed as such. Suck it Feds.

Wednesday, September 13, 2023

Prepper's Pantry: Extracts and Syrups and Reductions, oh my!

When it comes to food preservation, there are many methods. One trait that most of them have in common is using most (or all) of the fruit or vegetable being preserved. However, another option is the extraction of only the flavor, or essence, of the food for use as an ingredient in recipes. Almost any herbal or aromatic plant, most fruits, and many vegetables can be processed using these techniques. Most of these methods are fairly simple, and require few (if any) ingredients other than the flavoring in question. The most common extra ingredient for the extracts, as an example, is time.

Filtered and bottled extracts in the author's pantry
 
Extracts
These are usually made by submerging a flavorful herb in alcohol for a variable amount of time. The resulting liquid, once strained, can be stored in a cool dark place almost indefinitely.

Every baker is familiar with the benefits of vanilla extract when making cookies or pastries.

Ingredients:

  • 6 vanilla beans
  • 1 cup 80 proof (minimum) vodka (or bourbon, or brandy, or even rum)
Instructions:

  1. Slit the vanilla beans so the beans are exposed. If the length of the vanilla beans don’t fit in the bottle or jar, cut them into smaller pieces.
  2. Place beans into bottle or jar.
  3. Pour the spirit on top, using a funnel if needed. Ensure the beans are fully submerged. Shake a few times.
  4. Store at room temperature out of direct sunlight. Shake every week or two. 
  5. This can be ready to use in as little as 8 weeks, but 12+ months is better.

When I make vanilla extract, I use a quart canning jar and approximately 24 oz of vodka. When done, I break it up into smaller glass jars and put a few pieces of vanilla bean in each one. These make great gifts for fellow bakers.

Mint is an extremely versatile plant. It can also be a nuisance with its tendency to take over any area where it's planted.

Mint extract: the beginning

Ingredients:

  • ½ cup mint leaves
  • 1 cup vodka
Instructions:

  1. Place the mint leaves in a clean mason jar.
  2. Using a muddler or a wooden spoon, crush them gently to release some of the oils.
  3. Pour the vodka over the leaves, then push them down to keep them submerged.
  4. Store in a cool dark place for 30 days, shaking occasionally.
  5. Strain and store in a lidded bottle in the pantry.
Mint extract: second straining


As with the vanilla extract, I use a larger quantity of both mint and vodka. When done I strain it twice, once to remove the leaves, then a second time through a coffee filter to remove any sediment.

Not only can mint extract be used in baking, but it's also a good insect repellent, and can help keep rodents out of cars. Just sprinkle a few drops on the cabin air filter and in the air vents every few months.

Mint extract: final product

Syrups
 
Basic Simple Syrup
For those who enjoy cocktails, simple syrup is a fairly common ingredient. At its heart, it's a super saturated solution of sugar and water used to add sweetness to, or counter bitterness in, mixed drinks.

Ingredients:
  • 1 cup water
  • 1 cup granulated or brown sugar
Instructions:

  1. Add water and sugar to a saucepan over medium-high heat.
  2. Bring the mixture to a simmer.
  3. Stir occasionally until the sugar has completely dissolved.
  4. Cool then store in an airtight container, in the fridge, up to four weeks.

Some simple syrup recipes advise reducing the volume by up to half during the simmering phase.

Ginger Simple Syrup
This can be used as is to calm an upset stomach, in baking, or mixed with seltzer for home-made ginger beer.

Ingredients:
  • 1 lb peeled and cut ginger
  • 2 to 2 ½ cups of water
  • 1 cup of sugar
Instructions:

  1. Measure the depth with half the water added, then add the rest and cook the mixture down to approximately that level.
  2. Strain and bottle when done and it should last in the fridge for three months or so.

This is an even simpler version, as no cooking is required, only time.

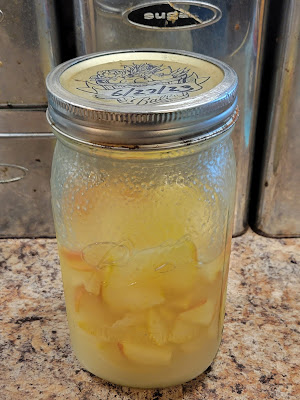
Apple simple syrup mid-process


    Ingredients:

    • 1 apple, cored and sliced thin
    • Equal weight in sugar, plus some for topping
    Instructions:

    1. Coat the apple slices in sugar and put them in an airtight jar in the refrigerator for 20-30 days. Make sure there is a layer of sugar on top.
    2. Shake every few days to break up the sugar that settles to the bottom.
    3. As with the ginger syrup, strain and bottle when done and it should last in the fridge for three months or so.

    When done, dehydrate the apple slices for a bonus tasty treat.

    Reductions
    A reduction is related to a simple syrup, but generally refers to savories that have been cooked down to thicken and concentrate the flavor. A similar concept is a glaze. The distinction between the two isn't a hard line, but glazes usually have a sweetener added.

    Beef or Pork Reduction

    A classic reduction is made from the juices left in the bottom of a roasting dish or pan after cooking a roast, generally beef or pork. Due to the variable nature of the main element, I'm going to list approximate ingredients and measurements the reader can adjust to taste.

    Ingredients:

    • Juices from cooking a roast
    • 1 tsp to 1 Tbs olive oil or bacon fat
    • 1 small to medium onion, diced
    • 1-2 cups red wine or red wine vinegar
    • Salt and pepper to taste
    • Garlic to taste, diced or crushed
    • 1 to 3 Tbs herbs appropriate to the type of meat
    • 1 Tbs butter (optional)
    Instructions:

    1. Add the oil, onion, and wine/vinegar to the pan.
    2. Over medium heat, scrub the bottom of the pan to incorporate the browned bits.
    3. Cook until the onion is soft, and the liquid is reduced by approximately half.
    4. Taste the liquid and add salt and pepper to taste.
    5. Add the garlic, herbs, and (if desired) the butter.
    6. Cook until the butter is melted and fully incorporated, or the flavors are blended to taste.

    Some people like to add a cup of beef or pork stock before the salt and pepper and cook down by half again. For a smooth result, use a stick or stand blender, or a food processor, to liquefy any remaining solids before serving.

    Ingredients:
    • 2 cups balsamic vinegar
    • ½ cup brown sugar
    Instructions:

    1. Mix in a saucepan over medium heat, stirring constantly until the sugar has dissolved.
    2. Bring to a boil and reduce heat to low.
    3. Simmer until volume is reduced by half (about 20 minutes).
    4. Let cool, then pour into a lidded jar. Seal and store in the refrigerator.

    This will last indefinitely. I use it on pork and chicken, as well as drizzled over mozzarella and fresh bread.

    Note: when chilled it will thicken considerably, as in "a spoon will stand up in the jar" thick. Heat it in the microwave in 10 to 15 second intervals until the desired consistency is achieved. A hot water bath can also be used, but will take longer.

    I said the balsamic glaze was thick (or should I say "thiccc"?)

    There are many other flavorings that can be preserved through these methods. Bon appétit, and happy experimentation. 


    Sunday, September 10, 2023

    Bug Out Rations

    Not actually Erin.
    & is used with permission.

    When it comes to food for bugging out, there are many options that are nutritious, portable, and shelf-stable. 

    I didn't mention "tastes good," did I? That was deliberate. The two biggest problems I have encountered when choosing bug out rations are their palatability and the amount of volume they occupy. This post will be a brief overview of what I believe are the best choices for bug out foods, with more detailed articles coming later. 


    Survival Ration Bars

    http://amzn.to/2tt3P46

    Also known as "lifeboat rations", these are vacuum-sealed packages of bars of... well, I don't know if I'd call them food per se, but they meet Coast Guard standards of life-sustaining nutrition. 
    • The Good News: They have a small form factor; have a five-year shelf life at room temperature or above, as they are designed to be stored in life rafts; and are inexpensive (about $12 for a 3600 Kilocalorie package).

    • The Bad News: Flavors start at "not bad" and get worse; flavors are consistent throughout the package, which can result in appetite fatigue; Kcal ratings are based on being sedentary and waiting for rescue (1200 Kcals per day for three days) and not being active -- activity will double your calorie requirements. 
    Chaplain Tim wrote an excellent series on survival ration bars on this blog, and since I agree with his assessments I feel no need to duplicate his efforts. Please go read his posts to learn more. 


    Meals, Ready to Eat (MRE)

    https://www.mreinfo.com/mres/#

    If you're a prepper, you know what these are and likely have eaten at least one. If you haven't, these are high-calorie single meals with a lunch/dinner menu; I believe that at one point there was an omelet MRE and it was... not good. In fact, the flavor profile of MRE is such that they have been dubbed Meals Rejected by Everyone, although they do continue to improve over the years.
    • The Good News: They come in a tough, watertight bag which protects the food from pests and weather; they stay good for at least 3.5 years when stored at room temperature; they are designed to provide an infantryman enough calories to fight; they are reasonably affordable at around $20 per meal

    • The Bad News: Food taste and texture can be hit or miss; high amounts of protein and sodium in meals can result in dehydration and constipation if you don't drink enough water; at an average weight of 22 ounces and dimensions of 12"x8"x3", each meal is larger than an average hardcover book and nearly twice as heavy; breaking down an MRE into smaller elements greatly reduces its longevity. 

    Humanitarian Daily Rations (HDR)

    https://www.mreinfo.com/other-us-rations/current-us-rations/humanitarian-daily-ration/

    Not many people have heard of Humanitarian Daily Rations; the short version is that they are "like MREs, but for civilians" and are handed out at disasters or given to natives as a show of goodwill. Unlike MREs, HDRs provide a full day's worth of meals for an adult. Also unlike MREs, they are strictly vegetarian, although they are not vegan. Per mreinfo.com, "In order to provide the widest possible acceptance from the variety of potential consumers with diverse religious and dietary restrictions from around the world, the HDR contains no animal products or animal by-products, except that minimal amounts of dairy products are permitted. Alcohol and alcohol based ingredients are also banned."

    I have not yet eaten one of these, but a friend of mine has, and I will include his review in the expanded article on HDRs. 
    • The Good News: They contain an entire day's worth of food; they are less expensive than MREs (about $10 per HDR); their packaging is comparable to  that of MREs, so shelf stability and impermeability is similar; they are designed to appeal to as wide a demographic as possible. 

    • The Bad News: Their taste is similar to MREs; vegetarian but not vegan is likely to make everyone unhappy; lack of animal proteins may result in lack of energy in high-activity situations; there is no chemical heater like MREs have. 

    First Strike Rations (FSR)

    https://en.wikipedia.org/wiki/First_Strike_Ration

    First Strike Rations are relatively new, having been invented after the onset of the Second Gulf War. True to their name, they are a lightweight, high-calorie meal system that is meant to be carried by soldiers and Marines during the initial stages of war when odds are high that they will be beyond the reach of resupply for days. Because of this, the FSR is meant to be eaten by hand (although a spoon is supplied for convenience) and do not need heating to be palatable; pocket sandwiches, energy bars, and other finger foods predominate. Unlike MREs, they carry a full day's supply of food, including snacks and caffeine in various forms, and despite all this are approximately half the weight and dimension of the three MREs it would take to match its nutrition. 

    There will be a greater review on FSRs, but I want to say that they have been an absolute game-changer for me when it comes to packing BOBs and GHBs. Furthermore, they taste good. I opened one at my LibertyCon demonstration to show its contents and I ate it on the way home the next day. While I wouldn't call it great cuisine, I enjoyed the taste of every component within the ration pack; at worst, it reminded me of a packed school lunch, and at best it was similar to tasty fast food. 
    • The Good News: A full day's worth of food in a package slightly larger than a single MRE; easy to eat on the move / one-handed; plenty of snacks, goodies, and caffeine; the food tastes good.

    • The Bad News: If you want a hot meal you will be disappointed, as heating  pocket sandwiches doesn't do much and hot applesauce is disgusting; the lighter-weight packaging which reduces weight and volume also cuts the shelf life; an individual FSR costs about $30-$35; buying a case of 9 gives you a better per-unit cost (sometimes as low as $15 each) but the case costs over $130. 


    Which of the three-letter ration packs (MRE, HDR, FSR) would you like to see reviewed first?

    Thursday, September 7, 2023

    A Different* Take on Bags

    * Not really that different.  

    The dust has settled and the First 72 Hours have passed. Follow along as I build a long term plan via
     Prudent Prepping.

    It's time to announce the true identity of the Purple Pack Lady as my lovely and extremely hardworking wife, Ophelia, aka Ophie. She doesn't have any online presence, anywhere, so there is nothing to follow. With that out of the way, on to the real post.


    Get Home Bag Preps
    Ophie's daughter now lives in a snowy winter area that is also subject to wildfires, which was at first blamed on climate change but in fact has now been shown to be 50% arson at a minimum. The better news is that the closest forested areas are several hours drive away for her town, and there's another saving factor in that  her work is in the entire opposite direction of the forested areas that might possibly burn. While her distance from the fire areas is nice, power lines have been down from fire damage, and the house has been dark for several hours on several different days.

    I did send the duplicate bag I made for Ophie to her daughter, but due to slightly different conditions than here, we have modified it quite a bit. This post was what was I did to address the specific differences. Since she is now settled and not going to move any time soon, she needs to start making preps for home and at work.

    Stranded at Work
    Since her work is in a relatively large city, being without food isn't the issue, but sleeping/staying at work  could be hard if the snow is bad. Her mother and I both have scolded her for trying to get home in bad weather, so her plans are now to stay put, which means either keeping sleeping gear in the car or stowing it at the office. 

    My suggestion was to keep it at work, since the decision not to head home will be made there and that slightly more bulky items could be used. Keeping even more preps in her car means buying smaller and lighter, and therefore more expensive  items designed for backpacking. I've sent her links to what I recommend, as the stores I use aren't the same as there and Amazon is different as well.

    Stuck at Home
    This can get expensive either quickly or slowly, depending on how you want to look at things. As she lives in a rental and not her own place, the recommendation for me is to keep it simple and spend money slowly. Culturally, being prepared for both emergencies as well as hospitality is built into her; I've never gone to visit anyone from her culture without being offered twice the food that I eat for a similar meal and having food to take with me when going home. 

    Storing slightly more of the basics in water-resistant containers, like a trash can with a tight-fitting lid, is what I suggested. I can't seem to find an inexpensive source for 5 gallon food-grade pails and lids in her area, so those are something to find later. I did find the local equivalent to these Ozark Trail 6-Gal Water Storage Jugs for her.

    From Walmart's website:
    • Traditional jerry can design
    • Heavy-duty plastic construction
    • BPA-free water jug is safe for storing household water supply
    • Ozark Trail 6-gal water jug has a spout system
    • Angled handle for 2-handed gripping
    • Easy to lift and pour
    • 6-gal capacity can keep 1 person hydrated for a week in an emergency situation
    • Keep in your vehicle as part of a supply kit
    • Ideal for camping and hunting
    I have similar jugs purchased form Walmart and other places. I like the fact that they will nest well together, and aren't so heavy at 6 gallons that they can't be lifted by shorter and slightly-built people. My suggestion was to start with buying 1-2 per person for cooking and 1-2 per person for sanitation. The chances for a longer outage are fairly remote, so this should be a decent starting point.

    Cooking
    This is an easy one, since grilling is a way of life for her and if there isn't a charcoal BBQ close, something is really wrong! There is a Solo Stove in her GHB which I hope will never be needed, but is there just in case. I do recommend keeping an eye on the Solo Stove Home Page for sales, as that is where I made a great buy on 2 Solo Lites several years ago. 

    Recap and Takeaway
    • Check in with friends and family to see if circumstances have changed, either at home or travel related. That could change what you carry or store.
    • Dealing with folks that have a history planning for disaster makes prepping so much easier!
    • Nothing was purchased by me for this post.

    * * *

    Just a reminder: if you plan on buying anything through Amazon, please consider using our referral link. When you do, a portion of the sale comes back here to help keep this site running!

    If you have comments, suggestions or corrections, please post them so we all can learn. And remember, Some Is Always Better Than None!

    NOTE: All items tested were purchased by me. No products have been loaned in exchange for a favorable review. Any items sent to me for T&E will be listed as such. Suck it Feds.

    The Fine Print


    This work is licensed under a Creative Commons Attribution- Noncommercial- No Derivative Works 3.0 License.

    Creative Commons License


    Erin Palette is a participant in the Amazon Services LLC Associates Program, an affiliate advertising program designed to provide a means for sites to earn advertising fees by advertising and linking to amazon.com.