Thursday, August 14, 2014

Welcome to Rock Ridge

OK, the wide-spread crisis has passed (EMP attack, solar flare, zombies rising, economic collapse, WW3, or whatever knocks civilization for a loop) and it's time to rebuild.

If your bug-out location is well-stocked, and you've made preparations for the inevitable growth of your tribe (people will make babies under ANY circumstances), then your trips into town will be limited. There will be times when you have to find something that you didn't stock enough of or can't do for yourself, so going into town is going to have  to be on your list of options.

Another possibility is that you couldn't (or didn't) prepare for the exact crisis that occurred, or your tribe has grown beyond what your land can support. Someone is going to have to move into town and try to make a living. There's no reason that a post-apocalyptic town has to be copied from "Mad Max" movies, we've seen small towns before and they weren't all that bad.

On Small Towns

Towns spring up where there is a need for them. This usually involves industry of one form or another. Farming is an industry, as is mining (fuel or metal), fur trapping, and manufacturing. Small towns in America usually formed around one of those four industries as a form of support structure or infrastructure for the industry. They provided the entertainment, trading, education, and legal opportunities not found in a barn, mine shaft, camp site, or factory ,as well as services aimed at separating fools from their money.

Towns are a mixture of good and bad when it comes to security. They can provide the "safety in numbers" effect, but they are also a concentration of people and wealth which makes the targets for bandits and "marauders". The town of Northfield, MN has served as an example for robbers and bandit since 1876. If the people in town have the will to fight, they stand a good chance of fighting off roving bands of raiders. If things get too bad, or you expect them to, perhaps you should look at the fortified towns that the US Army built along the frontier as an example of what worked against roving bands of lightly armed raiders. They contained the same basics as any small town, just within a wall and with more fire support.


Location, location, location

Towns also tended to be placed on, or near, routes of transportation (roads, railroad tracks, canals, harbors, or mountain passes) and waterways. If you're lost in the woods and want to find civilization, what do you do? You find water or a road and you follow it, because eventually you'll find a town on the water or road.

Transportation is important for the transfer of goods and people, which the townspeople will tap into to make their living. Using the economy of scale, a grocer can buy commodities in bulk and make a profit by splitting them up and reselling them in smaller quantities. Craftsmen can set up shop and find steady employment because of the number of people either in or visiting town. Blacksmiths, coopers, wagon-makers, chemists (early pharmacists), doctors, and such stand a better chance of surviving in a town than living by themselves.

Water is critical to any town. Look around your home state and try to find a city or town that doesn't sit on or near a source of water - they're rare. Water for drinking, as well as use in whatever industry is there, will usually be the deciding factor for how big a town can get. Water is also the standard method of disposing of sewage, or at least it has been for the last 150 years or so. The advent of municipal sewers has done as much for disease control and extending life expectancy as any medical breakthrough. Living near a stream or small river is better than living near a small lake, but not as good as a large river or lake. The ideal location is where a river flows into a larger body of water, either lake or ocean - look at where the big cities of the world are located. Wars between neighbors, cities, states, and nations have been fought over access to water - it's that important for the survival of civilization.


Welcome to Rock Ridge

Let's look at the layout of a typical small town from before the age of electricity. Please excuse the map, it's my first attempt at using some new software.


Rock Ridge sprang up to support a farming community, mostly ranchers raising cattle, but the railroad is planning to build a line nearby (unless they have to change the route because of something unforeseen like quicksand).

As you can see by my map, Rock Ridge has most of the amenities offered by a small town: a saloon with a stage for visiting acts; places to buy food, feed, furniture, lumber, and supplies; as well as services like a barber shop, funeral parlor, bank, stage line, and hotel. The First Methodist Church doubles as a meeting hall for town business. The bank hosts the Post Office and telegraph office, and there are small shops and businesses located above some of the street level shops.

Other things to be found in small towns like this may include a local printer and maybe a newspaper; a doctor's office (or a place for a visiting doctor); a chemist (pharmacy), a cobbler (to make footwear), and a fuel supplier.

Things you wouldn't find in a mid-1800's town that could be of use would be a library, electrical and telephone grids, street and sewers maintenance (or streets and sewers at all), and warehousing.

Rock Ridge is not the county seat or they'd have a courthouse to take care of the paperwork that is needed to keep a semblance of peace - things like registering deeds to ensure that land isn't stolen or taken by moving fence lines, or registering births, deaths, and wills to make inheritance of property less contentious. The level of government will have to be determined by the people of the community, and since we don't do political issues on this blog I will leave it at that.

I realize that it is not very likely that we'll have to start a town from scratch, but knowing what has worked in the past will allow you to look at what is available with an eye towards making it more useful under different conditions.

In the next few weeks I'll be writing about the skills and businesses that could be useful in a small town like Rock Ridge and maybe give you some ideas for areas of study. This will be an exploration of skills that are almost gone in today's world that have helped people in the past survive, and even thrive. At the very least, this should help explain how we came by some of the things we use every day, and maybe even give some insight into how to recreate them if there is ever a need.

Wednesday, August 13, 2014

Prudent Prepping: Sawyer Filter Dry (and Wet) Run!


The dust has settled and the First 72 Hours have passed. Now we concentrate  on what to do in, and how to plan for, the long term via Prudent Prepping.


Sawyer Filter System Test
 and 
Slight correction to last week's post


This is Part 2 of the Sawyer filter article that I started last week. The instructions will be followed to the best of my ability, to give as realistic a "First Use" review as possible.


This is a picture of the 2 water pouches and the cleaning/backwash syringe. Sawyer includes them so this filter can be used as a personal as well as a group filter. When dry, the whole setup weighs 5oz. and when rolled up neatly, will fit into a 1 liter wide-mouth water bottle.

Here are the major components that make up the Sawyer filter.

Top Row: Sawyer filter body, 13/16" spade drill bit

Second Row: Spare sport bottle top and cap (same as the one on the left end of the filter); 2 screw-on bottle caps; a spare filter inlet fitting; and a plastic hook (more on this later) used to attach filter to the bucket as seen in last weeks post.

Bottom Row: Spout assembly with strain relief and another filter inlet head.


What makes this product so nice, in my opinion, is the lack of proprietary parts and fittings. All caps are standard water bottle size, shape and thread pitch, which makes for easy replacement.


Building the Filter

The instructions state no power tools are needed to install this filter, so that is how I started.
Since this is a test build, a non-food grade bucked was used. In an emergency, any clean bucket that has had no chemicals of any kind in it may be used.

  1. Measure 1.5 inches up from the bottom of the bucket. It is important not to be less than this or more than 2 inches. More on this later. 
  2. I grabbed the included bit in my hand and started 'drilling'. 3 minutes later I was about 50% through the bucket and with my hands starting to cramp, I broke out my cordless drill and finished drilling the hole on LOW speed. One mistake people make when drilling lightweight or flexible plastics is drilling at too high a speed, with too much pressure applied to the job. Due to the aggressive shape of the bit, too fast and too hard runs the risk of cracking the bucket as you drill through.
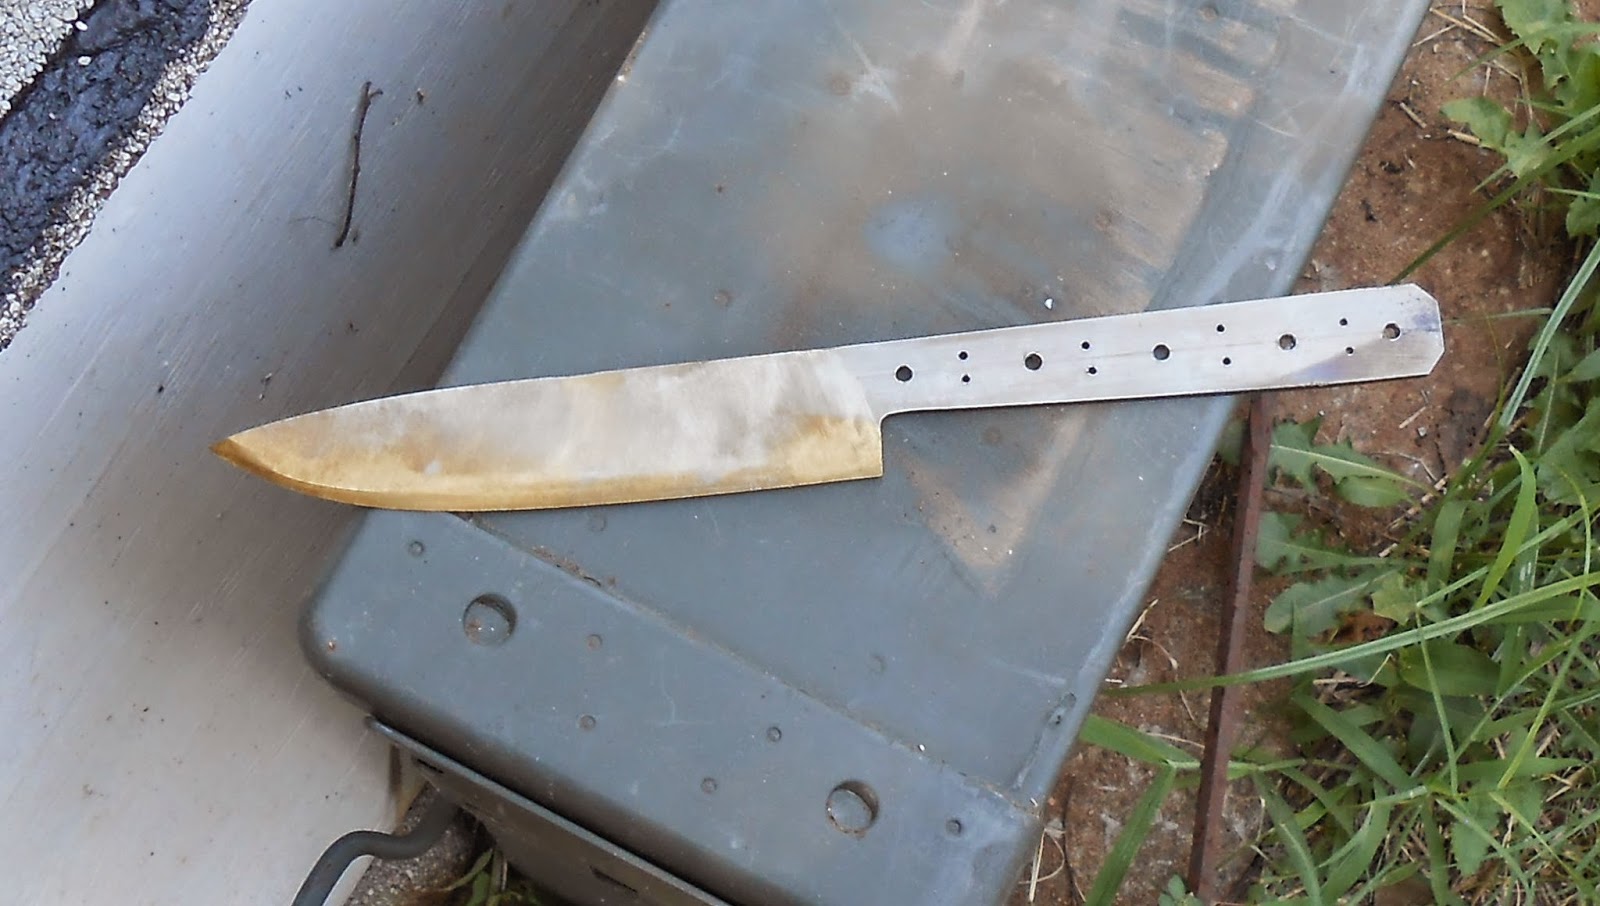
  3. Clean the edges of the hole (inside and out), being careful to remove the 'fuzz' from the edges and not change to shape of the hole as you go. Drag the blade of the knife over the side of the hole instead of attempting to slice the excess off. This will help to prevent any leaks when using the filter.
  4. Make sure to wash out the pail to remove any junk, like the curlicues visible on the table.


This next picture shows the spout and the mounting system. Notice the two cone-shaped washers with their narrow ends pointing towards each other. That is how is needs to be when installed.


   A close-up of the outer washer, correctly installed.


Assemble the spout, with the narrow end of both washers pointing towards the bucket, and then install the nut to finger tightness.

On my first run I found a slow drip from around the spout, which almost stopped when I reached into the bucket and wound the nut on tighter. I don't think using wrenches are required, since after tightening the leak slowed it down to a drip every 30-45 seconds.


Here is a picture of my assembled Sawyer filter bucket, and now you can see why the hole has to be within very narrow limits:  The built-in strain relief will not be at the correct angle to steady the filter and hose assembly. Too low or too high, and the threaded end will not be centered in the hole, which could distort the gaskets and cause leaks or premature failure of those rubber pieces.

At 1 1/2" off the bottom, the strain relief is resting perfectly on the table and the spout is square to the pail.

This was my second hole, as my first was too high.  


This is the last accessory in the kit: a faucet adapter. I did not see in the directions where or how this is to be used, but it doesn't seem to be intended for this to attach to the filter, but instead used to fill buckets. I am checking for more info.


The Filter Test

This was one of the simplest projects I have ever done, and the easiest to do. The use of power tools is really not needed -- if there are extra people around and you need to tag-team the drilling, so be it. I would estimate the total time to do this by hand to be less than 10 minutes, including prepping the hole and attaching the spout. With power tools, the total time was less than 3 minutes.

Really, really simple.


First run with water
Sawyer wants the filter to be pre-wet before use, if the filter is dry. This involves using the Backwash syringe to force water through the fibers 2-3 times. Obviously, this needs to be done with clean, drinkable water. Once this was done, the bucket was filled and onward I went to test the filter!

When I stated last week that it took 2 hours to filter 5 gallons of water, I'm afraid I was operating from a misunderstanding.  Those 2 hours were added onto the filtering time to allow any large particles to settle to the bottom of the supply bucket -- not how long it would take the Sawyer filter to process 5 gallons! The actual time to filter (almost) 5 gallons of water totaled just 20 minutes.

Why almost? There are approximately 1.5 inches of water in the bottom of your bucket, where contaminant particles will settle during the filter run. This works out to about half gallon that needs to be discarded.


Second run
No backwashing was required, since I'm using tap water. The same small leak was still there, but otherwise no other problems were observed and this time the bucket emptied in 18 minutes!


Storing your filter
After filtering contaminated water, Sawyer recommends backwashing the filter several times with a mild bleach solution and allow to air dry before packing your gear away.


A VERY, very minor complaint
Image courtesy of Amazon.com

The only thing that I have any concern about is the hook that is used to keep the filter out of the dirt (or to stop the flow of water if you don't need to filter everything). It is a thin, flexible plastic piece that I think might break if dropped. 

Even with this, I have to give the Sawyer a 5 star rating due to its ease of assembly and use.

To recap: One Sawyer filter set, model SP181, $52 through Amazon.


As always, if you have comments, suggestions or corrections, please post them so we all can learn. And remember, Some Is Always Better Than None!
 
NOTE: All items tested were purchased be me. No products have been loaned in exchange for a favorable review. Any items sent to me for T&E will be listed as such. Suck it Feds.

Tuesday, August 12, 2014

More Fun with Potassium Permanganate

Last week, Erin covered using Potassium Permanganate to treat drinking water. She also mentioned that it can be used as a disinfectant, which got me curious. So, here's how to get even more mileage from your PotPerm.

In its concentrated form, potassium permanganate is caustic and will burn, so it needs to be diluted. How far you dilute it depends on the use.  As Erin pointed out, the lightest pink is safe for ingestion, but nothing past that.  Disinfectant levels of potassium permanganate in water occupy the next two levels of color.  Also, be advised that PotPerm tends to stain, including skin and any vessel it is used in.

http://chemistry-chemists.com/N6_2011/U7/ChemistryAndChemists_6_2011-U7-3.html

For basic sores from skin irritation (eczema, etc.):  A solution of 1:10,000 is recommended, used as a bath. This gives a pink color to the solution, roughly the level used to treat water for drinking (no darker than bottle #2 from the left).  Used twice daily for two days, this will relieve sores and soothe pain.  This treatment is not recommended for sores from dry skin conditions.

For blisters and other topical sores: Make a 1:1,000 solution (similar to bottle #3), soak rags in it and then cover the area in 20 minute intervals, allowing the area to dry between treatments. This procedure is particularly effective on weeping or draining sores.  These sores are gross, and addressing them promptly is important.  This is where the real beauty of PotPerm as a disinfectant comes through.

For use as an antifungal: A 1% solution (darker than #3 but not as dark as bottle #4) is recommended.  This covers tinea pedis (Athlete's Foot) and similar conditions. Use the same treatment procedure as with eczema.


All treatment methodologies come from DermNetNZ (New Zealand Dermatological Society) and the WHO.  The EPA also has an interesting .pdf about potassium permanganate, if that catches your attention.

As such a simple disinfectant and antiseptic, I'll be adding a bottle to each of my car kits.  I'm a sucker for multipurpose gear, and this covers such a wide base as to not be missed.

Lokidude

Monday, August 11, 2014

Packs: My turn.

Since I think everyone else has talked about their packs or their hunt for a good/better pack, I guess it's my turn.

I have two packs that I use: a hiking pack and a trail pack.  Yes, I said trail pack, as in the backpacks you'd use for on the Appalachian Trail or the Pacific Crest Trail.  I don't do the whole tacti-cool, "oh this pack is soooo perfect for bugging out, it's from (5.11, Maxpedition, etc.)" thing. Yes, their gear may be "OMG teh awesome!", but they're also expensive as hell. Their packs -- forgive me guys, but I don't plan on being nice here -- are assembly line packs.

Don't get me wrong, their stuff is pretty freaking awesome... but they're all built, despite the different size ranges, with a "one size fits all" kind of approach. While that may be the most efficient way to manufacture items to appeal to the broadest range of humanity, the fact remains that humans aren't widgets.

I'm a 5'9", very slender woman (How slender?  Let's just say one of my nicknames is "Elfling" and leave it at that) with a narrow frame. Most packs are way, way, WAY too wide for me. Even the smallest of the "fashionably cool" bags end up looking like the rucksacks they give to "light" cavalry troops when I put them on.


Trail Pack

I spent a good two years hunting for a pack before I finally found this one here on the right.  Meet my bug out bag, a Teton Scout 3400.

"That's a backpacking pack, Evelyn."

YEAP!  This is my camping pack, my bug out bag, my trail pack.  I don't do that whole "I need a separate pack for every little thing" jazz.  I don't have the money, the time, or the patience for that kind of nonsense. If you have the money to waste on a pack specifically for bugging out when you have a camping pack that you are used to hauling for long treks and that you know inside and out... then you, my friend, aren't prepping right.  That $100 to $350 you just threw down the drain could have been used to buy better shelves for your bug-in preps, fix something on your vehicle that you've been putting off,  laying in more stores of bottled water and canned meat, etc.

As an aside to the women out there: buy trail packs that are designed for your bodies rather than "tactical" bags that are designed for men. If anyone gets on your case about your bag not being tactical enough, just pat them on the head and say "That's nice, but this is what works for me and, more importantly, it's comfortable."

I have to confess that, sadly, this pack has done more in helping me move than actual hiking, but it's held up beautifully either way. However, a drawback of using a pack you use for camping is that they do wear out. After six years of having this Teton Scout 3400,  it finally had a failure.

About two, three weeks ago, my fiancé and I took our gear out on a shakedown. Six minutes into the hike, I was miserable from not being able to feel my right arm and in a decent amount of pain. One of the nylon webbing straps on my left shoulder had given on out, leaving the weight of the pack unevenly distributed.  (See exhibit A, left.)

Four minutes later, we ended up dropping the packs at our campsite and exploring with just our vest gear. Fast forward to today, with the fiancé wanting to go on another shakedown trip soon.


Making Repairs

Now, I decided that I was going to fix this pack as I don't have the money or inclination to find a new pack. I'd rather not go through the aggravation of trying on pack after pack after pack, and finding that they are too long, too short, or too wide.

Quilting thread is the paracord/duct tape of the sewing world. Seriously.  I have one spool in every major color and there have been several times where I've had to hem pants or other clothes.  Yes, it's all by hand (I don't have the space for a sewing machine).  My biggest concern was whether or not I would have a sewing needle thick enough and strong enough to handle going through the actual shoulder strap in order to fix the webbing. Thankfully, the answer was "yes."

"But what if you didn't have one?"

Ah, see all these lovely buckle-wears, bungees and straps?  Had I not been able to fix the pack, all her parts would have been cannibalized into their separate components and pieces. I would have ended up with several yards of nylon webbing, at least six buckles of various sizes, several D-rings and two bungee cords, along with the top part which I'm fairly certain I could turn into a small pack or hip pack.

Which would leave me with several spare bits and pieces that I could use to fix any problems on any new pack I would need to purchase.

Now, fixing the strap was the most basic sewing that I could do.  However, due to it giving out, I indulged my paranoia a little bit and put three strips of stitching on the strap.  Then I checked the right shoulder.  That stitching looked okay, but I still put a second line of stitches just to be safe.  Voila! My pack is back to functioning again.


Hiking Pack

Now, I did mention that I also have a hiking rig.  This would be it on the right.

"That looks tactical, Evelyn!"

It's about as tactical as a pair of jeans. I needed a water bladder pack and Big 5 (an outdoor supply store here in L.A.) had this for $30.  It's seen more action than my big pack.  This pack still looks huge on me, just not as badly as other bags have. It's got the perfect number of pockets and MOLLE on it.  I have it set up for day hikes right now, but in all honestly, I could easily use this as a get-home bag.  It's big enough and sturdy enough to hold a good three or four days worth of food and water.

There is space at the bottom of the pack to put a sleeping pad and a bivvy sack if I wanted to, and the pack accommodates even the larger water bladders.


You see, you don't need the next big thing in packs. You don't need five, six, or seven packs.  You only need a few, depending on where you keep them.  Dual-purposing your gear will save you time, money and frustration. I know it has for me.

Friday, August 8, 2014

Potassium Permanganate for Water Purification

Not actually Erin.
Picture by KJ Photography
& is used with permission. 
Water week concludes with a discussion about a chemical no prepper should ever be without: Condy's crystals, aka potassium permanganate. An entire series of articles could be written about the uses of this substance, as it can do so many things:
But what we are interested in today is its ability to disinfect and purify water. 

Words of Caution

Before we begin, however, I need to make the following disclaimer:  Potassium permanganate can be harmful or fatal if used improperly. 
  • Crystals, powders and concentrated solutions are caustic and can burn the skin. Wear gloves!
  • Too much PotPerm can cause poisoning if ingested. Be aware of concentration in water!

What It Purifies

Not only does PotPerm disinfect water (it is used in the water treatment industry), it also removes microcystin toxins like the ones that compromised Toledo's water supply and inspired this week of articles: 
Potassium permanganate at 1 mg/L was found to achieve 95 percent removal of microcystin-LR at a starting concentration of 200 µg in 30 minutes, and higher permanganate doses achieved complete removal. 
However -- and this is important -- if you add PotPerm to water still contaminated by blue-green algae (such as in Toledo), the chemical reaction could result in the algae releasing more microcystin. 

Therefore, before you treat your water with potassium permanganate, it is recommended that you always, ALWAYS, filter your water (such as with the system David talked about on Wednesday). 


Procedure for Purification

First,  filter your water.  This will remove sediment, blue-green algae, and other nastiness you don't want to drink. 

Second, pour your water into a clear container. It needs to be clear so you that can judge PotPerm concentration from the coloration. If you do not have a clear container, use a one with a sufficiently large opening (like a canteen cup) so that you can see the coloration without having to look through a narrow bottleneck. 

Third, add PotPerm crystals to the water. Ideally, this is done with tweezers or a very small spoon, as it doesn't take much to disinfect water. The rule of thumb is 3-4 crystals per liter (roughly 1.06 quarts) of water.

Fourth, stir the water/shake the bottle to dissolve the PotPerm and disperse it completely into the water. Judge its coloration (below) to ensure you have the proper 1:10,000 (0.01%) solution. 

Finally, wait 2 hours before drinking. Keep the water in a dark place as PotPerm decomposes in sunlight


Color

http://chemistry-chemists.com/N6_2011/U7/ChemistryAndChemists_6_2011-U7-3.html
Above is a picture of several different concentrations of potassium permanganate in water. 

From left to right:
  1. The leftmost bottle does not have enough PotPerm dissolved in it to make it safe to drink, unless it had already passed through a strong antibacterial filter. 
  2. This is the darkest solution I would drink. Ideally you would want something halfway between #1 and #2, like the water in this picture:  
    http://www.practicalsurvivor.com/waterfiltration
  3. This is too dark to drink, although it would make a good solution for treating wounds. If you needed to drink this, first add more water to dilute it. 
  4. Use only for skin treatment. 
  5. and 6. are too dark to be used as anything other than dye. 
A handy way of remembering this is "If it's pink, it's safe to drink." Aesthetic arguments over whether or not bottle #3 is pink or magenta are outside the scope of this article. My only recommendation is to choose pale pink over any other shade -- think steak, not Barbie or bubble gum. 


A Little Goes a Long Way

Remember, I said that 3-4 crystals per liter, or 1 part per 10,000 parts of water, is all that is necessary to achieve water purity:
As potassium permanganate is a salt, it can be stored for decades without losing potency, and since a little goes a long way it can be part of your preps for a long time to come.  You can buy it on Amazon in different volumes, depending on your needs. My only suggestion is that if you choose to include PotPerm in your bug-out or get-home bags, make sure it is tightly secured within a watertight container -- you don't want caustic salt spilling all over your emergency preps!

Here is a useful video for constructing a small, watertight container suitable for BOBs or GHBs. 

Thursday, August 7, 2014

Reverse Osmosis


Osmosis is the process of a liquid flowing through a (semi-permeable) membrane. If you have a container with a membrane dividing it into two sections, and you put pure water on one side and salt water on the other, the osmotic pressure differential between the two sides will force water from the pure side into the salt water side. This is because osmotic pressure will try to equalize the salt concentration in the two sides, drawing pure water into the salt water in an attempt to dilute it.

Reverse Osmosis is the process of applying physical pressure to contaminated water in a container that has a semi-permeable membrane as part of its construction. This physical pressure will overcome the osmotic pressure and will force pure water through the membrane, but the contaminants (salt etc) will be filtered out by that same membrane. Depending on the pressure used and the construction of the membrane, reverse osmosis (RO) systems can clean water of everything down to the molecular level.


The Good

Membrane filtration has become more common in the last few years. There are several types of membrane filtration but the main kinds of pressurized membranes are microfiltration, ultrafiltration, nanofiltration and reverse osmosis. The following chart from Wikipedia gives a good idea of what each level of filtration is capable of.

"Cut-offs of different liquid filtration techniques" by Peter in s - Own work.
Licensed under Creative Commons Zero, Public Domain Dedication via Wikimedia Commons


Since some people aren't familiar with the metric system, I'll break down the micrometer scale on the top.
  • From the right-hand side: 1000 micrometers is the same as 1 millimeter. 1 thousandth of a meter is about the size of a grain of sand.
  • In the middle: 1 micrometer (often called a micron) is 1 millionth of a meter, slightly smaller than a red blood cell. You'd need a good microscope to see something this small.
  • On the far left-hand side: 1 nanometer, or 0.001 micrometers. 1 billionth of a meter. Simple molecules and large atoms are found in this size range - break out the electron microscope and you might be able to see things at this level.
As you can see, RO is about the best form of filtration available. It is so good at filtering water that it will take the salt out of seawater. 


The Bad

There are downsides to increasing levels of filtration. however. The main problem is that the smaller the pore size in the filter, the higher the pressure needed to force the water through it. Here are some general examples:
  • “Standard” filter: 0 to 1 bar (0 to 15 psi). The pull of gravity will exert this much flow pressure.
  • Microfiltration: up to 2 bar (up to 30psi). Easily hand pumped; gravity if the filter is large.
  • Ultrafiltration: 1 to 10 bar (15 to 150 psi). Hand pump pressure. 
  • Nanofiltration:  3 to 20 bar (45 to 300 psi). Mechanically pumped, or by hand with slow/low output.
  • Reverse Osmosis: 10 to 80 bar (150 to 1200 psi) Mechanically pumped, or by hand with very slow/low output.
Other downsides are cost and life:  The higher the level of filtration, the higher the cost of the filter and the shorter the life of the filter. Using coarse pre-filters to strain out the larger chunks will extend the life of your RO membrane.

The biggest downside to RO filters, though, is the simple fact that they are not something that you can make at home. The membranes have such tiny pores that there is no way to produce them (reliably) outside of a factory. If you do choose to get an RO system, purchase spare filter cartridges and store them carefully.


What to Buy

For about $200, you can get a filtration system that fits under your sink and will provide 50 to 75 GPD (gallons per day) of water cleaner than the stuff you buy in bottles. Here's an example:


This unit provides 5 different filters that will remove just about anything you may find in your water. The downside is that it requires water pressure of at least 45 psi, or a booster pump which will require electricity. 45 psi is possible from a city water supply, or you could use a water tower that is at least 105 feet higher than your filter (0.433 psi per foot of height).


If you need something more portable, this unit is designed to be used to desalinate sea water and is small enough to be carried in a lifeboat. It costs about $550.00 and will put out about 1.2 gallons per hour of hard hand-pumping. That's about enough for one person for a day, so you'd need to set aside an hour just to purify your water every day.


If you are providing water for a community or responding to a disaster and have the money, there are units that will put out clean water in large quantities. This one will put out 10,000 GPD (415 gallons per hour, or about 7 gallons per minute) but requires a 220V AC power source. It only costs $110,000.00...


The military uses similar units mounted on a flatbed trailer (with its own generator for power) to provide clean drinking water for troops in the field. A personal friend of mine operated one in Iraq during the second Gulf War. The main problem he had was the fact that the waste stream was so contaminated that they couldn't discharge it back into the river that they were drawing water from. They had to form lagoons in a field using a plastic lining and let the waste evaporate, then treat the sludge as toxic waste.


In conclusion, if you need clean water, a Reverse Osmosis system will give you the cleanest water available. but at the cost of money and the likely need for electricity. 

The Fine Print


This work is licensed under a Creative Commons Attribution- Noncommercial- No Derivative Works 3.0 License.

Creative Commons License


Erin Palette is a participant in the Amazon Services LLC Associates Program, an affiliate advertising program designed to provide a means for sites to earn advertising fees by advertising and linking to amazon.com.