Wednesday, January 31, 2018

Prudent Prepping: Birthday And Buffet!

The dust has settled and the First 72 Hours have passed. Follow along as I build a long term plan via Prudent Prepping.

Buffet posts are where topics are brought out when the portion is too small to fill things up to a normal-sized serving.

My Birthday
Yes, it was last week and no, I am not retiring or collecting any government funds, but thanks for asking. Before I forget, thank you for the Birthday wishes, they are appreciated! I had a good time with friends and family when we actually had a party. But I'm getting ahead of myself.

A recap of a Facebook IM conversation last Tuesday night (my actual birth day):
Erin: "Go outside and check your mail."
Me: "???" (I'm really on the ball)
Erin: "You're home, right? Go outside and look for mail."
Me: "Yes, hunt 'n pecking my post. brb."
Me: [Posts a picture of a box]
Erin: "Go on..."
Me:  [Posts a picture of an open box]
Erin: "I wonder what it could be?"
Me: "HOLY S**T!!!"
Erin: "I'm certain it isn't s**t, sanctified or otherwise."
Me: "The Master Chief just walked by and said 'Holy S**t' too!!!"
Here is my gift from Erin, a Cold Steel Assegai Spear with Short Shaft.
 

 From the Cold Steel website:
"Our Zulu Assegai [as-uh-gahy] are made from SK-5 medium carbon steel, heat treated and drawn to a tough spring temper, and designed to flex or bend under impact forces rather than breaking or shattering. The Assegai blade is available with a choice of two different premium American Ash shafts (A shorter model for thrusting or a full length throwing shaft), and comes complete with a durable Secure-Ex® sheath."
This is the short shaft version, and I have plans to adapt a longer handle to the head (once I find something 60" or so long) so it can serve as both walking stick and spear shaft.

The blade is very sharp right from the box, as are all the Cold Steel products I've seen, but the edge is rough from the factory and could use a little TLC from a fine stone.

One question I've been asked is "Why do you want a replica African spear?" There are several possible answers, but the best is simply "Because I want one, that's why". I mentioned wanting an assegai in passing a while ago, or maybe it was on my Amazon wish list (It was. -- Erin), I don't recall... but Erin did!

I have the best friends.

Other News
My search for long shelf life food (first mentioned in this post) continues, with several items on hand and several more to be ordered. I was disappointed that one company I want to try seems not to have single items available for order -- the website doesn't show that as an option -- but I haven't contacted Customer Service directly to find out for certain. Fortunately, other companies do have that option, so I won't have to buy a large-ish quantity of poor quality food to sample and test. 

I also had an opportunity to give some of my gear a longer test. I recently went to a convention and since I don't sleep well in beds other than my own, I packed my sleeping bag and inflatable pad. As odd as it sounds, I can get a good night's sleep on the floor with this pad and my travel pillow. While there is the danger of a puncture ruining a good sleep, carrying a patch kit and the pad is still lighter and takes up less volume than a ThermaRest of similar loft. 

The Takeaway
  • Be careful what you wish for; you just might get it!
  • Being careful with what I buy is important to me and my budget. Sampling things is what works for me.

The Recap

Just a reminder: if you plan on buying anything through Amazon, please consider using our referral link. When you do, a portion of the sale comes back here to help keep this site running!

If you have comments, suggestions or corrections, please post them so we all can learn. And remember, Some Is Always Better Than None!

Tuesday, January 30, 2018

One Year, Three Blades

I'm not normally one for "challenges," since they all seem contrived and really don't show much truth. However, I do like to take on challenges to my skills, to test the bounds of what I'm able to do and learn where I need to push and learn. One way I want to challenge myself this year is streamlining some of the tools I carry in the outdoors.

When I have my truck and trailer, my capacity for gear is nearly limitless. When I'm out with only what I can carry on my back, space is at a premium and pounds make pain. If I can eliminate five pounds, that's a huge savings on my knees and back, and will make me much happier and more relaxed.

One of the areas where I noticed that I have the tendency to pack way too many things is bladed implements. I'm not talking strictly about knives, even though those are the first bladed item folks think of; instead, if I'm camping with my truck I likely have an axe or hatchet, a saw, shovel, and a couple knives at a bare minimum. They all serve a purpose and do it well, but they still add up to a huge pile of stuff.

Looking at the tasks I have to accomplish in the sticks, I think I can cut that pile down to just three tools. I won't have the perfect tool for every task, but I'll have a tool that will handle anything that comes up, with only a minimal loss of utility.  I'll go into these tools in great detail in the coming weeks, but here's the Cliff's Notes overview  for now.

Knife
It will come as no surprise that I'm defaulting to my Mora, but I'll first perform a few modifications on it that I'll detail in a future article. I also plan on replacing my 3.6" version with either the 4" or 5.8" variant, due to my preferences for a longer blade.

http://amzn.to/2E2C2QS

Machete
I can replace the axe, hatchet, and saw with my SOG machete. It weighs about as much as the hatchet, tucks away more cleanly in my pack, and does the job of all three fairly well, as well as a few "big knife" jobs that the hatchet can't do as well. Giving up the hatchet means I lose a decent hammering tool, but I can use wooden batons for most hammering jobs. The trade-off is an easy call to make for me.

http://amzn.to/2DMGTCk

Foraging Knife
For Christmas, Erin got me a foraging knife, and it's kind of the lynchpin of this whole exercise. While it's called a knife, that name is pretty misleading. It's more of a fixed-blade e-tool, or a tactical combat trowel. I'll post a full review soon, but the short summary is that it's a handy digging tool, root wrecker, and otherwise packable earthmover. It's got me excited to show you a couple backwoods tricks I haven't broken out yet.

http://www.creekstewart.com/edged-tools/foraging-knife

I look forward to testing the capability of myself and my slimmed-down blade set this year. Knowing what you can do with what you have is a powerful thing.

Lokidude

Monday, January 29, 2018

Rhi (finally) Builds Her Bug Out Bag


When I first started writing for Blue Collar Prepping, I wasn't much of a prepper; I was a hobbyist re-enacter who happened to have a set of skills that meshed well with the other authors here. I honestly didn't know much about what folks consider prepping these days, other than things I'd grown up with as "common sense readiness for tornado season."

My Bug Out Bag at that time... wasn't. Not really. It was simply a really large day bag with spare clothes, a toiletries kit, a basic first aid kit, and a couple of granola bars. Oh, and a notebook with important paperwork, phone numbers, that sort of thing.

As I've read the posts, both here and on our Facebook group, written by my fellow writers here, it finally dawned on me that I needed to stop putzing around and actually put together a BOB / GHB (Get Home Bag) that was more than a slightly bad joke. It has taken me a while, due to various excuses - mostly money - but I finally managed to start getting serious about it today (Jan 4th) during my Post- Holiday Shopping.

The Bag Itself 
My original Bug Out Bag
Now when I say that my old BOB was a big day bag, what I mean is that it was really more of an oversized purse/girly gym bag that got preempted for the duration of tornado season here in Oklahoma. It finally gets to go back to being a designer Gym Bag. Yay!

What I replaced it with is an Ozark Trails Montpelier Adventure Pack, bought at Walmart for $49.97. The Montpelier is a rigid frame, 45L capacity backpack in rip-stop nylon with adjustable shoulder and waist straps. It has a large interior pocket that's perfect for the 2L hydration pack I bought to go with it (sold separately, but on the shelves right next to the pack).

While this backpack is considered a rigid frame, it is not an exterior metal frame; it has a pair of removable metal bars  inside that lay along either side of the spine to help maintain alignment.
The "new" Backpack


I've found that while the 45L capacity is good for a start, I've already run into the problem of space vs. weight vs. necessity for survival and/or comfort. I'm going to have to eventually  upgrade to something closer to a 70L capacity, which is something I've been eyeballing.

Word to the wise: if you can afford a larger capacity backpack, and have the strength to carry it loaded, get the larger size. You will spend less time trying to decide what you can live without as far as essential gear goes in the long run, and you'll spend a lot less time and money constantly upgrading your pack. Also consider making sure that any pack you buy can accommodate MOLLE gear hung from the outside, which will increase your capacity in much more affordable monetary chunks.

Inside the Bag
It's already stuffed to the gills. Everything inside the bag, however, is useful in one or more ways. I'm still tinkering with how I want things to go inside, and how many of certain items I really feel I need to carry. After all, this isn't a bag intended to see me through months out in the wilds; tts main purpose is immediate survival for 2 or 3 days at most.

Let's start with the basics of what I've got tossed in there.

Clothing
  • I've gone with minimal clothing because this is for short term use. 
  •  I opted not to add an extra pair of jeans because of the space allocation they take up, even when folded well. I'm not likely to be wearing a dress or skirt at any given time that I'm more than 5 miles from home, so whatever pants I have on will do for the 2 or 3 days I'm living out of the bag. 
  • 2 extra shirts, however, hit my personal "critical" list as a morale issue. Hiking makes you sweat, and having to wear a sweaty, nasty, smelly shirt for several days in a row can do serious things to your motivation to keep going. 
  • The same went for packing underpants and socks, both for basic hygiene/comfort, and the socks so they can be changed if they happen to get wet, to prevent foot issues.
  • Something that we women have to think about, but you male types don't, is foundation garments for our torso as well. That's right, an extra bra. 
 For you ladies who read the blog, consider taking an old bra that still fits but "needs replacing" and tossing it into your BOB; having a change when you're going to be living rough for a few days is on the same order as extra socks, underpants, and shirts. Its both a hygiene and morale issue, getting out of sweat soaked clothing.

A small packet of ultra-thin day liners for your underpants can help stretch the use of those as well, before you want to just burn them and have done with it.

First Aid
While all of us know that having a first aid kit can be good, if you're as accident-prone as I am, it becomes critical to have a seriously comprehensive kit. I started with an $8 basic kit by Equate (Wal-Mart store brand), then added "personal touches" to the basic kit:
  • a tube of antibiotic ointment
  • bug bite itch relief pen
  • extra gloves
  • extra butterfly closures
  • a small pair of scissors
  • a small bottle of Merthiolate for wound cleaning
  • a white wash cloth that I boiled to sterilize and then sealed into a plastic baggie
  • 7 day's worth of each of the 3 medications that I'm on for my Lupus, Fibro and Arthritis
  • a package of cotton swabs pre-impregnated with Iodine, again for wound cleaning. These were found at the Geek portion of Wish.com, and I managed to snag them for $1 for a set of 30 individually packaged swabs.
After additions, the cost came out to about $15, and there is no room left in the case to add more "extra" stuff. I do want to find and purchase a good field surgery kit and probably a suturing kit as well, but both of those are on the "want" list rather than the "must have now" list.

Fire Starting
I may have gone a bit overboard here, but I doubt it.

Schrodinger's Tin
with Tinder & Lighter
I started with a miniature cookie tin (you know, the Schrodinger's Tin that is both cookies and sewing gear until you open it?) filled with wood shavings (from a whittling project the HusBeast is working on) and a Bic disposable lighter. I also added 2 packs of strike anywhere waterproof matches (4 pack for $3).


Waterproof vs Tin for size comparison
Then I started looking at other possibilities, and added a waterproof case containing a Magnesium Bar, Flint and Striker, spare Bic lighter, and paraffin impregnated cotton "tinder" pieces. Somewhere in the bag is my trusty old Zippo lighter, and a small can of extra fuel, extra wicks, and extra flints, in a plastic baggie.
  • Magnesium bar with shaver was $9 on sale, $11 normally. 
  • Waterproof Fire Starting Kit was $10 with the flint, striker, and paraffin tinder. 
  • The 5 pack of Bic lighters, 2 of which went into the bag, $3.95. 
  • The small cookie tin was purchased during the Christmas Season, and I got several (filled with cookies that didn't last long) for $1 each. 
  • I can't remember what that Zippo cost me almost 20 years ago, and I always keep spare flints, wicks, and fuel around for it. It also wasn't a new purchase.
Contents of Waterproof Set
Total spent on fire starting equipment: $25 worth of peace of mind. Can you tell I absolutely want to be able to start a fire for warmth, comfort, protection, and light, regardless of the circumstances or weather conditions?

Hydration
I've kept this a lot simpler than either my first aid or fire starting portions: a 2 liter hydration bladder fits into the inner pocket of my backpack perfectly, and to that I added a Sawyer Mini filtration system which includes a small mylar bag that holds about 6 ounces of water. 

There are outside pockets on either side of my bag and each currently holds a 16 ounce disposable water bottle. These will be kept after they're empty for refilling, if I ever find myself having to use my bag in an actual emergency. I also put a small bottle of water purification tablets in the bottom of the bag, as a back up to the Sawyer.
  • The hydration pack = $10, and a good buy at that price. 
  • The Sawyer Mini kit = $20, so not what I personally consider "cheap" but still well worth the price. 
  • Iodine tablets for water purification = $4 and a good price as a back up, since there were 2 bottles in the package. 
Total for keeping myself hydrated: $35. 

Shelter
These items fall into both the "necessary" and "creature comfort" categories, mostly because while I have both the knowledge and skill set to build myself a temporary shelter when it comes down to it, I may not have the time and energy searching out materials and building. 
  • A mylar space blanket style A-frame emergency tent, with center tent rope included. It weighs less than an ounce; folded, it takes up about the same amount of space as one of the emergency space blankets. I consider it a good middle ground between building a shelter and carrying a backpacker's tent, since it weighs so little and only cost me $5.
  • A simple mylar space blanket at $2 is great for warmth and for insulation between myself and the ground or air. 
  • I also added a space blanket Emergency Sleeping Bag/Bivy Bag for $15 which takes up about the same amount of room as the tent or the blanket itself. Think of it as 2 space blankets that have been sewn together to form a bag, and you have the basic idea. Layers are a wonderful thing to keep you warm, dry, and comfortable, and I'm big on staying as comfortable as possible. 
  • One thing that I decided to include from my already existing camping gear was an inflatable pillow and its pillow case, which came as part of a camping bedding set intended for use with a queen air mattress. 
  • I've also tossed in a small but extremely comfortable fleece throw blanket from Wal-Mart for $2.50
Total for emergency shelter, so I don't have to stop and build one every night: $23 all told, and well worth it to me to maintain some semblance of "camping trip" rather than "fight for my life."

Food
There were only a few purchases made in this category that was strictly for the bag. 
  • A small folding emergency stove with fuel tabs ($5). This will likely get upgraded in the relatively near future to one of the Solo Stoves that the guys here all rave about. This small one was "better one than none" as an alternative. 
  • Ozark Trail 5-Piece nesting Mess Kit, $6.75, and used the extra space inside to store a pair of small can openers ($1.50 at Academy Sports - you never know what you'll find in a survival situation) a Swiss army/multi tool style eating utensil set I inherited from my granddad, and a folding corkscrew.
To that I added from my kitchen:
  • A package of 8 servings of Folgers instant coffee ($3.85) because I'm as mean as a momma bear without my coffee. 
  • A half dozen single cup size servings of coffee creamer in individual packets - don't laugh, I need it with my coffee to feel human.
  • One dozen Honey Stix. These are typically sold as candy, and are basically thin straws filled with honey and sealed at both ends. They take up less room and less weight than putting in a baggie of sugar for my coffee, can also be eaten as quick energy to boot, and generally can be found in groceries or other stores for $1 for 4 to 6 of them.
What got tossed in for food was simple: "add boiling water" stuff or things that don't need to be cooked at all. While the space taken by two Ramen cups is much higher than by the little packets, they can be dealt with by simply pouring hot water into the container rather than dirtying a pot. The same goes for the mac & cheese cup and the two soups that I decided to include. They are all things that I know I will eat and enjoy, because I normally keep them around for quick meals when I don't feel like cooking. 

To those I added four single-serving packets of tuna in various flavors as well as individual packets of Ritz Crackers to eat with the tuna. The tuna packets are $1 each, store flat, and are a good source of protein. There are also packets of cooked chicken that are available in a similar packaging and price range. 

Finally, I tossed in several packages of filled crackers (crackers with peanut butter or cheese in between them) that come in packs of six crackers for snacking. While they probably aren't the most nutritionally dense or wisest choice, they're inexpensive when you're simply snitching them out of your home cupboard, and an 8 pack can be had for $1.98 in various flavors from the grocery. They can also be eaten on the go without having to stop and heat water.

Total spent on keeping myself fed: under $20 if you don't count what I snitched from my own pantry, and probably $28 if you do count that stuff. While I know that I could empty most of that space by purchasing one or two high calorie MREs. this list is composed of things I know that I'll eat and I know that I like. That can go a long way towards keeping me motivated, so to me the space used is worth it.

Update: Ultimately what I've decided to do is to move all of the food (except 2-3 packs of filled crackers) into a separate day pack drawstring closure bag that I got for free at the State Fair. This has freed up an enormous amount of space in the backpack proper, and can be easily hung from any of a number of secure points on the backpack. Moving the food over to the spare bag as a test also clued me in to something I hadn't realized: my food stocks, while important and light weight individually, actually comprised almost half the overall weight of my pack! I may have to completely rethink what and how much food I intend to carry.

Miscellaenous Extras
  • 4 tent stakes, salvaged from a dead tent years ago, and kept as part of my collection of such. They'll come in handy for staking down the corners of the emergency tent so I don't have to look for rocks.
  • 2 more of the "Schrodinger's Tins" - one of them with fishing line, hooks, etc; and the other with sewing supplies - because being able to supplement food is important, and being able to repair clothing and shelter is more than handy. 
  • Mini fishing rod and reel which fits well into one of the side pockets with a water bottle (Wal-Mart, $10, 2 years ago.)
  • Toiletries kit - it has for the most part the standard stuff in travel sizes, but I added a package of baby wipes to it because I've learned after years of camping on "primitive" sites with my RenFaire group that if there is no water available other than what you're carrying with you, they can make you feel so much better. I also included a small can of Dry Shampoo, for cases without water available, for the same reason.
Travel Size for the Win!

  • Mini denture repair kit and mini glasses repair kit. Found both at the Dollar Store, they're about the size and weight of a space blanket, and they are incredibly handy.
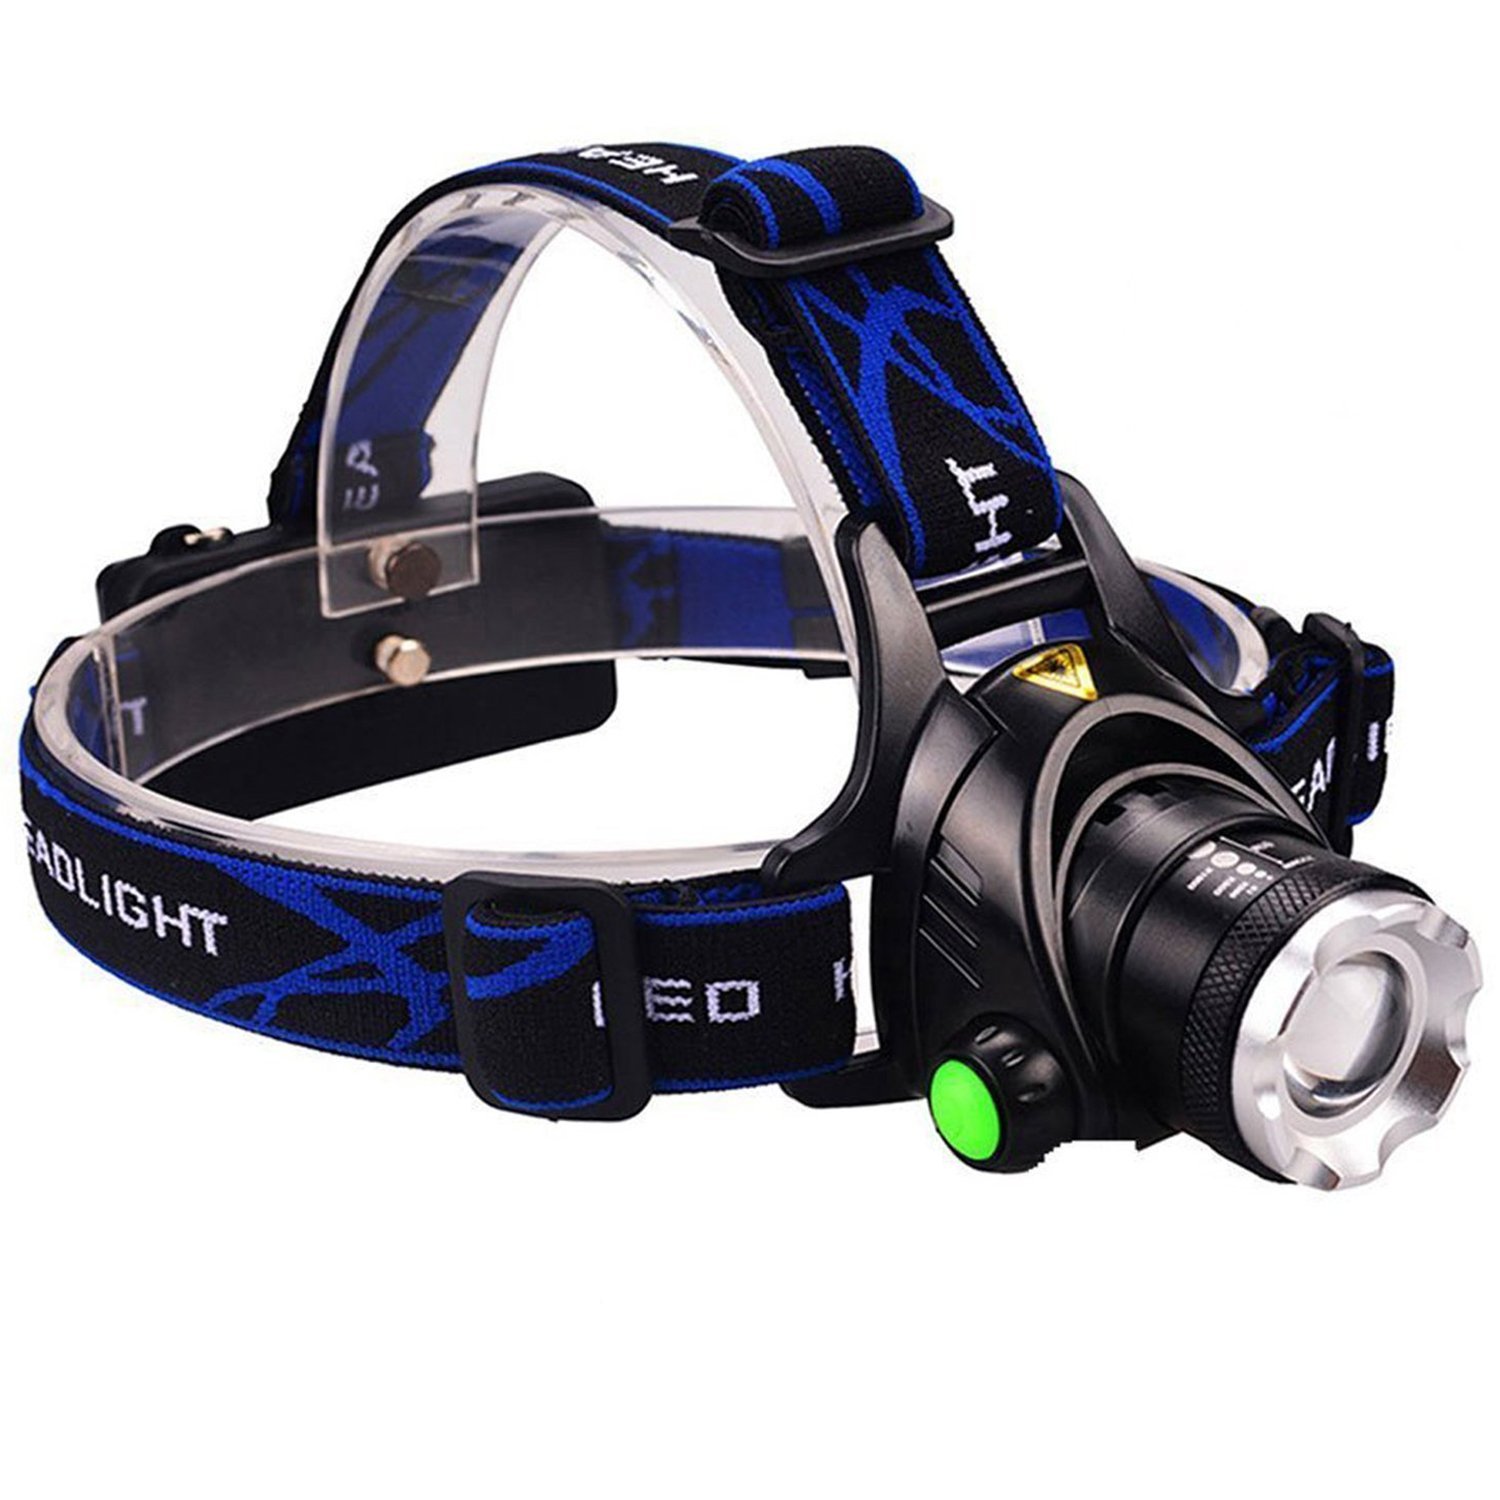
  • A trio of mini LED flashlights, kept in various pockets so that at least one of them will be easily accessible, along with a spare pair of batteries for each. 
  • Also 1 LED headlamp, for hands free.
  • A small can of Deep Woods Off bug spray, and a small tube of sun screen - trust me, they'll get used.
  • 1 pair Ozark Trails compact binoculars.
  • Two emergency foul weather ponchos.
  • Crocheted warm hat and a spare pair of gloves.
  • My multi tool and my Swiss army knife. While both of these get used frequently here at home, they are now placed back in one of the outside zipper pockets of the backpack when not in use, so that they'll be with me in a grab-n-go situation.
  • To Help Composting
  • Small folding camp toilet, bags for same, and an 8 pack of dry enzyme packets to help with composting, along with a roll of toilet paper. (Because having to use leaves SUCKS.) The Enzyme packs were found at WinCo grocery while they were doing a promotion on Emergency Preparedness Supplies, for $12.
  • Portable 14W solar charger to keep my tablet and phone charged. If the phone is charged, I can call for rescue when I have signal; if it's not, its nothing but a doorstop. My tablet contains nearly 200 books on various survival skills and techniques, as well as just plain reading material. This also helps with the various scanned important papers and phone numbers that are currently stored on a thumb drive that lives in the bottom of the bag and can be read by my tablet.

The Lowdown
While needs are going to vary (as always), you can get a good idea from my bag compared to the bags set up by other writers here at BCP as to where you might consider starting when building your own.

I spent more money on initial outlay to rebuild my GHB/BOB than a lot of folks would simply because there was so much gear I didn't already have that I considered crucial. All told, I spent about $300 getting everything together, almost from scratch, all at once. No doubt, some of it could have been done differently or more inexpensively had I waited and shopped sales, but patience has never been my strong suit!

Go at your own pace, spend what you're comfortable with, and consider how much you can realistically carry so you don't do yourself in physically.

Sunday, January 28, 2018

Expiration Dates

Not actually Erin.
& is used with permission.
Lokidude talked about pantry rotation on Tuesday, and David Blackard frequently donates food near its expiration date to the local Food Pantry. But food is expensive, and a significant investment in food could result in a financial hit if you aren't able to rotate through it quickly enough. This brings us to the question, "Are foods which go past their expiration dates no longer edible or nutritious?"

The answer is a resounding NO. While you need to be mindful of spoilage and decay in fresh foods like fruit & vegetables, and of insect or rodent contamination of dry foods like sugar, flour, pasta, etc, anything which is designed for long-term storage in cans has a surprisingly long shelf life.

How long?  Over one hundred years.

Food Expiration Dates
Back in 1990, the magazine FDA Consumer published an article titled The Canning Process: Old Preservation Technique Goes Modern. In that article, writer Dale Blumenthal tells the following tale:
The steamboat Bertrand was heavily laden with provisions when it set out on the Missouri River in 1865, destined for the gold mining camps in Fort Benton, Mont. The boat snagged and swamped under the weight, sinking to the bottom of the river. It was found a century later, under 30 feet of silt a little north of Omaha, Neb.

Among the canned food items retrieved from the Bertrand in 1968 were brandied peaches, oysters, plum tomatoes, honey, and mixed vegetables. In 1974, chemists at the National Food Processors Association (NFPA) analyzed the products for bacterial contamination and nutrient value. Although the food had lost its fresh smell and appearance, the NFPA chemists detected no microbial growth and determined that the foods were as safe to eat as they had been when canned more than 100 years earlier.

The nutrient values varied depending upon the product and nutrient. NFPA chemists Janet Dudek and Edgar Elkins report that significant amounts of vitamins C and A were lost. But protein levels remained high, and all calcium values "were comparable to today's products."

NFPA chemists also analyzed a 40-year-old can of corn found in the basement of a home in California. Again, the canning process had kept the corn safe from contaminants and from much nutrient loss. In addition, Dudek says, the kernels looked and smelled like recently canned corn.
If foods canned in the 1860s were edible and nutritious 100 years later, then foods preserved with modern techniques can easily last that long, if not longer, so long as basic precautions are taken. The most important is to store your canned foods in cool, dry places away from direct sunlight. This doesn't need to be a basement or root cellar; the pantry of your air-conditioned come will do.

Do Not Eat From [X] If...

Metal Cans
  • an obvious opening underneath the double seam on the top or bottom of the can 
  • a can with bulging ends 
  • a fracture in the double seam 
  • a pinhole or puncture in the body of the can
  • an unwelded portion of the side seam
  • a leak from anywhere in the can 
Plastic Cans
  • any opening or non-bonding in the seal
  • a break in the plastic
  • a fractured lid
  • a swollen package
Paperboard Cans
  • a patch in the seal where bonding or adhesive is missing
  • a slash or slice in the package
  • a leak in a corner of the package
  • a swollen package
Glass Jars
  • a pop-top that does not pop when opened (indicating loss of the vacuum)
  • a damaged seal
  • a crack in the glass of the jar

Flexible Pouches
  • a break in the adhesive across the width of the seal
  • a slash or break in the package
  • a leak at a manufactured notch used for easy opening
  • a swollen package

Drug Expiration Dates
In short, the expiration dates on most preserved foods follow the conventions of expiration dates on medicine in that they are not a hard limit of "food is good until this date" but rather a case of "We can only guarantee 100% nutrition / medicinal effectiveness up until this date, with a drop-off thereafter."

In fact, the U.S. Food and Drug Administration created the Shelf Life Extension Program as far back as 1986 and has saved the government hundreds of millions of dollars each year by testing stored drugs to see if their storage could be extended instead of being replaced. A 2006 study of 122 drugs past their expiration dates showed that two-thirds of them were stable, and therefore still effective, resulting in their expiration dates being extended  an average of four years.

Further,
Some [drugs] that failed to hold their potency include the common asthma inhalant albuterol, the topical rash spray diphenhydramine, and a local anesthetic made from lidocaine and epinephrine, the study said. But neither Cantrell nor Dr. Cathleen Clancy, associate medical director of National Capital Poison Center, a nonprofit organization affiliated with the George Washington University Medical Center, had heard of anyone being harmed by any expired drugs. Cantrell says there has been no recorded instance of such harm in medical literature.
More topically, EpiPens which were were two years past their expiration date were found to be at least 90% effective, and one pen which was 50 months (four years) past its expiration maintained 85% effectiveness!

In short, don't throw away your medicines or canned foods just because the calendar is past an arbitrary date. Inspect the containers, do some research, and find out if they really need replacement.

Further Reading

Friday, January 26, 2018

Banging the Pillow: .22 Magnum

This week we look at the penetrative ability of the  North American Arms .22 Magnum shooting a CCI 40gr TMJ Maxi Mag round.

The results were quite awe inspiring, though not unexpected. It is, after all, a rifle round.

Thursday, January 25, 2018

Prudent Prepping: Big Crowds, Big Problems

The dust has settled and the First 72 Hours have passed. Follow along as I build a long term plan via Prudent Prepping.     

I spent last weekend at a convention attended by 5,000 like-minded people. We all had a great time, learned some new things, and figured out how to apply what we learned to our lives and the lives of  those around us. It was wonderful... except for the other 4,985 people in the building.

I was with team members from around N. California, most of whom I've never met in real life, along with my direct contacts. I sat and met with the local team of 15 several times after the presentations to plan dinners and recap the days' events. Many of these meetings were less than 10 minutes long at the convention site, with a few lasting much longer. The off-site meetings were not a problem because they had less noise, were easier to be heard and had more room to move. Noise, hearing and space/room around me are a concern as a safety matter, not an emotional one.

My closest friends and I planned out what to do in an emergency, but the other people did not think it was necessary. We looked for emergency exits, staircases and even fire extinguishers, even if we were never going to use them. The leaders of my team were somewhat surprised when they overheard us setting up a meeting site if something happened. After a short explanation of why we were doing this, the rest of the team was called together to be told about our rally point.

When the discussion turned to why worry about meeting up, our leader explained how hard it was to get everyone in one place when 5,000 people were exiting a 3rd floor convention space, let alone if there was a panic. It turned out I was the only one carrying a real flashlight, not those midget door lock finder lights carried on a key chain. I was also the only one to stop and get a map of the building from the security office, which they gave me only after I proved to their satisfaction I was attending the event. It was a copy of the publicly available info, similar to what you could find online when planning an event, but expanded to include the (public) exits.

Just like in the pre-flight talk from your airline's flight attendant, our closest exit wasn't the obvious one. It turned out that around a corner was a set of emergency stairs leading to the loading dock. If I hadn't asked for the map, I'd have never thought to look down a corridor that would normally be for the catering staff. Access would be difficult if everyone rushed to the main exit doors, but we saw there were other doors to the side of the hall, and our plan was to stay together and stay put for a minute so as not be trampled and then  move to the side and safety. 

Like with most emergency plans or even insurance, you hope it never gets used but you should have it already!

The Takeaway
  • "Plan your plan" and be prepared to change it to previously discussed alternatives.
  • Get everyone on board and clear on what to do. During an emergency is not the time to discuss how to survive.
  • Information is usually there, just for the asking, so ask!

The Recap 

Just a reminder: if you plan on buying anything through Amazon, please consider using our referral link. When you do, a portion of the sale comes back here to help keep this site running!

If you have comments, suggestions or corrections, please post them so we all can learn. And remember, Some Is Always Better Than None!

NOTE: All items tested were purchased by me. No products have been loaned in exchange for a favorable review. Any items sent to me for T&E will be listed as such. Suck it Feds.

Wednesday, January 24, 2018

Guest Post: Faberware Stainless Steel Percolator

by George Groot
George is a member of our Facebook Group and has written for us before.


Coffee isn't a necessity for preppers (although I think it is an excellent trade item), but it is often the difference between low morale and high in a disaster scenario.When you are without municipal services like water and electricity, there are still plenty of ways to get your coffee.


Instant coffee is easy, but I've never found good instant coffee in America the way it is readily available in Europe. Instant coffee works, but you still need a way to get hot water, which means you'll want something to boil water in for sterilization. Odds are good that you have pots & pans that can do this chore already, but most household versions are too large for most camp stoves to heat effectively, let alone bring to boil. Camp stoves are made to work with camp cookware, which generally holds smaller quantities, has thinner construction, and is lighter weight.

Percolators are great for a "shelter in place" solution because they are low tech, and because they boil the coffee they provide their own sterilization solution. If you have a two-burner Coleman camp stove (the green one that folds up), or even a single burner stove sturdy enough to hold several pounds, a coffee percolator will work well with your alternative energy source. If you make your own "hobo stove" you can size it to fit a stove-top percolator quite easily, which brings us quite handily to the subject of today's blog post.

Faberware 8-cup stainless coffee percolator
http://amzn.to/2DE4sAm
This product nicely fills the niche between "lightweight camping" and "serious base camp" products.

The base is broader than the body, and has a nice design feature of indented rings along the outside of the base which are great for open flame stoves. The grooves "trap the heat" from flames a little better than a flat bottom solution, which would be better for a glass top range.

The Good
At $23 dollars and Prime delivery, with all-stainless construction including basket and stem (save for the glass percolator top and plastic handle), it's a great buy. Replacement parts are also available on Amazon, and because it is essentially a stainless steel pot it can do double duty boiling water or cooking soups on a camp stove or hobo stove where a larger pot would tip over or just be too big.

The Bad
If you want something truly lightweight for a bug-out solution, this is probably not the product for you as it comes in at 2.4 lbs (just over one kilogram for our metric friends). The pour spout looks like a traditional wedge, but is actually a drilled hole inside the wedge, which meant the first time I used mine it didn't pour the way I thought it would. I over-tipped the pot, which can get annoying if a lot of people are passing the pot around to fill cups. Finally , the handle is plastic, which means you have to be careful not to expose it to open flames.

How to use it:
  1. Fill the percolator basket half full with a standard coarse ground coffee.
  2. Fill the pot with 8 cups of clear, cold, palatable water.
  3. Put the stem and basket assembly into the pot and push down on the lid until it snaps into place. 
  4. Place over a heat source and wait. 
    • The percolator concept works because the stem assembly, being close to the heat, gets hot and the pressure of the colder water above makes "going up the stem" to the top of the pot a lower resistance pathway than going up the sides. So as your pot starts to boil, you'll see the characteristic "burps and splatters" in the percolator top, and they will get more and more brown as the process continues. 
  5. When a lot of steam comes out of the pour spout, and the sound of a constant boil is heard, your pot is ready after one minute of this rolling boil. 
    • Why one minute? That comes from the EPA recommendations on sterilizing water in an emergency. They also recommend 3 minutes of boiling above 5,000 feet (Denver residents take note).
    • The EPA also says "To improve the flat taste of boiled water, add one pinch of salt to each quart or liter of water, or pour the water from one clean container to another several times." 
    • The pinch of salt is actually an old trick to make coffee taste better. A soldier I knew always added a pinch to my cup whenever he was trying to sober me up (but that's another story involving one of the many uses of ethanol in a non-survival scenario). 
Filters
If you want to filter your coffee, you can either purchase disk coffee filters or simply punch a hole in the middle of regular basket filters. There are plenty of YouTubevideos to show how to use paper filters with percolators in case you want use filters. Filters have many uses, some culinary and some not, and so have a place in a prepper pantry.

Other Thoughts
There are other ways to make coffee, and other ways to sterilize water. This one is great for "glamping", "bug out by vehicle", or "shelter in place" scenarios where the size and weight of the unit aren't huge drawbacks to routine use. It's also cheap enough to stash at a bug out location or cache site without feeling too bad about wasting money on preps you might never use.

Protip: if you add fresh grounds to your once-used grounds you'll be able to make a can of ground coffee go longer. If you're like me and need a few stiff cups of black life water to keep you going through the day, this will help you wean yourself of a caffeine dependency over time.

Overall
While this percolator won't make a perfect cup of top-end dark roast, it will make a strong black brew that will taste a tad different from standard drip coffee makers. I recommend a French Press setup for "gourmet" in grubby times if you want a luxurious cup of coffee to start your day, but the percolator will make more coffee (often faster) and will be able to service more people than other solutions, which is important if you have neighbors or a work crew helping out. Never underestimate the goodwill that offering someone a warm drink on a cold morning will buy you! And even if it is hotter and muggier than the third ring of hell in your disaster, you can bet there is at least someone jonesing for their caffeine fix.

Tuesday, January 23, 2018

Keeping It In Rotation

I've said before that emergency preparedness is an actual tenet of my religion. A major part of that is food storage, above and beyond what many preppers keep around. With this level storage, my options boil down to heavily preserved/freeze-dried food (which can only be called food in that it is a source of nutrition), or normal canned and dried foods that everybody gets at the grocery store.

The freeze dried stuff is awesome in regards to stability and shelf life (there is some of it on the market that I could buy today and still eat when I retire, and I'll be working for the next two-plus decades) but seeing as it tastes terrible and nobody wants to eat it, it's really not a great option for food storage.

Eating normal canned or dried foods is far more palatable, as well as being pleasantly familiar in a time of utter chaos and often far less expensive. Unfortunately, shelf life is far shorter (often a year or two instead of decades) so the simple solution is to just eat from my food storage and restock as I go.

The trouble with rotation is that it's a whole lot of work to keep the older product forward and the new stuff behind it, and can feel like four hands are needed. Thankfully there is an easier way for at least some of your supplies.
Large can organizer

Small can organizer


My grandmother had several of the small organizers in her kitchen, running pop cans and canned soup. You load new product in the top, and it feeds older product out the front. They work as well in a refrigerator as a pantry. The larger organizers work great for all your canned goods in a pantry.

My current method for bagged and boxed goods is to pull them forward as I consume them and load new product into the pantry behind them. I still haven't found a better way to rotate them, but I'm always looking. If anybody has a method or solution, please share it in the comments or the Facebook group, as I'd love to give it a try.

We can all get better at this by learning from each other.

Lokidude

Monday, January 22, 2018

Product Review: Gerber Center Drive

Assuming your circumstances permit, the majority of preppers will have a knife, multi-tool, or both in their EDC.

On most days, I carry a pocket knife of some sort, (usually the Klein folding electrician's knife) a razor (usually the Gerber EAB) and a Gerber Center Drive*.

Years ago, Lokidude reviewed the Gerber MP400, and I feel that our readers would benefit from a similar review of the Center drive.

http://amzn.to/2E0Vknl

Features
The Center Drive has a pair of needle nose pliers with a replaceable carbide wire cutters/stripper cutting surface, which extend by pressing the button on the side  and sliding it upwards. It also has one fine edge knife, one serrated knife, one cat's paw prying tool, a bottle opener, a file, a spare bit holder, and a ruler stamped into the frame.

Mine came with a belt sheath that can be positioned either sideways or in a standard up/down configuration and closes with a sturdy Velcro type fastener. The sheath is MOLLE compatible, and holds a bit driver set. With the exception of the spare bit holder, all of the tools lock when extended.

http://amzn.to/2E0Vknl

The tool that it is built around is the magnetic bit driver, which extends out in such a way that it is very close to the center line of the tool. When you have to remove a screw, or drive one, this can be a real life saver.

http://amzn.to/2E0Vknl

The Good
The build quality on this is excellent. The moving parts are all made to tight specifications, and all of the tool locks are either metal, or plastic over metal, with ridges built into them to allow easier use. I have had my hands covered in oil from working on a car on the side of the road and not had an issue extending the pliers.

The straight fine-edge knife and the pliers can all be opened one-handed, and both the bit driver and knife have a quality liner lock on them. I don’t use a file very often, but when I do, it is VERY nice to have on hand.

The magnetic bit holder is a lifesaver if you have to use it to drive screws. While not as nice as a dedicated screwdriver, it is definitely more ergonomic, and less slip prone, than a normal multi-tool.

I have not done torture testing on this, just daily use (and yes, I have put it through the dishwasher), but it seems to hold up well. Have to change a stuck oil filter on the side of the road? Stab knife into oil filter, rotate out, hand screw new one on. Have to fix your hot glue gun? Sure. Have to pry up a 500 lb steel plate so that you can get to the thing underneath it? Awkward, but not really a problem with sufficient grip strength and leverage.

The best part is that I have yet to have this one stolen. I have traveled with it, worked with it, taken it to conferences etc, and have yet to have someone try to walk off with it. I have lost several Leatherman tools that way, but for whatever reason (my theory is that it is not a Leatherman brand, and so people do not think of it as quite so valuable) no one has “forgotten” to return it or grabbed it out of my luggage.

The Bad
The “handedness” of the tool tends to get in the way. I can get the knife out one-handed using my right hand, or the bit driver one-handed using my left hand, and put them away the same way; but trying to open or close them with the opposite hand is quite difficult.

The Ugly
This is not the best bang for your buck. I dearly love this tool, and use it quite often, but it does not have the widest range of accessories, or the biggest knife, or… you get the idea.

There are tools that have almost all of the same features for about a third the price. That is something that you have to keep in mind with this.

Overall: 4.5 of 5
I really like the tool and the sheath. If it is within your price range, I would recommend this, preferring it to the other options I have used (Leatherman Surge, Core, Wave, Mut EOD, and Micra; a couple of other Gerbers; and a multitude of knock offs and off brands). It seems to overcome the ergonomic issues with using a screwdriver on a multi-tool, and it has a high build quality. If you use a multi tool on a regular basis, but don’t need any more exotic tools (like the M-16 cleaning tool available on the Leatherman Mut), it is wonderful.

If however you do not mind a somewhat lower build quality, and do not need all of these exact features, you can purchase a quality tool for less money.


*I use the model # 31-003073N multi-tool, and Amazon has a slightly different model, but as far as I can tell they are the same tool; mine just came with some driver bits.

Sunday, January 21, 2018

Product Review: Dland 1000 Lumen LED Headlight

Not actually Erin.
& is used with permission.
I received this headlamp at Christmas and have been using it for about a month now.

It has three settings which I have named
  1. Set Things On Fire
  2. Rather Dim, Actually
  3. Let's Induce Epilepsy!
Setting one is great for doing things at night, but beware of "light splash". Setting two doesn't have that problem by virtue of being substantially less bright, and setting 3 is basically a strobe version of setting one.

I compared this light's output to a flashlight of known power (my 420 lumen Kel-Tec CL-42)  and discovered the following:
  • The dim setting is actually brighter than 420 lm when zoomed in to spotlight mode, but not by a whole lot; when zoomed out, the 420 lm light was brighter. From this I infer that the "dim" setting is probably 500 lm. 
  • The bright setting is noticeably brighter than 420 lm in flood mode, and definitely brighter in spot mode. While I'm not sure if it's actually 1,000 lumen, it's demonstrably brighter than 500 lm and likely 750 lm at the least. 
  • The strobe mode has the same output as setting one. 

The Good
  • It is comfortable to wear, which is slightly surprising given the weight of the light in front and the bulk of batteries to the rear. 
  • The battery case has a red light in the back which illuminates when the light is turned on, making it easier for buddies to find/follow you in the dark. 
  • The light is adjustable from spot to flood and angles up and down to conveniently illuminate the ground in front of you at ranges from "where your feet are" to "twenty feet ahead". 
  • It comes with two 18650 lithium batteries. 
  • The battery case is also a battery charger and comes with three input devices: a wall outlet, a car port, and a USB cord. 
  • The price. $15 for a comfortable, bright headlamp is great. 

The Bad
  • The battery lifespan is pretty abysmal on "bright". After 2 hours of use, the light output quickly diminished; the bright setting was dim and the dim setting was practically nonexistent. 
  • It's very, very easy to dazzle yourself if you get too close to a white or reflective surface. Even adjusting the light with your hand can cause light splash if your hand intersects the beam. 
  • It's also very easy to shine the light in someone's eyes while talking to them. What is an annoyance with a regular flashlight is absolutely painful with a high-lumen beam. 
  • It might make for a good tactical light if not for the dual faults of being mounted to your head and requiring you to take a hand off your weapon to turn the light on and off. 

My Verdict
The battery life make it a no-go for bug-out bags, but the price and performance are excellent for bug-in preps, especially if you have additional 18650 lithium batteries charged and ready to go. 

Friday, January 19, 2018

Banging the Pillow: .32 ACP


This week we continue our ballistic testing with one of my favorite pocket guns, the Kel-Tec P-32, and my favorite round for .32 ACP pocket guns, the Winchester white box 71gr flat point FMJ.

Next week I’ll cover the .22 Magnum out of everyone’s favorite pocket revolver!


Thursday, January 18, 2018

Another Swiss+Tech Pocket Tool

Since I reviewed one of the Swiss+Tech (ST) tools last week, I thought I'd keep going with a few more reviews of their products. When I find a brand of something that I like, I tend to explore their full line to see if the quality stays the same. That's one of the reasons I like Sawyer water filters and Nebo flashlights; quality is consistent throughout their line of products.

Back in late 2015, I added my Every Day Carry (EDC) list to the ones our other authors had done. One of the items on that list is another ST tool that I received as a gift which has been with me for about eight years now. That tool is the ST66676, a six-in-one multi-tool that looks vaguely like a key and attaches to a key ring. Mine is a bit dinged and pitted from the years of riding around in my pocket, so I'll use the picture from Amazon to illustrate.

The six tools available are:
  1. Straight screwdriver: Smaller than a #1, roughly 3/16 of an inch wide. It's the squared off piece at the top of the picture.
  2. Philips screwdriver: It appears to be a #2 pattern but without the depth. You can see it on the "left" leg.
  3. Bottle opener: Functional, but the arm isn't long enough for much leverage. Also on the left leg in the picture.
  4. Straight cutting blade: The front half of the "right" leg, about an inch of blade.
  5. Serrated cutting blade: The rear half of the "right", also about an inch long.
  6. Micro screwdriver for eyeglasses: Also serves as the locking tab for when the tool is closed. The protrusion on the curved piece at the top.
My thoughts, pro and con.
  • Like most of the ST tools, this one is designed to securely lock when closed around a key ring. The latching mechanism is stout and, when coupled with the small size of the tool makes, it a challenge to open. I doubt you'd be able to open this one-handed, and good fingernails are a major plus. There's just not much to grip when opening it.
  • I'm not sure which type of stainless they used, but it has held up to several years of abuse pretty well. Mine is showing some minor pitting from the sweat and chemicals it has been exposed to, but no rust. Like the multi-tool I reviewed last week, there is no plastic in this tool.
  • The Philips screwdriver is actually made of two pieces riveted together. This probably makes the manufacturing easier while providing a groove for the cutting blade to sit in when the tool is closed. With the short length of the arms, it would be hard to get enough leverage to damage the screwdriver, so I don't think this is a problem.
  • Being roughly the size and shape of a normal house key, this tool is light enough to carry on a key ring without adding too much weight. It isn't much thicker than an ordinary key, so it adds no bulk to a key ring.
  • Being shaped like a key, the tool should be able to get past the TSA but there are no guarantees. They keep changing the specifics, but generally don't allow any sharp blades in your carry-on.
  • The cutting blade is small (about 2 inches total) and is exposed when the tool is opened. Watch your fingers when using the screwdrivers, since a slip could slice open your fingers. The blades are sharp and take a good edge, so ST uses quality stainless steel.
  • When opened 90°, the latch locks the tool open to make it a bit safer to get some leverage. This is a nice safety feature, but I wouldn't bet my fingers on it. It will also latch when opened 180°, making the knife easier to use. Be careful when closing it; the latch is quite positive and fingers of one hand will be near the knife blade.
  • Priced around $10.00, this tool is cheap enough to have several attached to various gear. They also make good gifts for like-minded people.

As part of my EDC, this is my third-level blade -- a lock-back pocket knife and BSA pocket knife are my primary and secondary -- but it's comforting to have a backup to the backup. I rarely use it since I have other tools that work better, but it is an insurance policy against getting caught with nothing. It has come in very handy at times over the years and functions moderately well. It's not an everyday use tool, but I don't think it was designed to be one.

I have a few other ST tools on order, so I'll be reviewing them in the next couple of weeks.

Wednesday, January 17, 2018

Prudent Prepping: Safety Alerts

The dust has settled and the First 72 Hours have passed. Follow along as I build a long term plan via Prudent Prepping.  

I had a wake-up call this week, and it was caused by a mechanical failure. Funny enough, it was a problem with a button.

Seriously, a button was pushed, shaking up a bunch of people.

OOPS! I Did It!
Sorry everyone, I was not in Hawaii causing havoc. I wasn't in Japan either, for that matter. No, I was at work, just getting started for the day when my phone rang. My phone doesn't ring often that early, since I start at 5 AM.
Phone: Ring, Ring!
Me: "Hello?"
Sis: "Hey, it's your sister, are you okay?"
Me: "What?"
Sis: "You sent us two emergency texts and a sound recording of footsteps and banging noises."
Me: "Uhhh, I don't know what to say. Everything is fine here, we are just setting up for the normal work day."
Sis: "Look at your phone, the whole thing should be there."
I looked over my phone, and it was all there in black pixels.

The only thing that might have caused this to happen is that my phone case pinched the phone and rapidly punched the power button to activate the emergency message function on this model. I wear my phone in a horizontal case on my belt, not in my back pocket, and the case is two years old and getting a little soft. Since I am left handed, the phone is carried on my right side and  facing screen-in, so the power button is pointed upward.

Now this is a bit funny since my sister has a habit of checking on me anyway, but it usually isn't when she is pouring her first cup of coffee, and this only happened because I went through the steps to actually set up the Emergency Alert function available on this phone.

Samsung is not the only company to have this type of program, so look through your instructions or Google your particular make and model. This is something my friends and family have done and is something everyone needs to do, especially their kids or those working odd hours and places.

To have something so simple to set up and use already in my phone, even with the possibility of a false alarm, made the decision to spend the two minutes setting it up a no-brainer,

The Takeaway
  • Personal safety can be as simple as pushing your phone's "ON" button and almost that simple to set up.
  • Pick a reliable contact and be prepared to be the recipient of a future call. 

The Recap
  • Nothing was purchased this week. 

Just a reminder: if you plan on buying anything through Amazon, please consider using our referral link. When you do, a portion of the sale comes back here to help keep this site running!

If you have comments, suggestions or corrections, please post them so we all can learn. And remember, Some Is Always Better Than None!

NOTE: All items tested were purchased by me. No products have been loaned in exchange for a favorable review. Any items sent to me for T&E will be listed as such. Suck it Feds.

The Fine Print


This work is licensed under a Creative Commons Attribution- Noncommercial- No Derivative Works 3.0 License.

Creative Commons License


Erin Palette is a participant in the Amazon Services LLC Associates Program, an affiliate advertising program designed to provide a means for sites to earn advertising fees by advertising and linking to amazon.com.