Friday, January 30, 2015

My Bug-Out Bag: Part 5 of 6

Not actually Erin.
& is used with permission.
Part 1
Part 2
Part 3
Part 4

Welcome to Part 5 of what I now think will be a 6-part series. Today I'm going to cover the top part of the main compartment. I'm breaking this section into two pieces because it will be image-heavy, just like the rest of this series.


The very first item once I open the drawstring is a Swiss Alpenflage Poncho. I try to avoid camo in my bug-out gear because I don't want to attract the wrong attention when evacuating, but I went with this for three reasons:
  1. It's specifically designed to go over a rucksack so that both I and my gear stay dry. I've tried it, and yes, it fits. Just bake sure you're wearing tall boots so that the runoff doesn't soak your lower pants legs. 
  2. Switzerland is a rainy country, and so I trust them to make effective rain gear. I like how it leaves my arms free for doing whatever (and if I want to keep them dry I can just pull them inside), and there are various snaps along the bottom so that I can wear this while riding a horse or bicycle.
  3. To my utter surprise, the red-brown is exactly the same shade as Florida pine straw. This means it's effective camouflage, period, and while I want to look like a harmless civilian when evacuating there are still times when I might need to hide. 

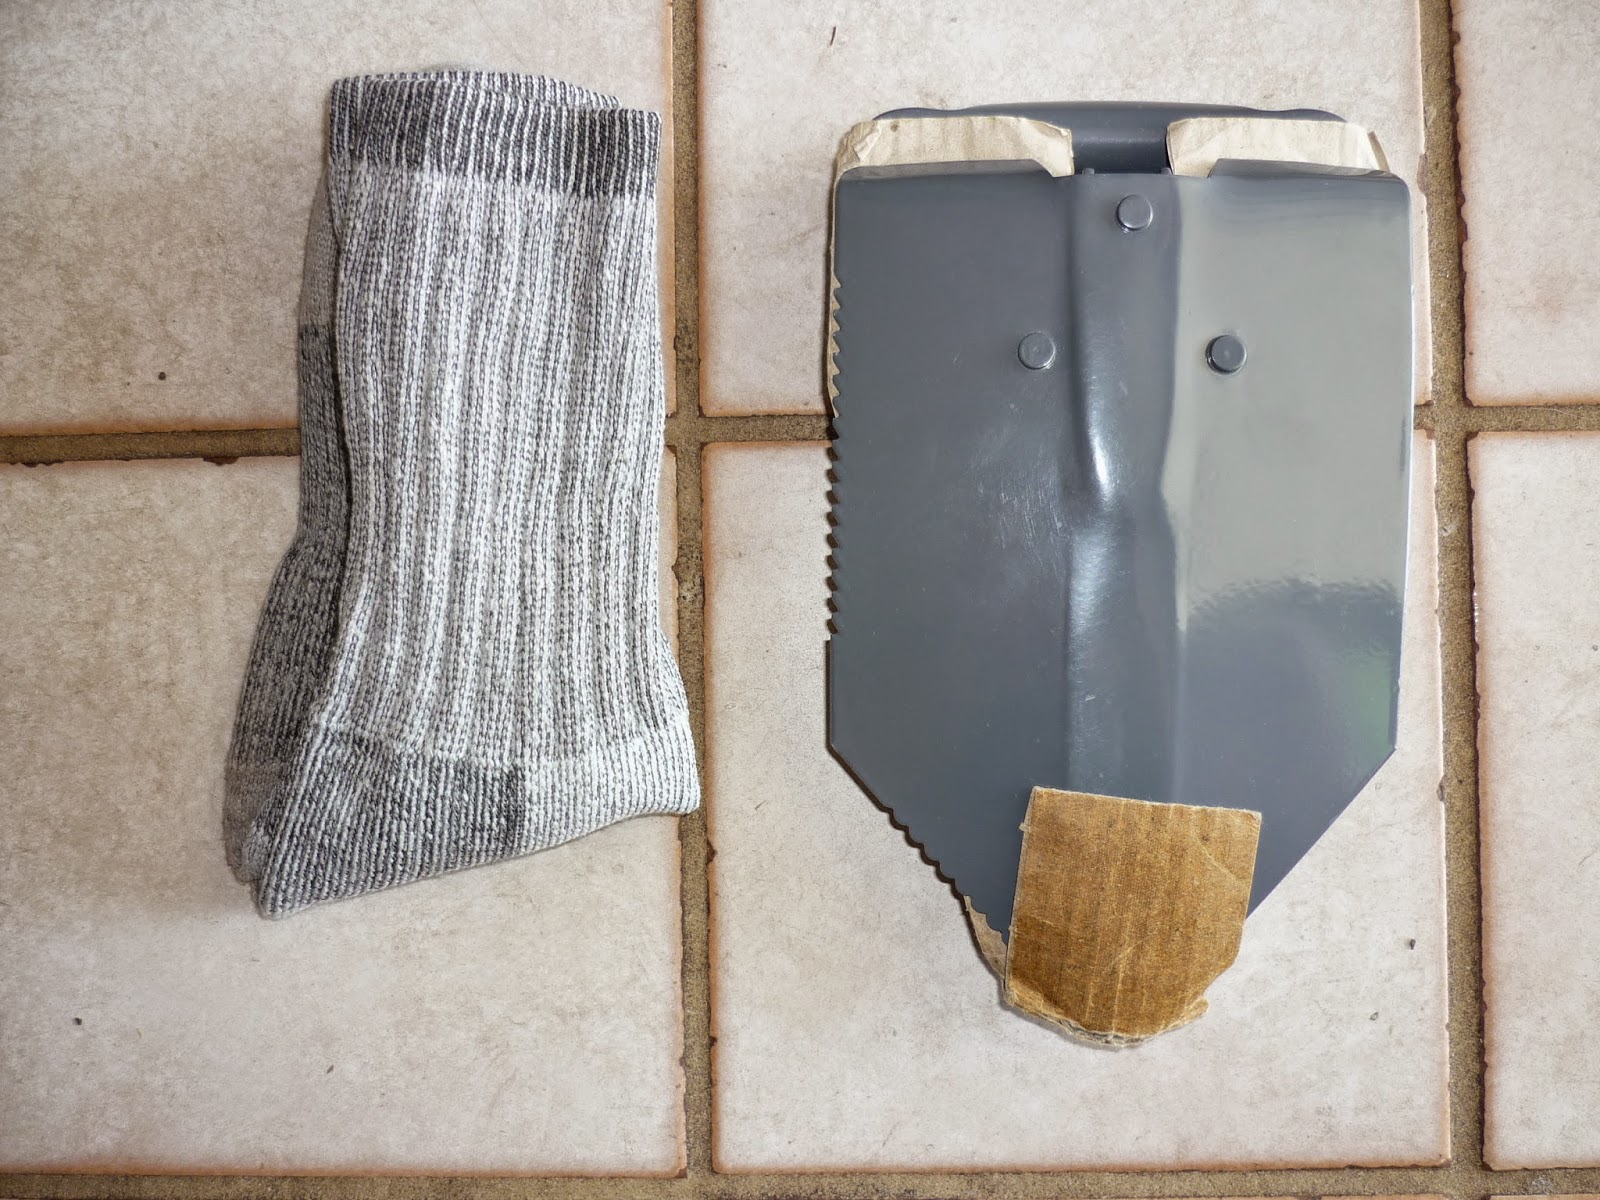
Immediately after the rain cape is a pair of woolen socks (easy to get to in case I need to change socks) and a Coleman Folding Shovel (because heavy things need to kept in the middle-top of the pack and close to my back).


www.wildbackpacker.com/backpacking-gear/backpacks/how-to-pack-a-backpack/

After that, things get a bit messy as I lack the ability to keep things organized and separated, yet easy to access. Suggestions on how best to correct this problem are more than welcome!

Front and center is the Power Pot that I got for Christmas, and nestled inside like Russian dolls (as I demonstrate in this video) is a Solo Pot and Stove combo.

Next to my back is an empty 2-liter hydration bladder, with (hopefully) enough room for it to fit when full. By "hopefully" I mean "I've filled it and had enough room, but I am constantly tinkering with my loadout and I've added some gear since I last tested it and I'm not 100% if everything still fits. I really need to clear my schedule and go camping so I can give everything a proper test."

Here's the rest of the top layer, spread out for easy identification in (roughly) the same position it occupied in the pack.


Clockwise from top:
  • Six-Herb Multi-Spice Pack. Has individual compartments for salt, paprika, curry, cayenne, garlic salt, and black pepper, which ought to enable me to eat nearly anything. It's wrapped in a Ziploc bag to prevent spills. 
  • Stainless steel Mora knife
  • Two large-size garbage bags. I really ought to add some white bags to this, so I'll go do that now. 
  • Top Ramen, Chicken flavor. Cooks quickly in the Solo Pot and weighs nearly nothing. 
  • Waterproof box from Lifeline that used to carry first-aid supplies but now has my deck of Edible & Poisonous Plants of the Eastern States recognition cards. Also inside is a backup thumb drive filled with scans of important documents, just in case the one on the outside of my pack is lost or damaged. 
  • A spatula & ladle taken from a Stanley 1.5 L Prep & Cook set
  • Camouflage mesh from the hunting department of Walmart. Can be used for concealment, or to keep mosquitoes off of me. 
  • A triangular bandage which ought to be in my first aid kit (which is in the lower section and accessible through the front loading panel) but wouldn't fit. 
  • A fishing kit I've put together but haven't tested for the same reasons I haven't been camping:
  • Another waterproof box, this time containing Knot Playing Cards
  • More Top Ramen!  This time it's beef flavor. 
  • A flashlight that I got from who-knows-where and is nifty because I can pull on the collar and it turns into a lantern. Great for use at bedtime while camping!


And that's the top half! Next week I'll show you the bottom half, as well as the stuff I'd like to be able to fit into my pack but can't quite make room for. 

Thursday, January 29, 2015

Water Purification, Part 5: Recommendations

I've covered the types of filtration systems that are available, the technology, and some of the sources of water that may be available in an emergency. To wrap it all up, I'll list some of the common systems and give my recommendations for their use. I'll go through the filters by size, from smallest to largest, since there is no really good way to list them all.

I should emphasize that I don't own all of these treatment types, haven't used all of them, and I don't have access to a lab capable of testing all of the claims made by the makers. These are my opinions of the filters as well as my opinions of their claims. Think of it as your free helping of ice cream for the day.


Heat
Pasteurizing or boiling water requires nothing more than a container and a source of heat (usually a fire), two things that you're likely to have readily available. Boiling your water will take care of the biological contaminants, but will have little effect on the chemicals present. I consider this the bare minimum level of treating water that I don't know to be potable.


Chemicals
Good for disinfecting water (killing anything in it), chemical treatment takes up very little room in a bag but generally has little to no effect on chemical contamination. Most chemical treatment types take 10 to 30 minutes to work, so they are not the best for quick treatment. They also tend to leave an “off” taste in the water (if used properly) which may be a disadvantage for some people. I consider the various tablets a good system for disinfecting clear running water I might find in a stream, small river, or some source that I'm just not sure about.
  • Potable Aqua: Iodine-based tablets, cheap and compact. Coleman markets a two-step system that uses Potable Aqua tablets and a second tablet that removes the Iodine taste, if that's a serious problem for you.
  • Taharmayin: Non-iodine based tablets for people allergic to Iodine, they still take 30 minutes to work. Can also be used to disinfect food and wounds in a pinch.
  • Katadyn Micropur: Chlorine dioxide-based tablets. Less of an aftertaste than Iodine, but just as effective. Costs about twice what you'd pay for Iodine tablets.
  • Bleach: Double-acting with both chlorine and oxidizing components, very easy to find but with a limited shelf life. Make sure you only use unscented bleach for your water treatment.
  • Potassium Permangenate: More stable than bleach, has multiple uses, and is cheap but not as easy to find. Permanganates are also strong oxidizers and must be stored with care to avoid unintentional fires and corrosion.

Straw-type filters
Easy to stick in a pocket and light enough to be barely noticeable in a pack, filter straws are generally cheap ($20.00) and come with a range of quality that bears paying attention to. Spend a few extra dollars if you plan on using a straw filter for more than taking bad tastes or odors out of tap water! Pros: No pumping to get clean water and most use no chemicals. Cons: Very limited life but convenient to have in time of need.
  • LifeStraw: 250 gallon life, weighs 2 ounces, log 6 (99.9999%) removal of bacteria, 99.9% removal of protozoa and 0.2 micron filtration. Not rated for virus removal, therefore not recommended for water that may be polluted with human sewage.
  • Aquamira Frontier50 gallons life, weighs about an ounce, 99.9% Giardia removal. ALso not rated for virus removal. 
  • Banyan Emergency Filter: 200 gallon life, weighs less than 2 ounces, claims 15 micron filtration but also claim log 7 (99.99999%) removal of protozoa which doesn't add up. 15 micron filtration is pathetic, so I'm not sure if it was a typographical error or if they're just trying to make it sound better by using scientific jargon.

Pocket filters
Larger than the straws, providing longer life and often using more than one type of treatment for better removal, pocket filters generally cost more than the straws or tablets. A better choice for when you expect to need to treat you drinking water for more than a few days, this type is a good example of the middle ground available. Pocket filters come in two general types, Reverse Osmosis (RO) and micro-filtration (standard).

Standard type: uses micro- or ultra-filtration media to separate the water from the contaminants. Efficiency of the filter media will vary widely according to the manufacturer, and should be compared closely to similar units before purchase. Avoid systems made in areas with a history of little to no regard for quality control, since it is your life on the line.
  • The Sawyer Mini is what I currently have in my bags. Small, light (2 ounces), cheap (<$20), and performance good enough for the water I will find in my area. The 0.1 micron filter is among the best on the market right now, but I'm doubtful of their claim of 100,000 gallon filter life.
  • Katadyn makes a selection of pocket filters for the backpacking market. They are generally well-built and moderately expensive ($75-300) depending on which model you're looking at. Filter efficiency varies by model, with 0.2-0.3 micron being normal. Some models come with carbon stages, silver impregnated ceramic, or built in pre-filters depending on what you're looking for and are willing to pay.
  • MSR Miniworks is a good example of a multi-stage filter. Using ceramic and carbon filter media, it is capable of removing anything larger than 0.2 microns as well as chemical contaminants. Less than $100, it's a good choice for rugged camping and backpacking.

RO systems: generally sold as desalination filters for sea water, these take a lot of energy to operate and produce less (but cleaner) water than a standard filter. If it has a long pump handle on it, it is usually some sort of RO system. There aren't many potable options that I can find, but you may have better luck if you live nearer an ocean (I'm about 1000 miles from the nearest).
  • Katadyn Survivor series: Internationally-known and -used manual desalination kits that are Coast Guard issue, not just CG-approved. Expensive units, with the larger (multi-person) running $2000 or more. The smaller one is $300 and will produce about a liter of water per hour of pumping.

Bottle filters
There are a lot of “sport” bottles with integral filters in them on the market. Most are made in China, with very little to no actual data available on their efficiency or method of filtration. From what I have seen, most are designed to remove bad tastes from tap water, so they likely use a resin or carbon filter to remove the residual chlorine from tap water and maybe some of the metals. I have to place them in the same category as the pitcher-type filters, and can not recommend their use for cleaning up untreated water with the exception of the LifeStraw version. If you see words like “fresh tasting”, “fresh and tastes great”, and no mention of removing bacteria or protozoa it is time to keep looking.


Larger systems
When you have to treat water for a large group, for a long time or in a stable location, the options get larger, and usually more expensive.
  • First Need: My first water filter. I bought one of these over 20 years ago to use on camping trips and it is still being made and I can still get parts for it. 0.3 micron filter with a pre-filter on the hose and threaded to fit common Nalgene bottles, it is a hiker's filter. Too large to drop in a pocket and weighs more than a pound, but it puts out water twice as fast as comparable filters. Rated for 200 gallons of use, but can be back-flushed to extend the life. I know this filter can take the color out of fruit juice, but not the sugars; that's an example of 0.3 micron efficiency.
  • Berkey: If you want a good quality, well-known and respected name, and a filter that is designed for use in a static location, look at the Berkey line. They do make smaller, more portable filters, but they got their reputation making base-camp equipment. Large, heavy, and make of metal, the body of their filters are sturdy. They use a ceramic filter media that is easy to clean and are rated for 500+ gallons of use. They are also expensive, but many find them worth the money.
  • Just Water is a resin and ceramic filter block that is designed to be installed in a gravity (drip) filter made of two plastic five-gallon buckets. Not expensive, they were originally designed for use in third-world countries and have had mixed reviews here in the US. Being ceramic, the filter media can break if not handled with at least a bit of care.
  • Katadyn makes a “base camp” level system, if you like the brand. 200 gallon filter life, up to 10 gallons per hour.
  • Platypus GravityWorks is another brand of gravity fed filter. Rated at about 20 gallons per hour, and using a replaceable in-line filter, it would be a good choice for a large group setting.

Distillation
If you can set up a still, you'll be able to clean up your water. Be aware that a still won't take out all of the chemicals that may be present, but will definitely take out all of the biological contaminants. The main use I can foresee for distilled water would be for medical uses, where you want water to be sterile. Boiling might work, but distilled would be better.
  • Aquamate solar still, which is an example of the type of desalination still available, costs about as much as a Katadyn RO system. Produces 0.5 to 2.0 liters of water a day depending on the sunshine, which is barely enough for one person. Yes, they're easier to use (no pumping), but they don't have the output needed for multiple people.
  • Non-electric stills like the Survival Still work over a camp fire or stove and put out about a half gallon of clean water per hour.. They are useful, but consume fuel that may be better used elsewhere, depending on your circumstances.
  • Electric stills like those made by GOWE are more suited to a laboratory than a survival situation. Requiring 220V AC power, they will put out very clean water, but if the power goes out you're stuck with a very expensive (>$500) door stop.


I hope someone out there finds this information useful, or at least learns enough to be able to ask the right questions when shopping for water treatment options. Always remember that it's your life on the line, not the salesman's, and shop accordingly. Water is second only to air for your survival and needs to be taken seriously. Don't let anyone convince you to settle for less than the very best that you can afford!  Read, research, and ask questions now while you have the opportunity.

Wednesday, January 28, 2015

Prudent Prepping: Long Term Food Storage

The dust has settled and the First 72 Hours have passed. Now we concentrate  on what to do in, and how to plan for, the long term via Prudent Prepping.


As the planning for my preps goes on, the choices for what foods I buy as long term storage items is mind numbing. Do I look to have several hundred pounds of wheat and other grains put away? What about MRE's? What are the popular freeze-dried meals like? Do they taste good?

I'm going to find out the answers to these questions.


First Things First
Since I am planning for a very small group (1-3 people) and do not have the budget or space to buy and store bulky items, discussions of bulk grains and similar are pretty theoretical for me. I hope this topic can be discussed by an experienced person in a guest post. Submissions welcomed! Contact Erin for details.


What Are The Choices?
They're almost endless. Use your favorite Search Engine and put in 'freeze dried food': 5.4 MILLION hits!

How do you know which is best? Ask your friends who prep, camp and hike, look in your local sporting goods store, and read Amazon reviews to get a better idea for where to start. I went to my local REI for some advice on where to start. Here is what I found:

Mountain House
From their website:
"Mountain House meals have since accompanied many great expeditions — to both poles, towering mountain ranges and even the moon and back! For nearly 50 years, consumers have continued to choose Mountain House as their favorite brand of freeze dried food for on-the-go adventures, emergency preparedness and survival. With just-add-water convenience, easy no-mess cleanup and home-cooked flavors, Mountain House is the best freeze dried camping, backpacking, hiking and emergency preparedness food money can buy"
I bought New Orleans Style Rice with Shrimp and Ham ($8.99, 2.5 servings)

AlpineAire
From their website:
"As a pioneer in the food marketplace for over 30 years, ALPINEAIRE FOODS has a reputation for excellence surpassed only by the distinction for outstanding taste. ALPINEAIRE FOODS produces all-natural freeze-dried and dehydrated, instant meal, side dishes, breakfasts, soups and desserts. We also offer an ever expanding variety of tasty Gluten Free options, so there is something for every palate and dietary choice."
I bought Santa Fe Black Beans & Rice ($9.82, two servings)

MaryJanes Farm
Not the easiest website to navigate, but the information is there... someplace. All-organic products, with an all-organic price tag.

I bought Organic Black Beans and Rice ($9.25, single serving) (REI link -- I can't find a direct, easily copied web link from Amazon. This may be an exclusive item for REI.)


Taste Test
The Testers:
  1. A retired Master Chief and SEAL
  2. A picky-eating 10 year old
  3. Me
All items are cook-in-pouch, meaning you just add boiling water and let sit.

Mountain House
  1. "Pretty good." "Not like Grandma used to make, though." " Needs some Tabasco."
  2. "I'm not eating that! That looks gross!" ($5 changes hands) "That tastes like a school lunch and it still looks gross."
  3. Consistency is a bit thin, probably from too much water. Flavor is pretty good, not too salty. +1 for Tabasco.
AlpineAire
  1. "That's pretty good!" "Where is the meat in this one?" "Less Tabasco needed here."
  2. "Are those carrots??? I'm not eating that!" 
  3. Nice flavor and still a bit soupy, even with careful measurement of the water. Adding a bit of meat (Spam?) would  make it better.
MaryJanes Farm
  1. "Are you trying to get me wearing sandals and those big shorts by serving all this organic, hippie ----?" "Where's the meat in this one?" "Gimme that Tabasco."
  2. "Are there carrots in this?" "I like the cheese taste." (Shocked face!) 
  3. Still soupy, but better than the first two. I like the taste and consistency of this one, without any extra Tabasco. Still, some Spam or bacon would help.

The Takeaway
Two of the three are reasonably priced; all three are taste okay and are easily ordered. I personally do not think going all-organic is worth the extra cost, but that is a value judgement for others to make. I do think the water required to make these items is about 10-15% too much for my taste. Your tastes may differ, however.


Ratings
4.5 out of 5 stars for all three brands, with the noted exceptions. I will be looking further into both Mountain House and AlpineAire for other items. Sorry, MaryJanes Farm, you're too pricey for me.


If you have comments, suggestions or corrections, please post them so we all can learn. And remember, Some Is Always Better Than None!

NOTE: All items tested were purchased be me. No products have been loaned in exchange for a favorable review. Any items sent to me for T&E will be listed as such. Suck it Feds. 

Tuesday, January 27, 2015

Prepping for Unemployment

When the question of "What do you prep for?" is posed to me, one of my top responses is always "Unemployment". I work in construction, so layoffs and work slowdowns are a very real part of my life. This was driven home last week, when I found myself suddenly unemployed.

So, how exactly does a person or family prep for a job loss or layoff? Most of this is just basic financial strategy, but sadly many folks, especially younger folks, aren't taught this except at the school of hard knocks. If you can learn these lessons and put them in place when times are good, they'll already be working for you when things get bad.


1) Build Savings: A bit of money in the bank does several things for you when you find yourself faced with a job loss, or any other financial crisis. Primarily, it numbs quite a bit of the fear of crisis by giving you some time to sort matters out and solve the problem. It can also smooth over smaller bumps in the road, keeping them from becoming a crisis. Knowing that you have a bit of savings and time can also help you stay calm while job hunting, hopefully helping you to interview well.

You don't have to develop massive savings overnight; just dedicate a portion of your monthly budget to savings, whatever you can afford. Obviously, the more you can budget to savings, the faster your savings will accumulate. It also helps to have a savings goal in place, but what that goal is will depend on your needs and circumstances.

2) Budget: Having all the neat prepper toys is nice. If they put you in the poor house, however, they're no good to you. Set a budget each month, accounting for all your regular bills, as well as setting money aside for savings, prepper supplies, and any other goals you have. List all your income and all your bills, and then find a place and a purpose for any extra dollars of income you have left.

3) Cut Debt: Cutting debt reduces how much you have to pay out each month, which is a big plus when you're un- or under-employed. A lower outlay also frees up more money in the monthly budget for savings or other needs. Spend less on credit and pay a few dollars extra on your credit accounts each month, if you can.

4) Network: Make and maintain contacts with people in your industry. This is particularly important in a small or narrow field; someone is always hiring, and multiple people keeping an ear to the ground are far more likely to find openings than a single person. In particular, they may be aware of soft openings, where a job isn't openly posted and actively hiring, but a boss would be interested in finding room for the right talent.

Join professional organizations in your field, and be active within them. In addition, keep any training, licensing, and certifications up to date.
5) If you do find yourself unemployed, make job hunting your full-time job. Contact your state workforce services office. Most of them have websites with all of their listings, as well as providing job and interview training courses. Let the folks in your network know you're looking. If you're in school, check with your advisers. Just like with any other job, the harder you work at it, the more successful you'll be.

As for me, don't worry.  I fell back on my network, called an old boss, and didn't miss a day of work.  The rest of the framework kept me calm and collected, and allowed me to form a plan, make the necessary phone calls, and be working the next morning.


Lokidude

Monday, January 26, 2015

Home-brewed Comfort: Menstrual Relief Tea

Tea is great. It's one of the simplest ways to get vitamin boosts and help induce higher comfort levels. It's also been around for thousands of years; the Egyptians and Ancient Chinese knew about tea and drank it.

This tea recipe is one I've been experimenting with and is sort of a work in progress. I say that because there could be another herb that is easy to find in loose quantities that would work better and be the icing to this tea cake.


Ingredients
  • Chamomile
  • Mint (any of the mints will work, I use just general mint)
  • Ginger
Get the pure stuff. Pure Chamomile, pure mint and pure ginger. Do not get anything that isn't just that herb. Yes, it makes it a tad more expensive, but it's worth it.

You can sweeten this tea, but I would advise that you use honey, real honey, and only one spoonful.

Ratios of the blend
  • 4 parts Chamomile
  • 2 parts mint
  • 1 part ginger
Chamomile should be the majority of the tea. If you're brewing a pot, you want about a tablespoon and a half (or two bags). Just one cup? Two teaspoons (or one bag).

Mint for a pot of tea is half of a tablespoon (one bag). For one cup use 1 teaspoon (if you have only bags, just go ahead use one bag).

Ginger is where it gets tricky. Ginger is very effective and you don't want a lot of it in your tea because it will overpower the other two herbs in terms of flavor, and then you're left choking it down. For a pot of tea, use a teaspoon and no more. For just a cup, use a pinch... literally, Use whatever minimal amount you can pick up with your thumb, index finger and middle finger. Again... do not use too much ginger.


Why chamomile, mint and ginger? 
I'm glad you asked. All three are great for upset stomachs, and nausea is common among menstruating women, even more so than the urge to rip off people's heads!

Chamomile:
  • helps you relax 
  • reduces insomnia (oh, how I love it for this property) 
  • eases anxiety 
  • boosts the immune system 
  • helps your body not only end diarrhea, but also makes recovery more comfortable 
  • lessens cramps (In my experience with this tea, it reduces the amount of pain reliever I need to take in order to deal with the cramps. As this is my personal experience, take it with a grain of salt as each woman's body will react slightly differently)
Mint:
  • eases digestive problems 
  • helps keep brain fog at bay 
  • improves your mood 
  • seems to be an aid in increasing blood flow, which can reduce the magnitude of headaches 
  • reduces stress 
  • is a mild pain reliever
Ginger:
  • is used to treat all sorts of digestive track problems 
  • is a pain reliever 
  • has a compound that reduces bloating 
  • counter-acts loss of appetite 
  • improves blood circulation 
  • reduces inflammation 
  • is a mood booster
As you can see, there are some very common themes between these three herbs. 


Advice
Remember, do not use too much ginger. Too much ginger can actually make your stomach problems WORSE. It doesn't take a lot of ginger to be effective. 

Three mugs on the first day is usually all I need. Sometimes I need to drink it for 3-4 days straight, but in those cases I only have two mugs a day and spread out over the day.

Be sure to read over the links I've included. There's a lot more information on the herbs themselves and conditions that they might aggravate.

Happy sipping!


Links for more information
Please be sure to check out these articles for information on allergies and side effects,

Gun Blog Variety Podcast #23

Not actually Erin.
& is used with permission.
Episode 23 is out and ready to impress!
  • Sean reveals that he's been reading short stories on the internets, and he tells you where to find them.
  • Erin Palette tells us her Twelve "C's" of Preparedness.
  • Nicki Kenyon discusses Foreign Policy Fails
  • The recent incidents of SWATting are making Miguel Gonzalez angry.
  • Barron B. pours cold water on the idea that cops are going to search your home with radar.
  • Weer'd explores the frequent anti-gunner refrain that "There's no such thing as a law abiding gun owner." 
  • And to top it all off, hosts Adam and Sean talk about the hidden gun rights message in Disney's hit movie "Frozen." 
Listen to the podcast here.
Show notes may be found here.

Check it out. And don't forget to share with a friend!

Friday, January 23, 2015

Guest Article: Prepping Guide for Beginners

by Gale Newell


There is a widely-used idiom about a straw breaking a camel’s back. The point of this idiom is identifying that everything has a breaking point. Case in point - try bending a pencil. Eventually any pencil will break when you put enough stress and pressure on it.


What does this mean? Society and our environment will follow the same trend. Today’s world is filled with international instability, economic and political crises, bloodshed, widespread pandemic such as the new Ebola outbreak, and general struggle on a large scale. Families struggle to put food on the table for their kids and many of us wonder how we can continue to live this way for much longer. The world is at its tipping point and you need to prepare. What can you do now that will set you and your family on the right course for the future?


Paying off Debt
The first course of action is to admit that you and your family need a safety net. Many people go through life on a week-to-week basis. We receive a paycheck and are forced to spend it on bills, rent, and towards paying off debt. This last item should be the first goal of the beginning prepper: paying off debt will allow you much more freedom to prep like you’d like to, because as you know, procuring preps is not cheap. Put forth all efforts towards paying off outstanding debt(s) and reduce your financial footprint. Get off the debt collectors’ map. This is the first step to going incognito in a world of dependence. 


Budget for Preps
Theodore Roosevelt once said, “It is not often that a man can make opportunities for himself. But he can put himself in such shape that when or if the opportunities come he is ready.” 

Your family needs you. The way the world stands today, resources and supplies are ample and ready for procurement. Tomorrow is not guaranteed and those same items could be gone from store shelves in 24 hours. Allot a certain dollar amount per week/month to purchasing preparedness items and do not go over that limit for any reason. Prepping is a slow burn type of process, not a reactionary one.


Get used to the Food in your Storage
Many times preppers buy foods that they've never eaten before. They say things like, “Oh, I’ll get used to it when the time comes.” This is not the best approach for the situation. Slowly work it into your diet. Have an item every day, or every couple days, from your food storage and ensure you replace that item soon after. You do not want to have a significant time period for family members to acclimate to the new items in their diet. 


Undervaluing Skills, Overvaluing Supplies
A prepper cannot simply rely on ample food supplies and extra cases of ammo without knowing how to fire a weapon accurately, forage for food, or construct simple means of shelter. Learning skills useful to survival (check out this Men’s Fitness article for a great read on essential survival skills) should be an important part of any prepper’s agenda. We've all got some free time; instead of spending hours in front of the television watching endless episodes of reality television, spend that time learning and practicing a new skill. Match this skill up with something you’re interested in. If you’d like to learn how to reload your own ammunition, look up some online tutorials and teach yourself how.


Prepping is more complicated than you may think. For those just starting out, you may find it a bit stressful and more than you bargained for. But once you get your hands dirty and make prepping an integral part of your life and a habit, it’ll be just as easy as breathing or sleeping. Stay true to goal, take steps to be a true prepper, and ensure your family will wake up tomorrow with food on the table.

When SHTF, will you be ready?


Thursday, January 22, 2015

Water Purification, Part 4 - Water Sources

A few weeks ago I was asked to explore urban water sources and its treatment To answer that question, first I need to explore some of the possible water sources and what type of treatment would be best for each. A very technical description of the various types of water found in the ground can be found on the USGS website, but I'll try to make it a bit more understandable. I'll start with the worst and work my way through to the cleanest sources.


Surface Water
Surface water is literally water found exposed on the surface. No digging of a well is required to get to it, which means that surface water is likely to be your first choice as a source of drinking water during an emergency. Surface water is also more likely to be contaminated than other sources because of the fact that it is exposed to animals, air, runoff, and sewage discharge.

Here's an aerial photo-map of the county I live in with the lakes, rivers, streams, and drainage ditches shown in blue. The legend didn't save with the picture, but for about 90% of the county you can't travel more than about a mile without finding water of some sort. For a rough estimate, the left (West) border has squared off bumps that are scaled in one mile increments. I am blessed with an abundance of surface water where I live, but I know that others aren't as lucky.

This photo-map came from an online service (beacon.schneidercorp.com) that provides GIS (Graphical Information Service) data to local county and State agencies. It is free to use and they cover a lot of the central US. There are other sites with similar data for other states. The maps are very detailed and you can select the information presented (roads, waterways, political subdivisions, etc.) 

Here's a resource for finding a similar photo map of an area in your area. Road maps and atlases can often give you a good idea of the waterways in your area, and a topographical map will give you details on lakes, ponds, swamps, rivers, and streams.

Photo my own work and copyrighted
Surface water can be contaminated with just about anything and everything you can imagine. Unless you can see the source of the water (spring, glacier, etc.), you should expect that it is contaminated. Somewhere upstream of you could be a dead beaver or raccoon laying in that crystal-clear mountain stream, or the field next to that lake might have been sprayed with 13 different chemicals in the last year. Your choice of filters must have excellent biological removal, and a charcoal filtration step would be prudent in areas where agriculture and industry are found. A good prefilter followed by chlorine or iodine treatment will take care of most surface water if you don't have a filter for removing the biological contaminants. A solar still (like this one) will take care of most of the contaminants and produce potable water in a stationary situation.
 
Photo my own work and copyrighted
How long you expect to rely on surface water will be a determining factor in the size of the filter you will need. My needs would be a filter that would allow me to travel to a place with safe water, which in my normal daily routine would be no more than 30 miles. Even on foot I can travel that far in 72 hours or less, so a small filter with high efficiency is in my GHB. Once at my bug-out location my water needs are taken care of, so my choice of filters is a lot simpler than some of you may have.

Where you are, and to where you are trying to get, are also important;
  • If you're in a metropolitan area, traveling through one, or sheltering in place in one, the water you find in drainage ditches, mud puddles, and storm sewers is going to be the surface water you'll find. 
  • Runoff from roads will have oil from vehicles, rubber from the tires, trash, salt and sand from de-icing, and roadkill remnants, so the treatment option you choose should be capable of removing all of them. 
  • If you see an oil sheen on the water, it's best to look elsewhere for water if you don't have a reverse osmosis system or an excellent filter system capable of removing petroleum from the water.
  • Water stored in a rain barrel or stock tank should be treated as surface water, since it is open to the air and animals. There are few things worse than getting to the bottom of a rain barrel and finding a dead mouse or squirrel. 
  • Rainwater that has run off of a roof will probably contain some bird droppings, leaves, and anything else that could land on the roof so it should be treated before drinking. 
  • Seawater is a special class of surface water, in that it contains enough dissolved salt to be unfit to drink untreated. Distillation and reverse osmosis (RO) are the only good methods of making seawater drinkable, and there are several units designed for this purpose out there. 
  • Brackish water refers to the water found where fresh water streams mix with seawater and should be treated as seawater. By the time the water in a river makes it to the sea it has picked up all of the run-off and discharges upstream and it will need a very good filter to clean it up.

Groundwater
Groundwater is the water trapped or contained in the soil between the surface and the bedrock of an area. Groundwater sources are recharged by water seeping through the soil and porous rock above it, and the water is filtered in the process:  if water can travel through a few inches of ceramic and come out clean, then a few feet of soil and then a few yards of rock will have the same effect. Ground water recharge takes time, though, which varies with the local weather patterns and the make-up of the geology underfoot. Dirt and rocks are capable of desalinating sea water -- if given enough of the right type of rocks and enough pressure.

Photo my own work and copyrighted
If you see a windmill or irrigation system, you will find a well attached. The old windmills may not be working, but if you see a center pivot irrigation system in the field, it is hooked up to a good well. Irrigation systems are fed by pumps run on electricity or an internal combustion engine (usually with a large fuel tank or propane tank next to the motor).

If you have the time and equipment to dig, drill, or drive a well, then you'll need to know if you have a chance of hitting water. The well-drillers around my area have always kept detailed records of their successes and failures at finding water, and pass that information on to each other. If you need to know how far you'd have to dig or drill to find water, try checking this page. Dowsing is another option, but would be best attempted before an emergency.


Photo my own work and copyrighted
If your water table is close to the surface -- within 20 or 30 feet -- a simple well is easily driven with a “sand point”, some pipe and a sledge hammer. Instructions are available online, and the parts can be ordered or purchased at farm supply or plumbing supply store.

Groundwater comes pre-filtered by the soil that it had to percolate through, so it will be free of most of the biological contaminants unless your well is open enough for animals to enter. You can get by with a slightly less efficient biological filter (or no filter at all) depending on the quality of the source. I grew up drinking water from a well and the only reason we ever wanted to treat it at all was to remove the iron and lime content. The chemical filtration step (carbon or RO) becomes more important with shallow wells, especially in areas where agricultural chemicals are used, there are leaking underground storage tanks, or industrial chemicals have been stored/dumped. In general, the deeper the well is, the cleaner the water will likely be. Sand point wells are commonly used for livestock and irrigation purposes in areas where the water table is high, but drinking it untreated may expose you to chemicals and pollutants because the water doesn't have as much soil to travel through.


Deep Water
Water that is below impermeable bedrock or clay is “deep” water. Usually part of an underground aquifer this water has been where it is for thousands of years, cut off from exposure to the air and any other source of contamination. Drilling through several layers of rock to reach this deep water usually takes professional equipment and several thousand dollars, but will provide a source of clean water for many years. The deeper the well, the harder it will be to draw the water up to the surface. Without electricity for a submersible pump, deep wells need good hand pumps to be useful. Bison Pumps have gotten good reviews, but I have no personal experience with them.

Deep wells will provide water that needs no filtration unless the aquifer itself has been contaminated. This is possible through blown-out oil/natural gas wells, severe earthquakes, and other things that may occur in a major catastrophe.


Trapped or Stored Water
Water that is locked up inside plants or left in pipes/containers is what I call “trapped” water.

Plants filter water by drawing groundwater through pores in their roots and carrying up into the body of the plant. The pores and capillaries inside most plants are small enough to filter out bacteria but not chemicals, and a lot of plants will actually concentrate metals in their flesh. Depending on the metals in question this can be good or bad; magnesium, iron, and calcium are good for your body but lead, arsenic, and mercury would be bad. Plants found in the wild would be safer to use than some random weed growing on top of a landfill or next to a factory building. Know the plants in your area and avoid the poisonous ones.

Cactus plants store water, as do the other succulents, and make a handy source of emergency water. Eating or tapping a cactus is pretty straightforward and has been covered in desert survival instructions for many years.


Foliage (leaves) are another plant source of water. Plants lose water through their leaves in a process known as “transpiration”, where water evaporates from the leaves into the surrounding air. Wrapping a clear, clean plastic bag around a tree branch overnight will provide a little bit of water for drinking. Another method is to place cut plants into a solar still and collect the moisture produced as they dehydrate.

Water trapped in pipes or containers is usually water that has been treated by a municipal plant or came from a well that is no longer under pressure. If used within a reasonable amount of time (a few weeks for most sources) no treatment will be needed. However, once it has sat stagnant for a long while, it will start to absorb materials from the container or pipes that it is sitting in, and any bacteria present has a good chance of reproducing and reaching levels of contamination that may be dangerous.  

Bottled water is usually treated with ozone or run through an RO unit (drinking water vs, purified water) and will last months on the shelf, but it can leach chemicals from the plastic bottle into the water. Toilet tanks (not the bowl!) hold 3 to 5 gallons of water; water heaters hold 30 to 50 gallons of water; and standard ½ inch water pipes contain a gallon of water in about 100 feet of pipe (this chart gives values for other pipe sizes). Since the water is trapped, you'll probably need to open the pipe/container at top (vent) and bottom (drain) to get the water out.


Fresh Water 
Fresh water is captured rainwater, snow melt, or other source of condensation or precipitation. Unless your collection system is contaminated, or the air itself is unsafe, this is the best source of water as it needs no treatment. Ice harvested from a frozen lake or river is clean enough to drink once melted, as is freshly fallen snow.


These are the main sources that I think about when I think of water. I haven't given any brands or suggestions for a specific situation because I am not able to test your water sources and then test the resulting water in a proper manner. I am also not getting paid by the makers of water filters, so I am not going to promote any one brand over the other. Check the specifications, reviews, and the maker's claims and compare more than one brand before you buy. You are going to have to do your own research and figure out what treatment method makes the most sense for your situation. If you have question about specific methods, let me know and I will do what I can to help clarify things for you.

Wednesday, January 21, 2015

Prudent Prepping: Planning for the Likely Disaster

The dust has settled and the First 72 Hours have passed. Now we concentrate  on what to do in, and how to plan for, the long term via Prudent Prepping.


Planning for Disaster:
What if the emergency you have
isn't the one you're prepared to have?


Since the contributers to Blue Collar Prepping live in different areas of the United States (with a bit of overlap), our topics will of course vary according to regional necessity. However, we all have a common element of planning for our families and friends, as shown below:
  • Erin (Florida) has hurricanes, tornadoes and fires.
  • Tim and Renee (Midwest) have tornadoes, low temperatures and fires.
  • Lokidude (Utah)has low temperatures and fires.
  • Evelyn and I (California) have earthquakes, landslides (if it rains enough) and fires. 
See anything in common?


What if you hear "Fire!"?
Let's get one thing out of the way right now: I am not going to be putting out any fires bigger than a Weber BBQ, even if I have larger than normal extinguishers available.

That is not my first job.

When my planned disaster (earthquake) hits, my first job is to get family and neighbors out of the area, then secure our gear, then alert the authorities and then maybe think about fire fighting. 

The best way to fight fires is to fight them before they happen:


PREVENTION
Inside
  • Secure all appliances to prevent movement that might break gas lines or wiring. 
  • Look at ceiling fans and suspended light fixtures. Make sure the proper fan brackets are installed and are rated to support the weight of the fan. 
  • Store all flammable liquids in an area where they will be contained and less likely to be crushed or fall off shelves and spill. A cabinet door with an eye hook or slide bolt is a good idea. Don't forget your stove fuel or propane cannisters! 
  •  Know where your fuse panel is located.
  • Don't overload wall sockets or run extension cords everywhere. This is a Very Bad Thing!
Don't be this person!
Outside
  • Know where the gas meter and electrical meter can be found, and know how to shut off both services. The same goes for external propane tanks. 
  • Gas powered equipment, motorcycles, and boats need to be stored where fuels spilled in a disaster will not easily add to the danger. 
  • If you are in a wildfire area or could be in an urban fire zone, then clearing away bush, overhanging tree limbs, grass and even leaves out of your gutters can help prevent a fire from damaging your property.

    Putting Out the Fire
    Even though I said I'm not fighting a fire, there are times when that will in fact be the best course of action. If I have a flaming pan on the stove, I'm grabbing my ABC rated extinguisher like this one to use on the fire. I also have one of those in my bedroom and a small version like this one in my truck. It just barely fits under the seat! One item I have always wanted to see and get are the fire blankets used to place over flaming pans.

    If the fire is anything bigger than the previously mentioned Weber BBQ, I'm not going to attempt to put it out; I'm going to exit the building, taking all items I can and then let the professionals put things out.

    Other considerations
    • If you are on the second floor, having an escape ladder is a necessity. One of those would have made getting down from the third story to the second story mentioned in this post much easier.
    • Practice getting out FAST and have a meetup spot planned. Practice regularly.
    • Check your smoke and Carbon Monoxide detectors often.


    And as always, if you have comments, suggestions or corrections, please post them so we all can learn. And remember, Some Is Always Better Than None!


    NOTE: All items tested were purchased be me. No products have been loaned in exchange for a favorable review. Any items sent to me for T&E will be listed as such. Suck it Feds.

    Tuesday, January 20, 2015

    Preventative Packaging

    A prepper friend discovered recently that her gear storage solution wasn't as secure and tight as she thought it was. Her situation turned my mind to ways to improve how my gear is stored, packed, and packaged.

    Let's start small:

    Use ziploc bags to protect individual items or groups of items. This has the benefit of keeping your gear organized, in addition to keeping it dry and protected from animals, and keeping perishable supplies a bit fresher. Items that you don't get into frequently can be even further protected by using vacuum-pack heat seal bags.
     
    Label anything perishable with its expiration date and the date you packaged it. Label your other bags with any pertinent information. If you're truly OCD like mine, you can mark a min/max on the bag. Be sure to go through them regularly and rotate or replace anything getting close to its date. Inventory your supplies and bring anything at or near its "min" level back up to "max." This works particularly well with things like medical supplies and first aid gear, food items, firemaking supplies, and other things that are especially moisture sensitive.

    If you're in a position where you're looking for a new bag, consider looking for one that is waterproof/water resistant, or waterproofing your current bag. There is a mind-blowing variety of waterproofing treatments available. Your local camping or sporting goods store would be one of the best places to seek a recommendation. The specific waterproofing you use will depend on the material you're treating, the method you want to use for application, and what may or may not be legal in your state. Learning to waterproof items is also useful for treating gear itself, like ditty bags and tents.

    For dedicated gear that you're not planning to pack, look at alternative storage containers. Ammo cans with gaskets are wonderfully weathertight. Make sure that the gasket is in good shape, pliable and with no cracks or breaks. If you drive a truck, in-bed toolboxes with seals and tight fitting lids hold a plethora of gear, and keep it secure and dry. Sporting goods stores that cater to campers and river runners sell "dry bags" and "dry boxes" which are truly watertight storage containers, the ultimate in gear protection, but nigh-useless if you have to actually carry them anywhere.

    Consider storing items like your BoB inside another container. This is a spin-off of a trick Grandma used for as far back as I can remember. She had a large plastic tote in her trunk that held most any emergency supply an old farm girl could need. In my wife's truck (actually a small SUV), all of her emergency gear lives inside a locking Rubbermaid tote behind the back seat. It is weathertight, and can be secured with a simple padlock. It is large enough to hold her Car Survival Kit, a 72 hour food kit, fire extinguisher, and basic tools. Grandma's wisdom lives on.

    As to my friend's original problem, periodically check the weatherstripping and seals on your doors, windows, trunk, and hood. Doing this at the same interval as your oil changes is an easy schedule to remember. The seals should be elastic and pliable, with the exception of the plastic "scrapers" at the base of windows that roll down. There should be no gaps or cracking. The seals should hold firmly to the metal of the car body. Windows that don't roll down should have all of their trim pieces, and a solid bead of adhesive between the glass and the car body. Sealant to go around glass is available at automotive supply houses, as is replacement weatherstripping and any needed adhesives, for a quite reasonable price.

    Take care of your gear, so it can take care of you.

    Lokidude

    Monday, January 19, 2015

    Baa Baa Black Sheep, Have you any Wool?

    One of the most basic human requirements is clothing. The production of clothing has been an industrial concern of mankind since the earliest civilizations, and has ranged from the most crudely tanned animal hides to the finest of delicate fabrics.

    From sumptuous silks, to sturdy canvas sails, and all the glorious variations that fall between those two polar opposites, there are several steps to be accomplished to take fiber from it's most primitive state to finished product ready for human use.

    Today we're going to concentrate on beginning the process of taking raw fiber and getting it ready to take its journey into becoming cloth.
    Whether you're dealing with animal-based fibers from fur or hair (such as various types of wool) or plant fibers of some sort (cotton, or flax for linen), almost* all types of fiber are going to go through the same basic process in order to ready it to become some sort of usable fabric.
    1. Harvesting
    2. Cleaning
    3. Straightening & Aligning
    Silk is a process unto itself, and with the exception of those living in portions of Asia and the Middle East where the silkworm is native, it isn't likely to be readily available to those who read this blog. Since it's not easily or readily available over a wide range of climate types and geographical areas, and is highly specialized, I'm going to leave it alone completely. For those who have a serious interest in silk as a sustainable fiber, I suggest Silk: Processing, Properties, and Applications. While it's rather expensive, it's a comprehensive text book on the entire silk industry, from cultivation of silkworms through processing of the fibers for spinning and weaving.


    Harvesting
    Harvesting is fairly straightforward, and is going to vary according to the animal or plant you are dealing with. Sheep and other animals used as primary sources of wool are regularly shaved to collect their fur or hair. Cotton and flax are harvested in season.

    I strongly urge you to become familiar with what is currently being grown in your geographical area, and learn the specifics of harvesting that particular type of fiber. Get to know someone in your area who raises wool animals, or grows cotton or flax intended for the clothing industry, and find out what you can from them how the fibers are grown and harvested.


    Cleaning
    Cleaning is almost as straightforward as harvesting: A gentle wash with water, or water with a very mild soap, is used to remove dirt and unwanted oils from the various types of wool.

    Cotton and flax are de-seeded, and then given a gentle rinse to remove surface dirt.

    Again I urge you to find out what is considered available in your area. Shearing sheep, and then skirting the wool, washing it, and extracting the lanolin is an art form as well as something that goes much easier when taught as a hands-on procedure by those in the know.

    An Aside About Wool
    Wool is the type of fiber most easily and readily available across a wide portion of the planet. Wool is defined as the hair of an animal - usually sheep, llama, alpaca, goat, yak, and rabbit - which varies in length and curl, and can be harvested without killing or inherently harming the animal it came from.

    If you have a dog or cat with long enough hair, then even their fur, once cleaned and prepped, would be considered a type of wool. (Don't laugh - I personally know people in the fiber arts community who have spun dog hair and used it for knitting projects. There's even an entire book out about how to do so!)

    For those who have access to some fur- or hair-bearing animal, wool is a safe bet for long term use. It's easily sustainable, relatively easy to process, available from a wide variety of sources, available in practically every climate where humans reside, and can be used in a wide range of end products. For the most comprehensive, all-inclusive book I've found concerning preparing all types of wool for use, I'd definitely suggest investing in a copy of The Fleece & Fiber Sourcebook. I have yet to find something more inclusive, and it gives tons of information that I simply don't have the space to offer here.


    Straightening and Aligning
    Aligning wool of most types requires one of two things, both of which ultimately accomplish the same job: lining up all the individual fibers in the same direction, and making sure there aren't major snarls and tangles in the clumps of fiber. For this, you'll need either a Drum Carder or a pair of Hand Carders.

    The same can be said for cotton. However the Hand Carders used for cotton have a different texture on the pad of the card. The two types are only somewhat interchangeable from what I've been taught: a cotton carder (which is ultra fine) can be used for wool, but the coarser wool carders can't be used for cotton. Don't take that as gospel, though; I'm still in the learning process for the early stages of fiber arts, and still have a long way to go before I'm any sort of expert.

    While the process is easy to learn, it takes time and practice to master. Even once you have the techniques learned, it requires a bit of patience to get large batches of fiber ready for use. This is an activity that is best suited to what might otherwise be unproductive "down" times (while resting but not sleeping), or as something to keep kids, the not-to-seriously-injured, and those who feel "useless" busy and productive, giving them a task tackle to free up the hands and time of someone who might have other necessary skills.

    Next week, we'll look at taking the fiber and getting it turned into usable thread or yarn.

    Sunday, January 18, 2015

    Gun Blog Variety Podcast #22

    Not actually Erin.
    & is used with permission.
    Episode 22 of The GunBlog VarietyCast is out!
    • Erin Palette gives us her thoughts on the perfect water bottle.
    • Nicki Kenyon talks about the Hermit Kingdom, North Korea.
    • Miguel Gonzalez reminds us that if you're not planning on acting like a grownup when you lobby, just do us a favor and stay home instead.
    • Barron B. explains why Leap Seconds can lead to computer problems.
    • And Weer'd Beard finds two anti-gun bloggers who try to dance in the blood of the Paris terrorism victims.
    • Plus Adam and Sean have a few choice words for those Yankees who like to talk smack about how Southern folks handle snow. 

    Listen to the podcast here.
    Show notes may be found here.

    Don't forget to share it with a friend!

    The Fine Print


    This work is licensed under a Creative Commons Attribution- Noncommercial- No Derivative Works 3.0 License.

    Creative Commons License


    Erin Palette is a participant in the Amazon Services LLC Associates Program, an affiliate advertising program designed to provide a means for sites to earn advertising fees by advertising and linking to amazon.com.