Showing posts sorted by relevance for query power pot. Sort by date Show all posts

Wednesday, May 6, 2015

Prudent Prepping: Gear Test

The dust has settled and the First 72 Hours have passed. Now we concentrate  on what to do in, and how to plan for, the long term via Prudent Prepping.


Testing the Power Pot

I am always looking for gear to add to my collection (like that tent which is so close but still so far away). Other items that are always needed are cooking pots and pans, and finding a dual-purpose item is a bonus. Which brings me to the Power Pot (mentioned by Erin here), found on sale in several places for $99, such as Amazon or at REI.

From the company website:
The PowerPot combines the benefits of a lightweight cooking pot and a portable USB charger. Power any of your mobile devices all while heating up a meal on your trusty backpacking stove or campfire. It even comes in handy as a backup charger for a power outage or another emergency.
  • 1A on-demand USB power for mobile devices 
  • Real-time power meter for optimal charging 
  • Works over any stove or heat sources 
  • 1.2 Liter hard-anodized aluminum pot for cooking
Setting Up


This is the 5W version (10W is also available), showing everything as it came out of the box: mesh bag, 2 pots (power generator and lid/saucepan), power cord and USB adapters.


There is a power output meter built into the cord, which shows how much power is being produced depending on your heat source. One bar means the unit is producing 1W at this time. When attached to a device, the red light turns blue to indicate charging.


Here is a picture of my buddy's Samsung phone being charged with the Power Pot.


Using It
I wanted to test the Power Pot with the Whisperlite stove I mentioned last week, but this stove of mine has not been used since Clinton was in office, and there is corrosion on the valve and needle that is preventing it from working correctly. (I need one of those maintenance kits for Whsperlite stoves,) Looks can be deceiving, so check out your items thoroughly before needing them!

Rigged on a BBQ grill with briquettes in my Vargo folding stove, the power light came on in about 5 minutes. I was able to get 12 oz. of water to boil in approximately 20 minutes. I think boil times could have been shorter if it was less windy, or a barrier was put up to block some of the gusts. 

Something mentioned quite prominently in the directions is not letting the pot run dry. The built-in thermocouple can be damaged if the pot overheats, so leaving a small amount of water in the pot and allowing it to cool down before emptying and storage is a Very Good Thing. I have a new friend that might be interested in hiking and camping this summer, so having everything sorted and working sooner than later is best

Other Items
Still looking for a good, used 3 season tent. I have found one locally but times and dates have not worked out for everyone to allow me to see it in person.

No other purchases were made this past week.

Recap
Power Pot charging set. Not the lightest pot I have, but worth the benefit of charging and cooking at the same time. $99 and up. I have to give this 5 stars.

As always, if you have comments, suggestions or corrections, please post them so we all can learn. And remember, Some Is Always Better Than None!

NOTE: All items tested were purchased by me. No products have been loaned in exchange for a favorable review. Any items sent to me for T&E will be listed as such. Suck it Feds.

Monday, February 1, 2016

Guest Post: BioLite CampStove and KettlePot review

by Gun Monkey

My initial impression of the BioLite wood burning camp stove was “This is some overpriced, gimmicky piece of junk.” The stove sells for around $130 and the kettle for $50. That seemed a little much for some plastic and metal that is going to spend most of its life in a backpack in my closet, but I decided to take a chance with something that might not live up to the hype. I bought the stove first, played with it, and found that I liked it before investing in the pot. I figured I could sell it or trade it for something if it was junk.

As it turns out, it's actually a good little stove.


So what is this thing?
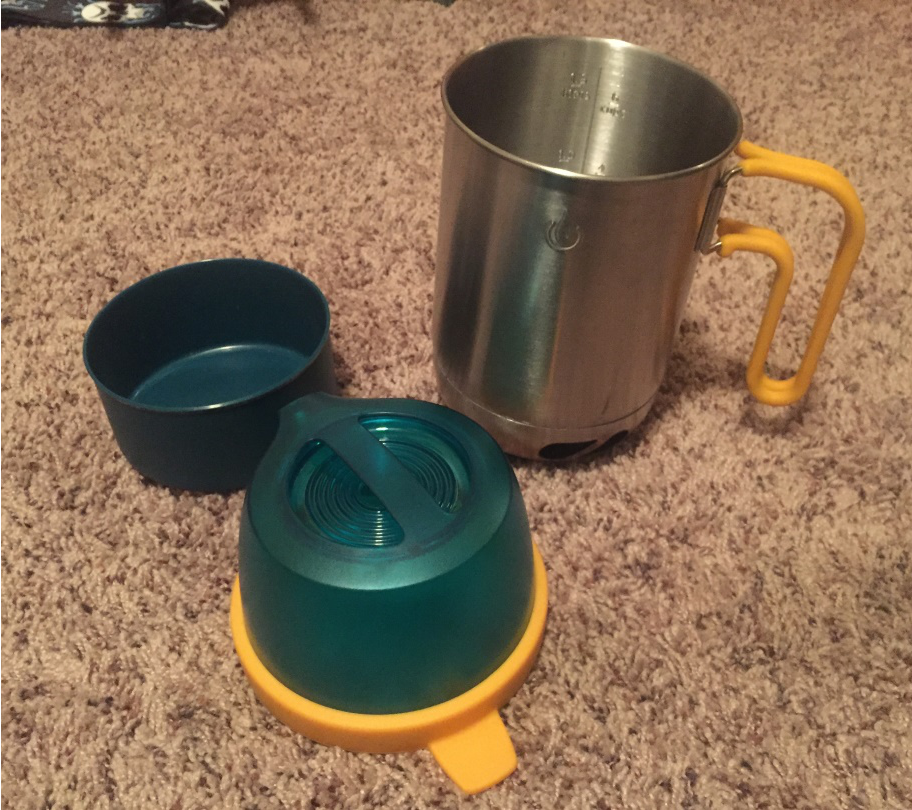
There are two parts to the BioLite camp stove: the stove itself and the thermo-electric generator. One will not work without the other. They come apart and nest inside each other for easy storage and transport. Together the assembly weighs in at a little over two pounds.

How does it work?
It's very simple. First you assemble the stove. Next, you pick up sticks, break or cut them into small enough pieces to fit inside the stove. You then light the stove, turn on the thermo-electric generator, and feed the fire.


Lighting the stove can be tricky. The best method for that involves putting a nest of pine straw in the bottom, followed by some small sticks. To light the fire, a grill or fire place lighter works best while holding the stove on its side. You can also use a ferro rod, matches, paper, and any other starting method to get the fire started.

Surely there's more to it?
Yes, there is. The thermo-electric generator contains a battery and two speed fan; the battery initially supplies the fan with power. After the fire generates enough heat, the heat is converted into power that powers the fan and recharges the battery through the black thermocouple that sticks out into the flames.

The stove is built in layers so there is space between the layers. There are openings in the inner layer that allows air to circulate around the fire. Because the fire is being fed a steady stream of oxygen as it burns, the fire burn very hot and very clean. There is almost no smoke once the fire gets burning.

The fan has a low and high setting. More air means a hotter burn, more fuel consumed, and more energy produced.

Is that a USB port on the front? What's that all about?
The USB port is attached to the thermo-electric generator’s battery, and can be used to recharge your electronic devices once the fire is generating enough heat. The way it works is once you get the fire going, you have to turn on the fan -- the fire won't get enough oxygen to burn unless the fan is on. It takes a few minutes for the fan's internal battery to recharge from use and natural decay. 

Once the internal battery is recharged, you can use the excess power to charge your device. The fan changes pitch and a light below the power button turns from orange to green. With the internal battery charged, the fan on low, and a constant source of fuel you get 2 watts at 5 volts. Once the light turns green after about 5 minutes of burning, you have the option to turn the fan on high and get 4 watts at 5 volts. I haven't measured it for myself, but that is what the literature included in the packaging says.

According to Biolite’s website, “20 minutes of charging provides 60 minutes of talk time.” I decided to put this to the test, so I plugged my iPhone 6 into the USB slot. After 20 minutes of feeding the fire, my battery only went up 2 percent -- which is only about 10 minutes of talk time. (Yes, it was on airplane mode, and the screen was locked.)

It’s not great --if you plan on completely charging your phone’s battery, you'd better have plenty of wood and time -- but it's something.

Tell me about the kettle pot.
The kettle pot sits directly on top of the stove. The handles are covered in a silicone material so you don’t have to carry a pot holder or worry about burning yourself.

The pot holds 1.5 liters of water. According to the Biolite website, it takes 4.5 minutes to boil a liter of water. In my tests, it took about 10 minutes to boil a liter of water with the fan on high. How fast the water boils depends on the type of fuel you find, fan speed, and how fast you feed the stove.


The kettle also comes with an easy-pour lid and a small bowl.


One of the cool features of the pot is it functions as a case for the stove. The stove fits perfectly inside the pot and the kettle handles fold to the sides, which saves room in your backpack.

What about the grill attachment?
Sorry, I can’t help you with that because I don’t have the grill yet. I plan on getting it before my spring camping trip, though.

Overall Impression
It’s a little expensive for what it does, but it works. If you need a camp stove to cook food and boil water without carrying fuel around or worrying about running out of fuel, then I would recommend saving your lunch money to pick up a BioLite stove and kettle pot. Be warned, though, that any cooking apparatus you use with the BioLite is going to collect some soot, so if you get one of these and decide to test it out, DO NOT use good pans.

If you are buying this to provide you a steady source of energy to recharge gadgets, though, then you are probably going to be disappointed. The power output is not nearly enough to provide a full change to most modern electronic devices. It also takes a tremendous amount of fuel and time to charge any device.

Where the BioLite stove excels is at its primary purpose: burning wood, boiling water, and cooking food. The stove will not cook anything on its own, though: you will need the optional kettle pot, grill, or some other cooking apparatus like a pan.


(Editor's Note: The BioLite stove costs $130 on its own website but $150 on Amazon. The kettle and grill are priced identically on both sites. You can get all three in a combo pack for $200 only from BioLite.)

Wednesday, November 29, 2017

Prudent Prepping: More Unfinished Business

The dust has settled and the First 72 Hours have passed. Follow along as I build a long term plan via Prudent Prepping.

I forgot to go over my general maintenance and all the steps I take to set up my car for California winters.

Car Preps
The washer fluid used in my car is Rain-X, because the way it keeps water beading up on the windshield is really amazing. Combined with good wiper blades (also from Rain-X), the glass is kept as clean as anyone could want. Rain-X also makes a spray-on treatment for the rest of the glass on your vehicle, which also makes water bead up and run off quickly, almost to the point of not needing a squeegee (but not quite... I still need to clean off the back glass most mornings). One place that I forget to treat after washing the car is both side mirrors. The number of days I've rolled both front windows down and used a leftover fast-food napkin on the mirrors is greater than I care to recall.

The last place to use a Rain-X is on your interior glass, including the rear view mirror. No, not the outside products, but their anti-fog glass treatment. The weather has been cooling off in the evenings and after parking the car with the windows up after work, every morning for the past week the inside glass has been a little foggy. Without that treatment, I would need to run the air conditioner to clear the glass quickly.

There are stories of people not needing to run their wipers after treating their windows with Rain-X products, and I can state that those stories are mostly true in my experience. I rarely use the 'Constant' setting control for my wipers and leave the 'Intermittent' on the longest possible position, even at night.

General Prepping
Due to several Cyber Monday sales, I blew up my prepping budget for the rest of the year. The one item that I have a confirmed sale for is the Solo Stove Lite and Pot deal. I was gently reminded how awesome and fantastically wonderful this deal by was our Esteemed Edtrix.

Multiple times.

Until I broke down and bought one, along with the optional windscreen.

Not that I was unduly influenced. Nope, I'm my own man and can make my own decisions... really!

As was pointed out in a previous review of the Solo Stove, it works very well with the Power Pot system. I have a Power Pot in my second set of camping gear, so that is where the Solo is going!

The Takeaway
  • Rain, snow, slush and dirt can build up on the outside -- and inside -- of your windows. Keeping them clean only takes a minute or two. 
  • Good ideas are Good Ideas and missing out on a sale for something I can use A Bad Thing.
    The Recap
    * Ordering a set of wiper blades and the cleaner would be a good way to get everything needed to start you on the way to clean glass.


    Just a reminder: if you plan on buying anything through Amazon, please consider using our referral link. When you do, a portion of the sale comes back here to help keep this site running! 

    If you have comments, suggestions or corrections, please post them so we all can learn. And remember, Some Is Always Better Than None!

    NOTE: All items tested were purchased by me. No products have been loaned in exchange for a favorable review. Any items sent to me for T&E will be listed as such. Suck it Feds.

    Monday, November 30, 2015

    Cyber Monday Prepping Deals from Erin's Favorite Companies

    Not actually Erin.
    & is used with permission.
    There are three great deals that I want you folks to know about before they disappear.


    I've sung the praises of the Solo Stove before (as recently as last Wednesday), and getting a free pot & free shipping is a great deal that doesn't happen very often; it might pop up again right before Christmas, but then again it might not. Best of all, this works with ALL their stoves and pots: the smallest pot sells for $35, the middle sized one for $46, and the largest (actually a 2 pot set) for $60; and you get those free when you buy the matching stove.

    Another company that I really like, Power Practical, is offering 50% off its most popular items (that's most of them and includes the nifty Power Pot) and free shipping for all orders of $50 or more.

    UVPaqLite also makes awesome products. (I had the chance to meet the owner/inventor at the NRA Convention in Nashville this year, and she's a really awesome lady who listens to her customers and has tons of great ideas), and they are running a holiday special from now until Dec. 15 and you can get some great values. My favorite is the Scout Pack: designed for the Boy Scouts, but of lots of use to anyone who hikes, backpacks or camps. (I have one of these and I love it.)

    Or get the 5-pack of reusable mini glow sticks and either hand them out as stocking stuffers or use them as zipper pulls for things you'll want to be able to quickly find in the dark, such as the opening to a first-aid kit.

    Or just use the coupon code SAVE2015 to get 20% off of everything else in the store.

    Friday, January 2, 2015

    Guess what fits inside a Power Pot?

    Not actually Erin.
    Picture by KJ Photography
    & is used with permission. 
    This Christmas I received a Power Pot as a present and while fooling around with it, I discovered it could do something pretty neat.


    I decided it would be easier to show you than to tell you, so I made a quick video about it.


    (I apologize for the hissing in the audio. I don't know what caused it and haven't figured out a way to remove it.)


    I'm looking forward to testing this out. I also received at 4400mAh battery to go with it, and so not only do I have three ways to generate electricity in the wild (by thermocouple, by solar, and by hand crank), I also have a way to store it for later use.

    Next week:  I return to cataloging what's in my Bug-Out Bag.

    Tuesday, June 27, 2017

    Care and Feeding of Cast Iron: Damage Control


    Cast iron is incredibly durable and can last virtually forever. As I mentioned last week, cast cookware can often be found very cheaply at yard sales and thrift stores, but the downside of these low prices is that the cookware is often in pretty rough shape. Thankfully, cast iron is also easy to rescue from a life of rough treatment.

    Rust and Removal
    When buying used cast iron, inspect it for major damage. Rust and minor pitting are easily fixed and not a major concern. Major pits, as well as any cracks or breaks, make a pot a no-go. Lids should fit snugly and also be in decent shape.

    One you've determined that your pot is physically sound, you can get down to repairing damage. First, you need to remove any loose rust or debris, and a wire brush is great for this. Large areas needing rust removal might call for a wire wheel or cup brush mounted in an angle grinder, or a brush mounted in a power drill. If you do use power tools, be sure to wear appropriate gloves and eye protection! Use light to moderate pressure on the tool to clean the heavy rust areas.

    Once the worst rust is removed, lighter abrasives are used to remove the remaining rust. I'm a fan of non-metallic scouring pads for this, but another great alternative is coarse salt, like kosher or brining salt; two tablespoons in a dry dutch oven make a wonderful scrubbing medium. If you do use salt, be sure to rinse and dry your pot thoroughly afterward to prevent further rust intrusion.

    Seasoning
    At this point you have a clean, raw, unseasoned piece of cookware. In order to protect and make it useful, you need to season it. Luckily, this is a pretty simple process, and can be done in your kitchen oven.
    1. Preheat your oven to 325° with one rack set in the center position and one in the bottom position.
    2. Apply a thin coat of oil to the cast iron, inside and out, just as you would after a regular cleaning.
    3. Place the pot upside down on the center rack, and a baking sheet on the lower rack to catch any oil drips.
    4. Bake at 325° for 1 hour.
    5. Open the oven door and allow the pot or pan to cool naturally. 
    Once your cast iron is cool, it is ready to cook in or store properly. In the future, simply clean and maintain it normally, and it will serve you well for a lifetime and more.

    Lokidude

    Friday, June 5, 2015

    Product Review: Recharging Cables

    & is used with permission.
    Last week's post on the Etón FRX2 felt like it was missing something, and now I remember what it was: a good charging cable.. or three.
    • If you wanted to charge your FRX2 from an outlet or USB port, you'd need a USB to Micro-USB cord. Fortunately, the FRX2 comes with one of those. 
    • Handily, this cable can be turned around and used to charge a tablet from the FRX2's battery. Hooray for double use!
    • But if you wanted to charge your iPhone from the FRX2, you'd need a USB to Apple 30-pin connector. 
    • And if you have a camera or other device that uses a different kind of adapter head, you need one of those as well. 
    So now you're carrying several cords to charge your devices, and while not heavy they are bulky and likely to get tangled with each other. If only there were a way to combine their functions into a single cord!

    Fortunately, there are ways. Two of them, in fact. 

    Power Practical Fast Charge 3 in 1 Cable
    The first solution comes from Power Practical: a 9 inch long cord with a USB plug on one end that branches out into three flat cables ending in Mini-USB, Micro-USB and Apple 30-pin connectors.
    http://tinyurl.com/oucu25n
    I received mine when I got the Power Pot for Christmas, but you can also buy it separately from Amazon.

    Not only does this nicely consolidate the most common cords you will need for using your FRX2 (iPhone 5 users will need to buy a 30-pin to Lightning adapter for $10), but these cords are also optimized for power transfer and do not transfer data. That last feature can be a big help if the only place you have to plug in your smartphone is a computer, and you either don't want it to start synching or you're concerned about viruses from one getting onto the other. 

    I keep mine in a a Ziploc bag alongside my FRX2 and several packets of silica dessicant to absorb moisture. 

    Highly Recommended. $12.00 from Amazon. 


    But what if you need to charge something that uses a more specialized tip? Say, a Nokia or a Samsung phone? No worries, Goal Zero has you covered. 


    Goal Zero Medusa USB Universal Adapter

    http://www.goalzero.com/p/203/medusa-usb-universal-adapter/
    This beast has no fewer than ten separate tips:
    1. Micro-USB
    2. Mini-USB
    3. Nokia N90
    4. Nokia 8250
    5. Samsung D800
    6. Samsung 1900
    7. PSP
    8. LG
    9. Apple 30-pin  (sorry, iPhone 5 users, you still need to buy that 10 buck adapter)
    10. USB Female 
    The cord itself is 5.5 inches long and comes with a male-to-female USB whose cord is almost two feet long, but when stored (by wrapping the cable around the hub) it reduces to only two inches in length.

    I am a bit annoyed and perplexed at the USB female adapter. I suppose that is to allow daisy-chaining of more cords, but I would worry about too much drain on the charger/not enough power for the device if that approach was used. Personally, I would have replaced the USB female with a Lightning adapter.  

    That said, I still like this cable very much, and it too does not synchronize data. I keep mine in my bug-out bag so I may recharge a variety of things with my solar panel (also a Goal Zero). Keep in mind, though, that if you plan to bug out with both a laptop and iPod/iPhone/etc then you need to pack a sync cable as well, or else you're stuck with whatever music you already have loaded on your device!

    I bought mine on Amazon last month for $25, but the storefront seems to be out of stock with plans to get more any time soon. Goal Zero's own website lists them as unavailable. however, they can still be found for online purchase if you know where to look. 

    Also Highly Recommended. $25 online.   Availability might be an issue for some and the price too much for others, but if you need a plug and don't want to carry a dozen or so cords, this is the one to get.

    Happy recharging!


    Obligatory FTC Disclaimer: I bought this with my own money. Go away. 

    Friday, January 30, 2015

    My Bug-Out Bag: Part 5 of 6

    Not actually Erin.
    & is used with permission.
    Part 1
    Part 2
    Part 3
    Part 4

    Welcome to Part 5 of what I now think will be a 6-part series. Today I'm going to cover the top part of the main compartment. I'm breaking this section into two pieces because it will be image-heavy, just like the rest of this series.


    The very first item once I open the drawstring is a Swiss Alpenflage Poncho. I try to avoid camo in my bug-out gear because I don't want to attract the wrong attention when evacuating, but I went with this for three reasons:
    1. It's specifically designed to go over a rucksack so that both I and my gear stay dry. I've tried it, and yes, it fits. Just bake sure you're wearing tall boots so that the runoff doesn't soak your lower pants legs. 
    2. Switzerland is a rainy country, and so I trust them to make effective rain gear. I like how it leaves my arms free for doing whatever (and if I want to keep them dry I can just pull them inside), and there are various snaps along the bottom so that I can wear this while riding a horse or bicycle.
    3. To my utter surprise, the red-brown is exactly the same shade as Florida pine straw. This means it's effective camouflage, period, and while I want to look like a harmless civilian when evacuating there are still times when I might need to hide. 

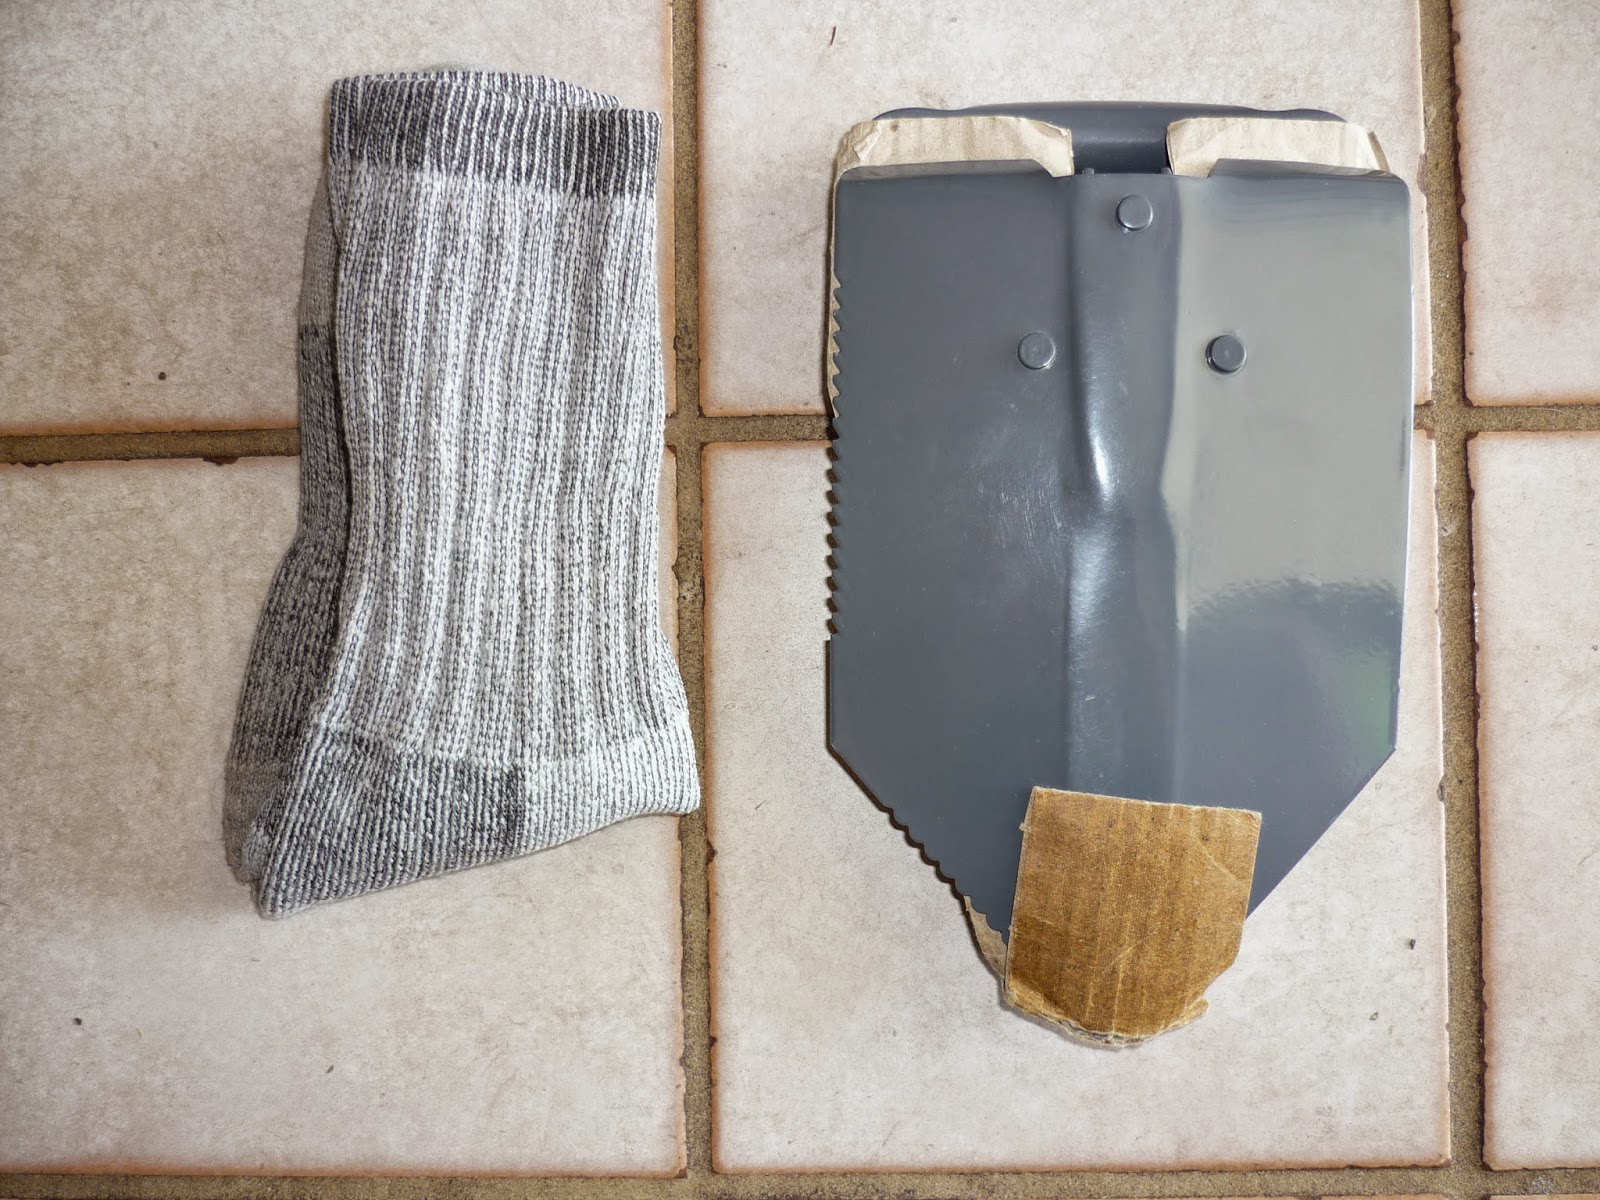
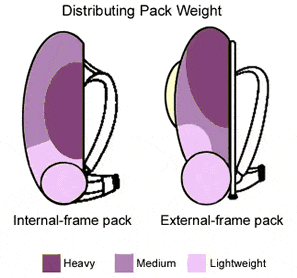
    Immediately after the rain cape is a pair of woolen socks (easy to get to in case I need to change socks) and a Coleman Folding Shovel (because heavy things need to kept in the middle-top of the pack and close to my back).


    www.wildbackpacker.com/backpacking-gear/backpacks/how-to-pack-a-backpack/

    After that, things get a bit messy as I lack the ability to keep things organized and separated, yet easy to access. Suggestions on how best to correct this problem are more than welcome!

    Front and center is the Power Pot that I got for Christmas, and nestled inside like Russian dolls (as I demonstrate in this video) is a Solo Pot and Stove combo.

    Next to my back is an empty 2-liter hydration bladder, with (hopefully) enough room for it to fit when full. By "hopefully" I mean "I've filled it and had enough room, but I am constantly tinkering with my loadout and I've added some gear since I last tested it and I'm not 100% if everything still fits. I really need to clear my schedule and go camping so I can give everything a proper test."

    Here's the rest of the top layer, spread out for easy identification in (roughly) the same position it occupied in the pack.


    Clockwise from top:
    • Six-Herb Multi-Spice Pack. Has individual compartments for salt, paprika, curry, cayenne, garlic salt, and black pepper, which ought to enable me to eat nearly anything. It's wrapped in a Ziploc bag to prevent spills. 
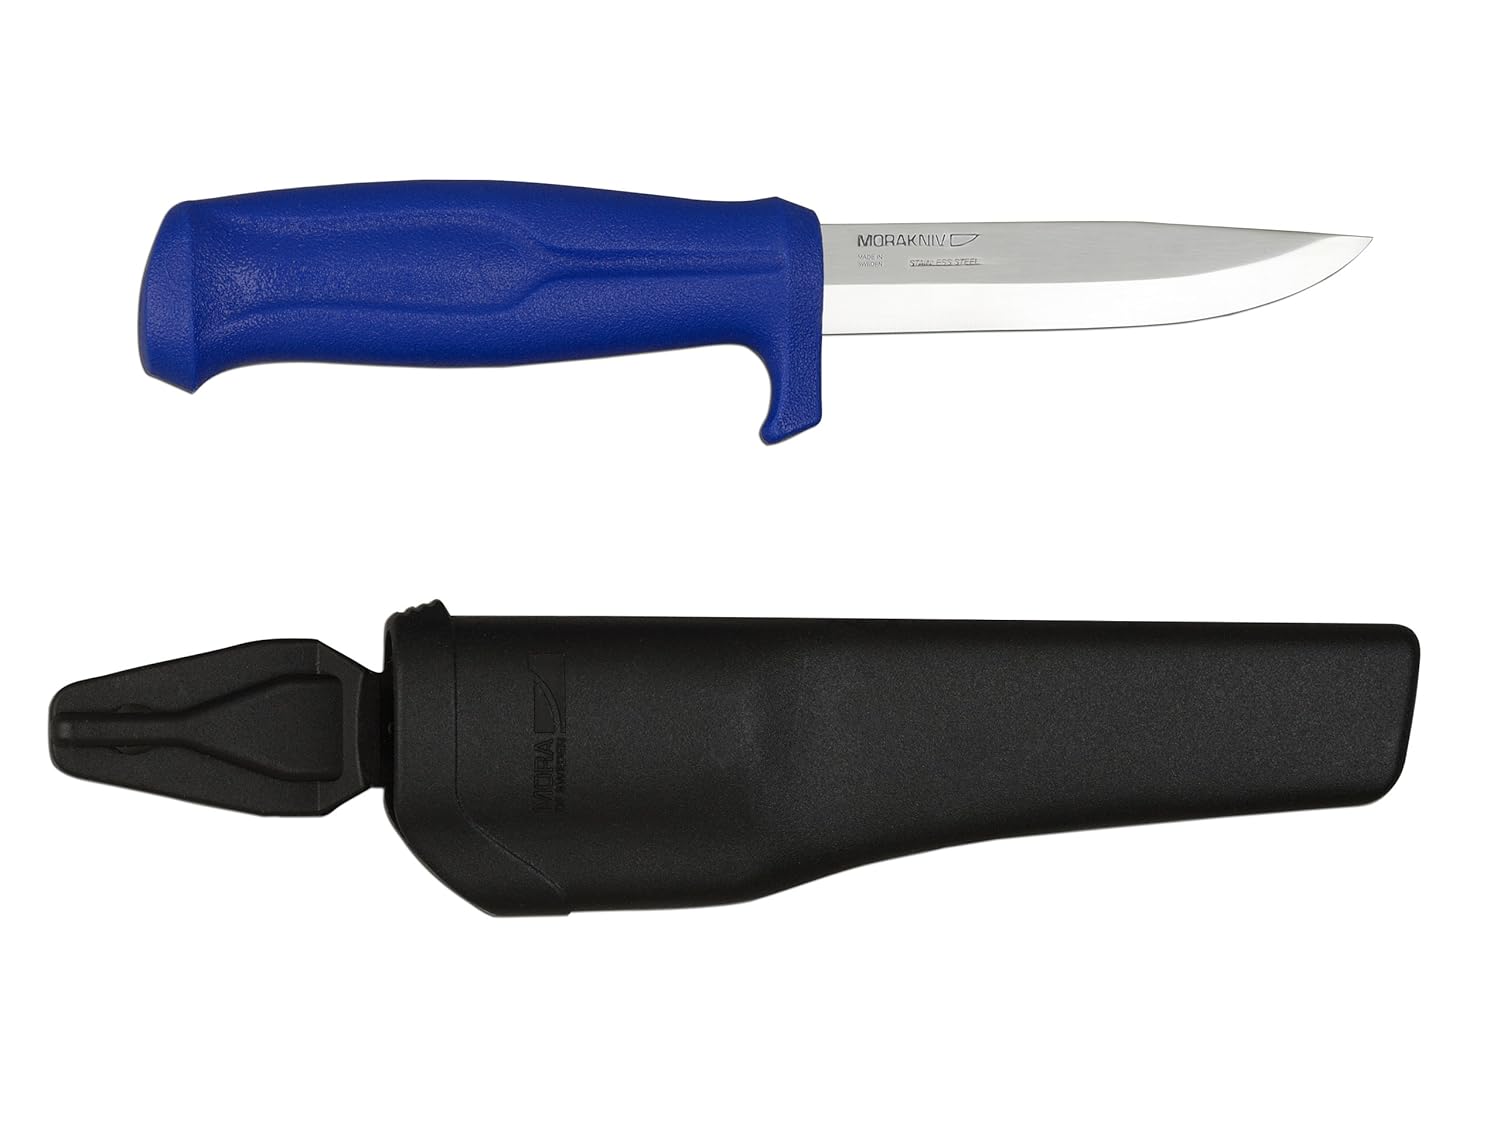
    • Stainless steel Mora knife. 
    • Two large-size garbage bags. I really ought to add some white bags to this, so I'll go do that now. 
    • Top Ramen, Chicken flavor. Cooks quickly in the Solo Pot and weighs nearly nothing. 
    • Waterproof box from Lifeline that used to carry first-aid supplies but now has my deck of Edible & Poisonous Plants of the Eastern States recognition cards. Also inside is a backup thumb drive filled with scans of important documents, just in case the one on the outside of my pack is lost or damaged. 
    • A spatula & ladle taken from a Stanley 1.5 L Prep & Cook set. 
    • Camouflage mesh from the hunting department of Walmart. Can be used for concealment, or to keep mosquitoes off of me. 
    • A triangular bandage which ought to be in my first aid kit (which is in the lower section and accessible through the front loading panel) but wouldn't fit. 
    • A fishing kit I've put together but haven't tested for the same reasons I haven't been camping:
    • Another waterproof box, this time containing Knot Playing Cards. 
    • More Top Ramen!  This time it's beef flavor. 
    • A flashlight that I got from who-knows-where and is nifty because I can pull on the collar and it turns into a lantern. Great for use at bedtime while camping!


    And that's the top half! Next week I'll show you the bottom half, as well as the stuff I'd like to be able to fit into my pack but can't quite make room for. 

    Friday, July 3, 2015

    Blue Collar Prepping Recommends...

    & is used with permission.
    I have been asked by several people if I would make a post where I list basic survival equipment and prepping supplies that have been endorsed by our authors. Since many of these these links lead to Amazon Affiliate pages and therefore indirectly help support this blog, I am more than happy to oblige.

    As more recommendations are made, I will give this section its own page in the header, so it can be found easily.

    For a Ready-Made Bug-Out Bag, BCP Unanimously Recommends:
    Michael Z. Williamson's Bail-Out Bag. A comprehensive review of it begins here.


    Erin Recommends:

    Mora Knife. Every prepper needs a good fixed-blade knife, and Moras are some of the best kept secrets of the knife world -- very sharp, durable, high in quality and ridiculously inexpensive. The carbon steel version holds a sharper edge, but is more prone to rusting, so I recommend the stainless steel version for new preppers or for folks who just want to throw a knife into their bags and not worry about it.

    Cold Steel Kukri Machete. It's part machete, it's part cleaver, it's part hatchet. I have used mine to cut down small trees. I've used and abused this blade for six years and it's still going strong, as it's made of incredibly tough steel. It's also very affordable ($20-25). Regardless of which version you get -- regular, Magnum, or Royal -- you will not be disappointed.

    EZE-LAP pocket diamond sharpener. If you carry a knife you'll need a way to sharpen it, and this little gadget is both effective and convenient. I've been carrying one in my EDC kit for years.

    Speedy Sharp. For when a file just can't fix a really damaged knife, or you need to put a working edge on a seriously blunt piece of metal. Read my review of it here.

    Nalgene Tritan Wide Mouth BPA-Free Water Bottle. It holds a quart of water (almost a liter) and is practically unbreakable. (I'm sure dedicated destructoids could find a way.)

    GSI Outdoors Glacier Stainless Bottle Cup. It  fits over the bottom of the above Nalgene bottle for maximum space savings.

    Water Pasteurization Indicator. You don't even have to boil water; just pasteurize it instead. Save time and fuel!

    Rothco Paracord. Basically the duct tape of camping, not only is it very strong rope (the 550 stands for being able to support 550 pounds), you can take out the inner strands and use them for things like dental floss, fishing lines, etc. Replace your shoelaces with paracord and you have a free, weightless prep.

    Spool Tool. A handy way to store that paracord, along with other useful tools like a lighter holder and an integrated cutting tool. Read my review here.

    Adventure Medical Kits Heatsheets Survival Blanket. It isn't exactly comfortable, but it's light enough to carry anywhere and it'll keep you warm and dry in a pinch. I suggest getting the two-person version, as it's always better to have more blanket for one person than try to fit two under a single-size.

    Rothco Shemagh. I talked about this in the second Gun Blog Variety podcast. Get one in military colors and avoid red, red & white, black & white, and if you're in gang country, blue.

    Military Surplus Swiss Poncho. Actually, this is properly a rain cape and not a poncho; the difference is that a cape is a fitted garment while a poncho is essentially a rectangle folded in half with a hole cut in the middle for your head. I like this item for three reasons:
    1. Countries in wet Western Europe know how to make proper rain gear that keeps you dry.
    2. You can fasten the snaps around your legs if you want to ride a bicycle (or a horse).
    3. It's large enough to cover a military rucksack and still keep you dry.
    Emergency Sleeping Bag. Similar to the mylar rescue blanket, only enclosed so that you don't lose heat to the cold, hard ground. Pair this with the poncho above and you'll make it through any cold and wet situation that doesn't involve snow.

    Doan's Magnesium Fire Starter. Make sure it's true magnesium from a reputable source like Doan's, and not a conglomeration of cheap pot metal.

    Coughlans 36 Hour Survival Candle. A stable source of flame is damn handy, and this will also give you light to see if it's getting dark. Comes with a book of matches.

    4x Magnification Fresnel Lens. While you can start a fire with it, there are easier ways. Instead, just keep this credit card-sized magnifying lens in your pocket/wallet/purse and use it to, well, magnify things. Good for minor first-aid tasks like removing splinters and the like.

    Starflash Signal Mirror. Reflective like glass but made of plastic, it's scratch-resistant, aimable, unbreakable (they claim) and it floats. Pair it with...

    UST Jetscream Whistle and you have an unbeatable combination for signaling with sound and light.

    Eton FRX2 Hand Turbine AM/FM Weather Radio with Smartphone Charger is a flashlight, a radio, and a way to charge electronic devices. Pair it with the Power Practical Fast Charge 3 in 1 Cable and you ought to be able to charge most anything in the field. Read my review of both here and here.

    Halo Pocket Power Charger. A lipstick-sized battery that holds a charge for a very long time. Comes with a variety of adapters. Read my review of an older model here.

    WaterBOB (Bathtub Oblong Bladder). A single-use water storage and dispenser unit that turns a bathtub into an emergency water source and keeps that water safe from contamination. See my review here.

    Solo Stove & Pot and/or Folding Firebox. Both are excellent camp stoves with features that the other lacks. Read my review of them here.


    Lokidude Recommends:

    Instafire fire starting fuel. Catches a spark easily and can serve as tinder or kindling in a pinch. Read his review here.

    CRKT Eat'n Tool XL.
     The ultimate spork. Read his review here. 

    UCO Micro Candle Lantern. A way to turn tea candles into useful camping equipment. Review here. 

    Sparkie Fire Starter. This will get a fire going easily, even use it one-handed. Review here. 

    Esbit Folding Stove. Put your cup on this stove and you can boil water, then pour the purified water into your bottle. Review here.

    Outdoor Element Kodiak Bracelet. Firestarter, tinder and fishing line, all inside a paracord bracelet. Review here.

    Gerber MP400 Compact Sport multi-tool. The Gerber version of a Leatherman. Review here.


    David Recommends:
    Butane Camp Stove. His review stove says "Jinyu" but it appears to be sold under a variety of names, all of which are made in China.

    Sawyer Mini Water Filter. Weighs 2 ounces, fits in the palm of your hand, and can filter up to 100,000 gallons of water with proper maintenance. Its big brother can filter up to 1 million gallons. Review here.


    Light My Fire Ferro Rod with Whistle. Two important rescue elements in one easy to use package. Review here.

    Goal Zero Guide 10 Plus. An excellent solar charger that just happens to be rather expensive. Review here.

    Power Pot. Generate electricity via thermocouple while boiling water at the same time. Works on various camp stoves or on hot coals. Review here.


    Firehand Recommends:
    KT Sports Tape. Some people have called it a placebo, but placebos have been proven to help reduce pain. Either way, it helps with muscle and joint pain. Read the product review here. 

    Cree Ultrafire 7W LED Flashlight. It's 300 Lumens, has an adjustable focus, runs on a single AA battery and costs around $4. What's not to love? Read his review here. 


    Chaplain Tim Recommends:
    Nebo Twyst LED Flashlight. It's a flashlight, a work light and a lantern, and it has many useful features. Read his review here. 

    Evelyn Recommends:
    Prepping For Women. A book that focuses on the specific health and sanitation needs of female preppers. Read her review here. 


    The Fine Print


    This work is licensed under a Creative Commons Attribution- Noncommercial- No Derivative Works 3.0 License.

    Creative Commons License


    Erin Palette is a participant in the Amazon Services LLC Associates Program, an affiliate advertising program designed to provide a means for sites to earn advertising fees by advertising and linking to amazon.com.